Tracking Events in Next.js with Segment Behind Usercentrics


In today's web development landscape, both understanding user behavior and respecting user privacy are paramount. This comprehensive guide is designed for web developers who are familiar with JavaScript and the Next.js framework.
I based this tutorial on how I integrated consent and tracking when building the Prismic website. On our website, we also pass the data on from Segment to Amplitude. This process allows our team to conduct detailed website analysis and make informed decisions.
In this tutorial, we will delve into the integration of Segment, a robust analytics platform, with Usercentrics, a tool focused on managing user consent to comply with data protection laws. This bundle ensures insightful analytics and adherence to legal standards in data collection. Our journey will take us through setting up a basic Next.js application, integrating Segment for user behavior tracking, and then implementing Usercentrics to manage user consent. By the end of this guide, you will have a Next.js application that is both data-rich and privacy-compliant. Prior experience with Prismic, Segment, and Usercentrics is beneficial but not mandatory, as this article will cover their integration in detail.
Whether you aim to grow user engagement, improve site performance, or ensure legal compliance, this guide will equip you with the necessary skills to balance user analytics with responsible data usage in a Next.js environment. So, let's explore how we can create an engaging, effective, and compliant online experience.
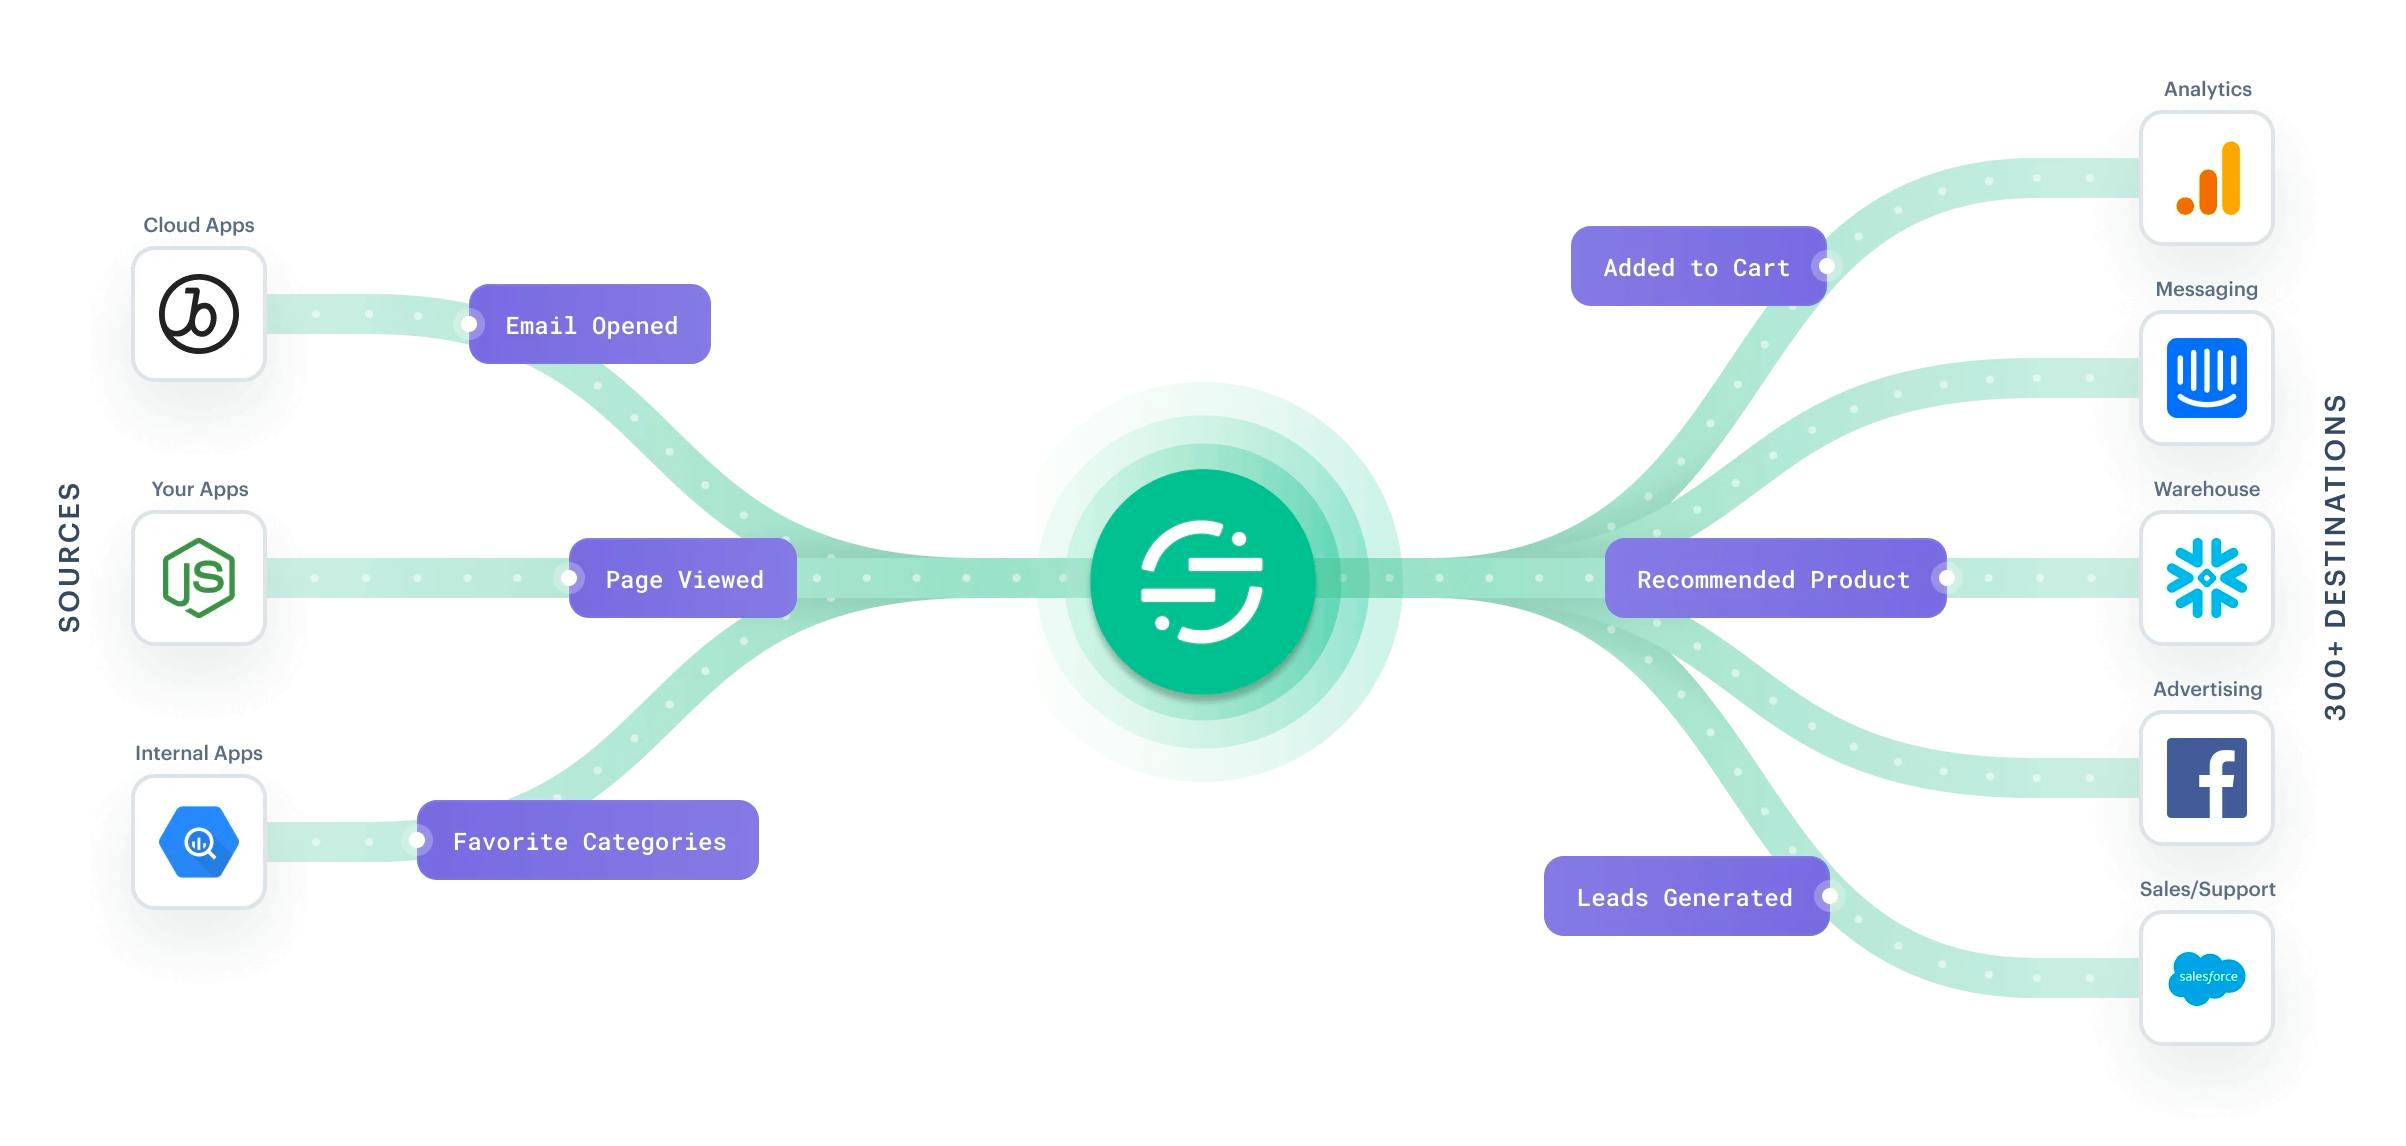
What is Segment?
Segment is a powerful customer data platform that simplifies the way you collect, manage, and analyze your user data. It's particularly beneficial for web applications built with frameworks like Next.js, as it provides a unified view of customer interactions. This integration not only streamlines your data collection process but also enhances your ability to understand and engage with your audience effectively.
What is Usercentrics?
Usercentrics stands at the forefront of data privacy and consent management. In an era where user privacy is paramount, Usercentrics offers a solution that helps websites comply with international data protection regulations like GDPR and CCPA. By integrating Usercentrics into your Next.js site, you ensure that user consent is handled transparently and legally, fostering trust and compliance.
Setting up Segment and Usercentrics on a Next.js application involves a few crucial steps. Let’s break down each part of the process for clarity and ease of implementation.
Setting up a Basic App with Next.js and Prismic
Before we start, it is important to have a basic app that allows for the seamless integration of Segment and Usercentrics. In this section of the tutorial, we will guide you through the process of creating a simple Next app that will serve as the foundation for the integration.
1. Begin by creating a new Next.js app by running npx create-next-app@latest and follow the instructions. In this guide, I’m using these settings for the Next.js app:
What is your project named? … segment-uc
Would you like to use TypeScript? … Yes
Would you like to use ESLint? … Yes
Would you like to use Tailwind CSS? … Yes
Would you like to use `src/` directory? … No
Would you like to use App Router? (recommended) … Yes
Would you like to customize the default import alias (@/*)? … No
2. While we could complete most of this tutorial without using a CMS, we will install Prismic to illustrate how data coming from a CMS can easily be passed on to Segment. So, to connect to Prismic, we’ll install the required packages by running npx @slicemachine/init@latest within the root of our newly created Next.js app. Here, you’ll get prompted to log in to Prismic if you're not already logged in and then create a new repository. When prompted if you want to run Slice Machine, select yes.
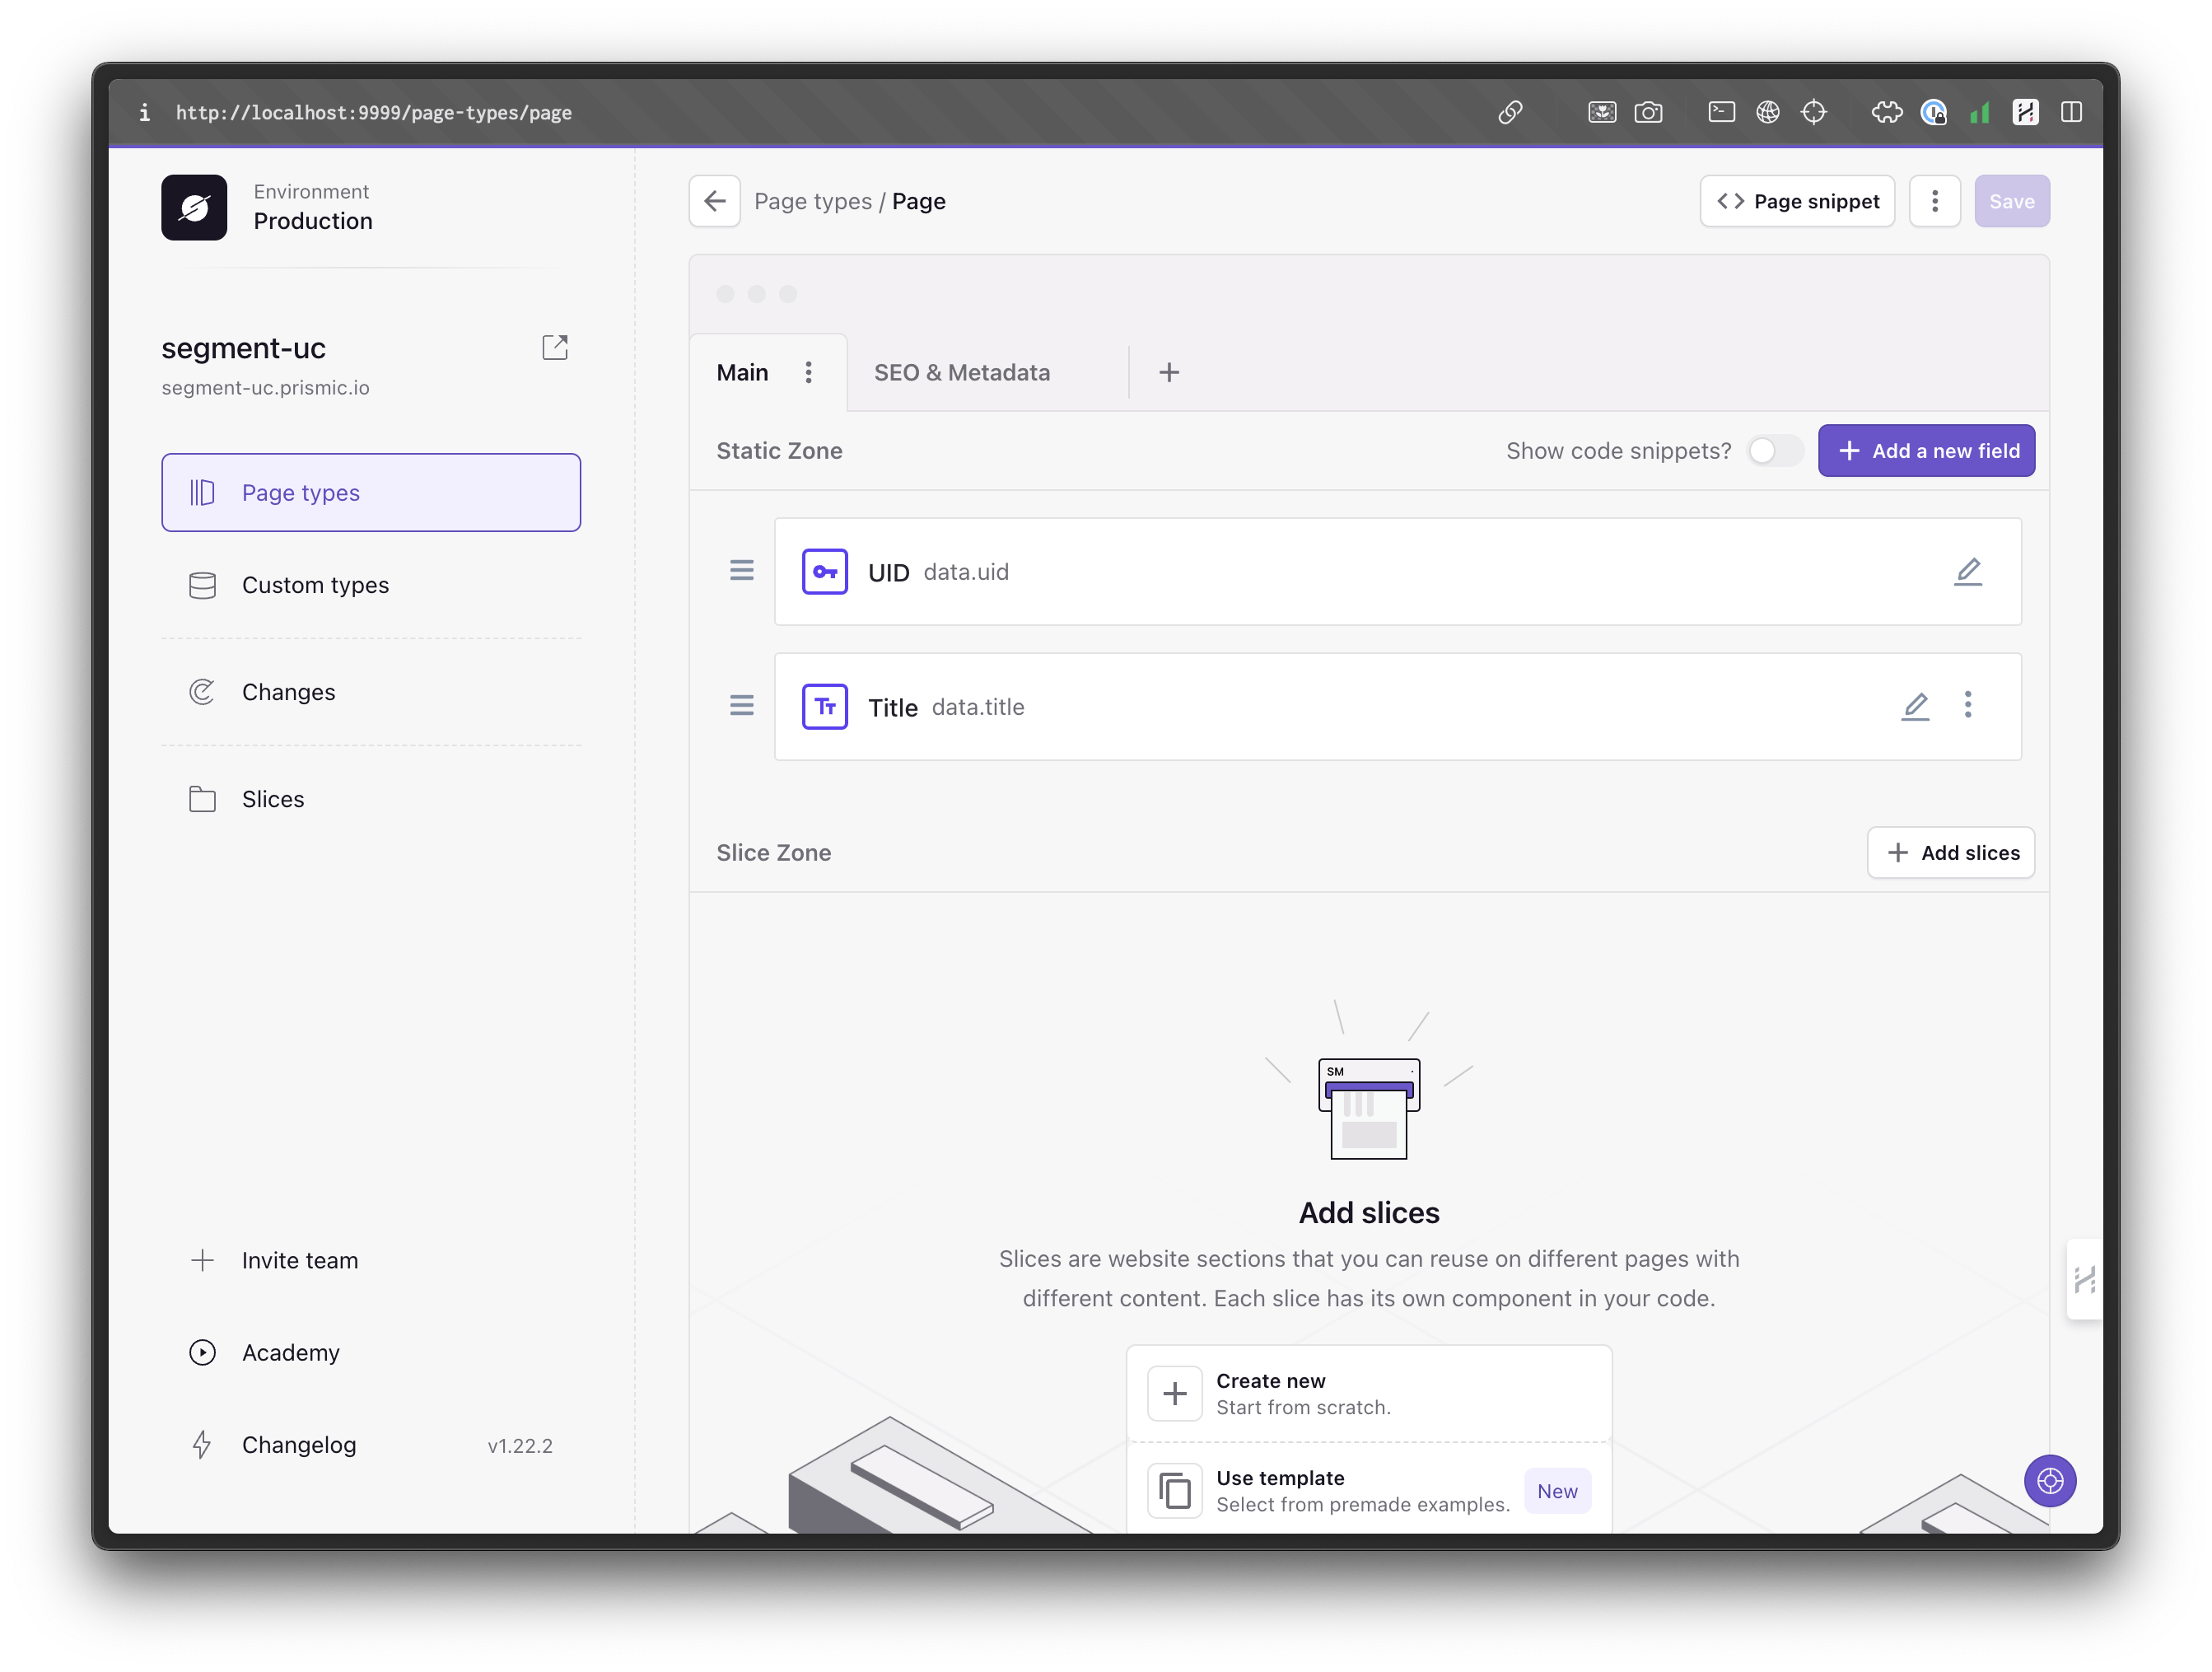
3. Then go to http://localhost:9999 and create a Reusable page type. Let’s call it "Page." On this new page type, just create a static rich text field called Title, configured to only use the H1 tag, and then save. Then head over to the changes tab and push your changes to the Prismic repository.
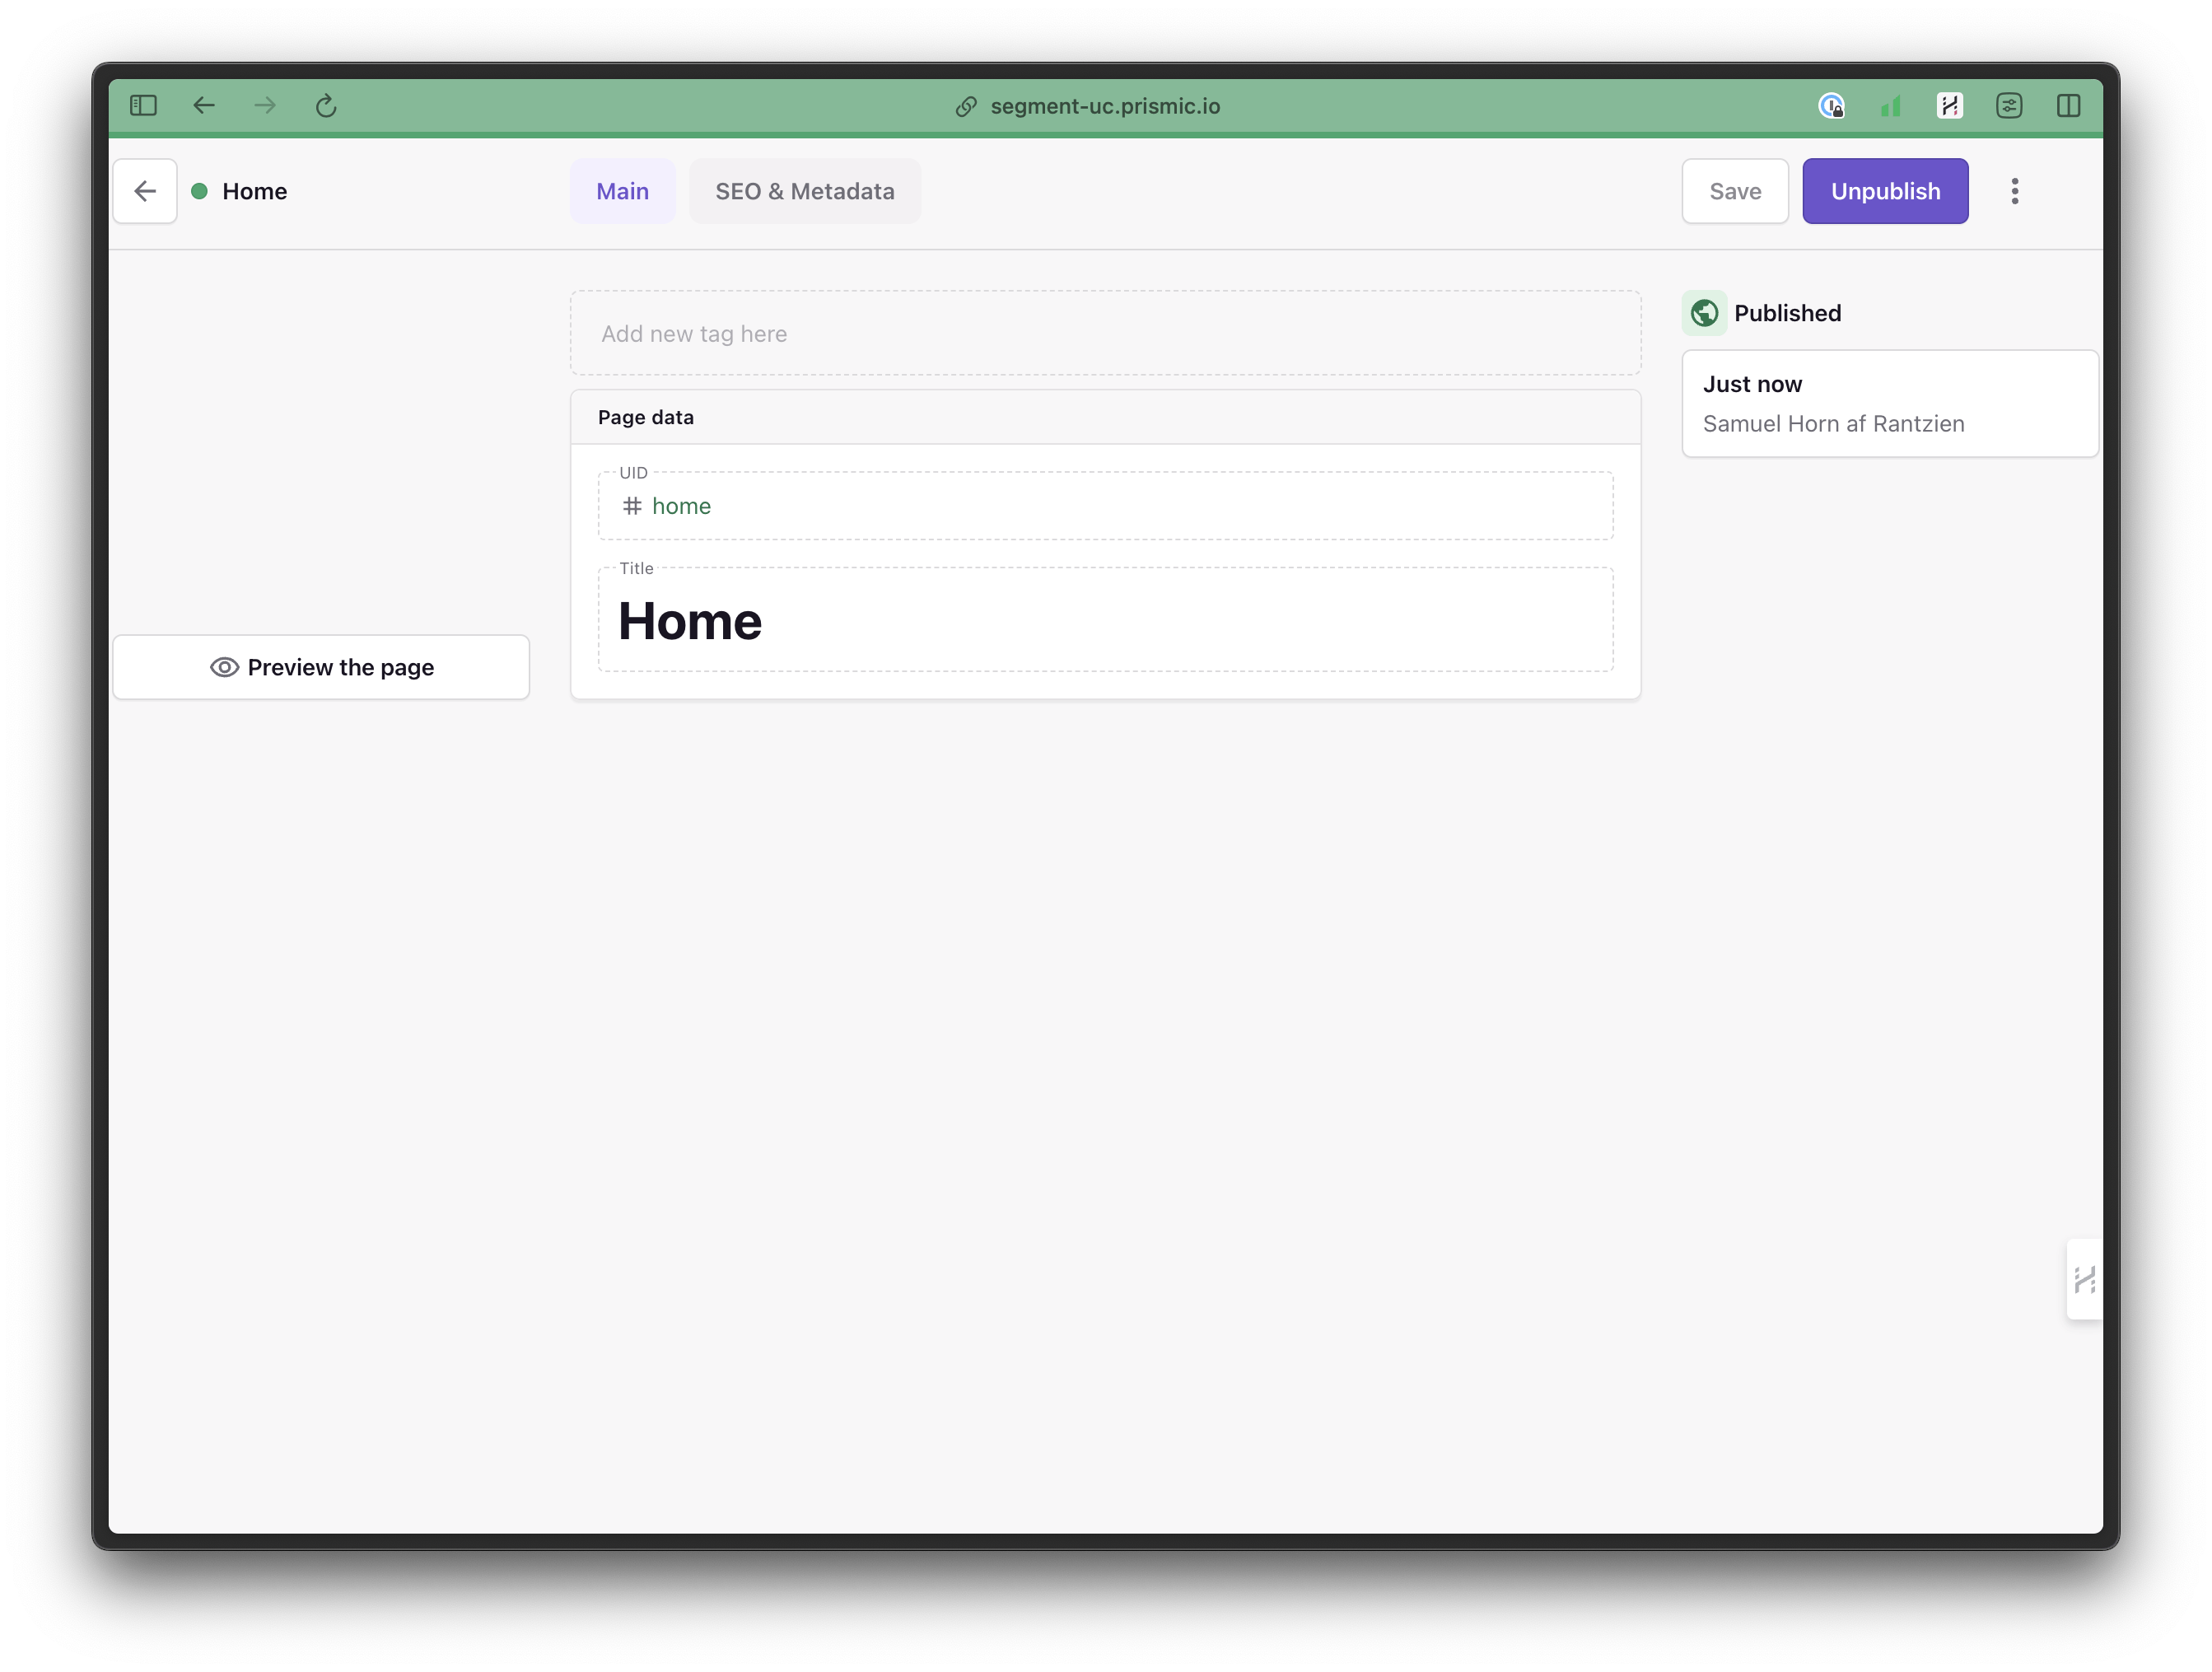
4. Now, to open your project within Prismic, click the arrow icon in the top right of the sidebar. You will be prompted to select a language. Once done, click the green pen icon to create a new page; let’s call it “Home.” Now save and publish that document, then create another one called “About,” and publish that one as well. This way, we will have two different pages to track in our Next.js app.
5. Now it’s time to get coding. Open your Next.js app in your favorite code editor, and find the file /prismicio.ts. In this file, on lines 17-27, replace the example route resolver with:
const routes: prismic.ClientConfig["routes"] = [
  {
    type: "page",
    uid: "home",
    path: "/",
  },
  {
    type: "page",
    path: "/:uid",
  },
];
This way, our homepage will be generated at /, and our about page at /about.
6. Further, we need to set up our /app directory to render these pages. In /app/page.tsx, replace the whole contents with:
import { createClient } from "@/prismicio";
import { PrismicText } from "@prismicio/react";

export default async function Home() {
  const client = createClient();

  const home = await client.getByUID("page", "home");

  return (
    <main className="flex min-h-screen flex-col items-center justify-between p-24">
      <h1 className="text-4xl font-bold">
        <PrismicText field={home.data.title} />
      </h1>
    </main>
  );
}
7. And for the about page, and potential other new pages, create a new dynamic route by creating a file in /app/[uid]/page.tsx. This file should look like this:
import { createClient } from "@/prismicio";
import { PrismicText } from "@prismicio/react";

export async function generateStaticParams() {
  const client = createClient();

  const pages = await client.getAllByType("page");

  return pages.map((page) => {
    if (page.uid !== "home") {
      return { uid: page.uid };
    }
  });
}

export default async function Page({
  params: { uid },
}: {
  params: { uid: string };
}) {
  const client = createClient();

  const page = await client.getByUID("page", uid);

  return (
    <main className="flex min-h-screen flex-col items-center justify-between p-24">
      <h1 className="text-4xl font-bold">
        <PrismicText field={page.data.title} />
      </h1>
    </main>
  );
}
8. Then, update the /app/layout.tsx file with a simple static navigation for now. Import <Link> at the top and then add the nav below after the opening body tag, just above the children:
+ import Link from "next/link";

  // ...

  export default function RootLayout({
    children,
  }: Readonly<{
    children: React.ReactNode;
  }>) {
    return (
      <html lang="en">
        <body className={inter.className}>
+         <nav>
+           <ul className="flex items-center justify-center gap-4 p-4">
+             <li>
+               <Link href="/">Home</Link>
+             </li>
+             <li>
+               <Link href="/about">About</Link>
+             </li>
+           </ul>
+         </nav>
          {children}
        </body>
      </html>
    );
  }
9. Finally, we can remove the /app/slice-simulator route since we won't be using any slices for this tutorial, and it will give us build errors without slices.
10. Now, if we open another terminal and run npm run dev we should see something like this on http://localhost:3000 (note that yours might look different depending on your system settings for light and dark mode):
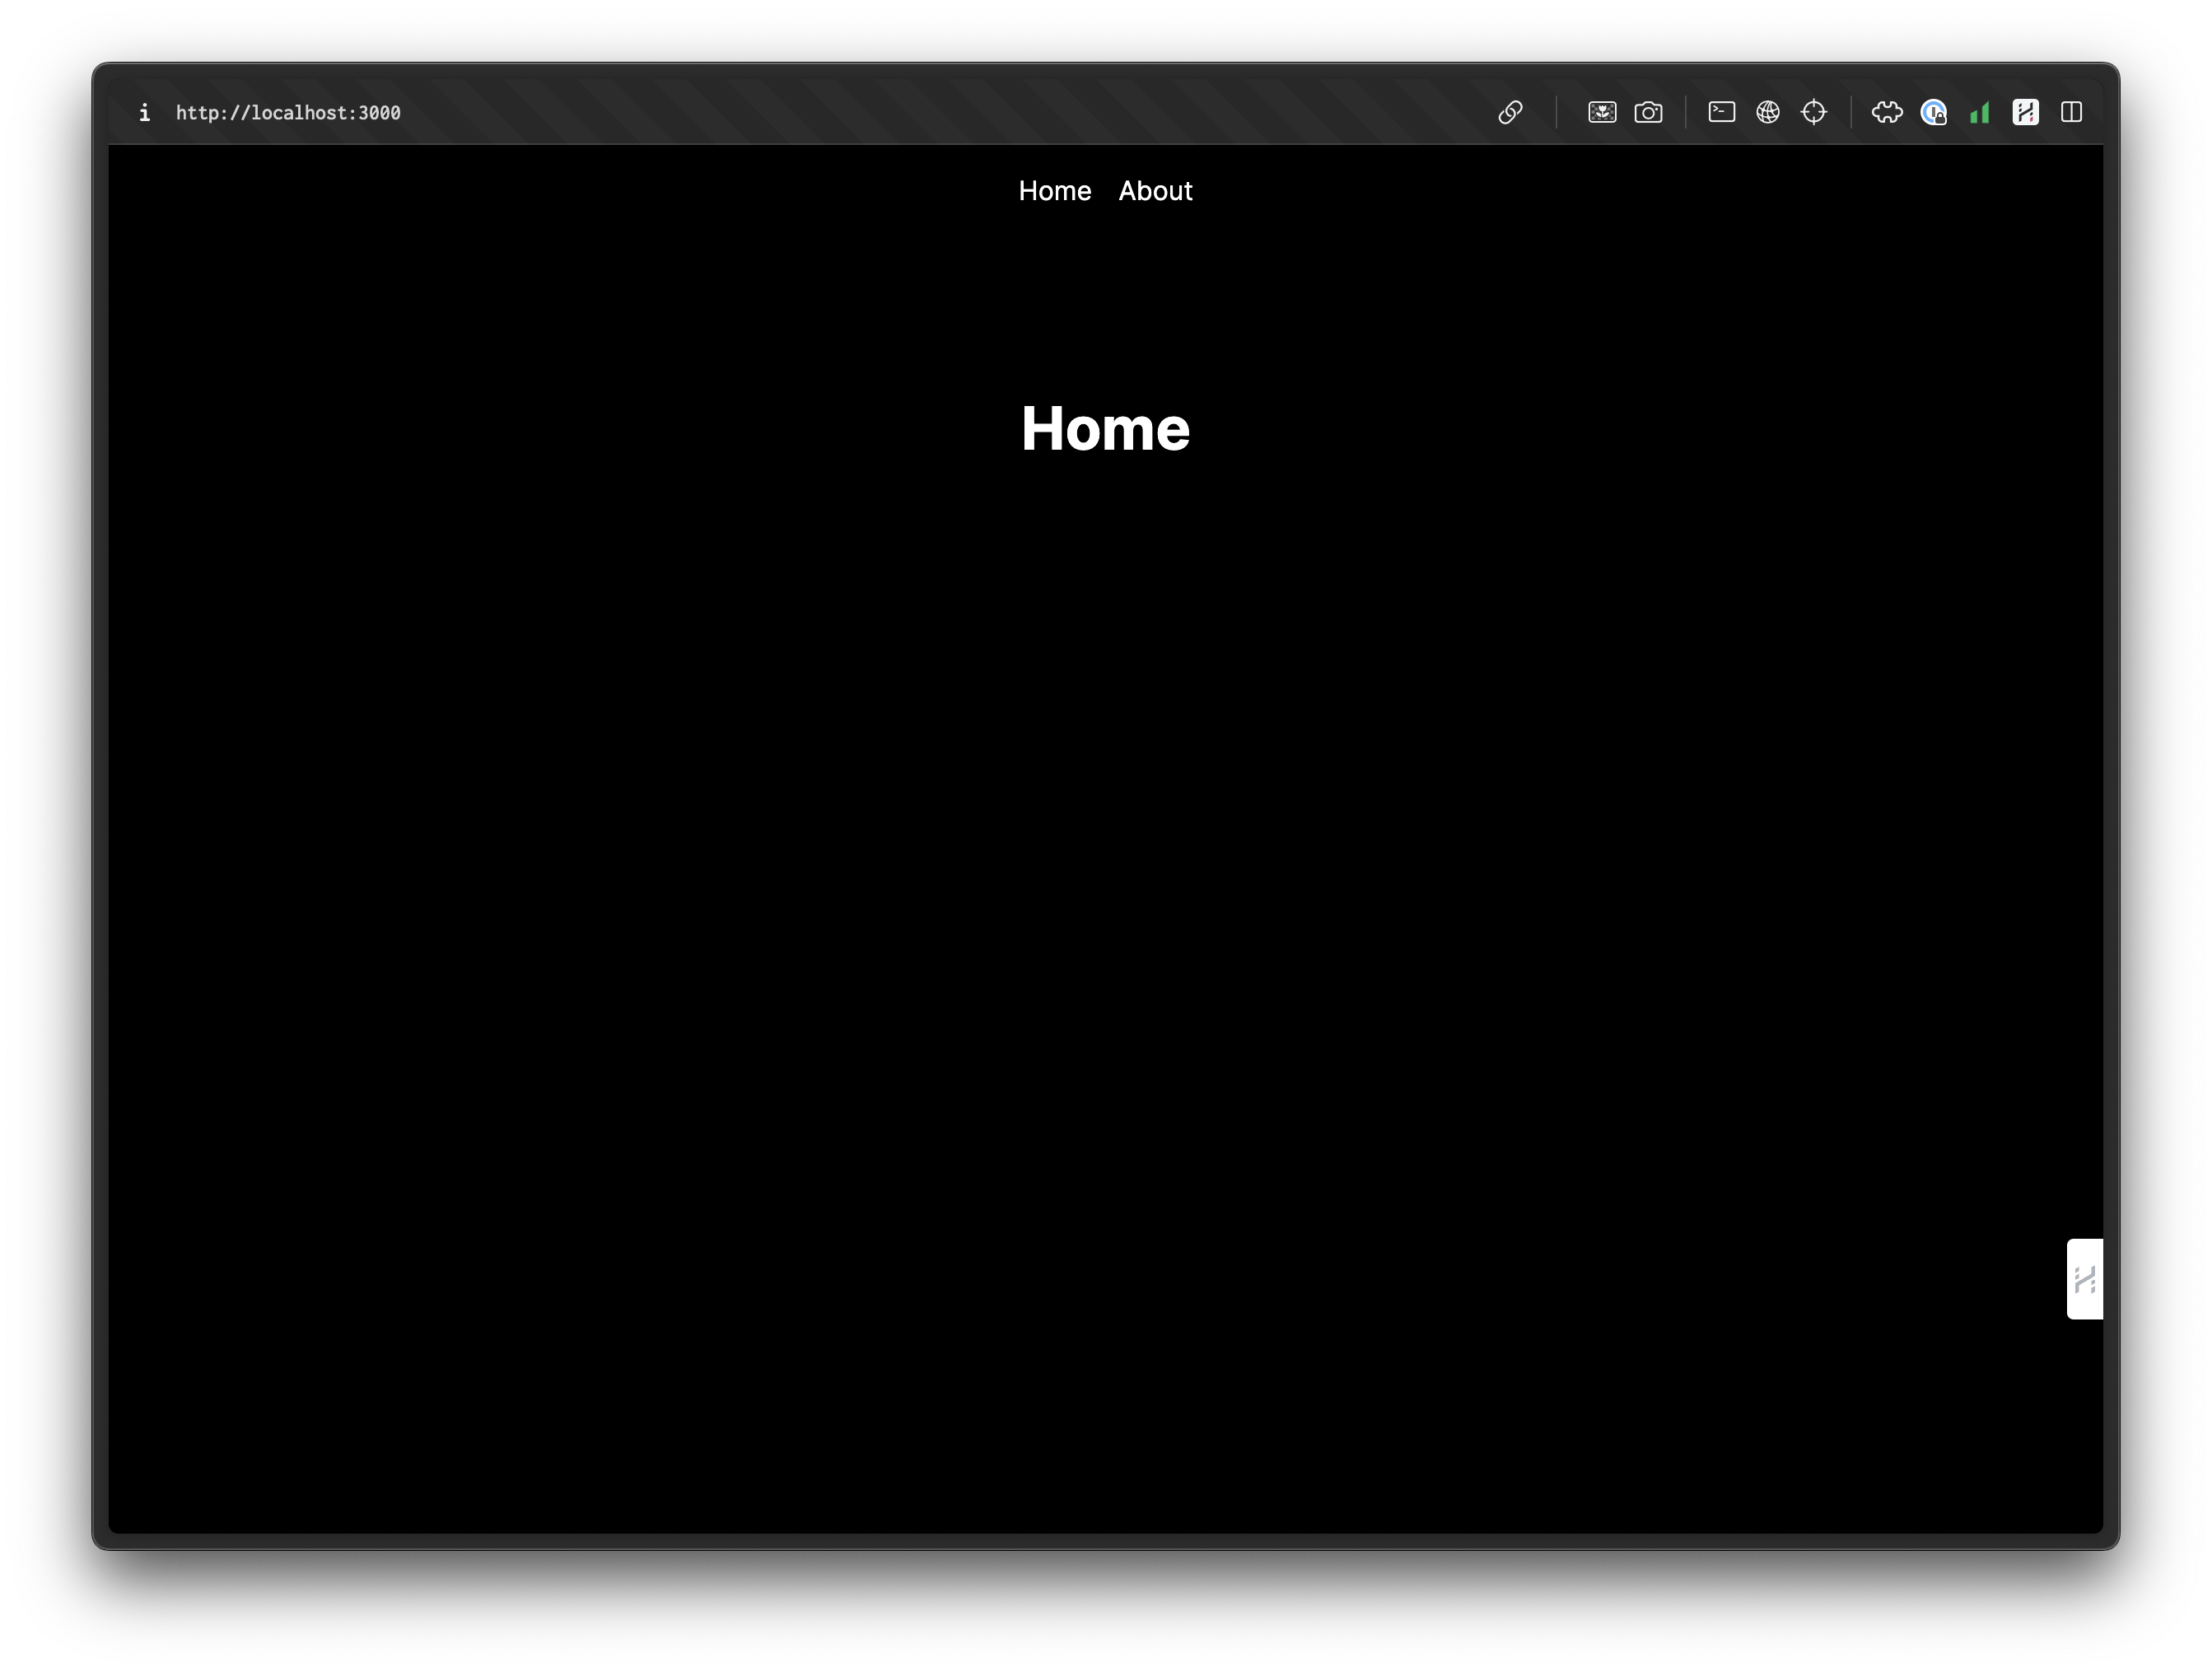
That’s it for the setup of Next.js and Prismic. Now, we have a simple app with two pages where we can start to implement Segment and Usercentrics.
Stay on Top of New Tools, Frameworks, and More
Research shows that we learn better by doing. Dive into a monthly tutorial with the Optimized Dev Newsletter that helps you decide which new web dev tools are worth adding to your stack.

Implementing tracking with Segment
Now it's time to add Segment to our app as a first step. By integrating Segment, we will be able to gain valuable insights into our user data, track user interactions, and optimize our app's performance.
Setting up Segment
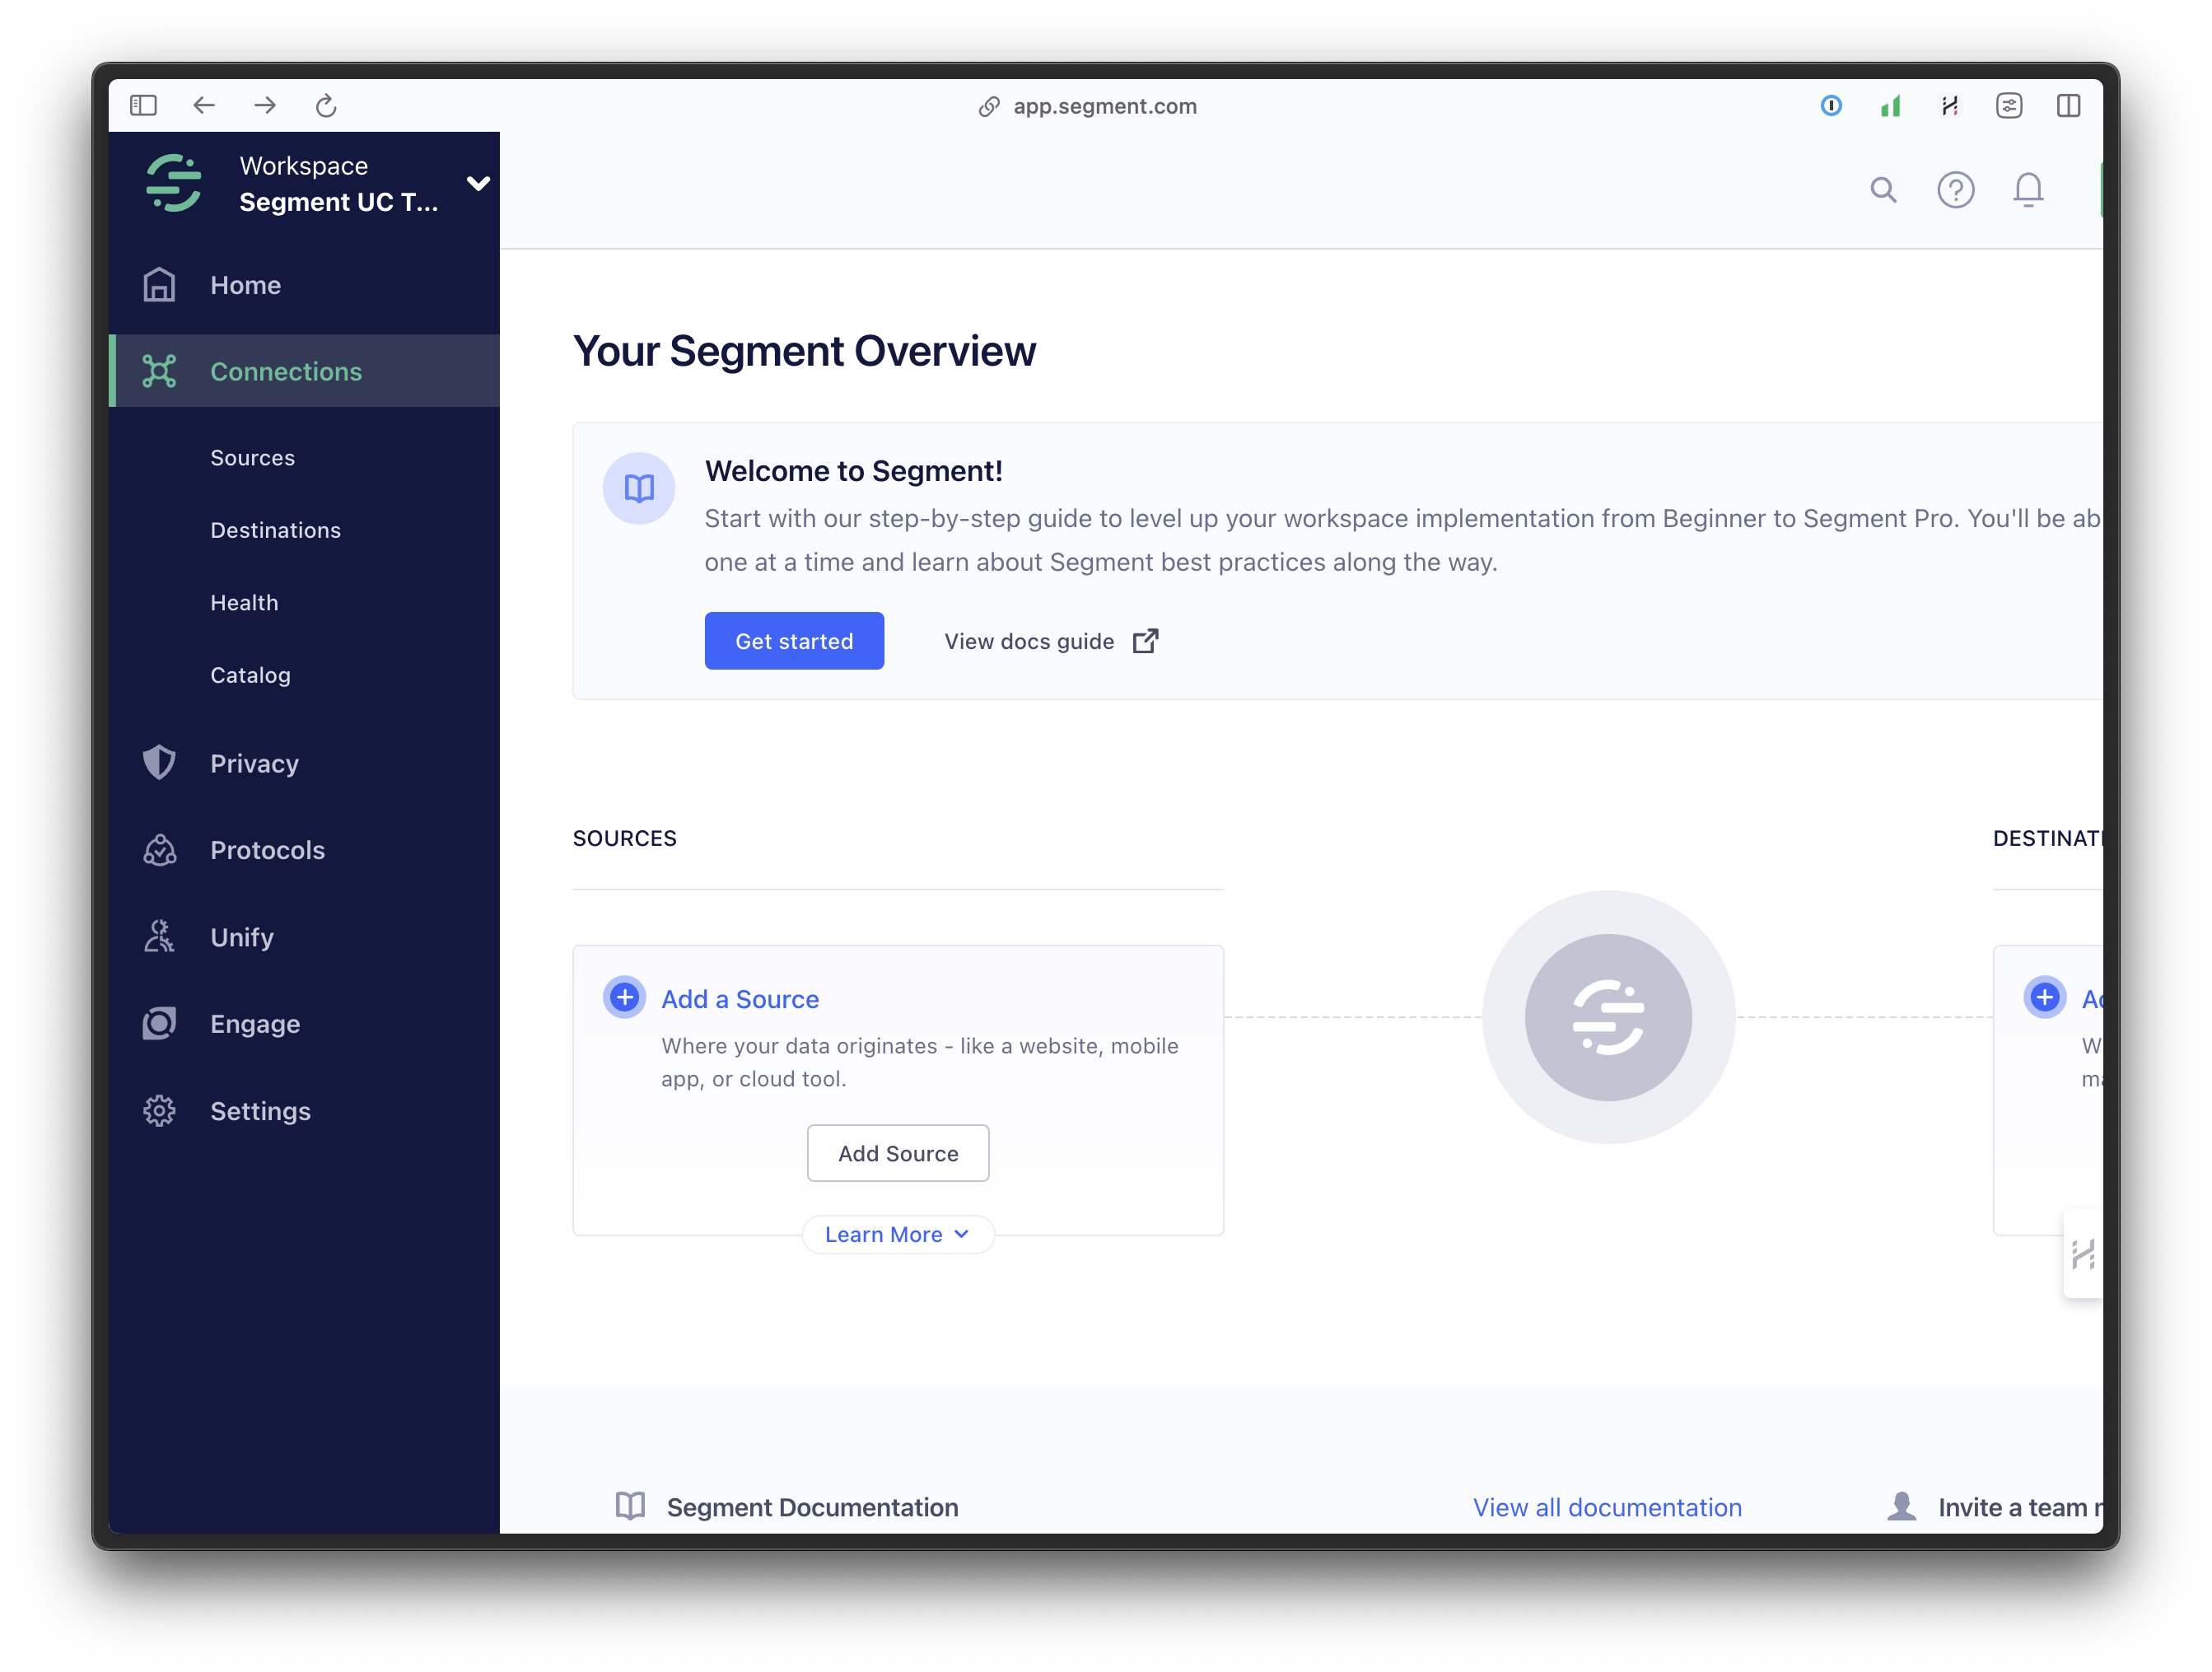
1. Go to https://segment.io and log in or create an account, then create a new workspace. Once on your new workspace, add a new source by pressing “Add source” under the “Connections” tab.
2. Add a JavaScript source and give it a name and URL. I put http://localhost:3000 as URL for now.
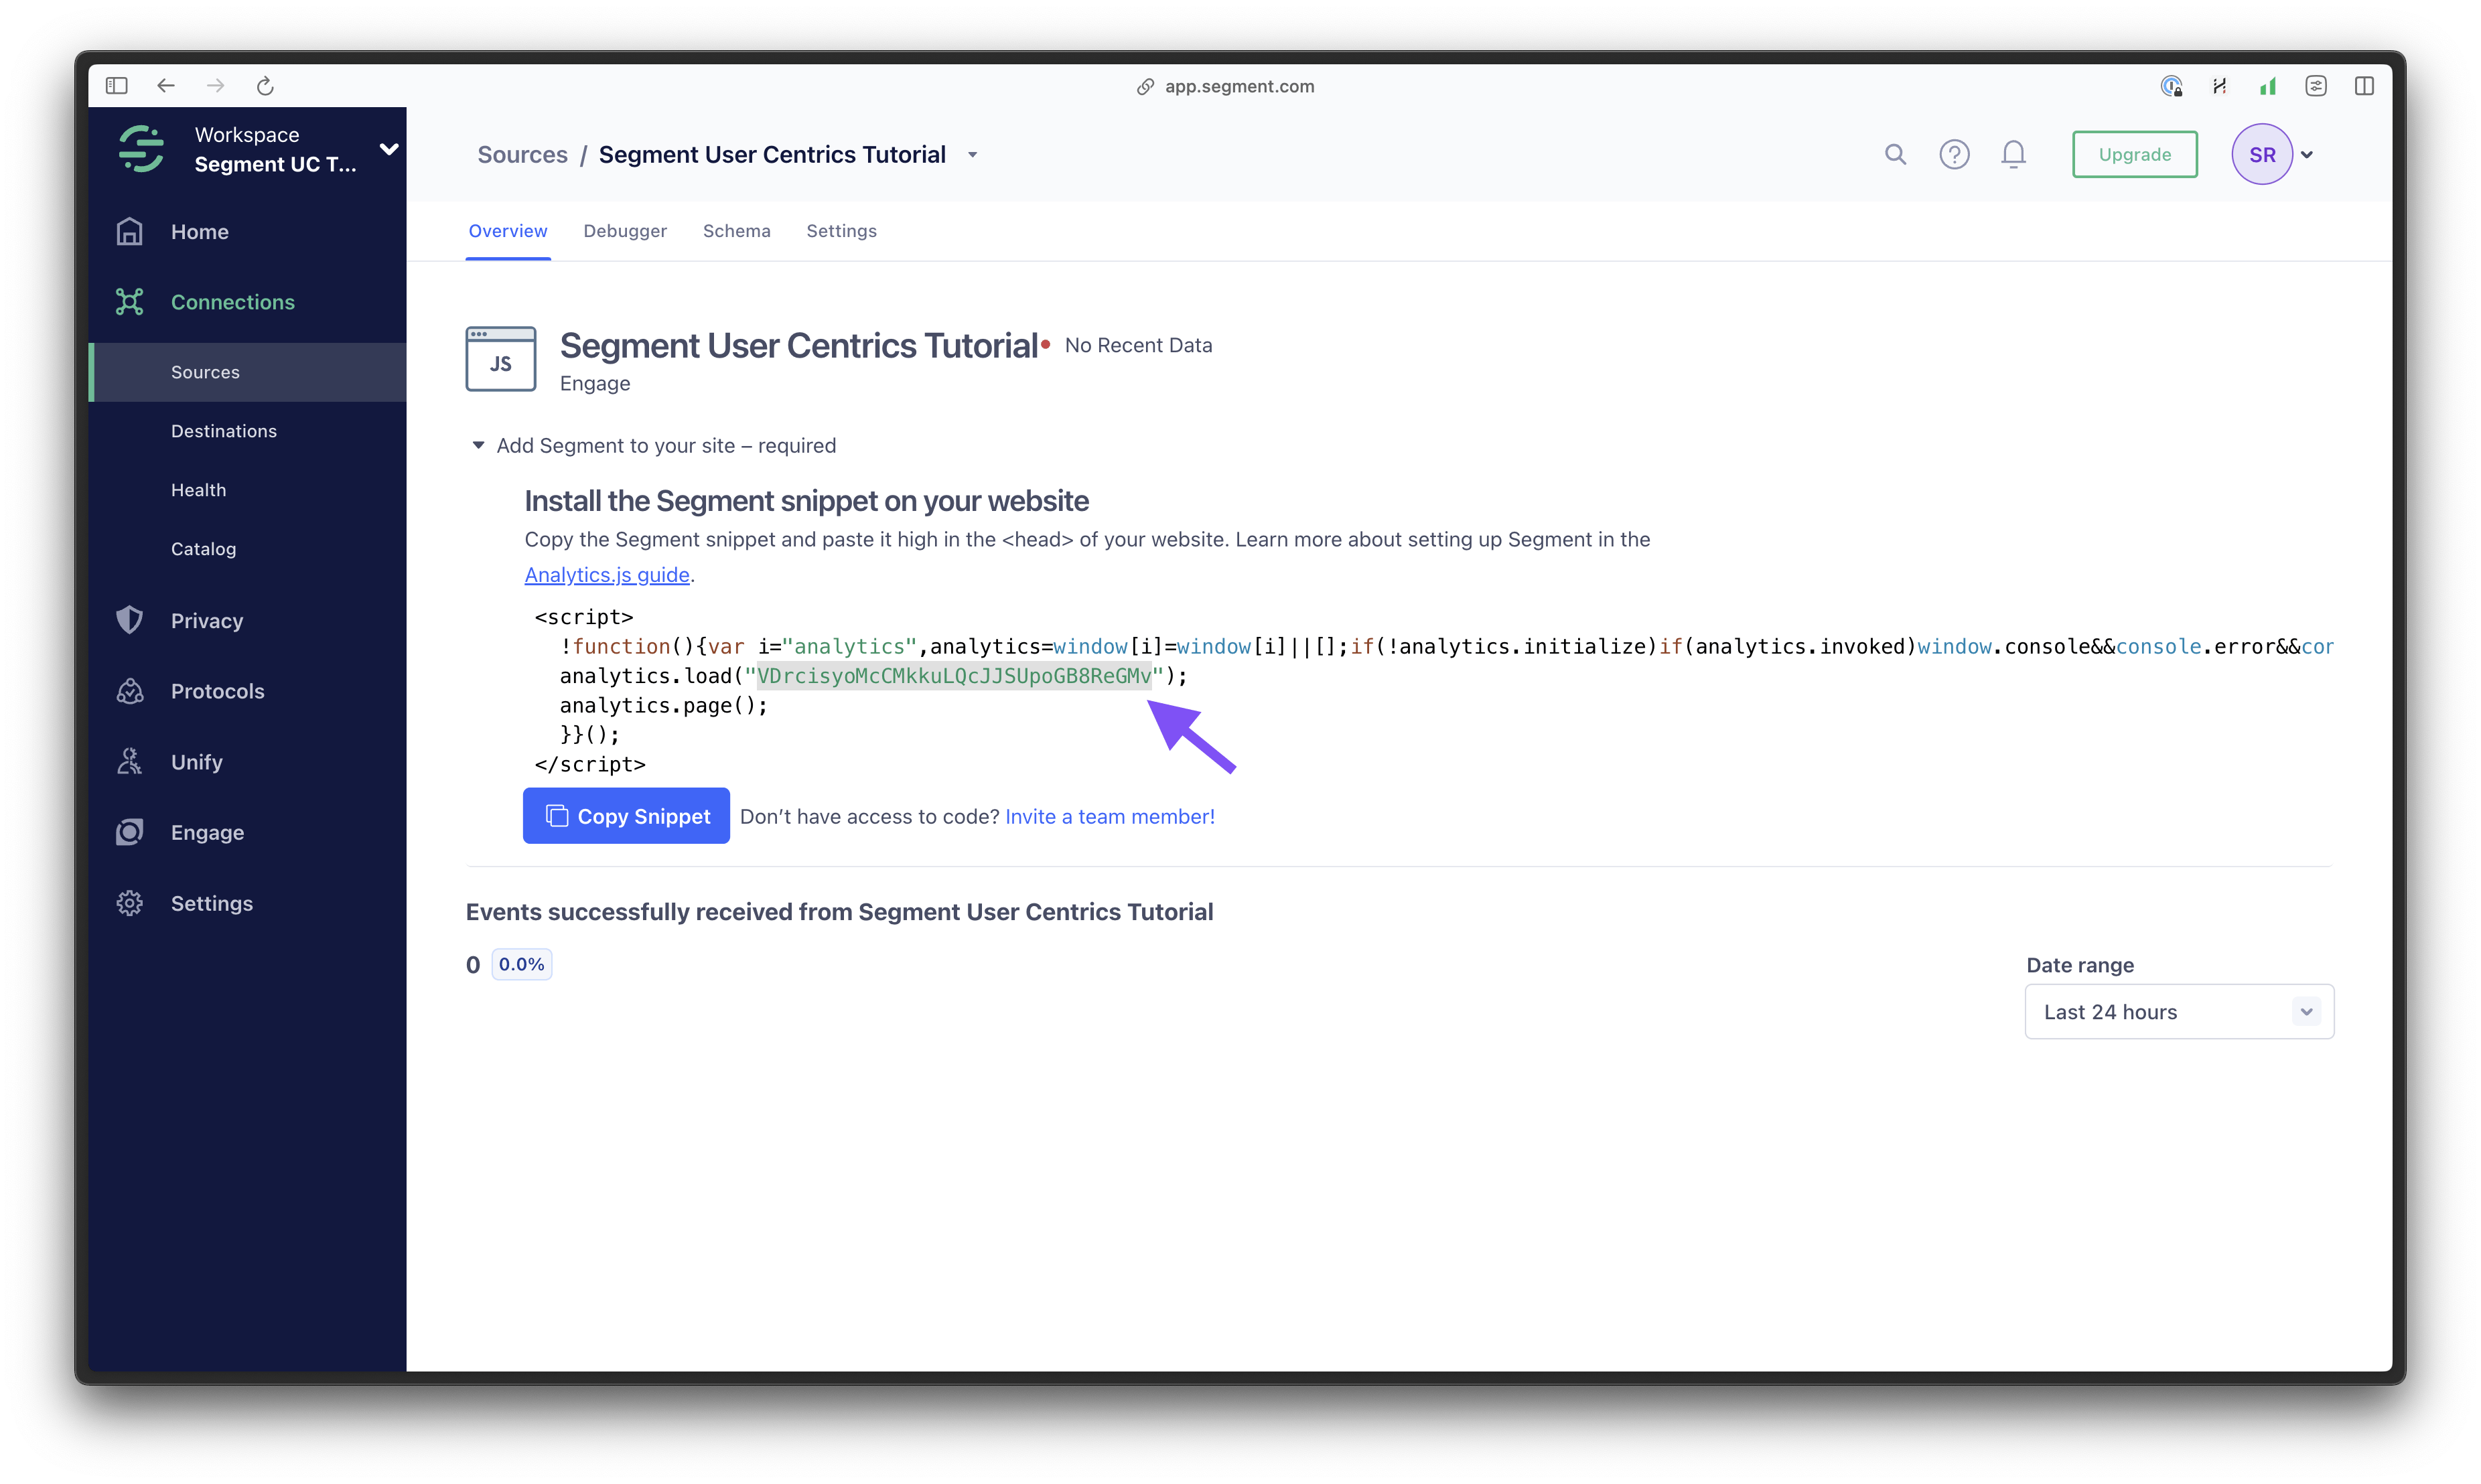
3. You will be presented with a script tag that should be implemented on your website, but we will use a library to add Segment to our website, so instead of copying the whole script tag, just copy the write key from the script. It’s the key used in the analytics.load() function.
4. Back in your Next.js app, create a /.env.local file and add your key there, like:
NEXT_PUBLIC_SEGMENT_WRITE_KEY=YOUR-KEY-HERE5. Now, install the library we’re going to use to implement Segment by running npm i @segment/analytics-next.
Building the context and provider and sending a basic pageview
To be able to access our analytics from the whole project, we will create a global context for it, where we will handle everything regarding both Segment and Usercentrics. To do this, follow the steps below:
1. Since we will be using hooks and libraries that are only available in the browser and not when we build the app, we need to define this as a client component. Otherwise, Next.js would create it as a server component by default. To do this, we will write “use client”; at the top of our component. Create a client component at: /app/components/AnalyticsProvider.tsx. In this file, add the following code:
"use client";

import { createContext, ReactNode, useContext, useMemo, useEffect } from "react";

import { AnalyticsBrowser } from "@segment/analytics-next";

// Types
interface AnalyticsContextProps {
  pageView: (tags: string[]) => void;
}

interface AnalyticsProviderProps {
  writeKey: string;
  children: ReactNode;
}

// Set up the global context and expose a function called pageView that
// can be used when importing this context.
const AnalyticsContext = createContext<AnalyticsContextProps>({
  pageView: () => {},
});

// Set up the provider that we will use to wrap our whole app in the
// rootLayout. This provider will make our app aware of all this
// tracking code.
export const AnalyticsProvider = ({
  writeKey,
  children,
}: AnalyticsProviderProps) => {
  const analytics = useMemo(() => new AnalyticsBrowser(), [writeKey]);

  useEffect(() => {
    analytics.load({ writeKey }).catch((e) => {
      console.error(e);
    });
  }, [writeKey]);

  const pageView = (tags: string[]) => {
    analytics.page({
      tags
    });
    console.log("pageView fired", tags);
  };

  return (
    <AnalyticsContext.Provider value={{ pageView }}>
      {children}
    </AnalyticsContext.Provider>
  );
};

export const useAnalytics = () => useContext(AnalyticsContext);
2. With this in place, we are then able to use the provider inside our /app/layout.tsx. To do so, import it and wrap it around your app like this, passing the NEXT_PUBLIC_SEGMENT_WRITE_KEY that we previously set up in our environment variables.
import type { Metadata } from "next";
import Link from "next/link";
import "./globals.css";

import { Inter } from "next/font/google";

import { AnalyticsProvider } from "@/app/components/AnalyticsProvider";

const inter = Inter({ subsets: ["latin"] });

export const metadata: Metadata = {
  title: "Create Next App",
  description: "Generated by create next app",
};

export default function RootLayout({
  children,
}: Readonly<{
  children: React.ReactNode;
}>) {
  return (
    <html lang="en">
      <body className={inter.className}>
        <AnalyticsProvider
          writeKey={process.env.NEXT_PUBLIC_SEGMENT_WRITE_KEY!}
        >
          <nav>
            <ul className="flex items-center justify-center gap-4 p-4">
              <li>
                <Link href="/">Home</Link>
              </li>
              <li>
                <Link href="/about">About</Link>
              </li>
            </ul>
          </nav>
          {children}
        </AnalyticsProvider>
      </body>
    </html>
  );
}
3. The only thing left to do now, to be able to pass page views to Segment, is to import and call the pageView() function from our provider on each page. But since the /app/page.tsx and /app/[uid]/page.tsx are server components by default, and we want to keep it that way since we want to ship a minimum of JS to the client, we can’t call the pageView() directly in those components. We have to find a way around it.
The way I solved this is that I created a new client component helper in /app/components/PageView.tsx, which looks like this:
"use client";

import { useEffect, useRef } from "react";

import { useAnalytics } from "@/app/components/AnalyticsProvider";

interface PageViewProps {
  tags: string[];
}

export const PageView = ({ tags }: PageViewProps) => {
  const { pageView } = useAnalytics();
  const called = useRef(false);

  useEffect(() => {
    if (called.current) {
      return;
    }
    pageView(tags);
    called.current = true;
  }, [pageView, tags]);

  return null;
};
It’s a bit weird to have a component not returning any UI. For that we normally use hooks or regular functions. Since we want our pages to be server components for performance reasons, and we still want to use client functionality like React’s useEffect() and our client-side tracking, we actually need a client component.
4. This component can then be imported and used in our home page at /app/page.tsx like this:
+ import { PageView } from "@/app/components/PageView";
  import { createClient } from "@/prismicio";
  import { PrismicText } from "@prismicio/react";

  export default async function Home() {
    const client = createClient();

    const home = await client.getByUID("page", "home");

    return (
      <main className="flex min-h-screen flex-col items-center justify-between p-24">
+       <PageView tags={home.tags} />
        <h1 className="text-4xl font-bold">
          <PrismicText field={home.data.title} />
        </h1>
      </main>
    );
  }
And for the dynamic page route at /app/[uid]/page.tsx, just do the same, but replace <PageView tags={home.tags} /> with <PageView tags={page.tags} />.
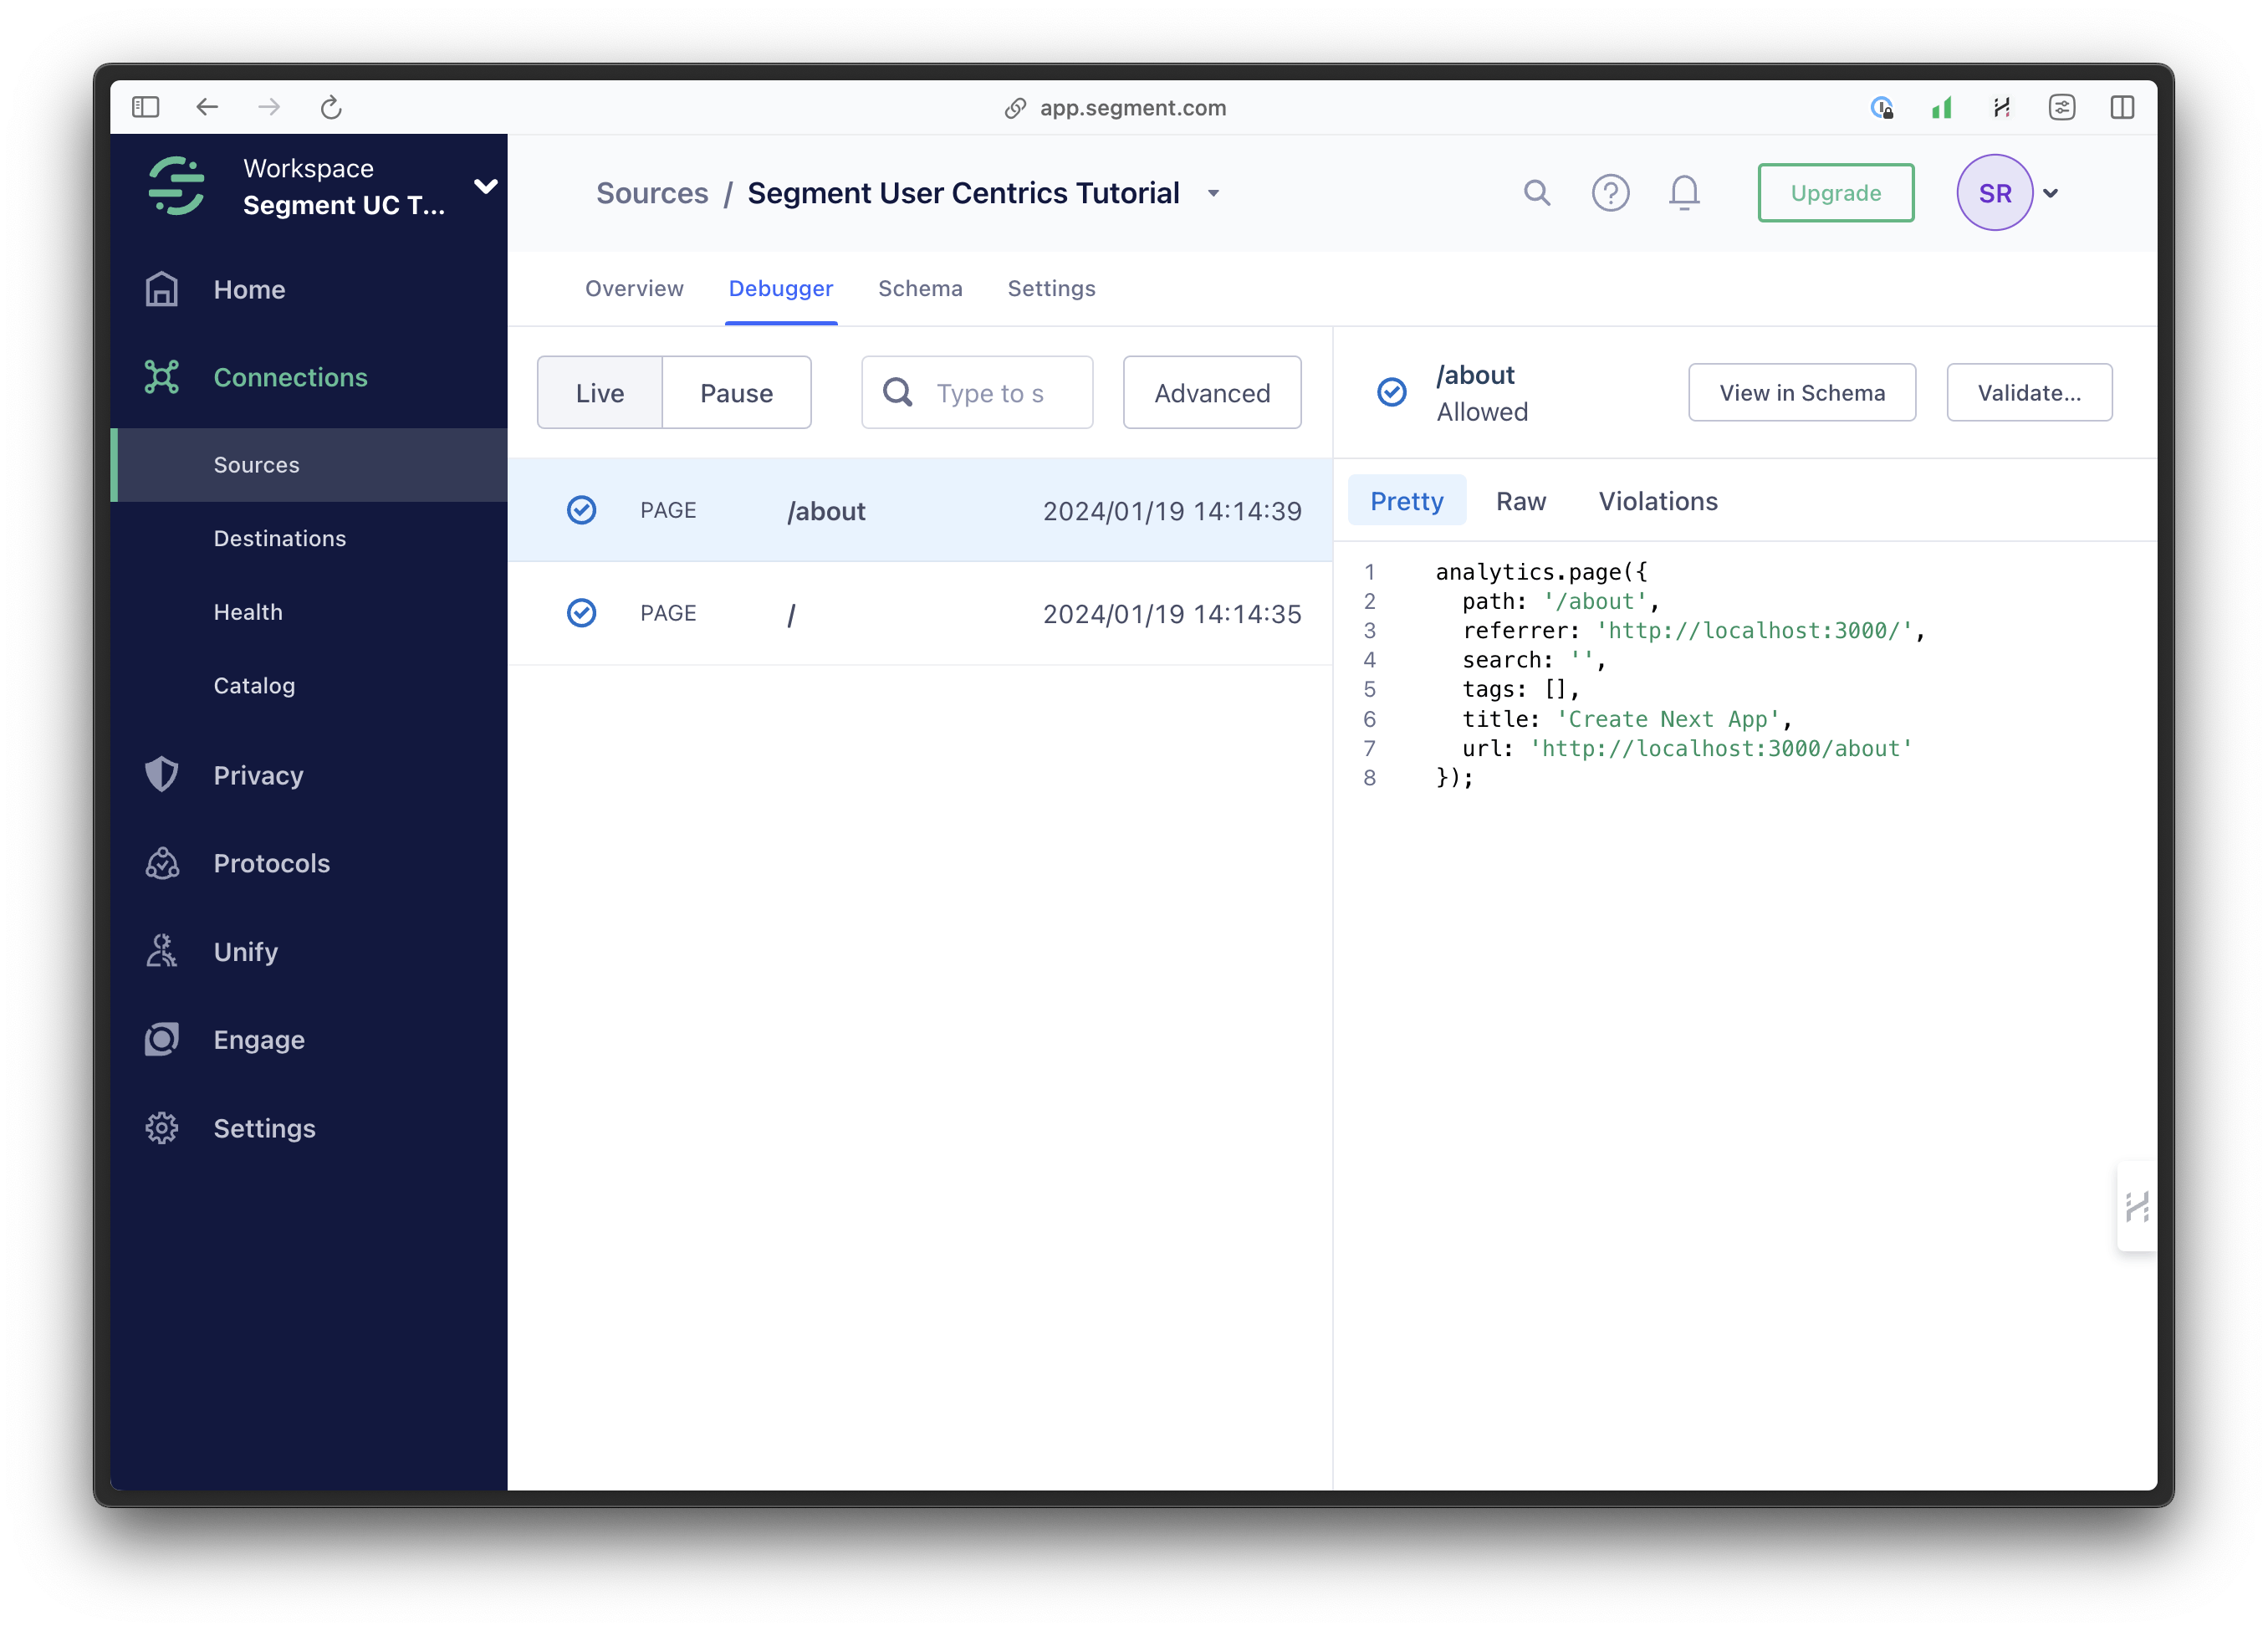
5. Visiting our page at http://localhost:3000 and clicking from home to about should now log pageView fired [] in our console. If we go to our Segment dashboard again, click “Sources” in the sidebar, and then click on the source we added, and then click on the “Debugger” tab, we should see something like this, which means that our events are successfully sent to Segment.
That’s a major part of the setup completed. Next, let's see how we can enrich the page event data with data from Prismic.
As you can see, looking at the sample data above, we actually have an empty array of tags: [] being sent with each page view. That’s because when we built the context and the internal pageView function for it, we defined that the function should include a property called tags, which should contain an array of strings. We also did this for the helper function we include on pages.
That way, we already prepared our function to handle sending Prismic tags, as a simple example.
Let’s head over to the Prismic dashboard and add a tag to our "About" page, saving and publishing it again.
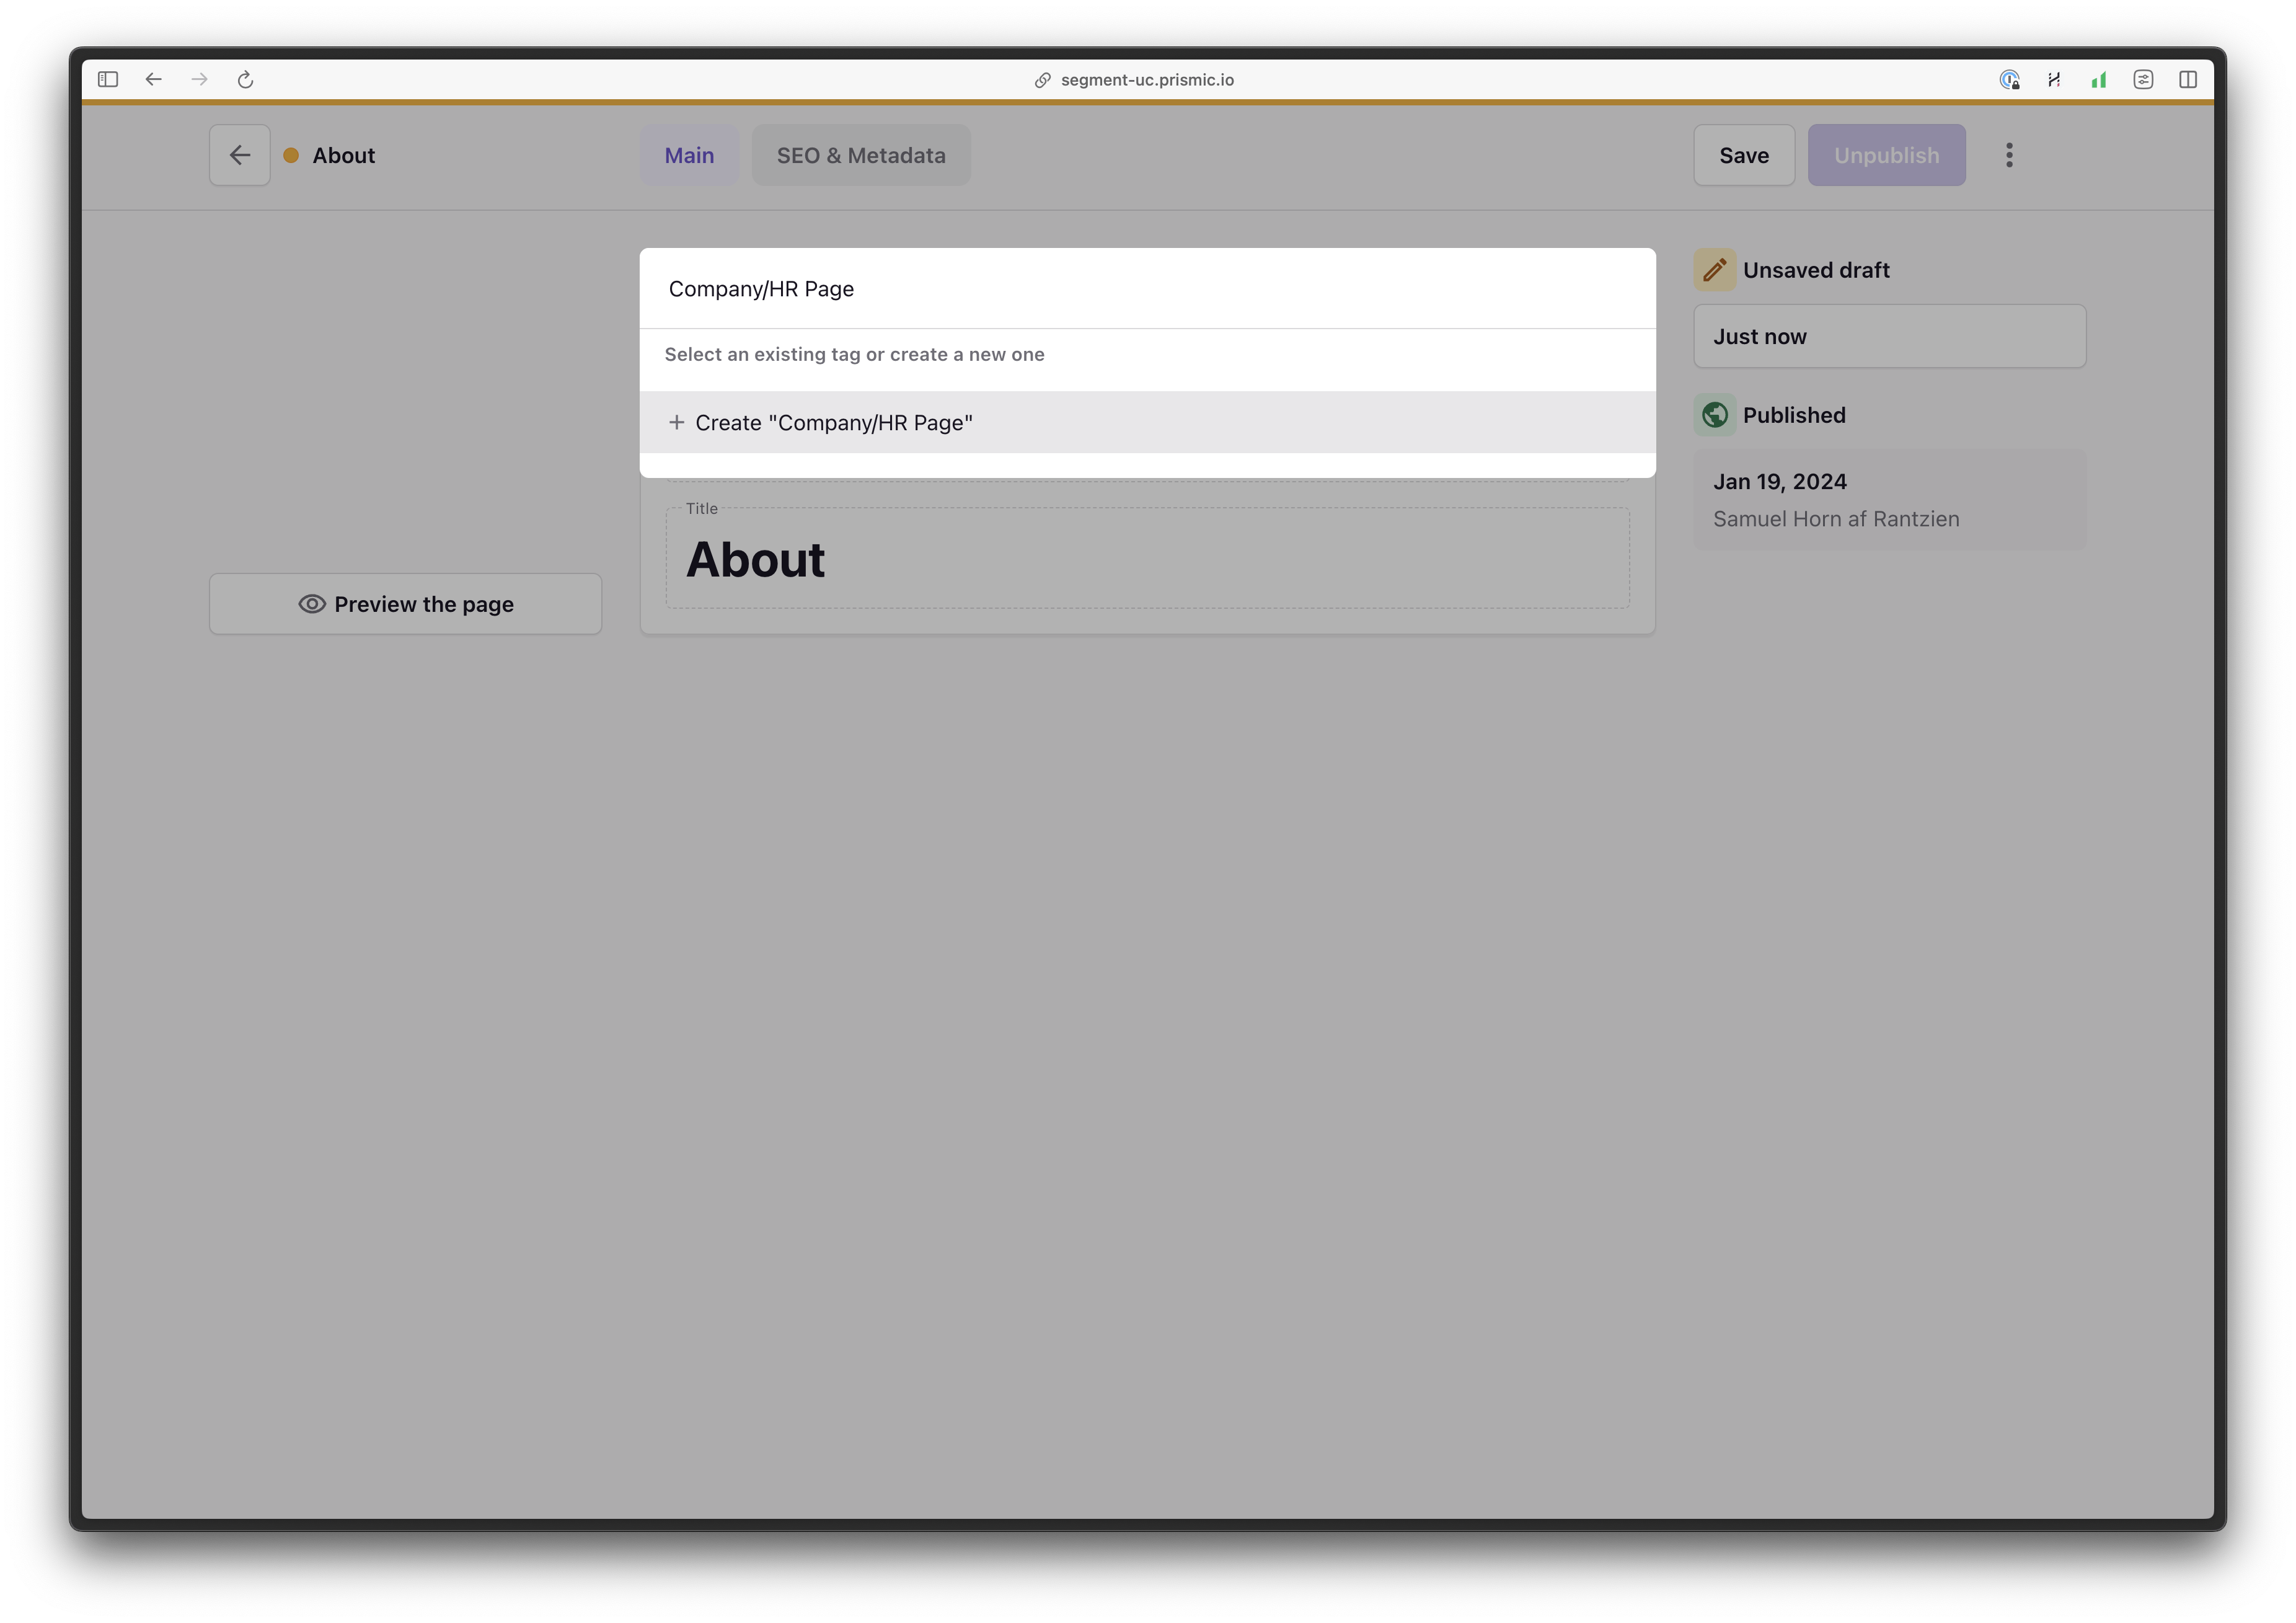
I added a tag called “Company/HR Page” because I could imagine a scenario in a big repository where you would want to categorize your documents based on some kind of type. This data can then be used to segment the data further down the pipeline when passing it on from Segment to other services like Amplitude.
If we take a look at one of our page components in the Next.js app again, we can see that we already sending the tag data by passing the tag array from the fetched document to the page view helper: <PageView tags={page.tags} />.
So, refreshing our about page one more time on http://localhost:3000 to generate a new event and then heading back to the Segment debugger, we should now see that the payload of the event now also includes our tag:
analytics.page({
  path: '/about',
  referrer: 'http://localhost:3000/',
  search: '',
  tags: [
    'Company/HR Page'
  ],
  title: 'Create Next App',
  url: 'http://localhost:3000/about'
});
That wraps up the basic Segment implementation.
But right now, we’re logging all page view’s as well as setting cookies in the users browsers without any kind of permissions, and that might be a problem, since we have different rules in different jurisdictions. In Europe, for example, we need to comply with GDPR laws. Next, we will focus on adding Usercentrics to address that.
Adding Usercentrics consent before tracking page views
Implementing consent before tracking users is crucial for several reasons. Not only is it a legal requirement in many jurisdictions, but it is also a fundamental step towards respecting user privacy, enhancing users’ trust, and delivering a user-centric experience. Essentially, this means we build our platform to suit each user's specific needs and habits, giving them a more personal and enjoyable experience.
Setting up Usercentrics
Just as we did with Segment above, the first thing we need to is to head over to https://usercentrics.com and set up a free trial account, or sign in if you already have an account.
Once you’re signed in, there are a ton of different settings you can change depending on how you want to use the product. We are just going to use a barebones GDPR setup, to get started:
1. Create a new configuration for GDPR and give it a name and a URL. Note that you may need to create your configuration by clicking the button in your confirmation email after signing up for your free trial. Here again, I assigned http://localhost:3000 for the purpose of this tutorial. Then, go to your newly created configuration.
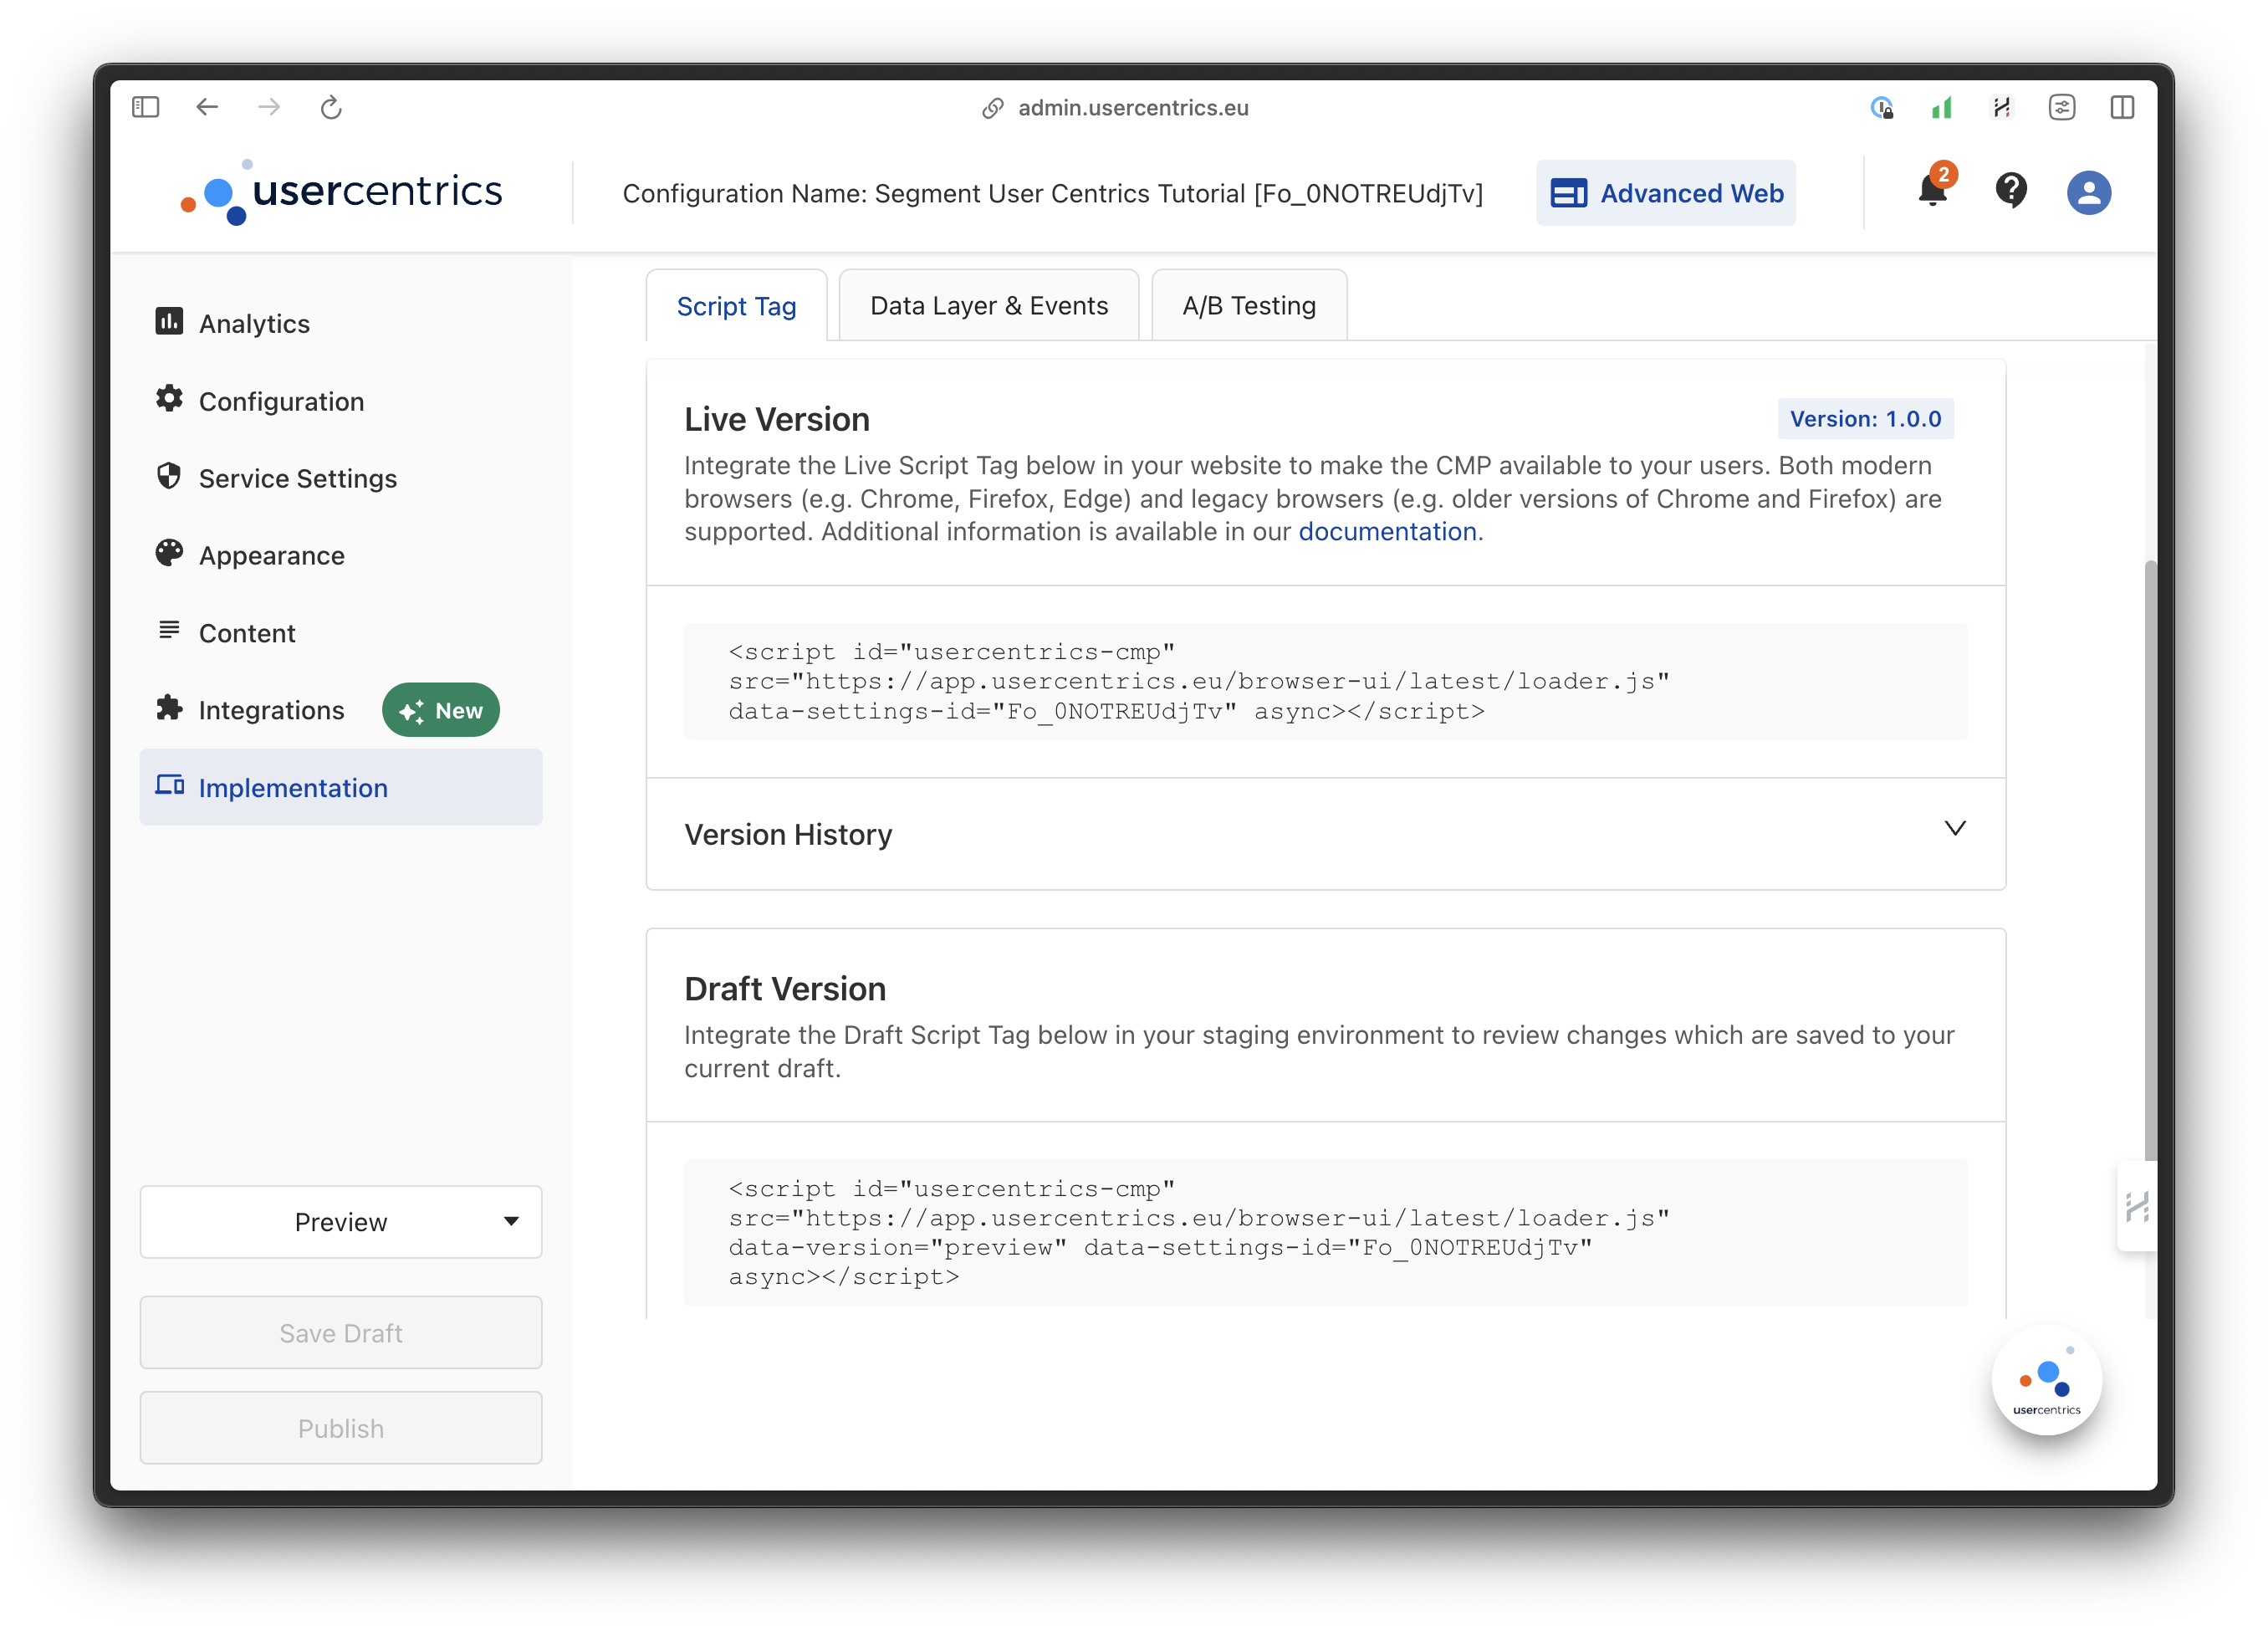
2. Click on the tab “Implementation” in the sidebar. Here, we’re yet again presented with a script to paste in our HTML. However, it’s a bit different since we’re using Next.js.
3. Start by copying the data-settings-id from the script, and create another environment variable in our /.env.local file next to our Segment write key, calling it NEXT_PUBLIC_UC_SETTINGS_ID. So now our /.env.local should look like this:
NEXT_PUBLIC_SEGMENT_WRITE_KEY=YourSegmentWriteKey
NEXT_PUBLIC_UC_SETTINGS_ID=YourUserCentricsSettingsId
4. Now let’s head over to our provider in /app/components/AnalyticsProvider.tsx and import Next.js’s Script component on the top of the file with import Script from "next/script";. Then go to the bottom of this file and add the Script component like this, right above the {children}:
import Script from "next/script"

// ...

return (
    <AnalyticsContext.Provider value={{ pageView }}>
      <Script
        id="usercentrics-cmp"
        data-settings-id={process.env.NEXT_PUBLIC_UC_SETTINGS_ID!}
        data-version={
          process.env.NEXT_PUBLIC_NODE_ENV === "development" ? "preview" : ""
        }
        src="https://app.usercentrics.eu/browser-ui/latest/loader.js"
        async
      />
      {children}
    </AnalyticsContext.Provider>
  );
As you can see on the screenshot from Usercentrics above, they give you two different script tags, one for the live version and one for the draft version of your Usercentrics configuration. The only difference between the two is that the draft version has a data-version=”preview” attribute added to it. So, in our version above, we listen to what environment our app is running and add preview if we are in development mode. Also, we pass the id from our environment variables.
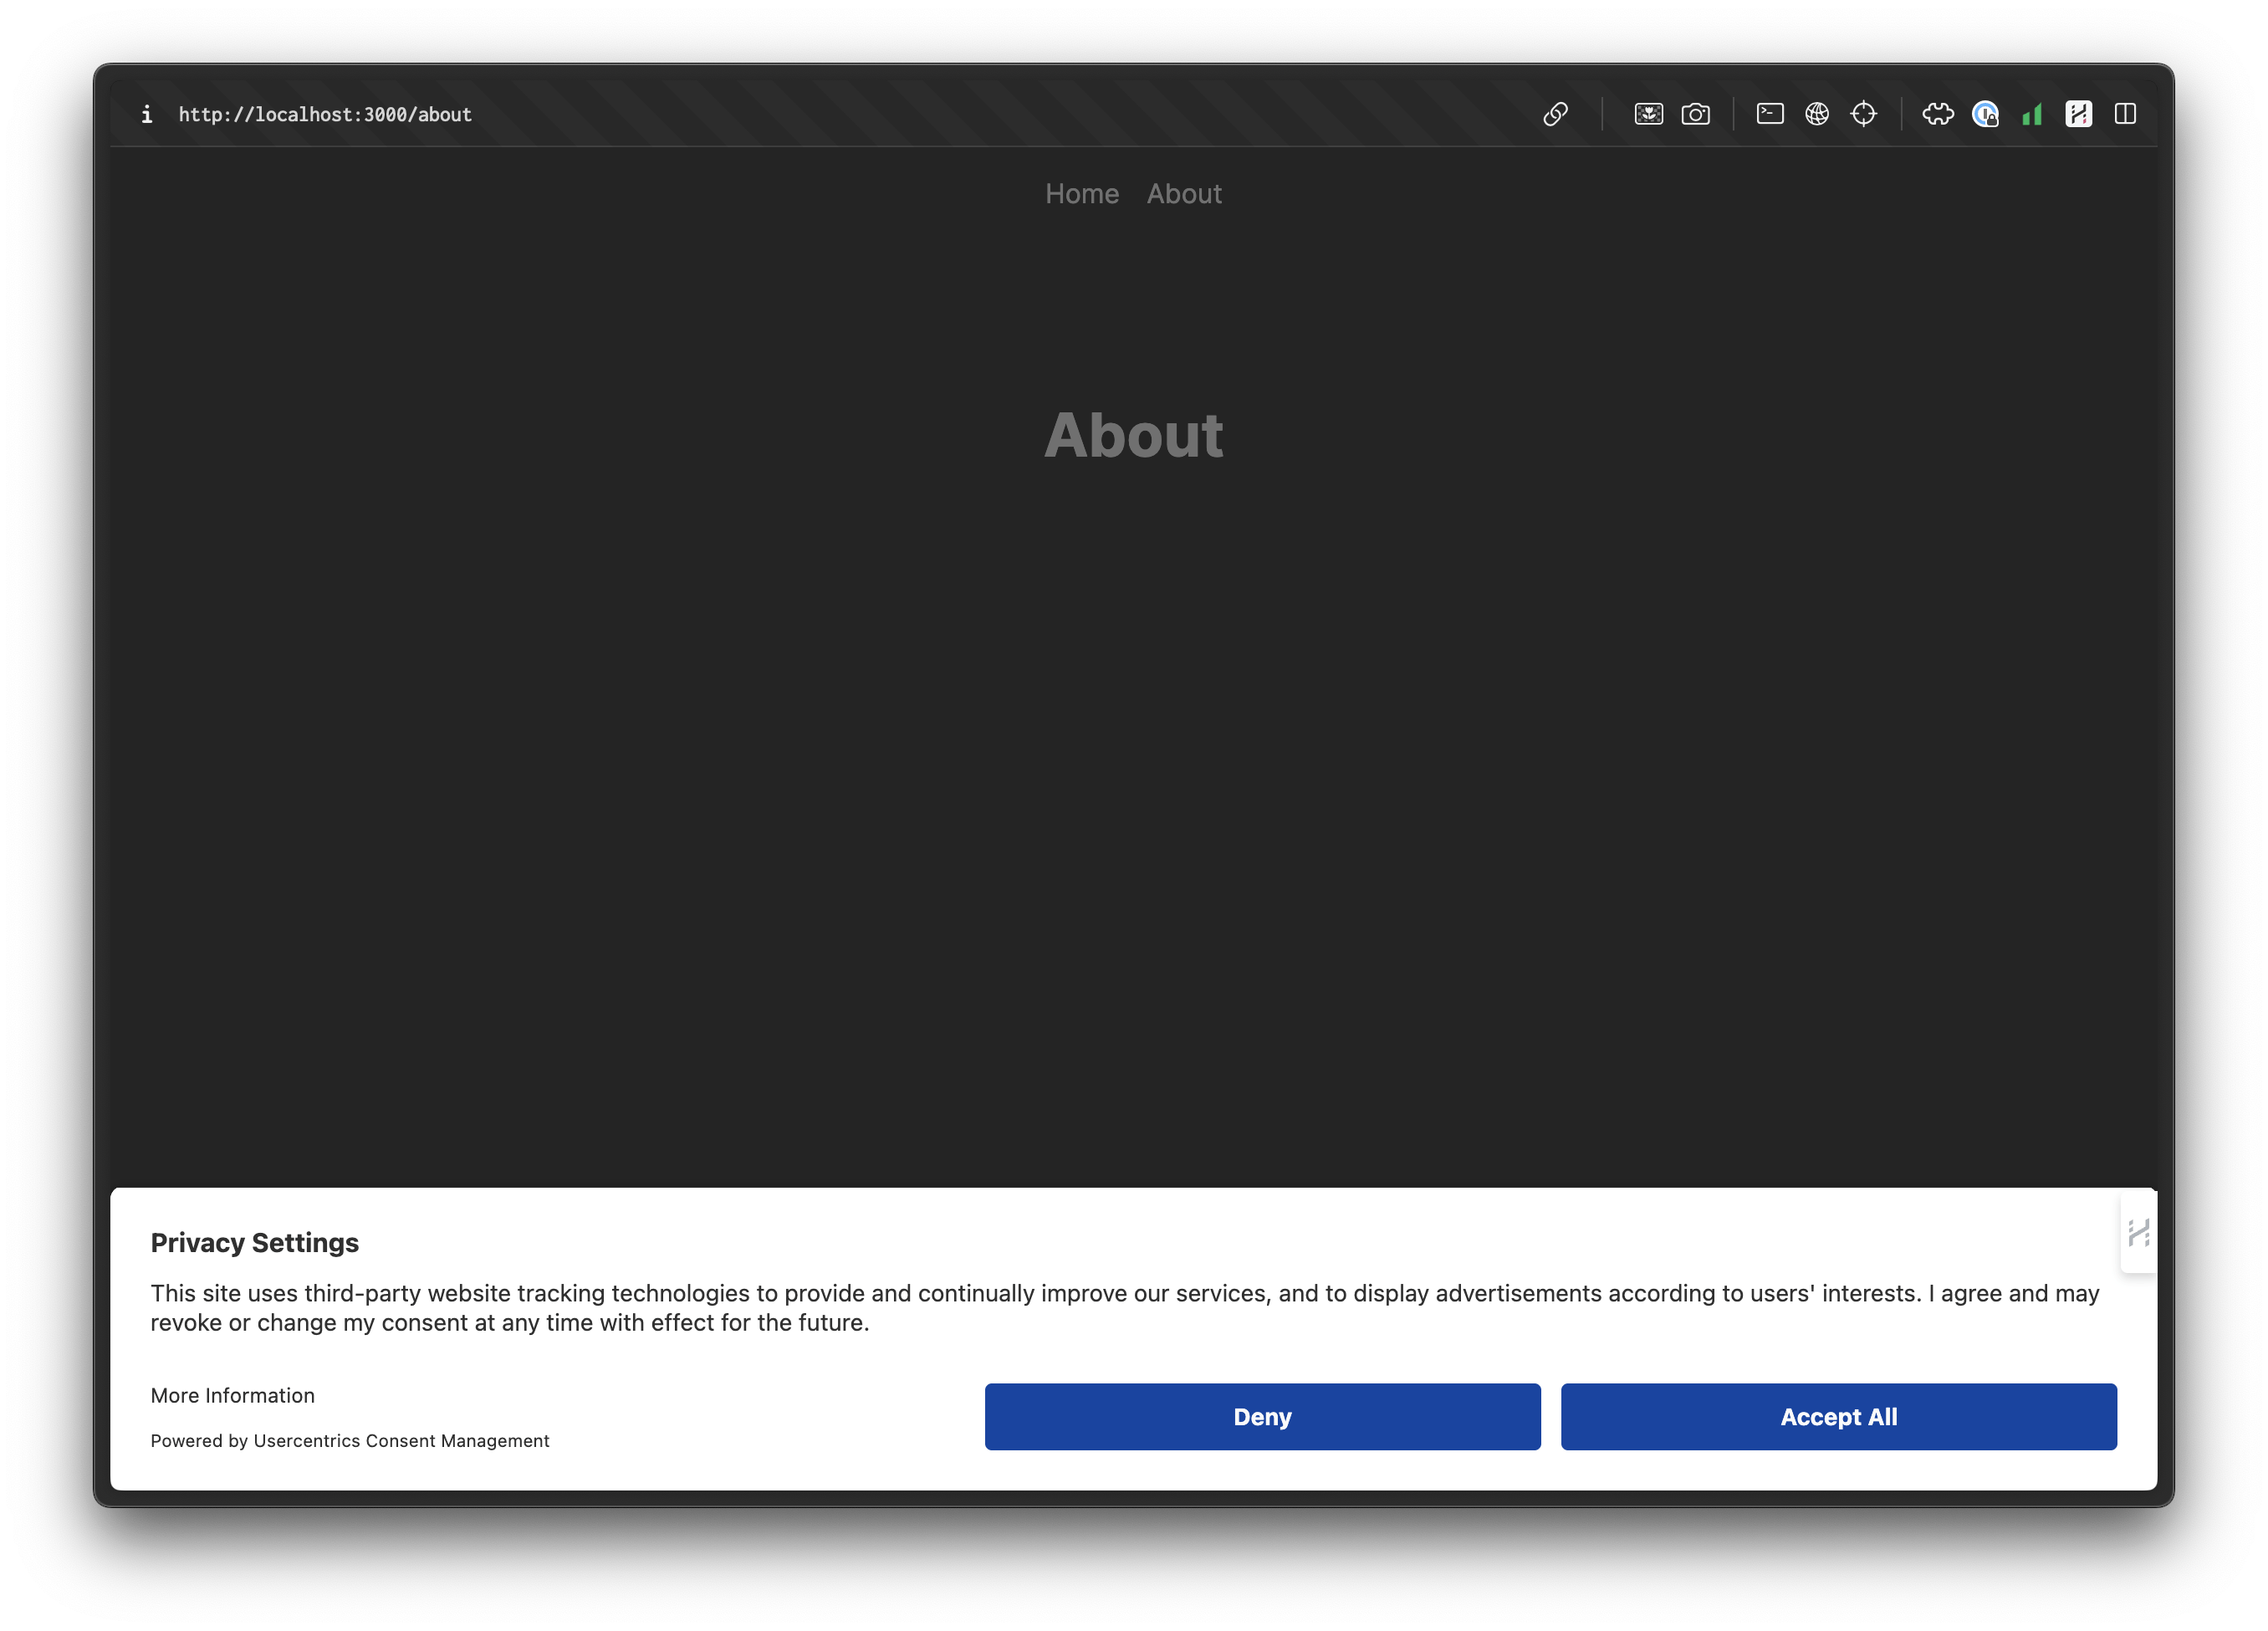
5. Saving this and then heading back to http://localhost:3000 again, we will see this:
A note regarding ad blockers
Although we haven't encountered any problems with Usercentrics, there may be situations where ad blockers prevent consent modals from appearing. If you don't see the popup, please try disabling your ad blocker.
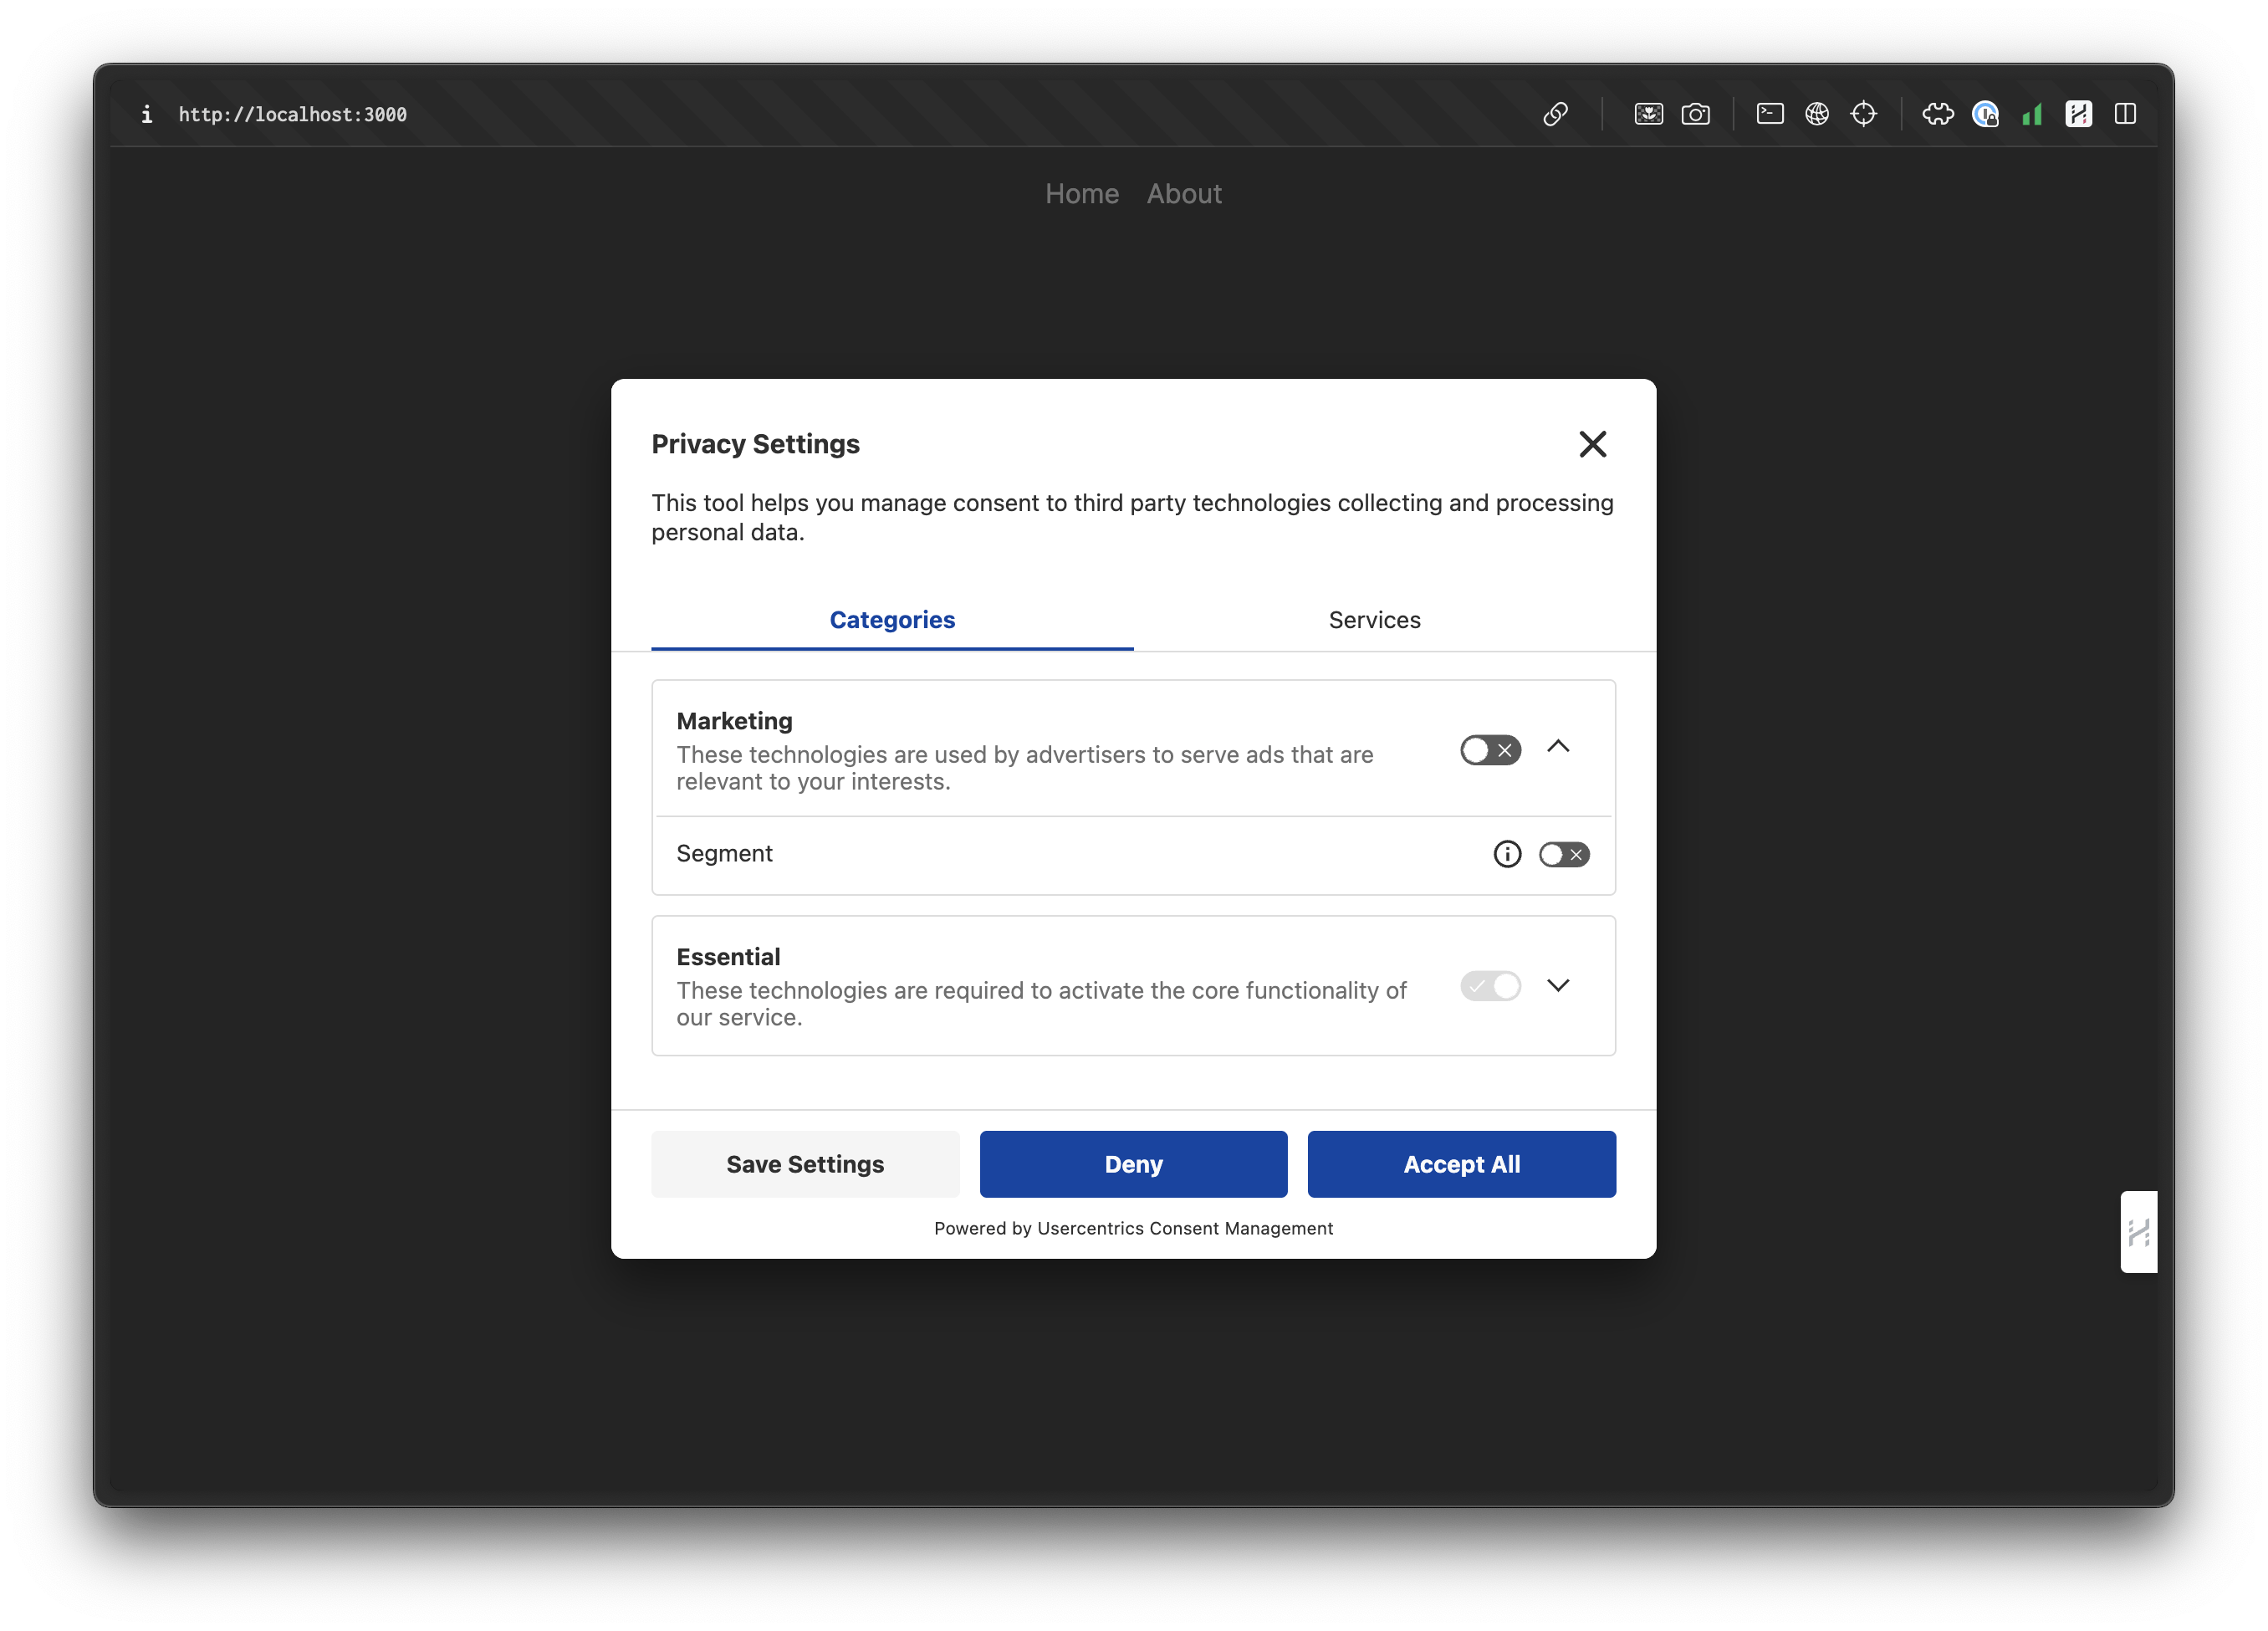
6. We now have a big consent banner on our page. This banner is what Usercentrics refers to as the “First layer”, and it could be customized however you want from the Usercentrics dashboard, but for this tutorial we’re keeping it as is.
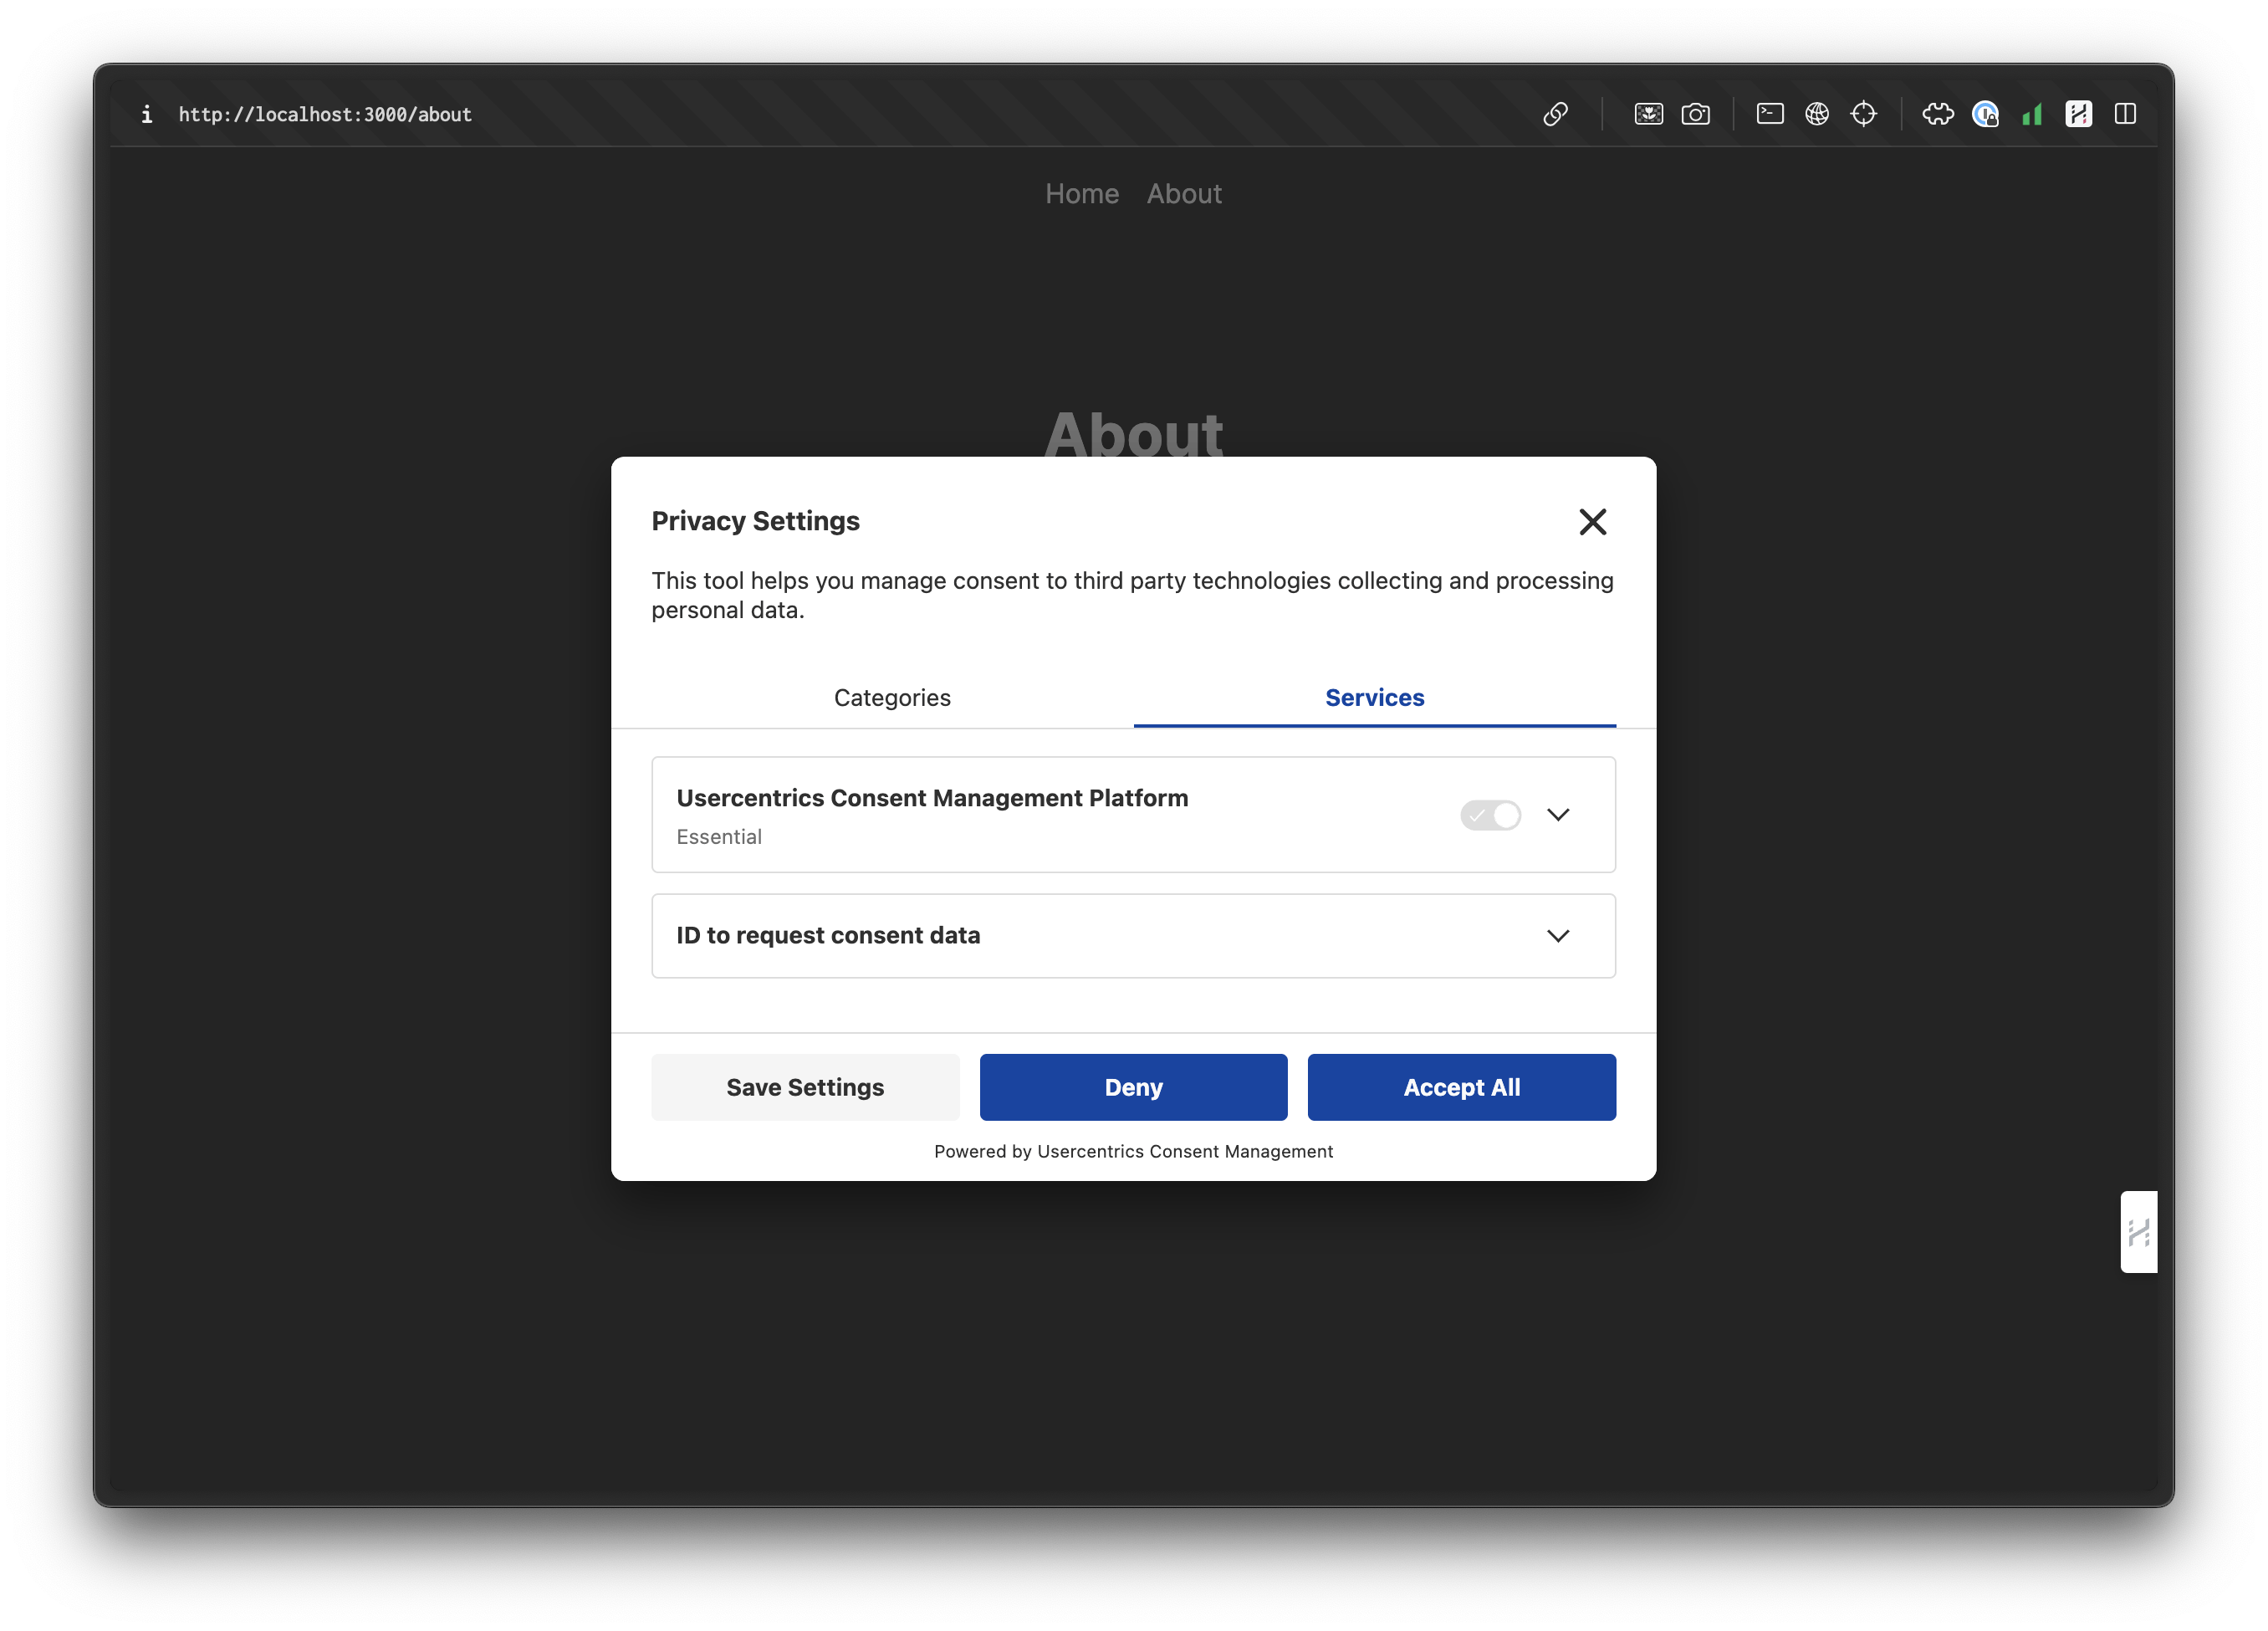
If we click on “More information” in the banner we get presented with the “Second layer”, which shows the scripts we intend to load on the page.
For now, as you see if you click “Services”, the only thing we have is the Consent Management Platform, which is considered essential, since it’s required to have this consent modal. We somehow need to add Segment here, so a user can chose if they want to opt-in to the Segment tracking.
7. To add Segment, go back to the Usercentrics dashboard, and click “Service Settings” in the sidebar, then go to the tab “Data Processing Services” and click “Add DPS via Database”.
Here we can search for Segment, which they already have in their database, we assign it to the existing “Marketing” category, and selects that it should keep the service up to date.
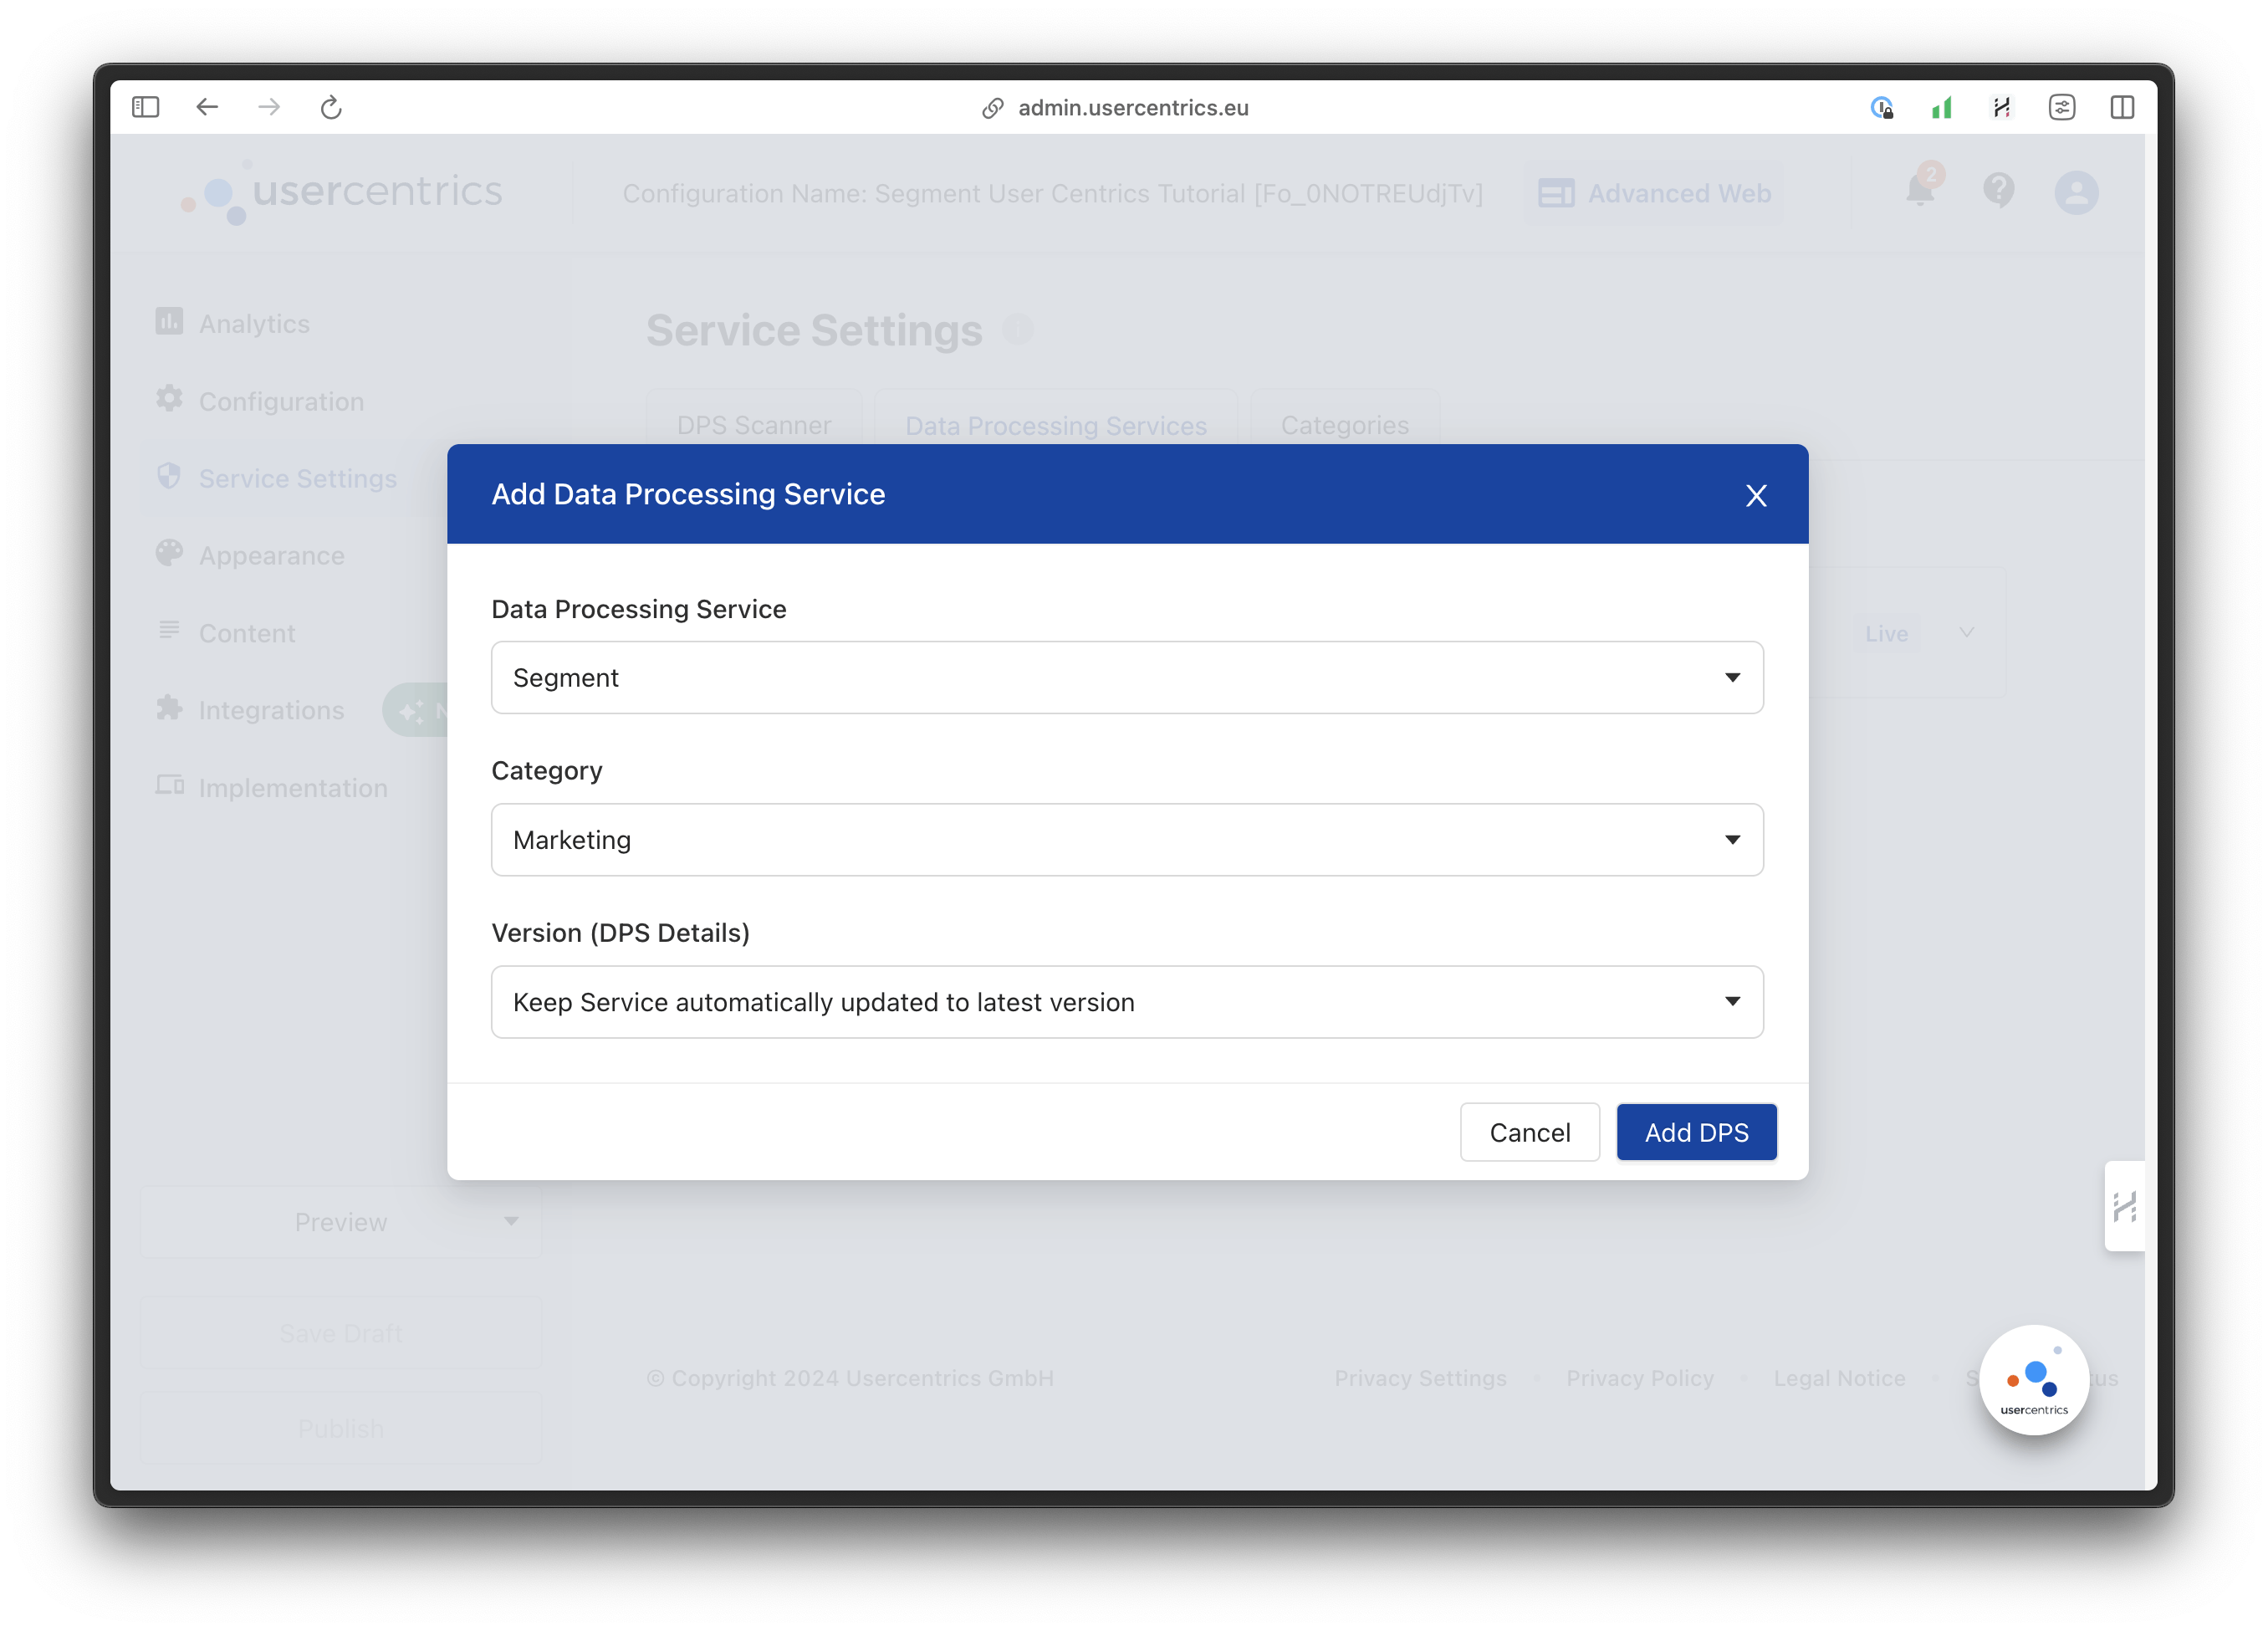
Then we click on “Add DPS”.
Now we can see that Segment is added to our list of services, and that it is in draft mode. For the sake of this tutorial, I will just go ahead and publish it as it is by clicking 'Publish' in the bottom left of the Usercentrics dashboard.
It could take a while, but soon, if you refresh your localhost, you should now see this:
Now, the only thing left to do is integrating Usercentrics with Segment on the code side of things.
Loading Segment based on users consent
To begin this, the first thing we should do is stop loading Segment by default by removing the following analytics.load() function in our provider at /app/components/AnalyticsProvider.tsx:
analytics.load({ writeKey: writeKey }).catch((e) => {
    console.log(e);
});
This will make it so data will no longer be sent to Segment.
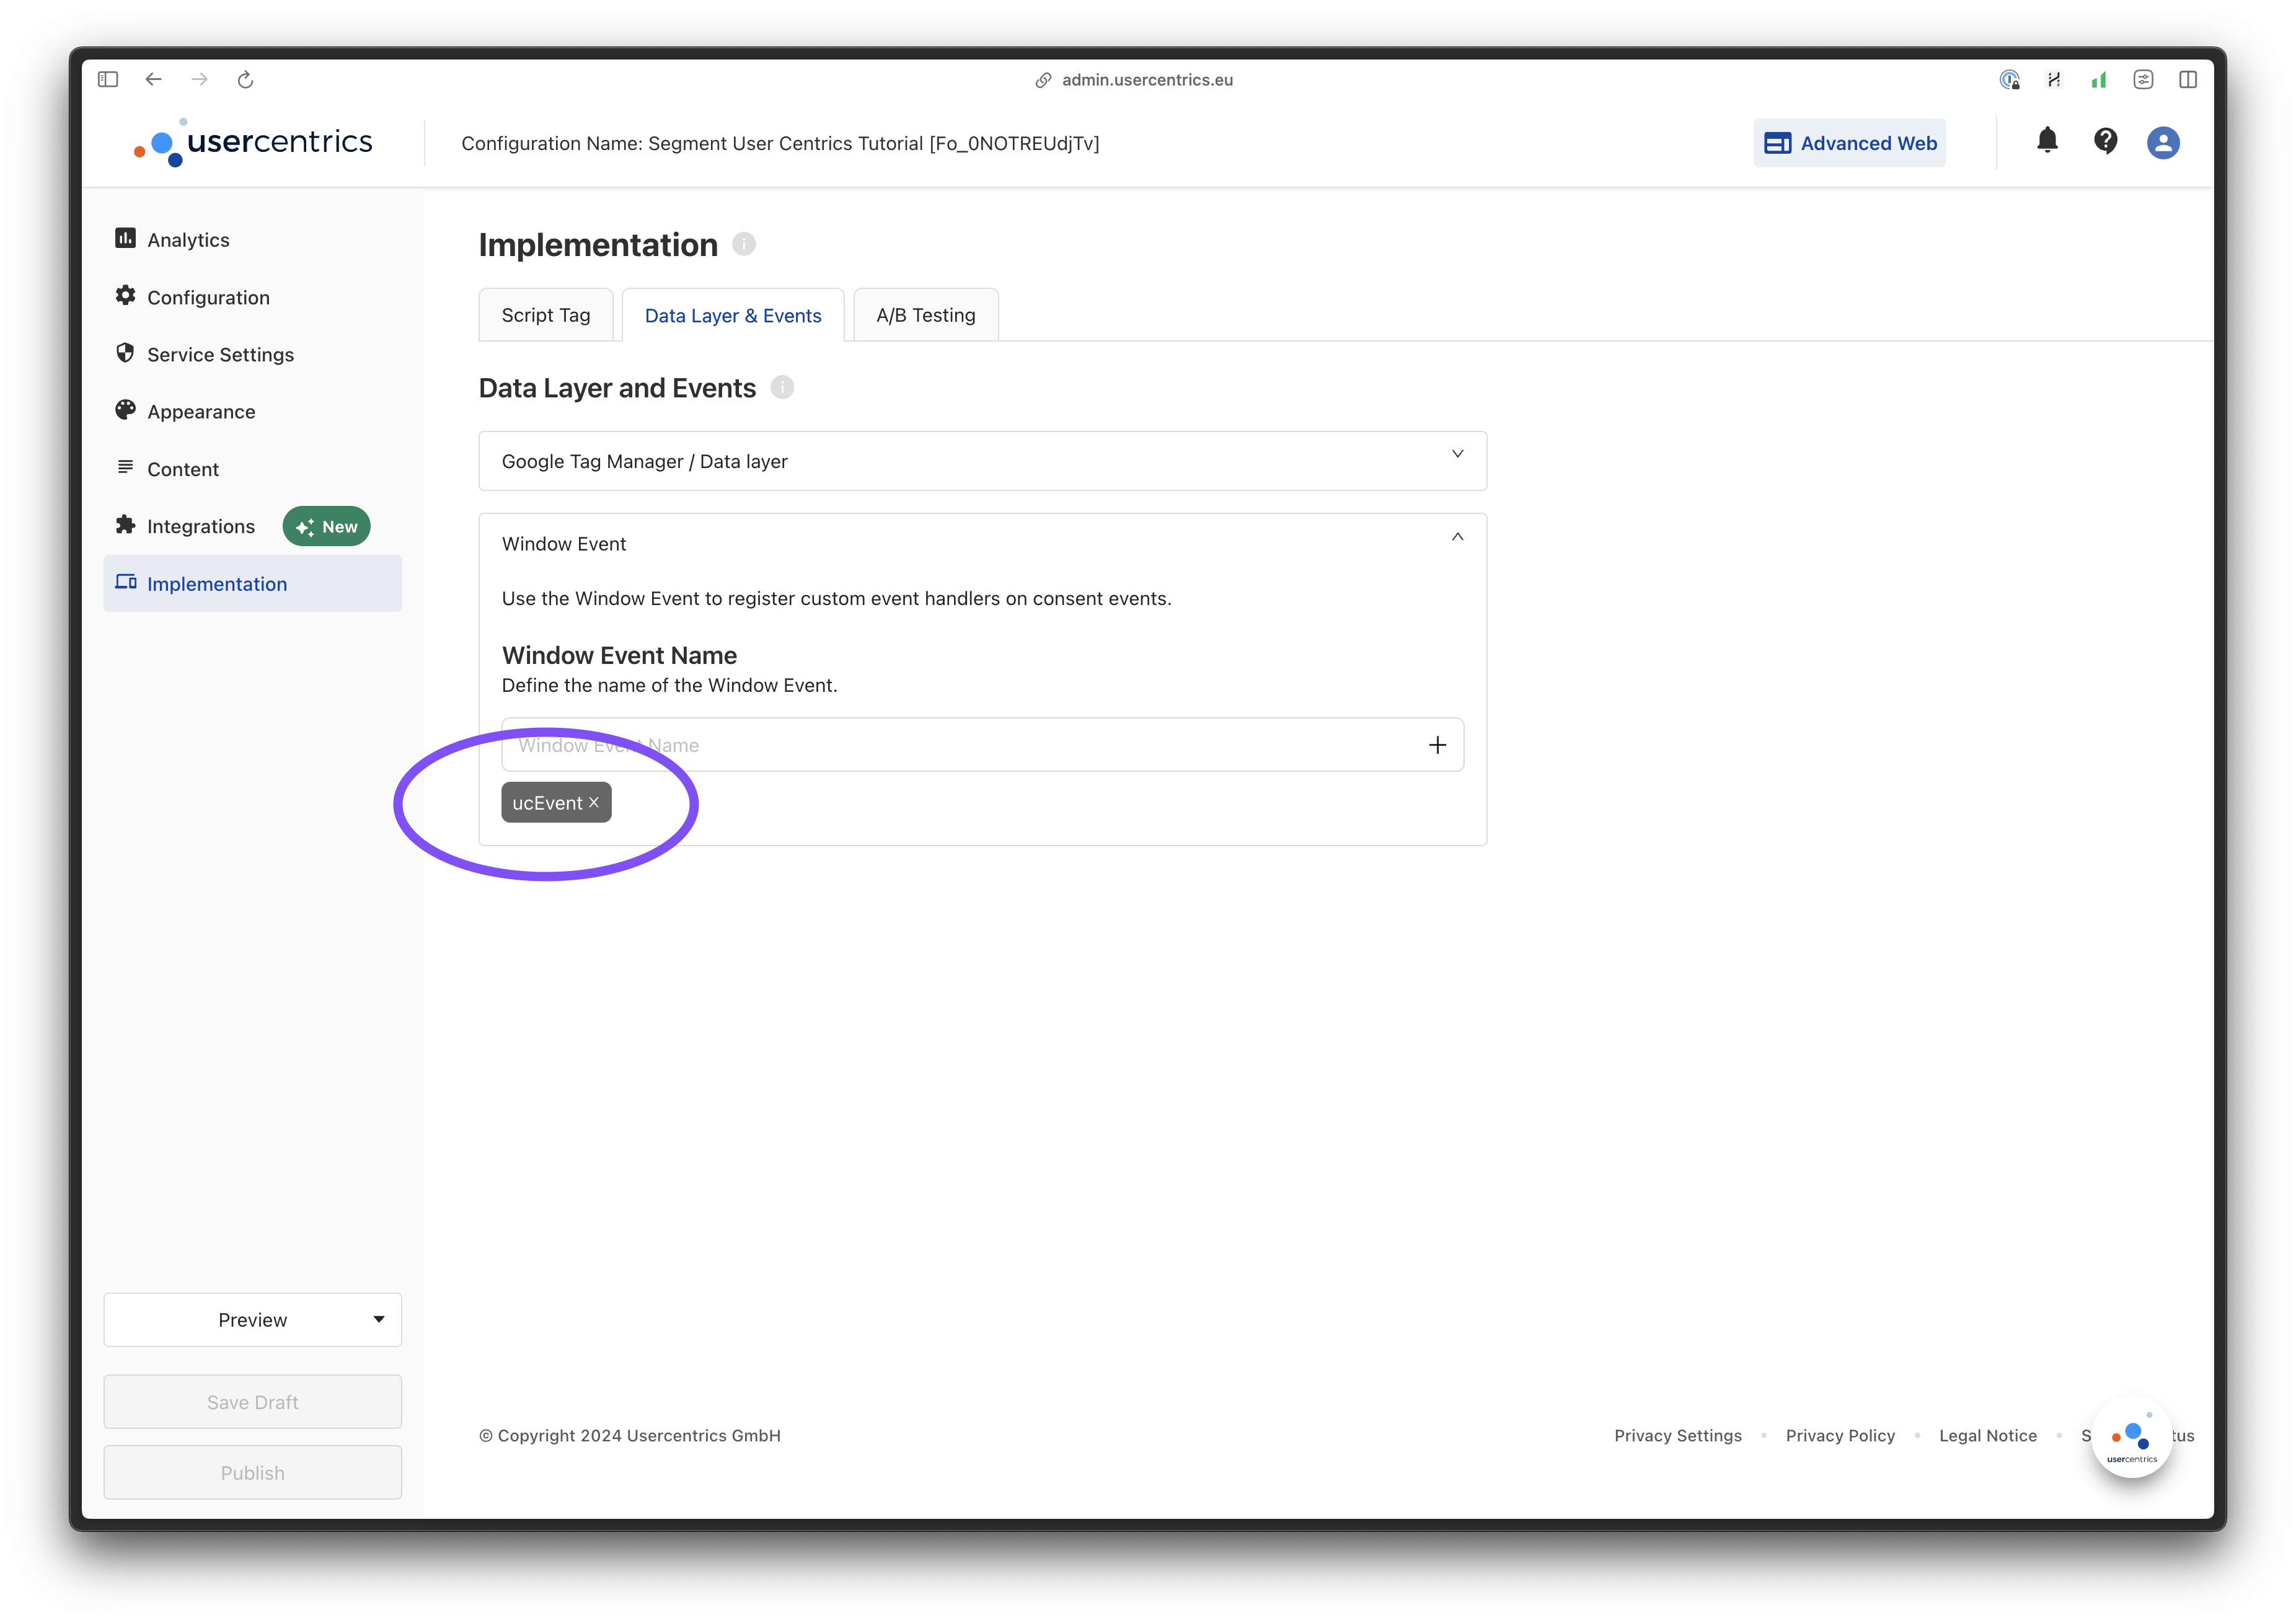
To be able to listen to interactions with the Usercentrics modal, we can use the window event described in their docs. To enable it, on the Usercentrics dashboard go to “Implementation” in the sidebar, and click the tab “Data Layer & Events”. From there, click the button “Add Window Event” and give it the name “ucEvent”. Then hit “Publish”.
With that setup, let’s change the code of our provider to look like this:
"use client";

import Script from "next/script";
import {
  createContext,
  ReactNode,
  useContext,
  useEffect,
  useMemo,
  useState,
} from "react";

import { AnalyticsBrowser } from "@segment/analytics-next";

// Types
interface AnalyticsContextProps {
  pageView: (tags: string[]) => void;
}

interface AnalyticsProviderProps {
  writeKey: string;
  children: ReactNode;
}

// Context
const AnalyticsContext = createContext<AnalyticsContextProps>({
  pageView: () => {},
});

// Provider
export const AnalyticsProvider = ({
  writeKey,
  children,
}: AnalyticsProviderProps) => {
  const analytics = useMemo(() => new AnalyticsBrowser(), [writeKey]);
  const [segmentLoaded, setSegmentLoaded] = useState(false);

  // Function for tracking page views.
  const pageView = (tags: string[]) => {
    if (!segmentLoaded) return;

    analytics.page({
      tags: tags,
    });

    console.log("pageView fired", tags);
  };

  // Function for loading Segment
  const loadSegment = () => {
    const ucSettings = JSON.parse(localStorage.getItem("uc_settings")!);

    // Load Segment with all services disabled by default, then set individual
    // services based on user's settings.
    analytics
      .load(
        { writeKey: writeKey },
        {
          integrations: {
            All: false,
            "Segment.io": ucSettings.services.find(
							// Segment ID from Usercentrics
              (service: any) => service.id === "O97xcRJFR"
            ).status,
          },
        }
      )
      .catch((e) => {
        console.log(e);
      })
			.then(() => {
        setSegmentLoaded(true);
      });
  };

  useEffect(() => {
    // If user has interacted with the banner before, load Segment.
    if (localStorage.getItem("uc_user_interaction") === "true") {
      loadSegment();
    }

    // When user interacts with the banner, load Segment, or reset Segment if
    // user declines.
    const reactToUsercentrics = (event: any) => {
      if (
        // If user accepts all services or updates services, load Segment, if
        // not already loaded.
        event.detail.action === "onAcceptAllServices" ||
        event.detail.action === "onUpdateServices"
      ) {
        if (!segmentLoaded) {
          loadSegment();
        } else {
          // Segment is already loaded, so reload the page to apply the
          // new settings, since we can only load Segment once.
          window.location.reload();
        }
      } else if (
        // If user declines all services, reset Segment.
        event.detail.action === "onDeclineAllServices"
      ) {
        console.log("Declined");
        analytics.reset();
      }
    };

    window.addEventListener("ucEvent", reactToUsercentrics);

    return () => {
      window.removeEventListener("ucEvent", reactToUsercentrics);
    };
  }, []);

  return (
    <AnalyticsContext.Provider value={{ pageView }}>
      <Script
        id="usercentrics-cmp"
        data-settings-id={process.env.NEXT_PUBLIC_UC_SETTINGS_ID!}
        data-version={
          process.env.NEXT_PUBLIC_NODE_ENV === "development" ? "preview" : ""
        }
        src="https://app.usercentrics.eu/browser-ui/latest/loader.js"
        async
      />
      {children}
    </AnalyticsContext.Provider>
  );
};

export const useAnalytics = () => useContext(AnalyticsContext);
1. First, we define the component as a client component to interact with users. Then, we import our dependencies.
2. We set up two simple types for our context and provider.
3. We create the AnalyticsContext, exposing the pageView function for use where needed.
4. We create the AnalyticsProvider to wrap our app.
5. In the provider, we first create our AnalyticsBrowser with the writeKey and create some state to track if Segment is loaded.
6. Then, we create a basic pageView function that only fires if Segment has been loaded. In this function, we also log the tags, if any.
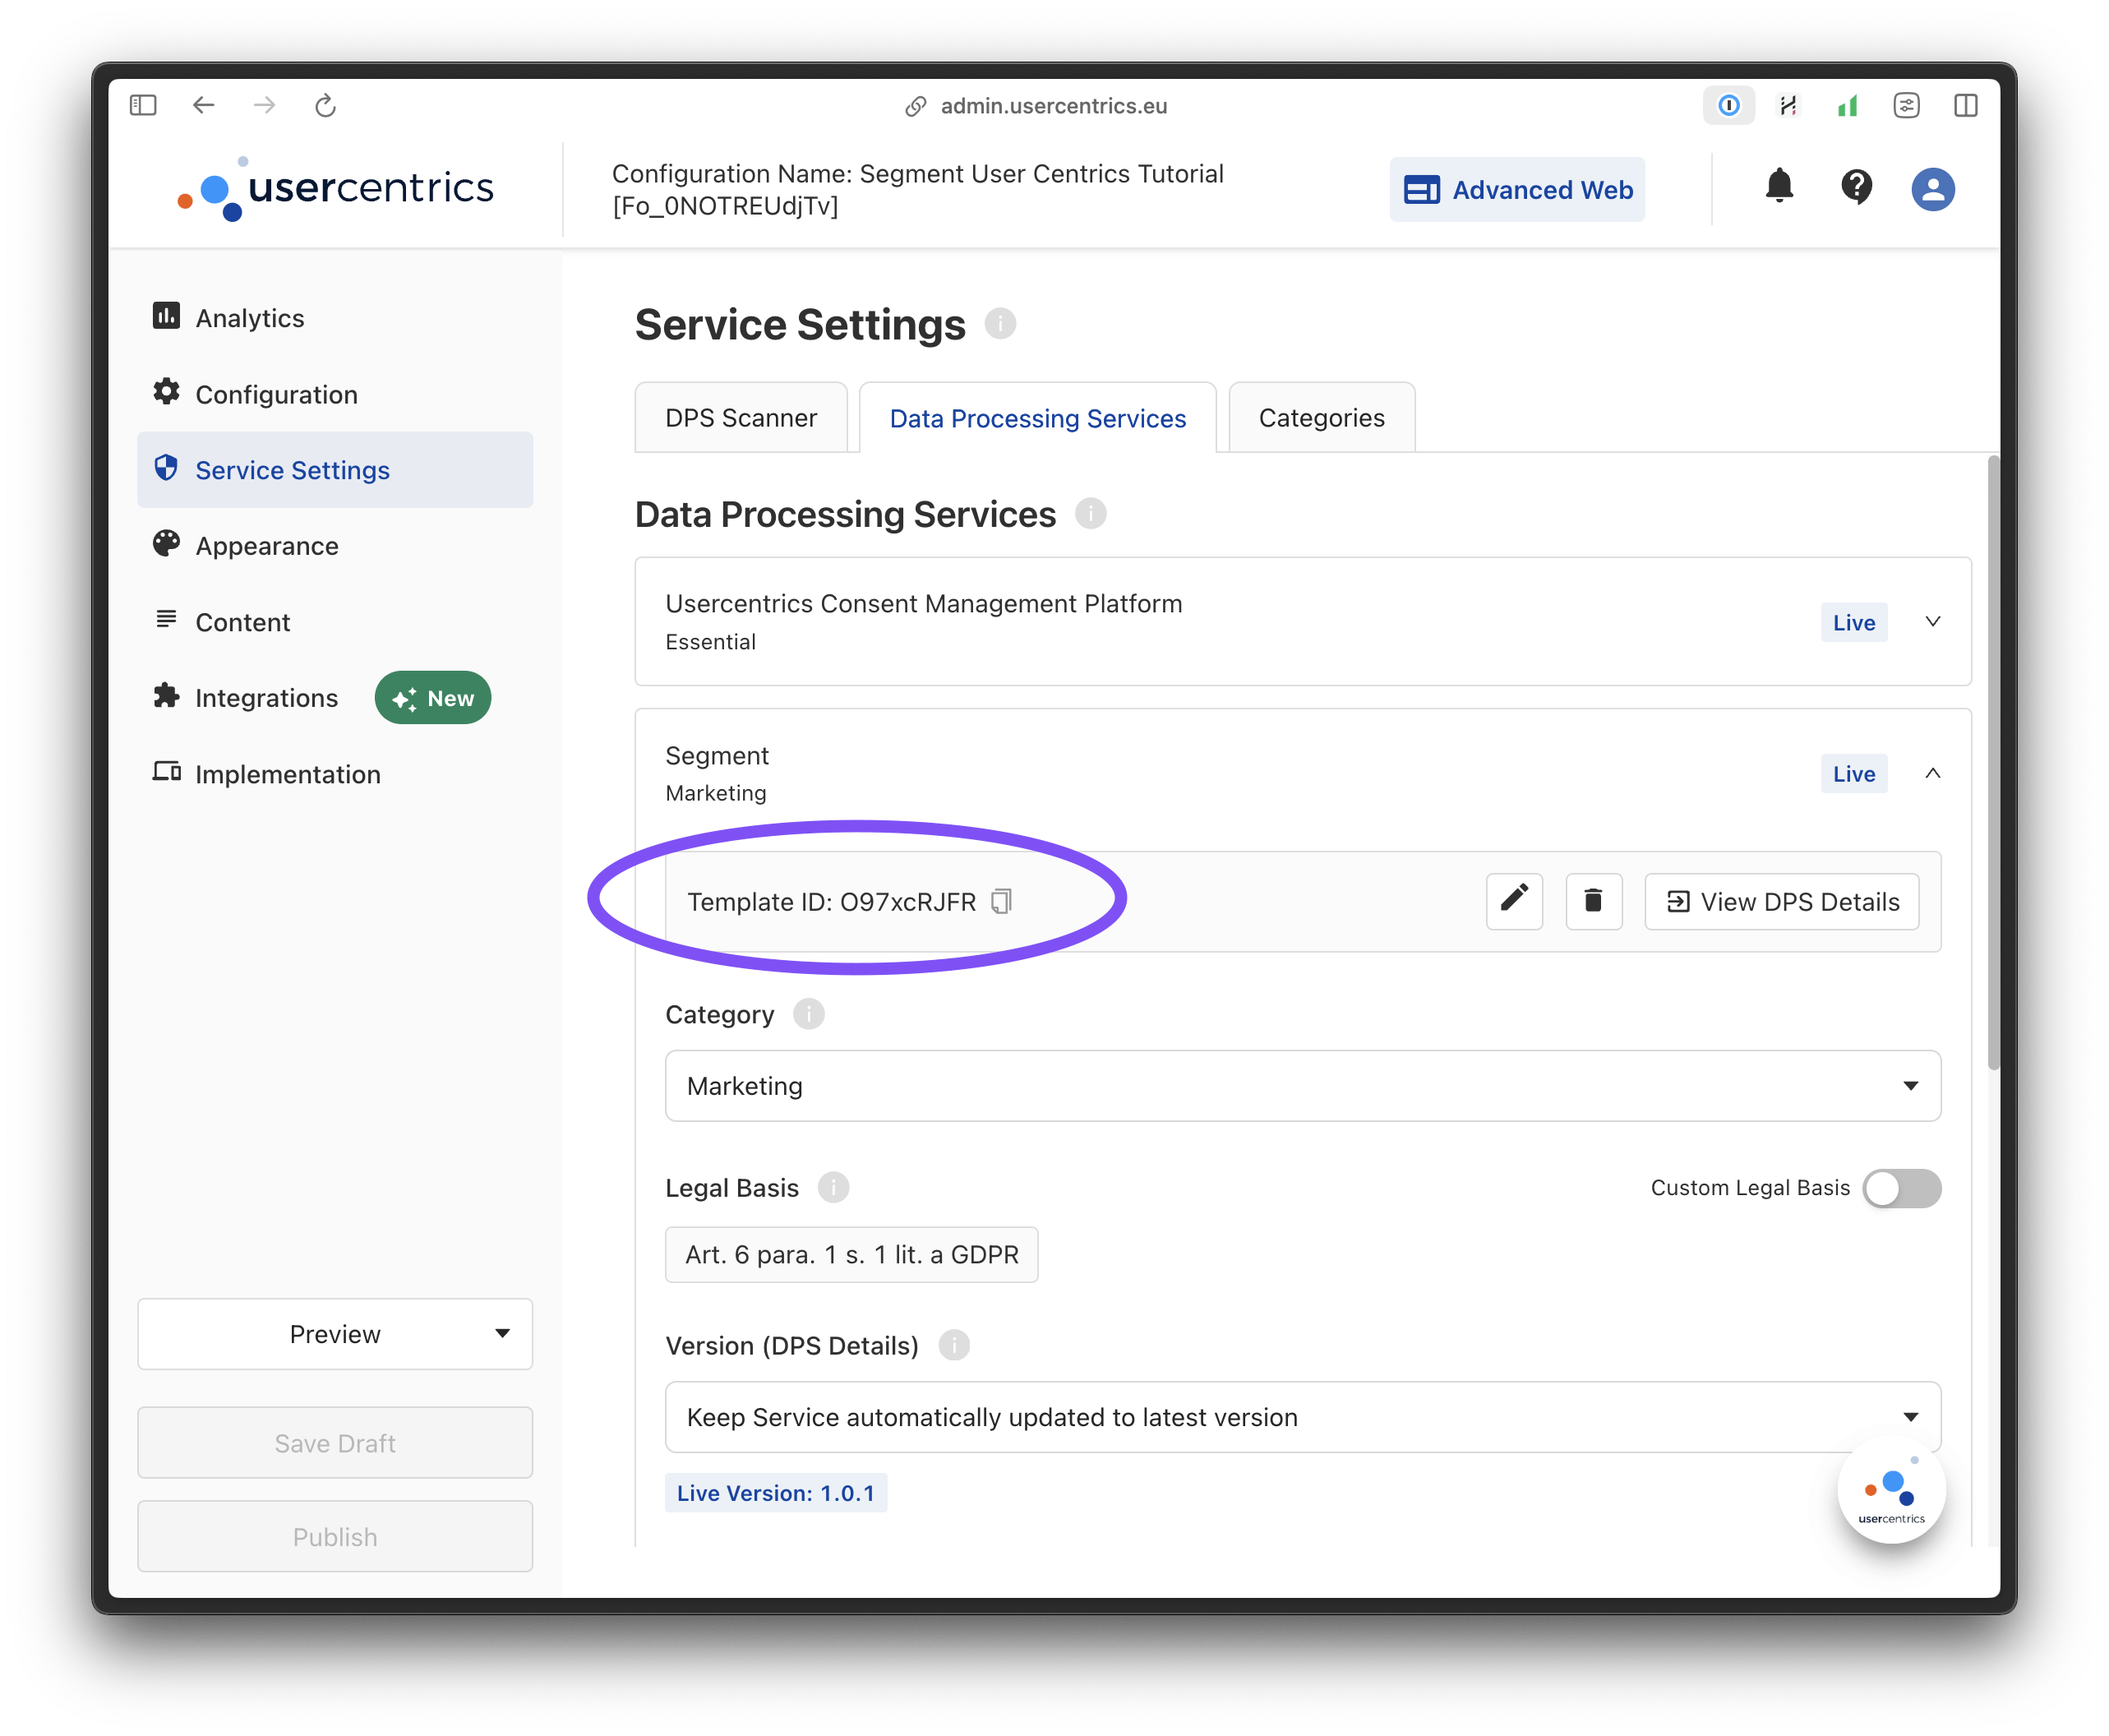
7. Next, we have a function called loadSegment(). It first checks localStorage to see if there are any previous settings from Usercentrics. Immediately after that, we call the analytics.load() method to load Segment. We use our writeKey and set up an integrations object. We set All to false by default, indicating that we don't want to send data to any destinations within Segment. Currently, the only service we have is Segment.io itself for this tutorial. To determine if it should be true or false, we search ucSettings.services to get the status of the service with the ID "O97xcRJFR". This ID corresponds to our Segment DPS form from Usercentrics, which can be found here:
If the user did not consent to Segment in the Usercentrics layer, we would instruct Segment not to send any data to itself. This may seem strange, but in a real scenario, we would likely have other services that should be enabled or disabled based on the user's consent.
8. In a useEffect hook, we first check if uc_user_interaction is true in localStorage. If it is, we call the loadSegment() function because it means the user has interacted before. We also add an eventListener for the ucEvent, which we receive when the user interacts with the consent layer. Inside the listener, we check if the action is onAcceptAllServices or onUpdateServices. If it is, we load Segment if it hasn't been loaded already. If it has been loaded, we reload the browser instead, as the analytics.load() method should only be called once. If the action is onDeclineAllServices, we call analytics.reset() to clear any cookies and localStorage data set by Segment. Finally, we remove the eventListener to clean up our useEffect function.
9. The final step is to return the provider component, while also loading the Usercentrics script to enable the consent layer.
That pretty much wraps up the basic Segment and Usercentrics implementation.
What to do next?
Expanding the range of services
In addition to the existing services, we have the capability to incorporate more services into this setup, such as Amplitude, HubSpot, Hotjar, and Facebook pixels.
To add a new service, we would follow a few steps. Firstly, we would need to add a new destination in the Segment platform. Secondly, we would need to create a corresponding DPS (Data Processing Service) for the new service in Usercentrics. Finally, we would need to update the code to include a check in the integrations object when loading Segment on our page to determine if the service should be enabled or disabled.
Enhancing tracking capabilities
In addition to the current tracking functionalities, we can extend our analytics to track a wider range of events beyond page views.
For instance, we could develop a function specifically for tracking clicks on call-to-action (CTA) buttons. Similar to how we implemented the pageView function using analytics.page(), we can introduce a new function called ctaClicked in our context. This function would utilize analytics.track() to send events to Segment, providing valuable information such as the location, text, style, and destination of the clicked button.
Conclusion
In conclusion, this post has covered the integration of Segment and Usercentrics in a Next.js application. We have learned how to track events in Next.js using Segment, while also ensuring GDPR compliance by incorporating Usercentrics for consent management. By following the provided instructions, we can implement a robust analytics solution that respects user privacy and enhances the user experience. It is important to continue exploring and expanding the range of services and tracking capabilities to tailor the analytics solution to specific needs. Additionally, it is crucial to address common challenges such as handling the loading of Segment based on user consent and customizing tracking behavior to meet GDPR requirements. Overall, the integration of Segment and Usercentrics provides a powerful and privacy-conscious approach to analytics in Next.js applications.
FAQs
What are the common challenges when integrating Segment and Usercentrics with Next.js, and how can they be addressed?
One common challenge is handling the loading of Segment based on user consent. This can be addressed by using Usercentrics' event system to listen for user interactions with the consent banner and then loading or resetting Segment accordingly.
Another challenge is customizing the tracking behavior based on user consents. This can be addressed by implementing conditional tracking logic in Next.js, like we did in /app/components/AnalyticsProvider.tsx, where the tracking is adjusted based on the consents collected by Usercentrics.
How does the integration of Segment and Usercentrics impact the performance of a Next.js application?
The impact on performance depends on how the integration is implemented. By default, Segment and Usercentrics scripts are loaded asynchronously, so they don't block the rendering of the page. However, if there are multiple services being loaded, it can increase the overall page load time. It's important to optimize the implementation and consider using techniques like lazy loading and caching to minimize the impact on performance.
Can Segment and Usercentrics be used together for GDPR compliance in a Next.js application?
Yes, Segment and Usercentrics can be used together to achieve GDPR compliance in a Next.js application. Usercentrics provides the necessary consent management capabilities, while Segment can be configured to track data based on the consents collected by Usercentrics. By implementing conditional tracking logic and ensuring that data is only tracked with appropriate consent, the integration can help meet GDPR requirements.
How can developers customize the tracking behavior in Next.js using Segment and Usercentrics?
Developers can customize the tracking behavior using Usercentrics' and Segment’s APIs. Usercentrics allows for adjusting tracking based on the user’s consent settings and your own business needs. Segment’s API allows for creating custom events and properties based on specific requirements and user interactions. By combining the flexibility of Usercentrics and the customization options of Segment, developers can tailor tracking behavior to their application’s needs.


