

TL;DR
Cursor is still the most complete AI-first editor I’ve used. It’s built on VS Code, adds planning and agent workflows on top, and gives you practical levers: Rules, Plan Mode, Slash Commands, Browser control, Hooks, and Background Agents—that make AI help feel predictable instead of “vibes only.”
Below is how I use it day to day and what’s new in 2026. Recently, in 2.0, Cursor also shipped Composer, their own ultra-fast coding model, and a new agent-centric interface that makes it much easier to run and manage multiple agents in parallel.
I’ve been using AI editing tools since they first came out. GitHub Copilot was my gateway drug sometime in 2022, the tab‑complete that almost felt like cheating. About a year after that, I jumped to Cursor not long after its launch.
Since then, I’ve wandered. I tried Warp in beta and tested Claude Code when it landed, which felt like a leap in certain areas. Of course, I tried GPT Codex 5, which I still use from time to time, but in Cursor. I’ve tried… pretty much everything. However, I keep coming back to Cursor as my daily driver. They ship fast, they’re pragmatic about UX, and the feature set keeps wrapping around the way I actually work. Sometimes another tool may excel in one area temporarily, but Cursor usually catches up and folds it into a more cohesive flow.
This post serves as the guide to what Cursor is, the features that matter, my preferred working setups, and a few guardrails to avoid “AI chaos.”
So let's dive in! 👇
What is Cursor?
Cursor is an AI‑first code editor on top of VS Code with a developer‑experience layer for planning and shipping features with agents. It looks and feels like VS Code, so extensions and keyboard muscle memory carry over, but it adds:
- Context‑aware chat and tab completion that understand your repo
- Project‑level memory via Rules
- Long‑running agents with planning, diffs, and branch/PR workflows
- Native browser control for testing, debugging, and UI polish
Pricing Snapshot (2026):
Plan | Price (2026) | Key Features |
|---|---|---|
Hobby | Free | Limited Agent/Tab usage |
Pro | $20/mo | Extended Agent limits, unlimited Tab, Background Agents, and maximum context windows |
Pro+ | $60/mo | 3× usage on supported models |
Ultra | $200/mo | 20× usage + priority features |
Teams | $40/user/mo | Org controls, SSO, analytics |
Bugbot add‑on | $40/user/mo | AI PR reviews with rules |
What’s new in Cursor 2.0: Composer and the agent layout
Cursor 2.0 is a biggish release. It now features its own coding model (Composer) and a redesigned interface centered on agents rather than just files. This is the first release where Cursor feels less like “VS Code with AI” and more like “an agent workbench that happens to be an editor as well.”
Cursor’s own coding model
Cursor 2.0 introduces Composer, a coding model specifically designed for building software inside Cursor. The most significant difference for me is speed: generations feel “instant enough” that I no longer hesitate to rerun plans, refactors, or experiments. It seems to operate at about 2x the speed of Sonnet 4.5.
Quality-wise, Composer is in the same ballpark as the top models I was already using, and sometimes even outperforms them. These days, I default to Composer for most coding tasks inside Cursor and only switch models when I need something very specific.
The agent-centric interface
The other significant 2.0 change is the agent-centric interface. Instead of feeling like “VS Code with a chat panel”, there’s now a dedicated agent layout where agents, plans, and runs are first-class objects in a sidebar, with their conversation and diffs front and center. You can have multiple agents working in parallel on the same project (e.g., one refactoring, one fixing tests, one doing UI polish) and hop between them like you’d switch terminals or branches.
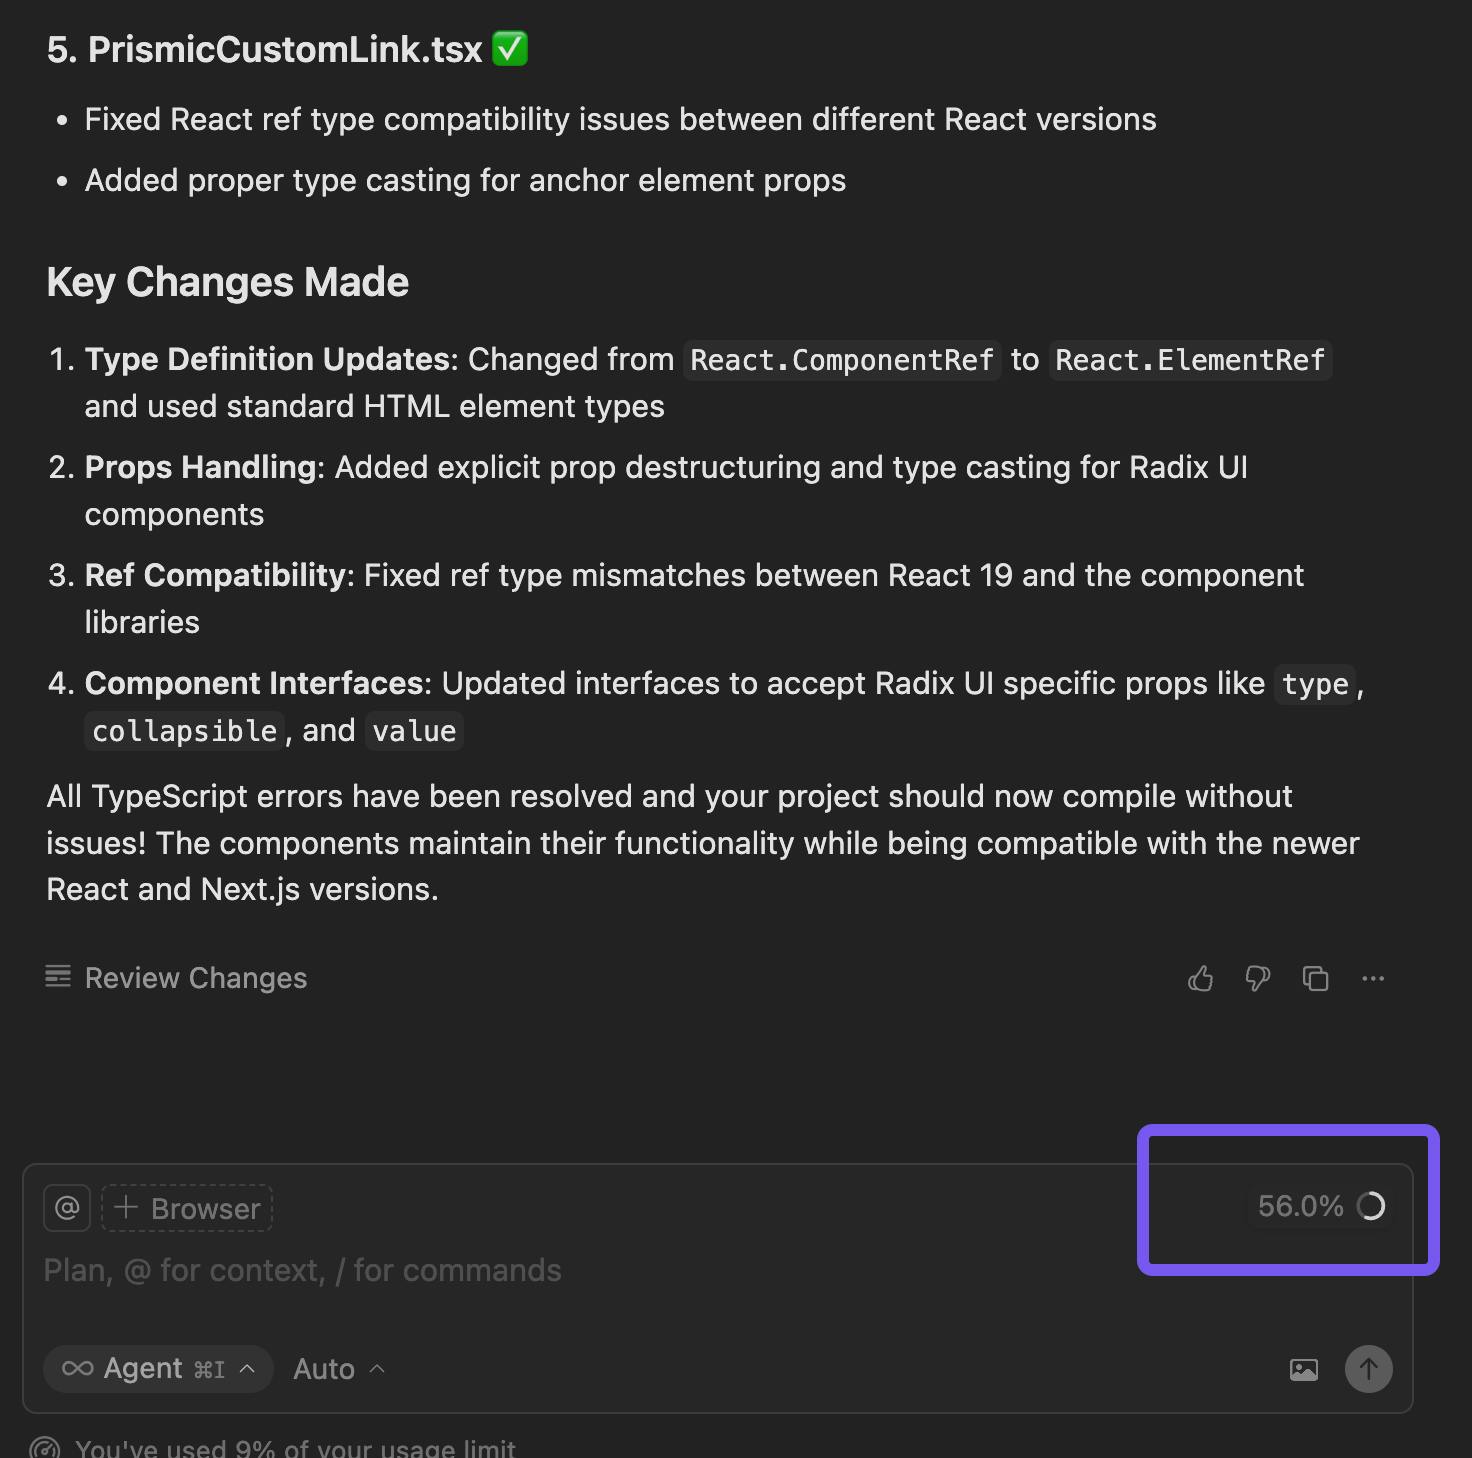
This setup nudges you to think in terms of a “small team of agents” working alongside you, rather than a single long, messy chat thread. I haven't yet fully grasped the concept of running multiple agents simultaneously. Probably because of the nature of the projects I work on. But what I really like about the new agent interface is how you view changes; it feels more like reviewing a pull request.
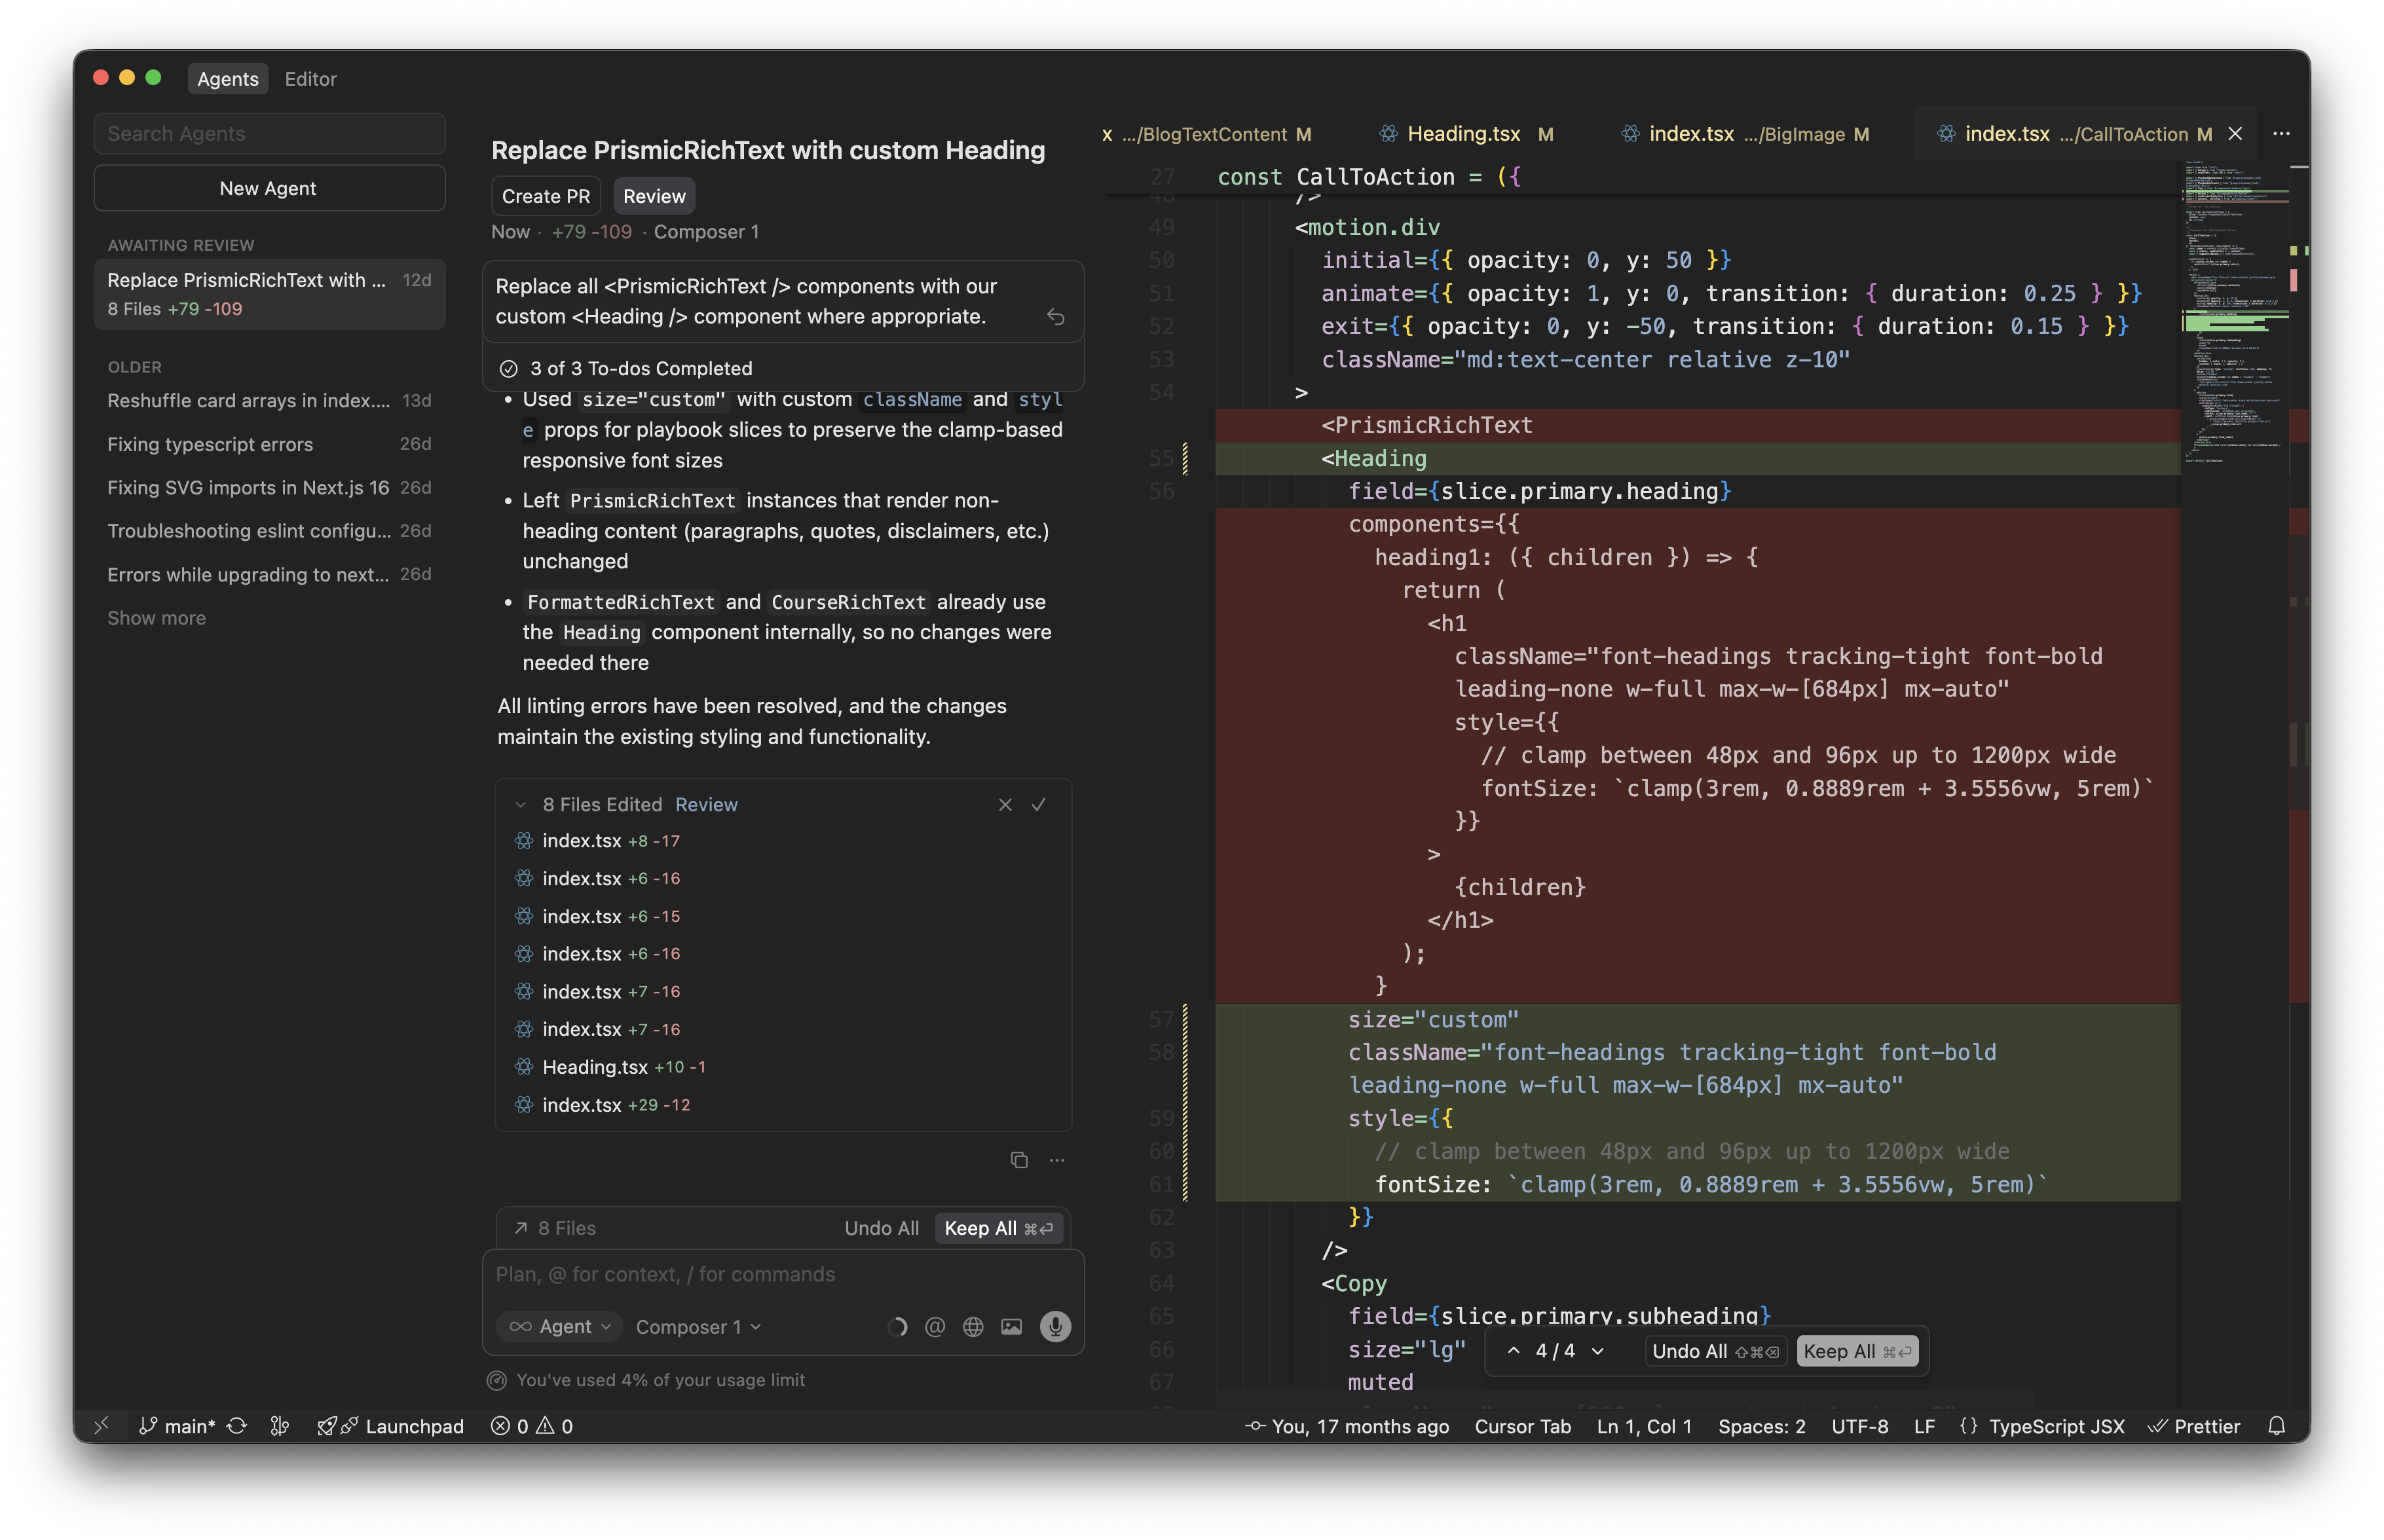
Reviewing changes in Cursor 2.0’s agent-centric interface
Notable Cursor features that I actually use
1. Rules: persistent, reusable context (a.k.a. your system prompt)
One of my big problems with LLMs is memory between completions. Rules fix this by letting you pin instructions to a project, user, or team, so your preferences and architecture stay in the model’s head.
Four ways to store rules, depending on what you want:
- Project rules — versioned in
.cursor/rules/*.mdcinside your repo. - User rules — global to your machine via Cursor Settings.
- Team rules — set once in the team dashboard and available for all team members.
- Agent rules — a simple
AGENTS.mdat repo root with plain markdown instructions.
Why it matters: You can encode conventions (code style, folder structure, “never use default exports”, “prefer server actions”, “always use shadcn components”, etc.), give framework‑specific guidance, and attach rules to globs so the right guidance loads only when relevant.
A minimal project rule (.cursor/rules/react-standards.mdc):
---
description: React standards for this repo
globs: ["src/**/*.{ts,tsx}"]
alwaysApply: false
---
- Use TypeScript.
- Favor server components where possible.
- Co-locate tests with components as `<name>.test.tsx`.
- Prefer `zod` for runtime validation.
- No default exports; named exports only.
When to use AGENTS.md: If your project doesn’t need structured rules, a single AGENTS.md is ideal. It allows you to keep setup commands, build/test scripts, coding style, and “don’ts” in one predictable place for any agent.
There are four different settings for how rules can be applied. These can be toggled by adding rules from within the cursor settings, but what they change is the three frontmatter options: description/globs/alwaysApply.
Always
Always included in model context (alwaysApply is true)
Auto Attached
Included when files matching a glob pattern are referenced (glob is filled and alwaysApply is false)
Agent Requested
Available to AI, which decides whether to include it. (only description)
Manual
Only included when explicitly mentioned using @ruleName
I mostly use project-specific rules across my projects, with smaller rules that always apply, like which frameworks and packages should be used. And then obviously, I have some global rules for coding standards that should always apply, no matter the project.
For things that the AI should figure out itself (Agent Requested) from above, I tend to lean towards MCP servers as much as possible, as nowadays there’s an MCP server for pretty much anything.
Explore the Cursor Rules Directory
If you are looking for Cursor rules, there’s a great directory with cursor rules for different use cases over at Cursor Directory
2. Plan Mode: start by writing the plan, then build the plan
My old workflow, before we had plan mode in Cursor, often looked something like this:
- Write a PRD (Product Requirements Document) in ChatGPT/Claude.
- Paste it into a Markdown file.
- Mention it in Cursor chat.
- Hope the agent stays on track. 🤞
I tried using tools like Taskmaster to get around this, also creating tasks from the PRD, but I always found it too cumbersome.
My new workflow with Plan Mode actually builds the plan with me inside the editor. It looks something like this:
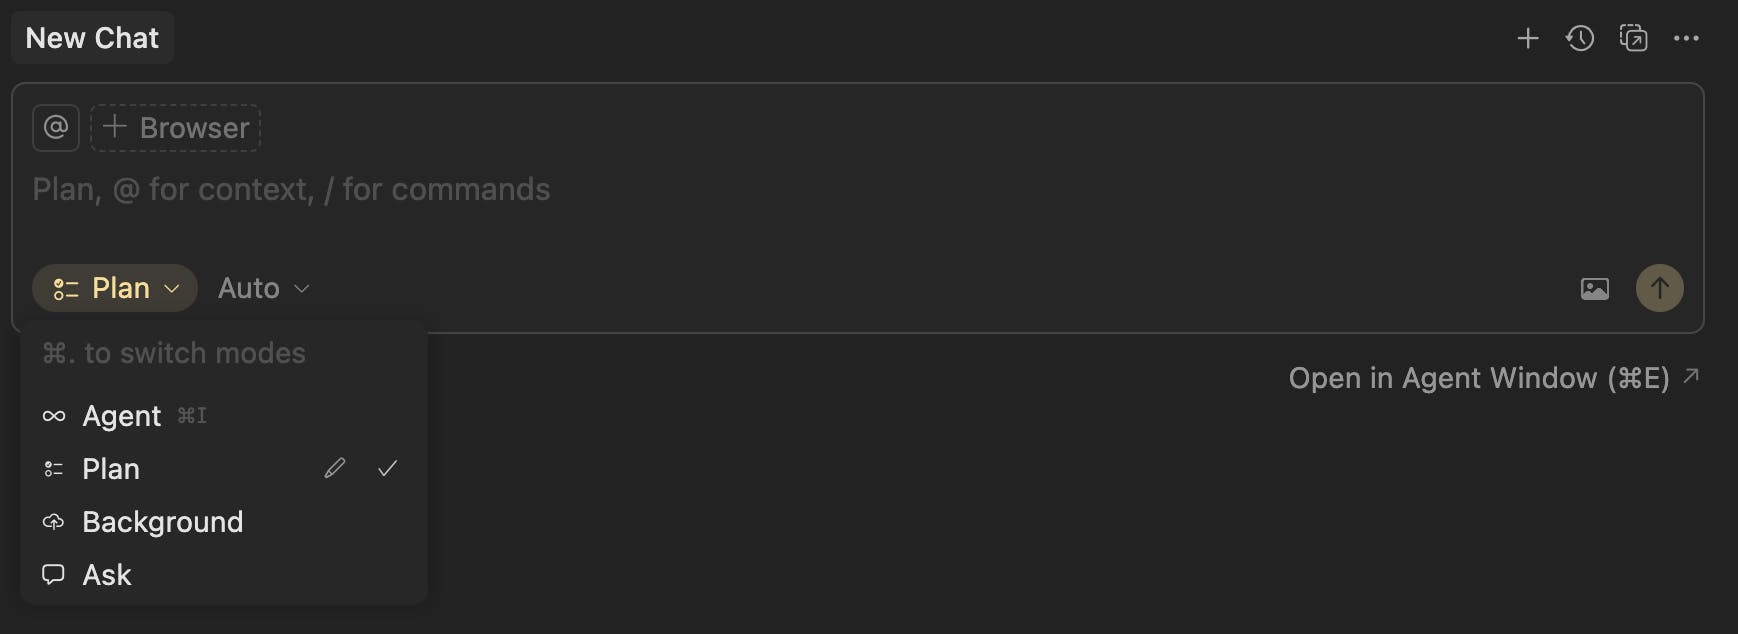
- Kick off Plan Mode by typing a prompt, but selecting “plan” instead of “agent” in the chat window.
- Let Cursor crawl the project—it reads docs and rules, asks clarifying questions, and generates an editable Markdown plan with file paths, code references, and a to-do list.
- Refine the plan, save it to the repo, and execute.
It’s like moving from “prompt and pray” to “define a contract and build to spec.” It’s also pretty satisfying seeing how the agent works itself through your to-do list, one task at a time.
Why I like it:
- It uncovers unknowns early (“which auth provider?”, “target Node version?”, “SSR or client?”).
- Plans live in‑repo as Markdown, so the artifact survives the chat window.
- The agent sticks to the plan, reducing rework.
When I use it: When starting a new project, for big features, refactors, or anything cross‑cutting. For smaller tasks, I still rely on simple but specific prompting in agent mode.
Pro tip!
For very specific, one-off utilities, I don't even use the agent chat. Instead, I write a comment directly in the code where I want the function, like this: // Make a pretty slug from title, and then I just rely on auto-complete.
3. Slash Commands: your repeatable prompts, one keystroke away
If you find yourself typing the same prompts (“create PR for…”, “do a security audit on…”), turn them into commands so they show up when you hit / in chat.
Where they live:
- Project commands:
.cursor/commands/*.md - Global commands:
~/.cursor/commands/*.md - Team commands: managed in the Cursor dashboard (auto‑available to teammates)
Example: global command for PR hygiene (~/.cursor/commands/create-pr.md)
# Create PR

## Overview
Create a well-structured pull request with proper description, labels, and reviewers.

## Steps
1. **Prepare branch**
   - Ensure all changes are committed
   - Push branch to remote
   - Verify branch is up to date with main

2. **Write PR description**
   - Summarize changes clearly
   - Include context and motivation
   - List any breaking changes

3. **Set up PR**
   - Create PR with descriptive title
   - Add appropriate labels
   - Assign reviewers
   - Link related issues

## PR Template
- [ ] Feature A
- [ ] Bug fix B
- [ ] Unit tests pass
- [ ] Manual testing completed
4. Native Browser control: test, debug, and polish UI from chat
Another feature I've really come to love is that Cursor’s agent can talk to a real browser. That unlocks workflows like:
- Compare your app to a reference screenshot and nudge spacing/typography.
- Capture console errors and network traces when reproducing a bug.
Prompt examples:
@Browser screenshot the product page and compare to /designs/product.png. Propose CSS fixes and patch them.@Browser open <http://localhost:3000> and capture console + network while toggling the filter
Under the hood, this uses MCP‑based browser tooling so the agent can capture screenshots, DOM nodes, console logs, and network requests from your machine.
5. Hooks: extend the agent lifecycle
Hooks let you run your own scripts at key points in the agent loop. Use them to auto‑format after edits, gate dangerous commands, add commit checkpoints, or redact env secrets before anything leaves your machine.
A hook file could be as simple as below, where we say that after every file edited by an agent, we want to run a shell script that formats our code (just remember to make the script file executable):
~/.cursor/hooks.json:
{
  "version": 1,
  "hooks": {
    "afterFileEdit": [
      { "command": "./hooks/format.sh" }
    ]
  }
}
6. Background Agents: parallelize work on remote machines
As previously mentioned, the interface have been completely overhauled in Cursor 2.0. But the concept of running agents in the background is still the same.
When you need to juggle features or run long workflows, you can spin up Background Agents. They can work on separate branches and can open PRs for review. Think “AI pair programmers in isolated Ubuntu VMs with internet access”. You can even add your own Docker files if you need a very specific environment.
I haven’t used agents as much as I should yet. I think it's something you need to get used to, as it feels much more hands-off. However, I can definitely see how this could greatly multiply your work. You can kick them off from within Cursor, Slack, or even web/mobile.
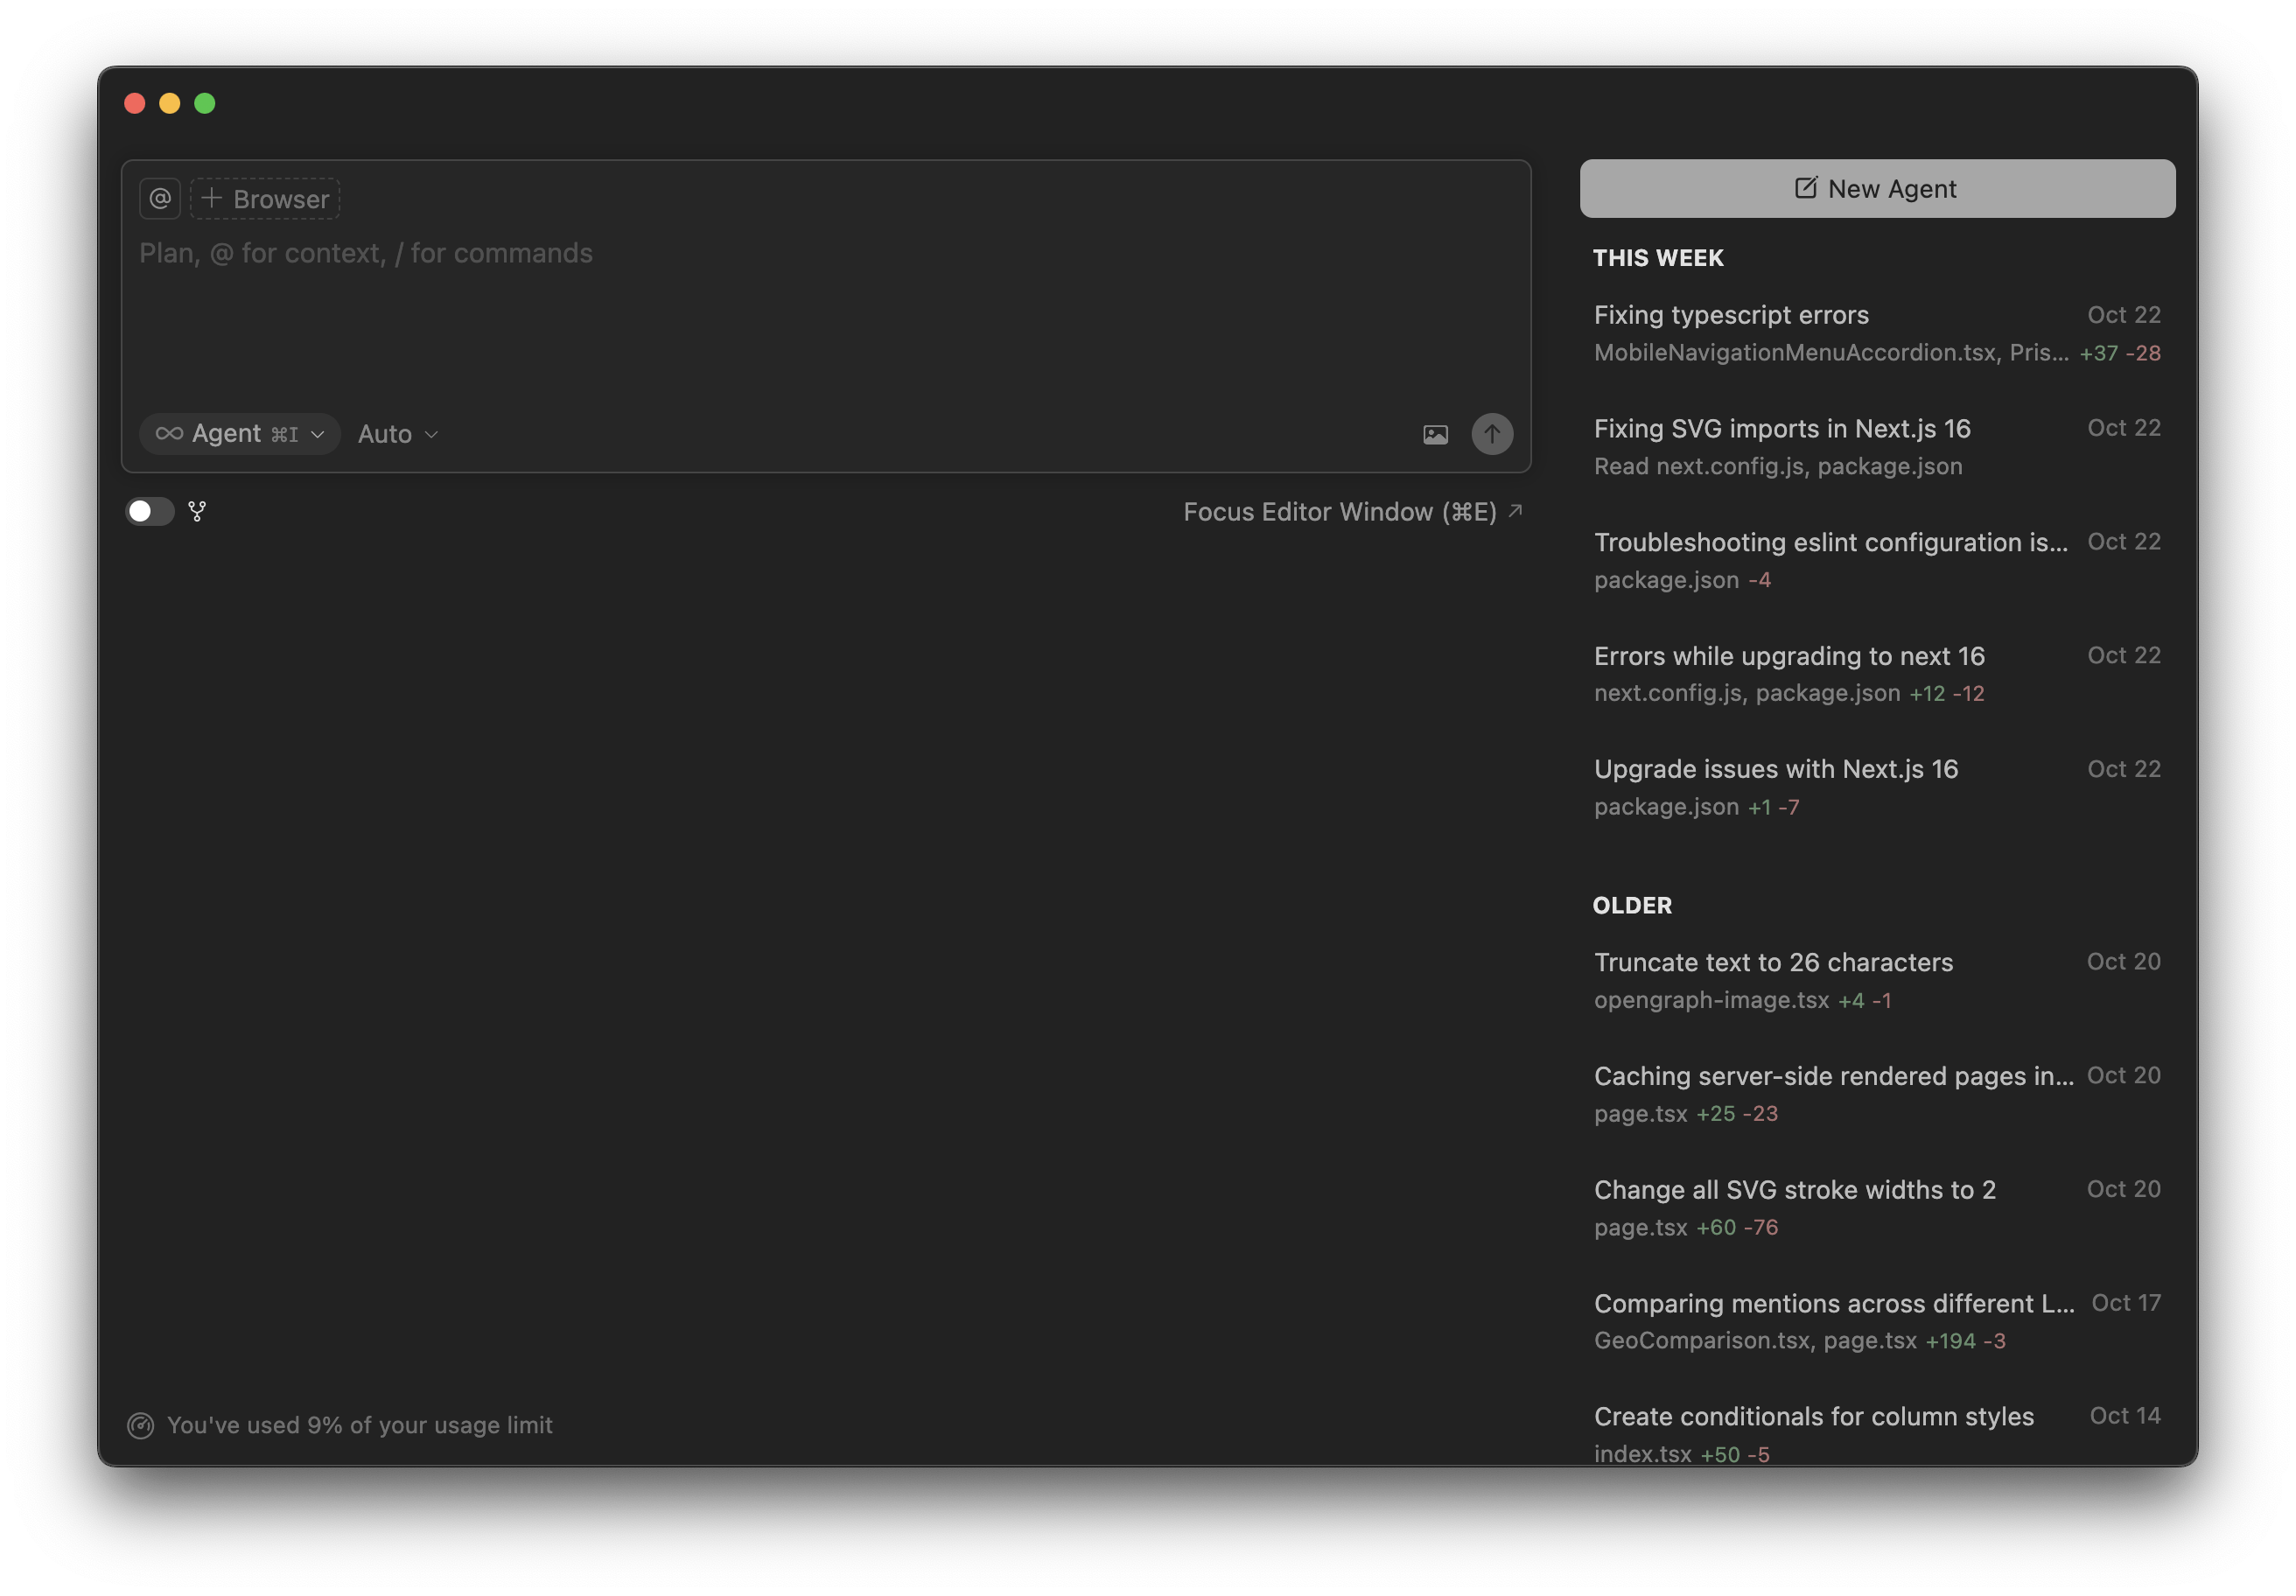
This is how the agent window looked before 2.0.
MCPs: bring your tools and data into Cursor
While not a specific Cursor feature, Cursor does, of course, have first-class MCP support. MCP (Model Context Protocol) is like the USB‑C port for AI: it lets your editor communicate with external tools and data sources via standard “servers.” In practice, adding MCPs to Cursor means less copy‑paste and fewer mega‑prompts. Your agent can call tools (deploy, query content, run migrations) and read project‑aware context (configs, models, docs) directly, resulting in more accurate, repeatable outputs.
Adding MCPs in Cursor
You can add MCP-servers from the cursor settings:
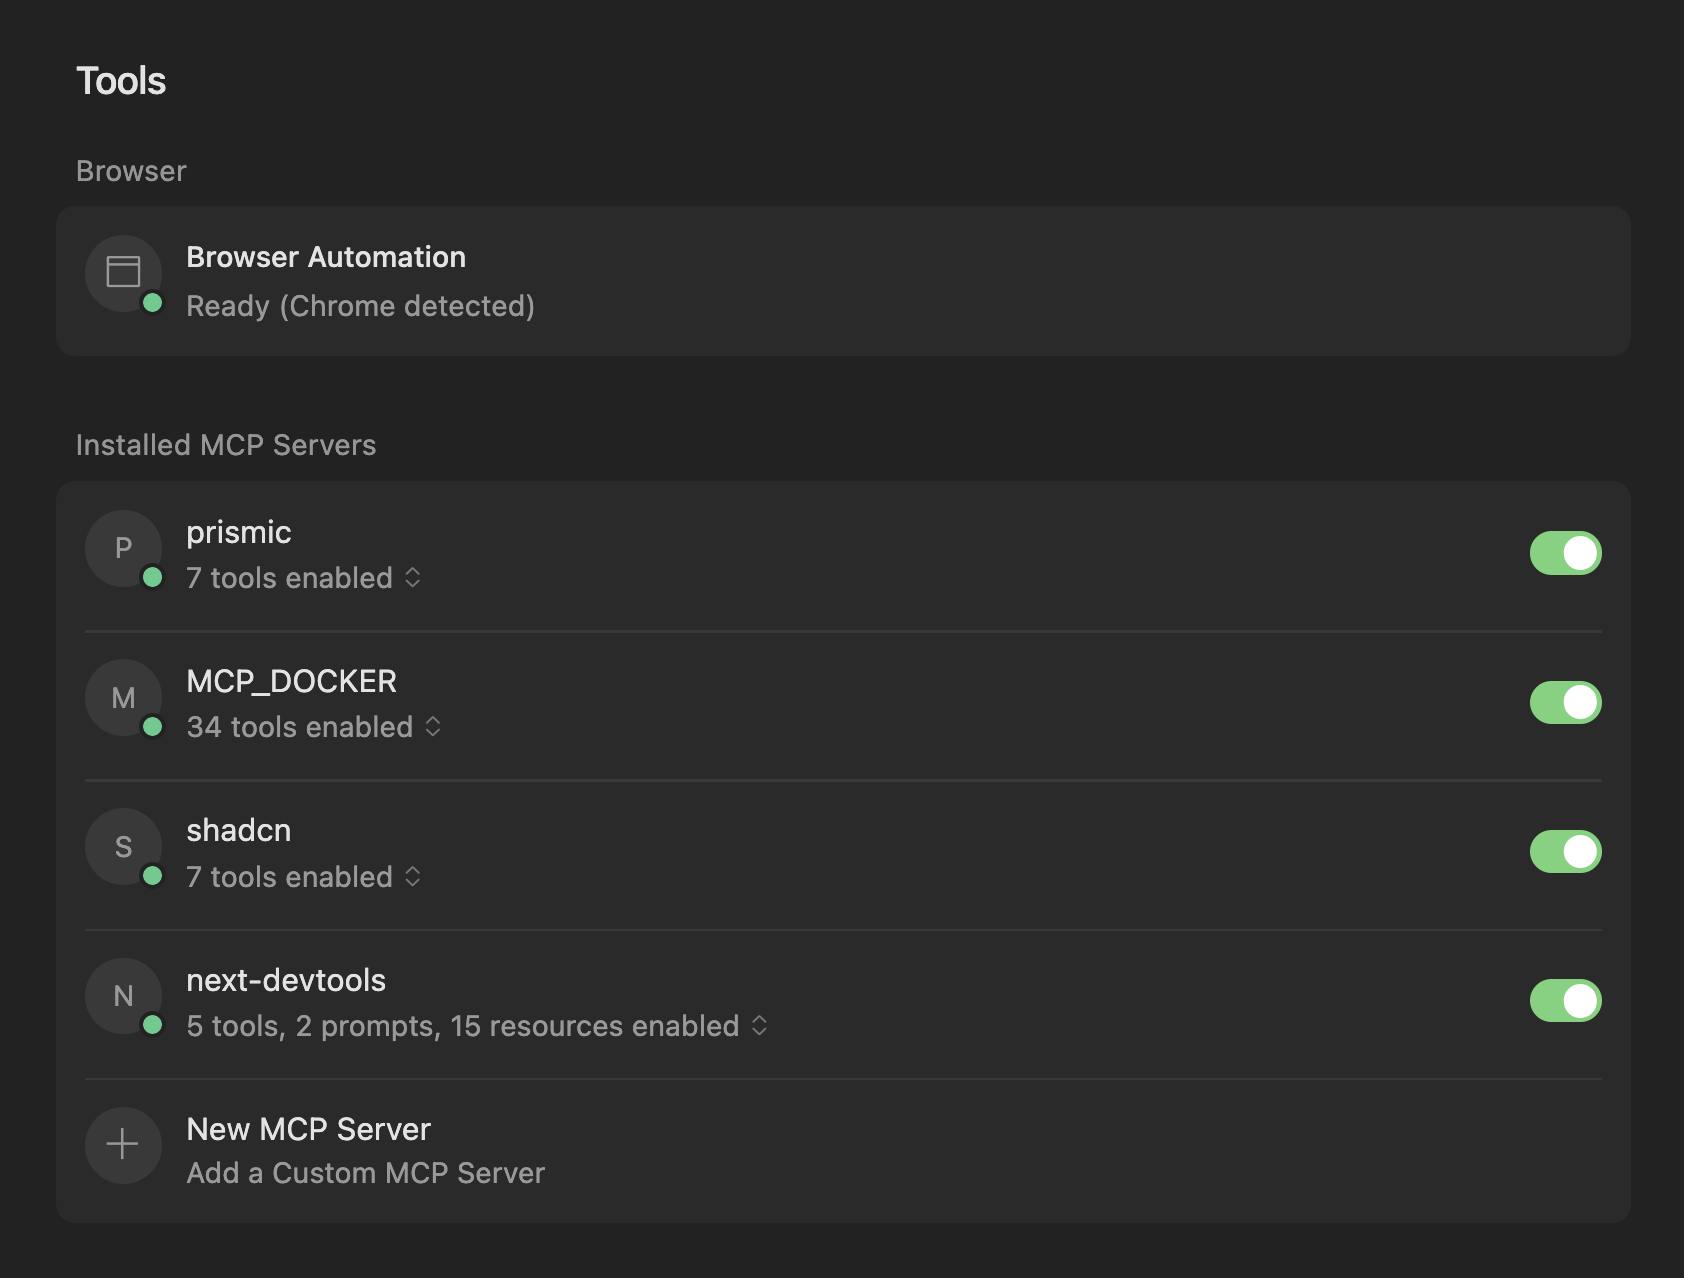
Sometimes when you have added a server you need to toggle it off/on again to se the green light, and see the tools listed.
Two MCP servers I rely heavily on:
Prismic’s MCP: a must-have for Prismic websites
Prismic’s MCP shares:
• Your slice models and their field configurations
• How to use Prismic SDKs specifically for your content
• The framework being used (Next.js, Nuxt, SvelteKit)
• Styling approach and conventions (Tailwind CSS, CSS modules, etc.)
• Prismic SDK configuration and setup
• TypeScript configuration and usage patterns
• Existing slice component structure and patterns
This saves you time when creating slices, but also gives developers a better starting point, reduces the guesswork of repetitive setup, and ensures output that’s aligned with best practices.
Read more here!
Docker’s MCP Gateway: great if you rely on MCPs from more agents than Cursor
Running lots of MCP servers locally can get messy. Docker’s MCP Gateway centralizes them behind a hardened proxy: it builds/starts servers in isolated containers, injects credentials as needed, and provides logs and call tracing. Point your AI clients at the Gateway and standardize tool access across the team. It’s super simple to set up from the Docker desktop app.
Read more here!
Tips & best practices when working with Cursor
- Start big work in Plan Mode. It forces clarity and produces a durable artifact.
- But don’t "Plan Mode" everything. For more minor edits, the regular agent chat is good enough, and for tiny utility functions, write a crisp comment above the code and let tab‑complete do the rest.
- Invest in Rules. Encode conventions, folder structure, naming, and “gotchas.” Attach globs so they apply only where they should.
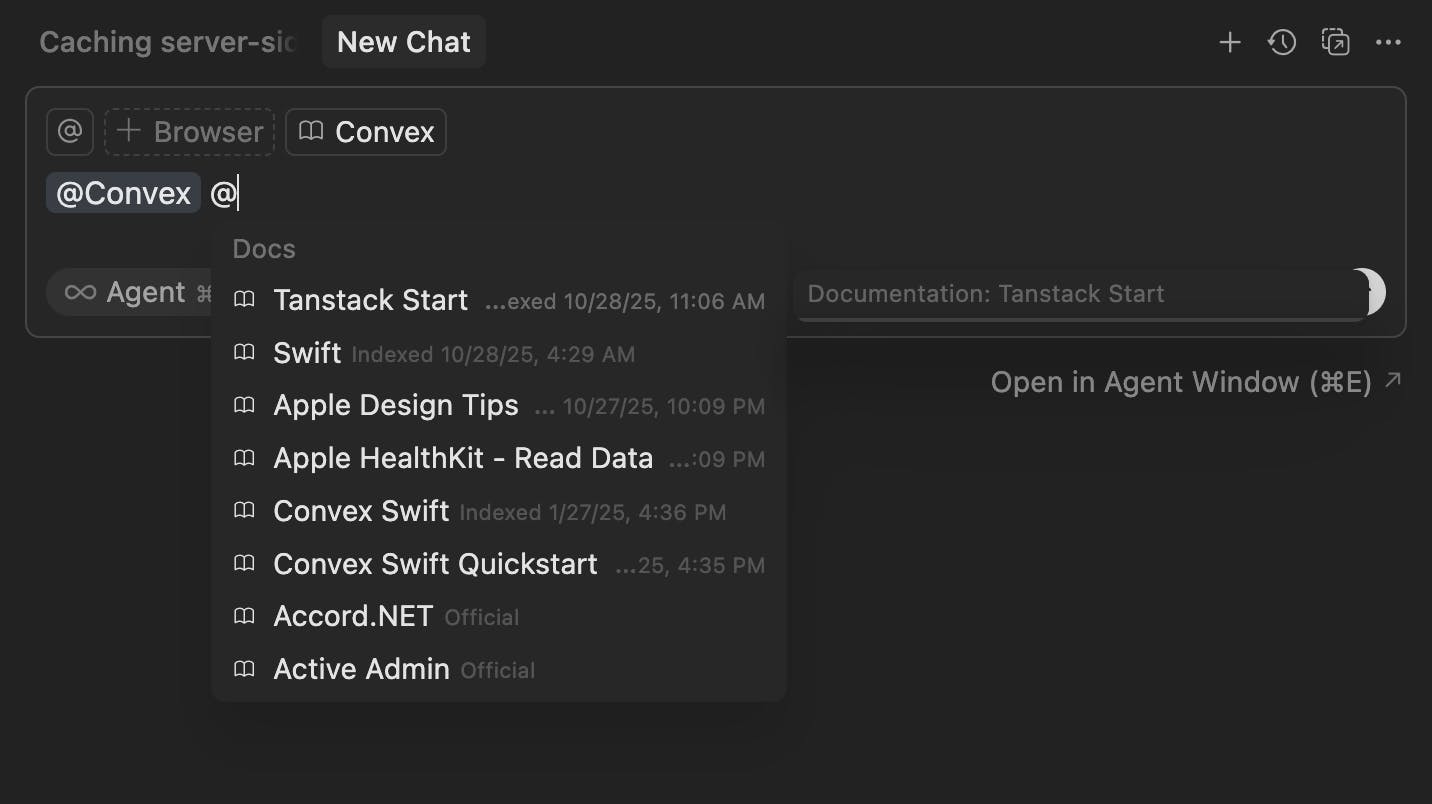
- Use
@mentions aggressively. Reference files, functions, docs, or rules to boost precision. This is really key with AI agents: be specific and narrow the scope to keep context in check. - Talking about context, manage it. Get used to starting new agent chats instead of continuing to work in the same session indefinitely. Context is valuable, and Cursor now indicates how much of it you are using directly in the chat. When you reach the maximum, Cursor will automatically summarize the context so you can continue chatting, but you should try to avoid going there in my opinion. You can use the built-in
/summarizecommand yourself when your context grows too large. However, I recommend starting a new session most of the time, especially for clearly separate tasks, to avoid polluting the context. Try to think, “Does the agent really need the chat history?” each time you’re prompting for something.
- Prefer edits over re‑prompting. If the agent drifted, restore the last good diff and restate the delta instead of piling on new prompts.

- Work in small steps and commit often. You get clearer diffs, safer rollbacks, and better agent alignment.
- Add docs for tools you always use. If your stack has sharp edges (auth, router, CMS, testing libs, UI libs), give the agent a laminated card via Rules.
Conclusion
The magic of Cursor in 2026 isn’t just “AI that writes code.” It’s the scaffolding around it, like rules, plans, commands, hooks, and agents, that make the AI predictable. Start with a plan, encode your rules, keep prompts tight, and let the agent grind through the chores while you focus on product.
I hope sharing my personalized workflow and the little systems I’ve built around Cursor helps spark ideas for refining your own. Even minor tweaks can make a huge difference in how reliably the agent works for you.
If you also ship with Cursor, I’d love to hear the setups and rules that actually moved the needle for you in the comments below! 💬👇


