

If you've built a web or mobile app that relies on a third-party backend, you've probably seen a webhook. Let's break down how webhooks work, find parallels with APIs you're likely familiar with, and get hands-on by diving into a real-world example!
What is a webhook?
A webhook is a specialized API endpoint that pings another app whenever an event occurs. Say, to have Slack ping your admin moderation panel whenever spam is detected or to have Trello ping your delivery service whenever a customer sends a text message.
A webhook may also connect one third-party service to another to perform actions on your behalf. A common example is hosting providers like Netlify or Vercel, who can rebuild your website whenever content changes. In this case, the hosting provider can supply a callback URL, and the content provider (say Prismic) can ping this URL as a webhook when updates are ready to deploy.
Server vs. client-side applications
To set up a webhook with an external server, you'll need to pass a backend URL where this server can reach your server. Think of this like a phone number to call on speed dial with events you care about.
Note that a URL is key, so you will need a server of your own or some hosted service, like GitHub, to receive pings from a webhook. This method is not used for triggering live updates in client-side applications.
Example: Polling vs. sockets vs. webhooks
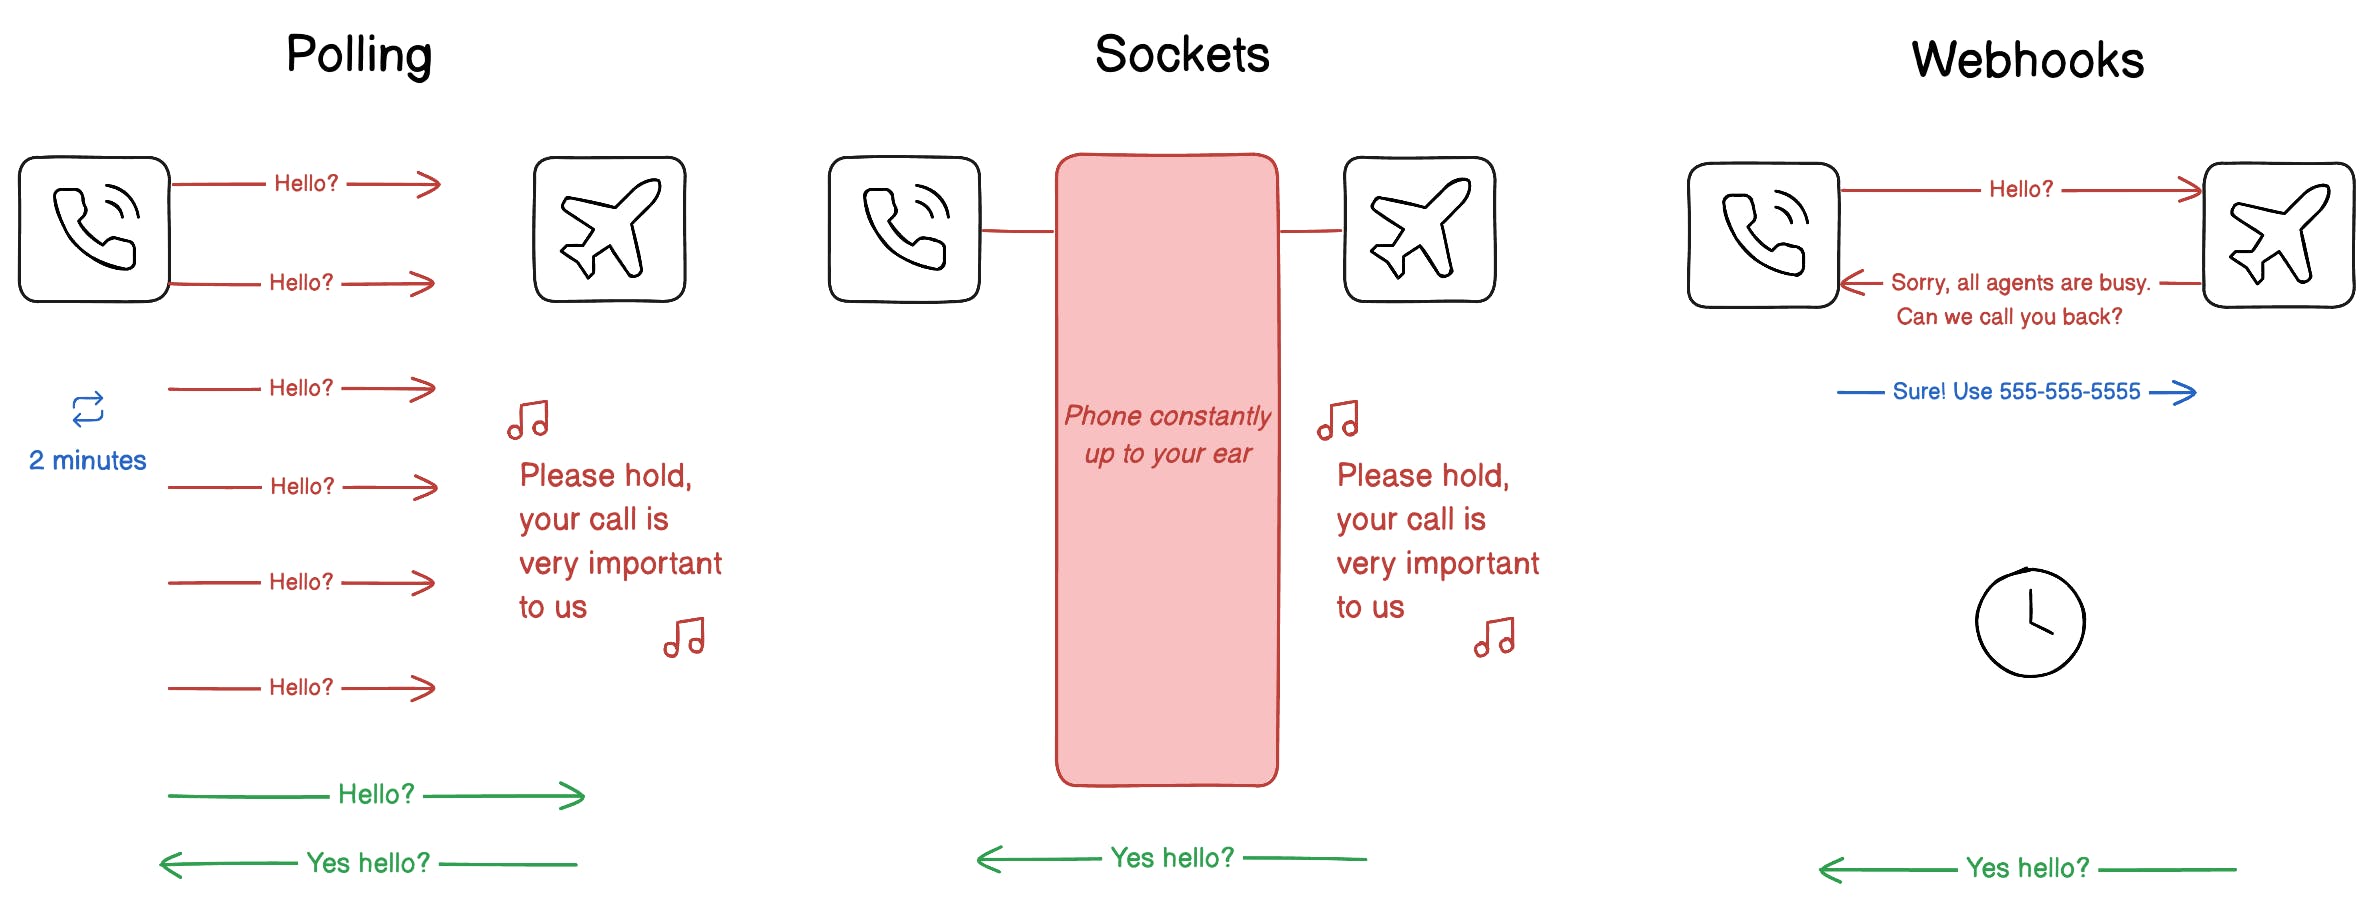
You may have considered "polling" or "web sockets" to establish these connections, though each can prove much more wasteful than webhooks. Let's use a guided example to compare:
Staying on hold with an airline to reschedule your flight ✈️
(Totally not inspired by a true story.)
Polling
When you're on hold for a long time, your first instinct is to set the phone down and check back every few minutes. In other words, you "poll" your phone to see if that same elevator music is still playing (spoiler: it is). This is how a polling application works.
For illustration, here's some sample code to periodically ping your phone every 2 minutes using JavaScript:
const keepChecking = setInterval(async () => {
	const pickedUp = await checkPhone();
	if (pickedUp) {
		cancelInterval(keepChecking);
		await startTalking();
	}
}, 120_000);
This is the simplest way to receive updates from a server if you have a purely client-side application. Still, there are some clear inefficiencies. What if it takes days for pickedUp to turn true? Or what if they pick up at the start of the interval, and we check 2 minutes later only to get hung up on? We can address this latter point with sockets.
Sockets
Perhaps missing the customer service rep really worries you. In that case, you probably want your phone to be on-person and up to your ear at all times.
This is how a socket works, where you establish an open connection between client and server until either decides to disconnect. The following code sets up a web socket using JavaScript + the Deno runtime:
Deno.serve((req) => {
  if (req.headers.get("upgrade") != "websocket") {
    return new Response(null, { status: 501 });
  }
  // Set up a web socket
  const { socket, response } = Deno.upgradeWebSocket(req);

  // Listen for when customer service picks up
  socket.addEventListener("message", async (event) => {
    if (event.data === "picked-up") {
      socket.send(CUSTOMER_SERVICE_QUERY);
    }
  });

  return response;
});
Source: https://examples.deno.land/http-server-websocket
If this looks a bit more complex, that's because it is! Keeping a constant connection with event listeners is more to maintain and costly to your network activity. Yes, there are some scenarios where constant data transfer is vital. However, in our case, there's just one event we need to receive before the connection is closed. It's more reliable than polling but still inefficient.
Webhooks
So we want to pick up our phone the instant customer service is available, without checking for hold music all the time. What if... they could just call us?
In the past few years, you may have heard of a new option to have customer service call back when there are long hold times. This is a strong parallel to how webhooks work.
- You provide a phone number, and the airline reaches out when they're free
- You provide a GitHub URL, and Prismic reaches out whenever content changes
- You provide an admin URL, and Slack reaches out when spam is detected
As long as you have some URL where a third party can reach you, you can trigger a webhook event.
Why headless applications need webhooks
You may have heard the term "headless" when developing websites with modern frameworks. This refers to other backend services your website may rely on that don't supply a frontend. In this architecture, you provide the UI (or head), and headless services provide the data or content powering that UI.
This decoupling offloads backend complexities like saving rich text or managing a publishing process. If you have a server-driven website, you can ping these backend services on each user request. But what if your website is just static HTML templates?
You could create a cron job to poll this content hub and rebuild whenever assets change. But if you ping a third party aggressively, you can get rated limited... fast.
It's best to allow a third party to rebuild those HTML templates whenever your content changes. This is where a webhook between your hosting provider (say Netlify or Vercel) and your content provider (say Prismic) can help.
Try webhooks with Prismic and Next.js
Prismic is a headless website builder that makes updating websites approachable to non-developers on your team. In order to generate build previews and production deploys, you need some mechanism to trigger a rebuild whenever content updates.
Webhooks are commonly used with hosting services like Vercel and Netlify to rebuild your site. When building websites with Prismic, we recommend using Prismic’s built-in webhooks to rebuild your site when content is changed.
For this example, let’s take a look at how we can rebuild a Prismic Next.js site published on Vercel. To try it out, we will take the following steps:
- Download a custom starter
- Install Slice Machine and run your project
- Add your local repository to GitHub
- Deploy site on Vercel
- Create and configure webhook in Prismic
- Edit your content and see the webhook in action!
So let’s get started! 👇
Download a custom starter
You can start a new Next.js website with Prismic in just a few steps:
- Log in to Prismic or create a new account.
- Create a new Prismic repository using the Next.js option.
- Select the “Full website demo” starter and click ‘Select’.
- Give your repository a name and Display name, select the free plan, and click ‘Create repository.’
Install Slice Machine and run your project
Now that we have created our repository, we can click ‘Get started with Slice Machine.’
Slice Machine is Prismic’s developer tool that allows developers to code reusable components and lets you deliver them directly to marketers in a custom page builder.
To launch your starter, you can simply run the following command shown in the dashboard (make sure to swap in your repository name for <your-project-name> in the following steps):
npx @slicemachine/init@latest --repository <your-project-name> --starter nextjs-starter-prismic-multi-pageAfter running this command in the terminal, it will prompt you to re-login to Prismic in your browser.
You can then run your project by running cd <your-project-name> and npm run dev.
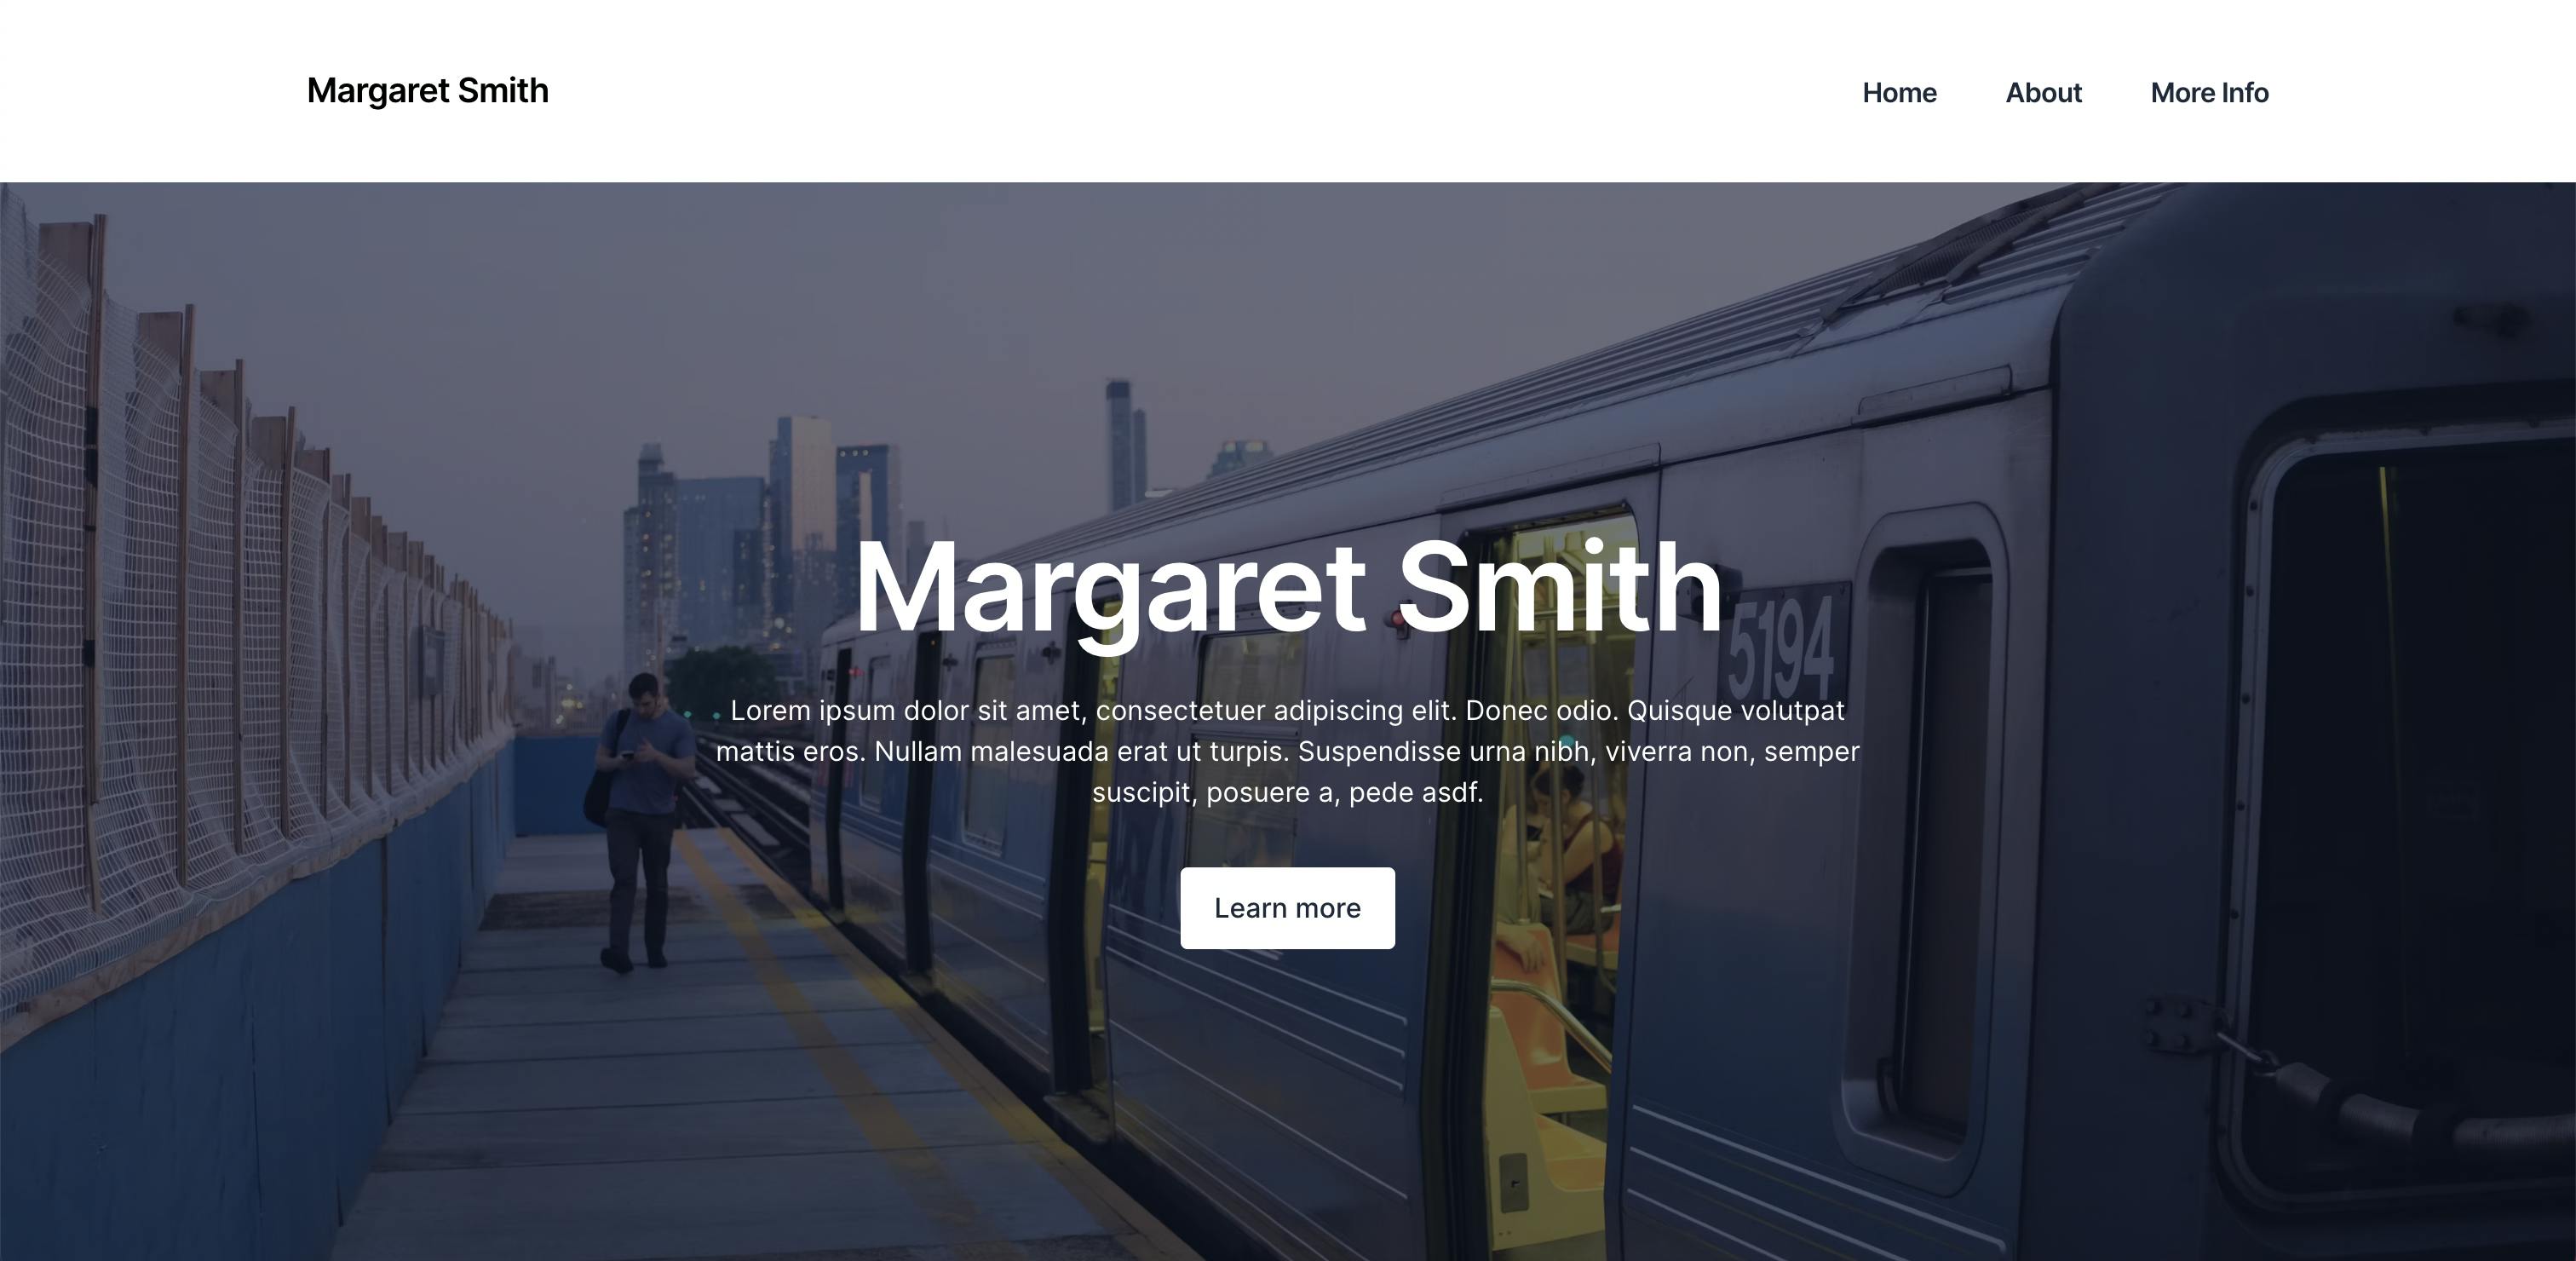
You will now see your website locally at http://localhost:3000/, which should look something like this:
Add your repository to GitHub
Before we can deploy our site, we need to add our local code to a version control platform like GitHub. This allows Vercel to automatically rebuild our site whenever we push new code changes. Adding the repository makes it easy for Vercel to detect changes and redeploy the site.
To add your local repository to GitHub, follow the steps in the docs. It will walk you through initializing Git in your project, creating a GitHub repository, and pushing your local code to that repository.
When you’re done, you should have a public repository with your code from your starter project.
Prefer another version control platform?
In the next step, we will be deploying our site to Vercel. Vercel makes it very easy to pull in your repository directly from GitHub. However, it also supports GitLab and Bitbucket integration, so if you prefer to create your repository there instead, feel free!
Deploy site on Vercel
You will then want to go to vercel.com and log in using whichever version control platform you chose for your repository (GitHub, GitLab, or Bitbucket).
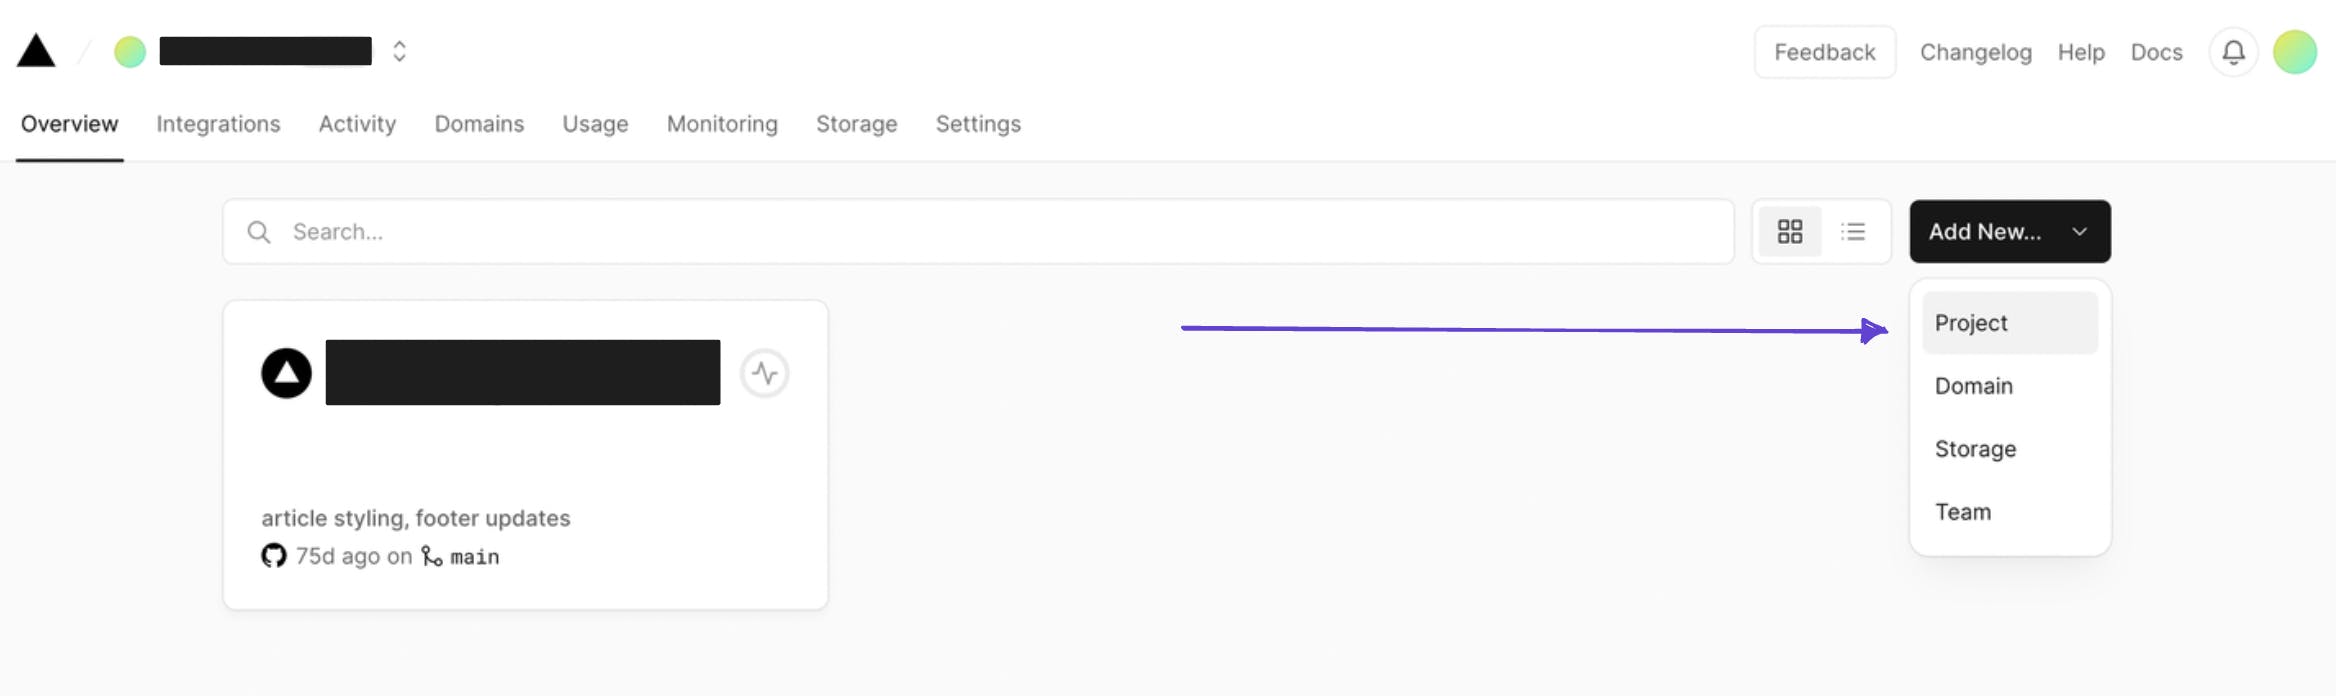
Once you sign in, you will be able to add a new project, like so:
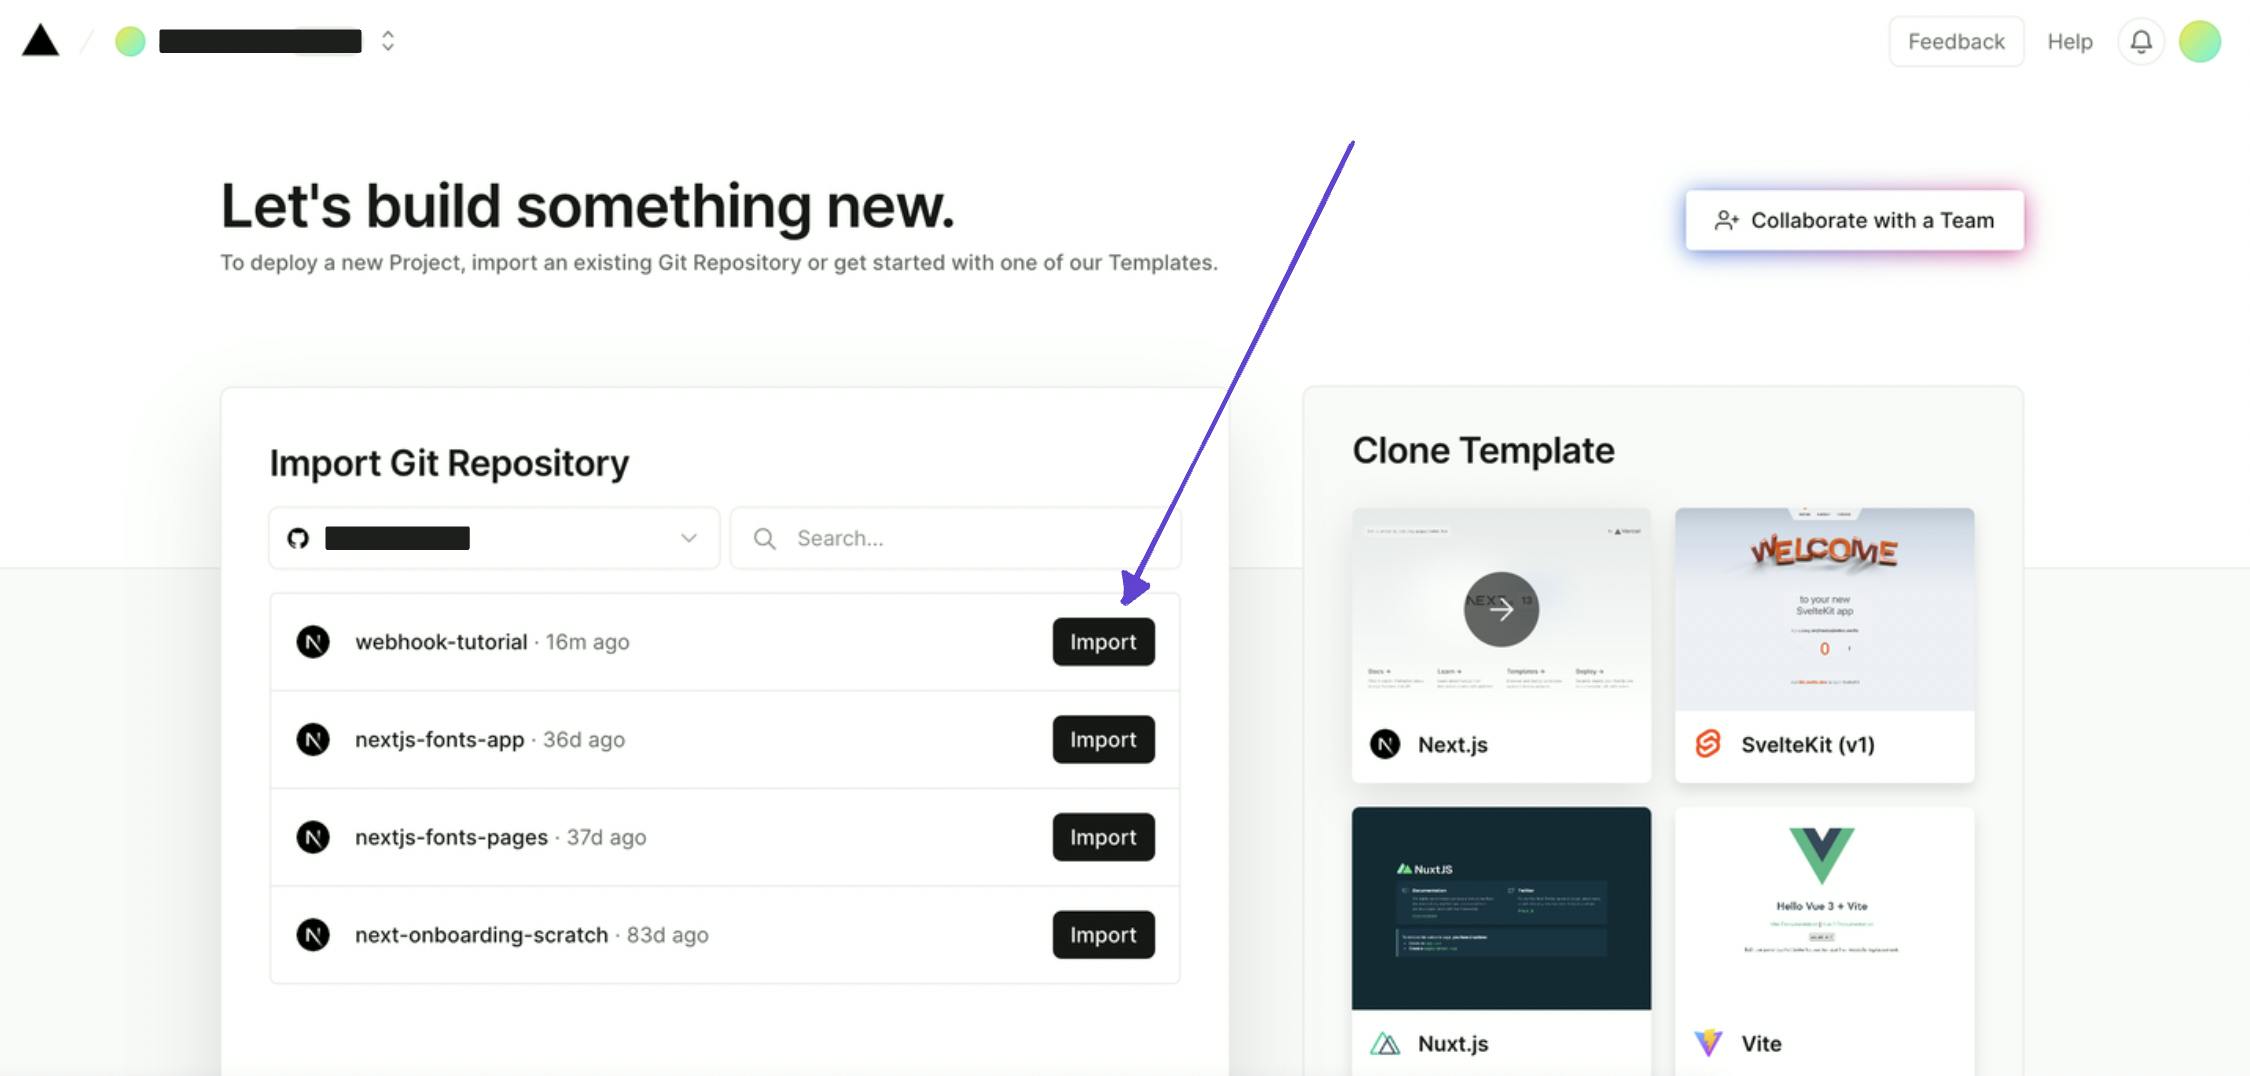
Since we logged in using GitHub, Vercel makes it very easy to create a project by importing a repository directly.
Then all you have to do is give your project a name and click 'Deploy'!
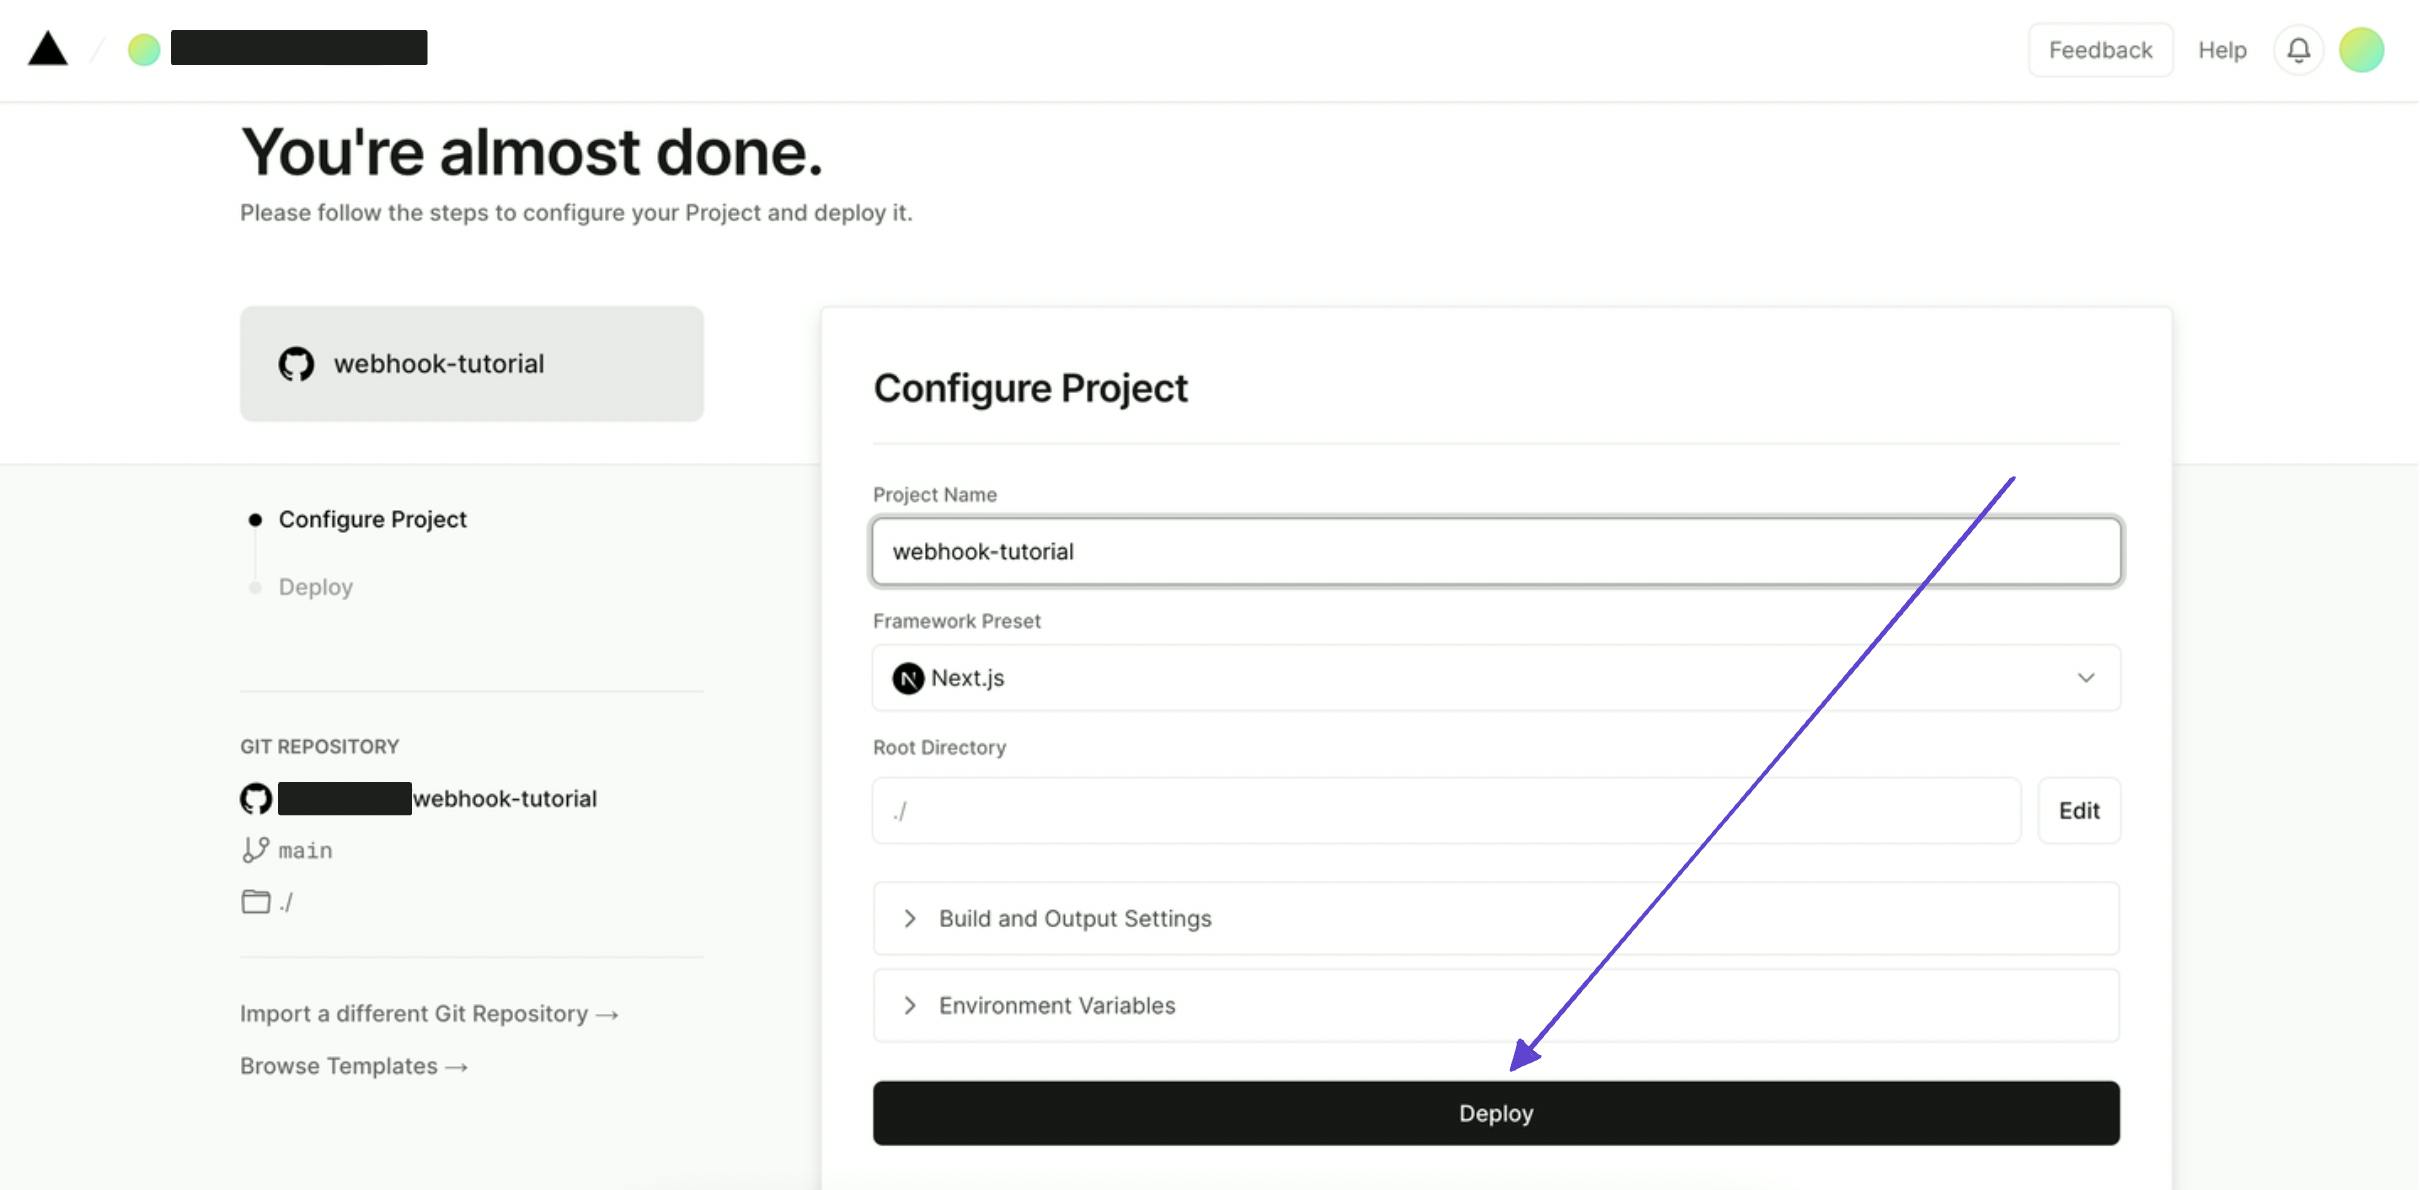
Once you click ‘Deploy’, the site will start building, and within a matter of minutes, we can see our site deployed using Vercel!
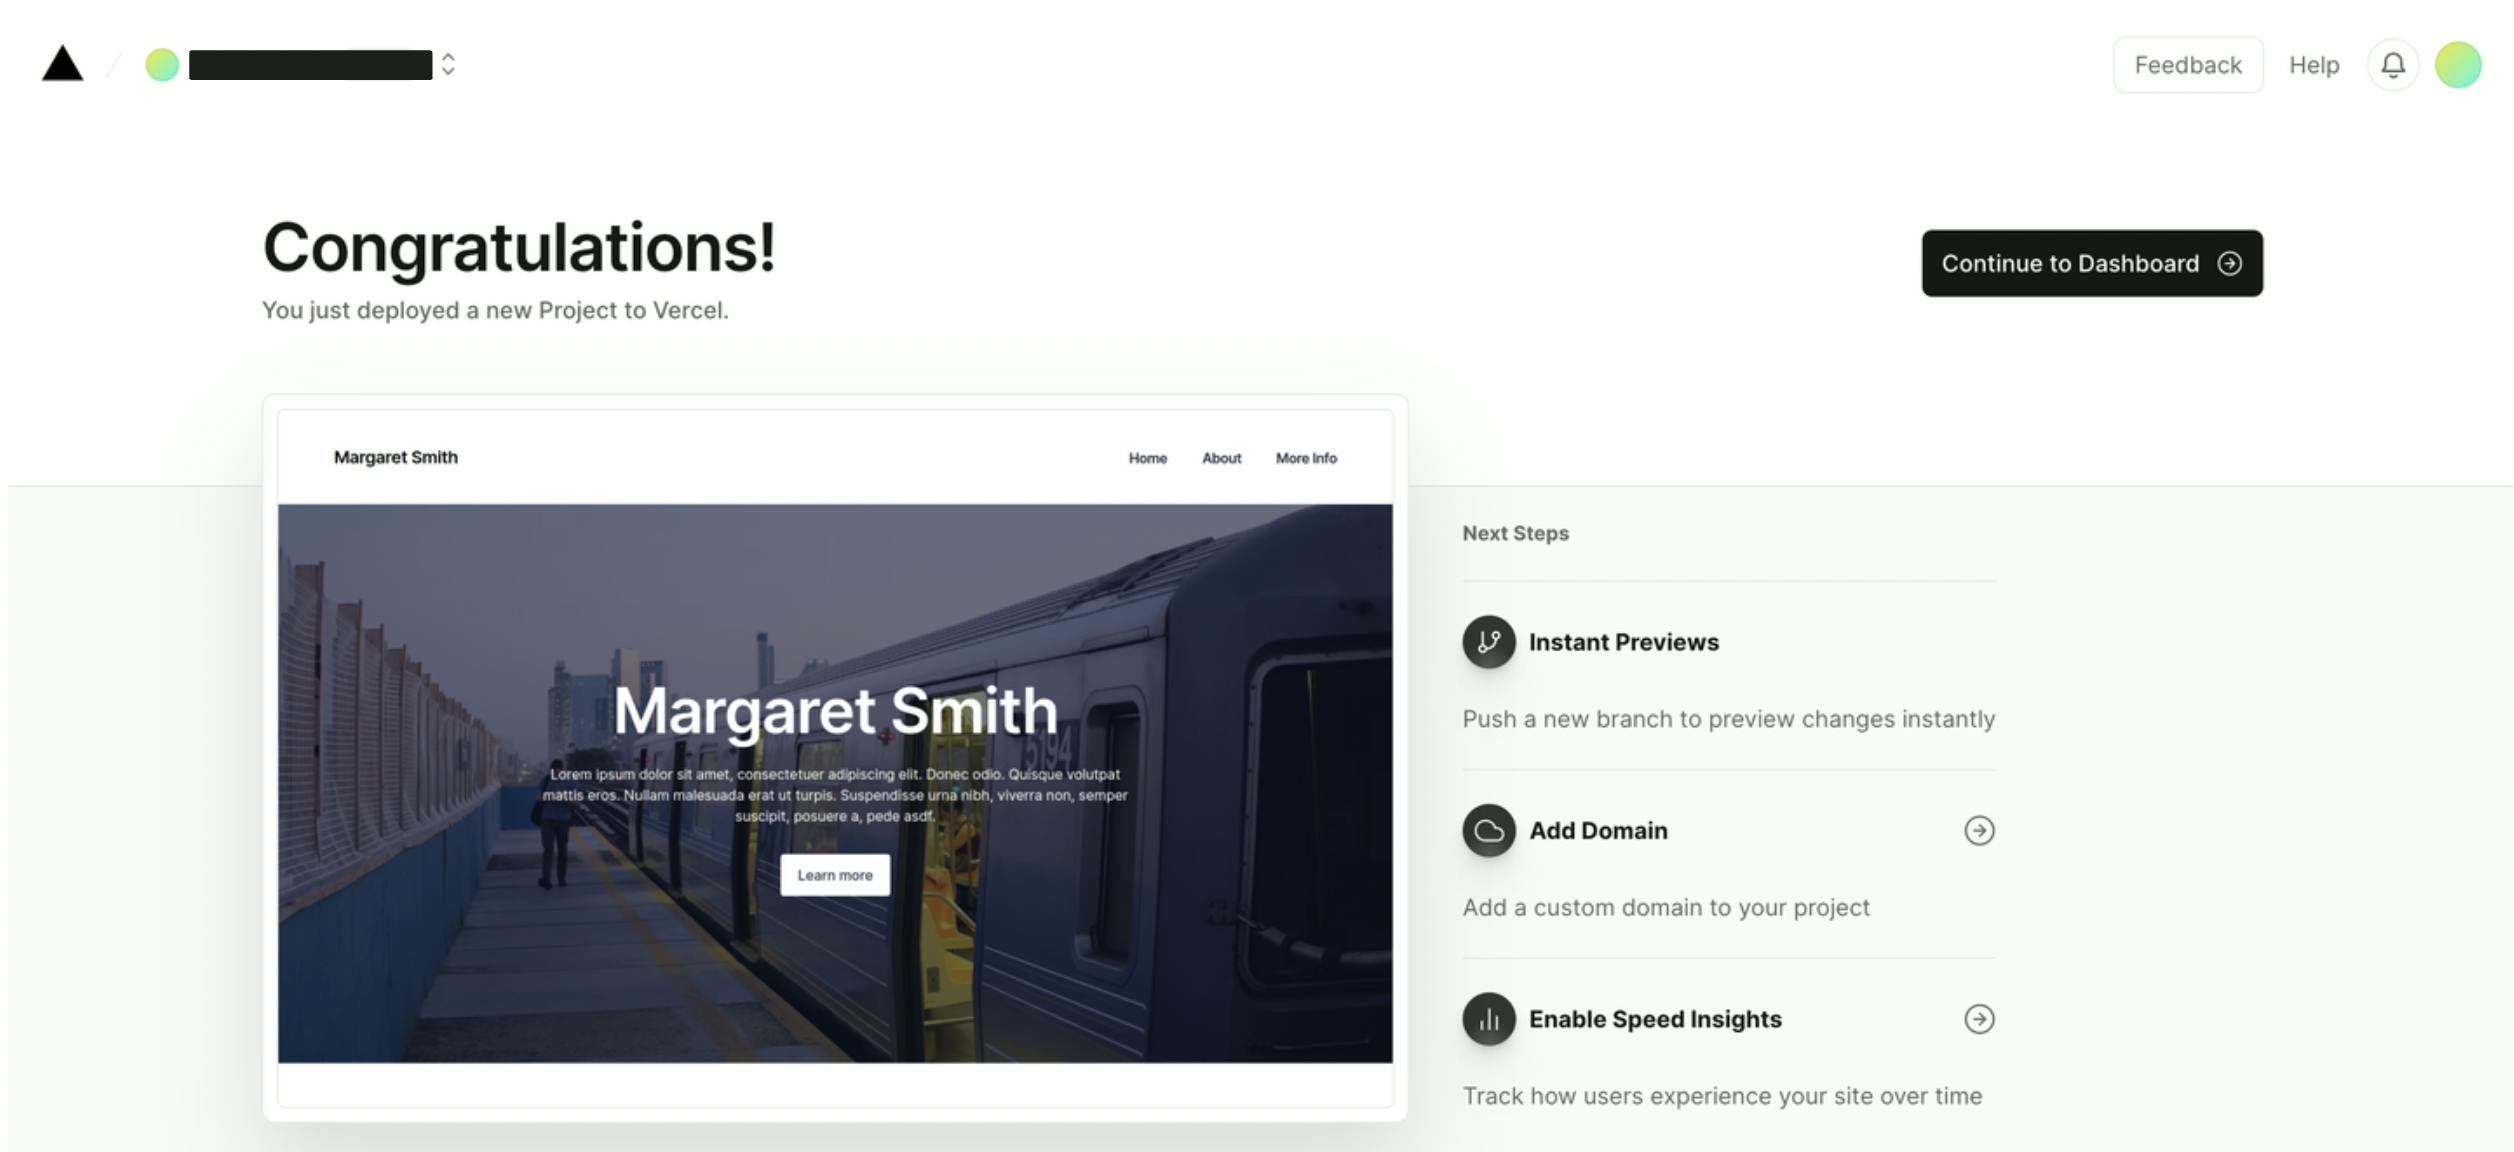
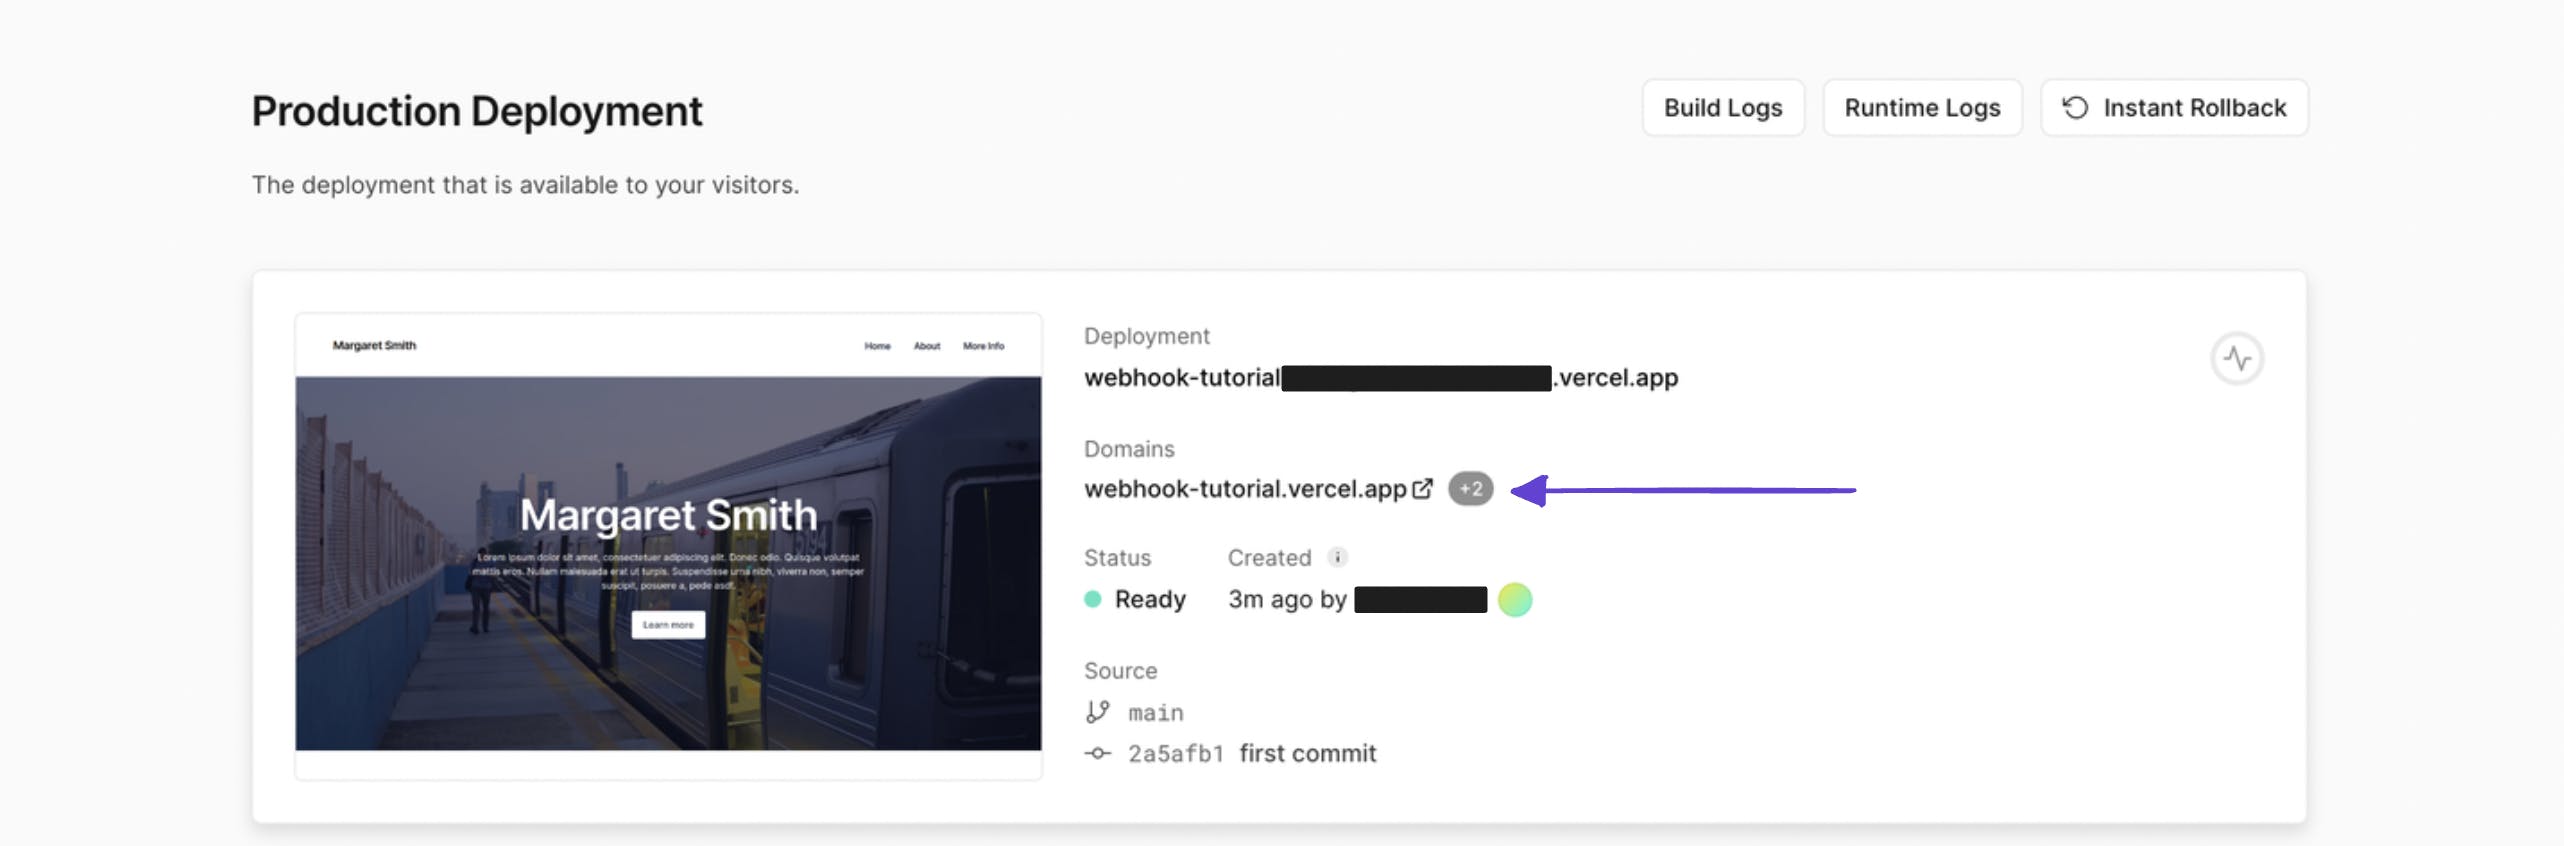
If we click ‘Continue to Dashboard’, we will see our deployed URL, which is where we can now view our live site on the front end!
Configure webhook in Prismic
Now that we have our site deployed, we need to configure our webhook so that when we change the content in Prismic, we see it updated on our live site.
Next.js and on-demand revalidation
Your app is configured to cache all Prismic queries indefinitely for the best performance. However, you’ll want to fetch new content after you publish documents in Prismic.
This starter is set up to utilize on-demand revalidation to do exactly that. Prismic will be configured to call one of your app’s endpoints to clear Next.js’ network cache upon content changes.
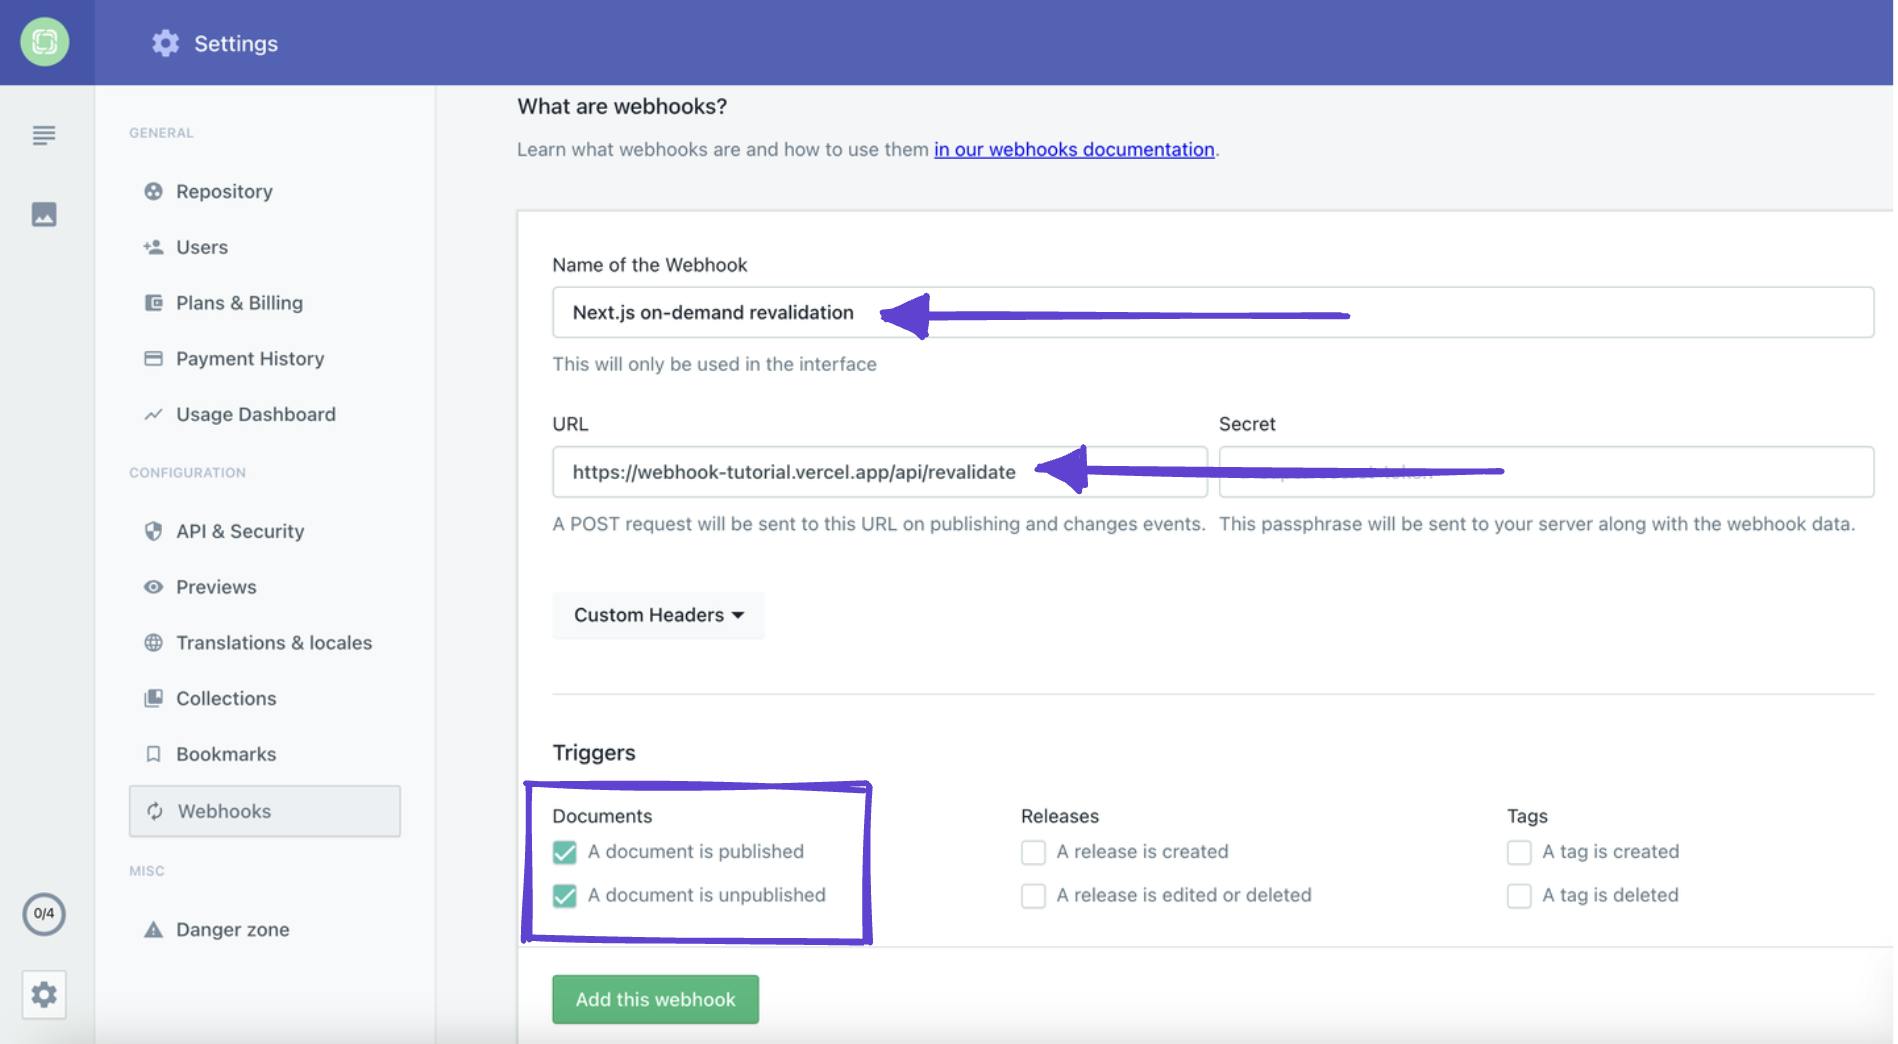
All we need to do to finalize this step is copy the deployed URL from Vercel, as seen in the previous step. Then, navigate back to our repository in Prismic, and in the sidebar on the bottom left, you can click on Settings > Webhooks.
Then, enter the URL + /api/revalidate (example: https://example.com/api/revalidate) in the Webhook URL field of your webhook settings in Prismic. To avoid unnecessary cache clearing, we will want to uncheck everything under ‘Releases’ and ‘Tags,’ so the only checked times will now be the two under ‘Documents.’ Once you have done this, click ‘Add this webhook.’
You can now see we have our webhook configured in Prismic.
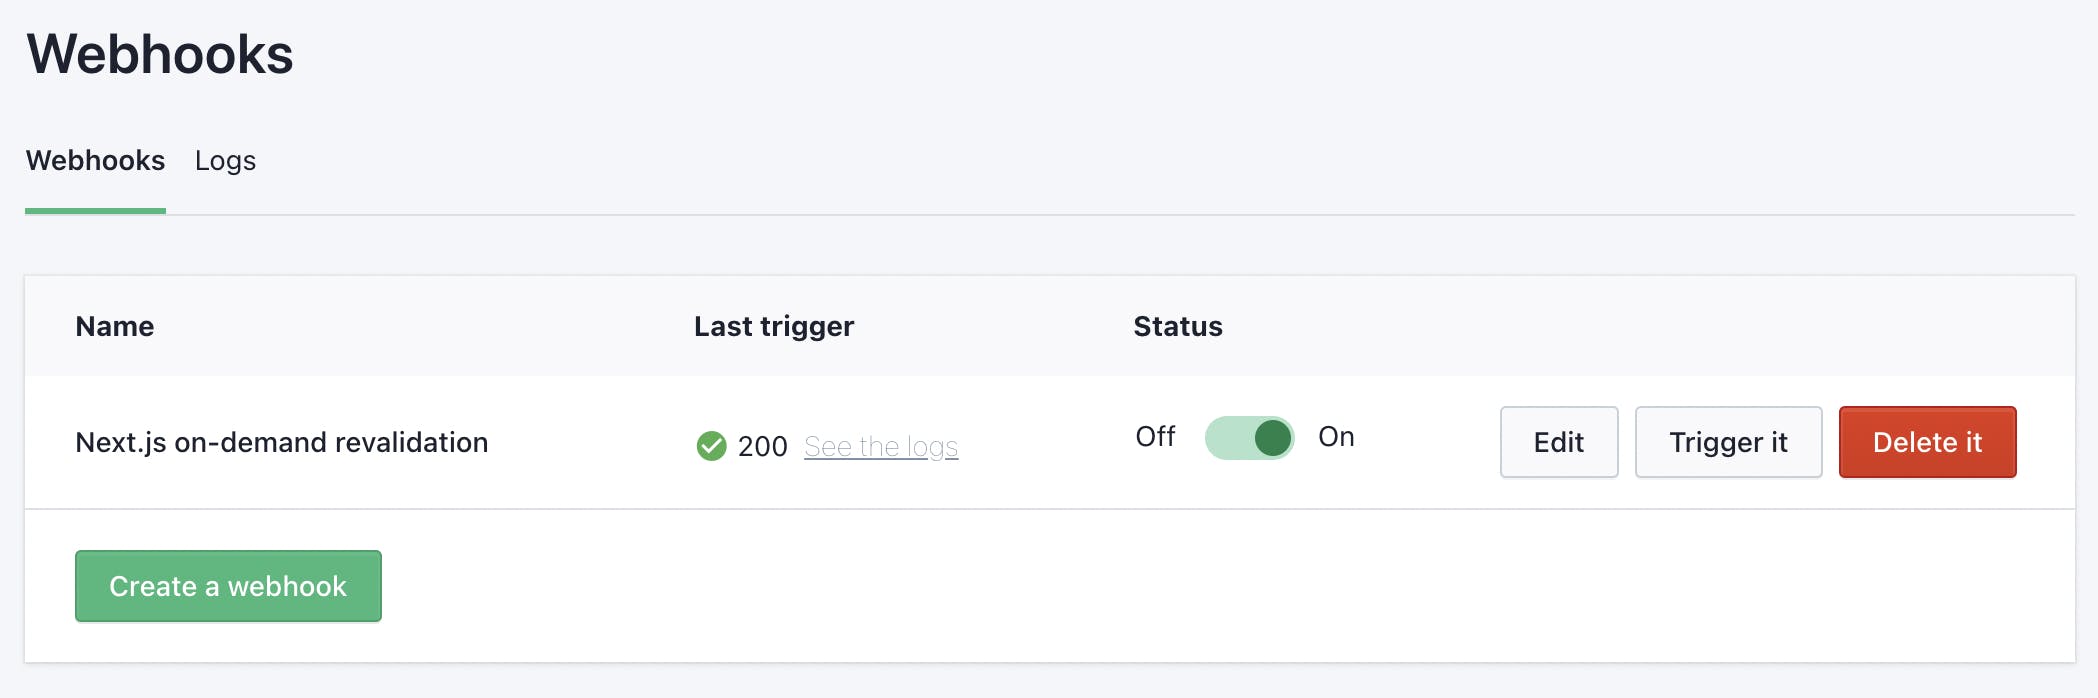
Now, when you publish new or updated content, Prismic will call your /api/revalidate endpoint with the webhook you set up.
But how do I know it’s working? Let’s edit some content so we can see our content change on our live site.
Edit your content and see the webhook in action!
To test our webhook, let’s navigate back to our documents in Prismic. To keep it simple, let’s click on ‘Navigation.’
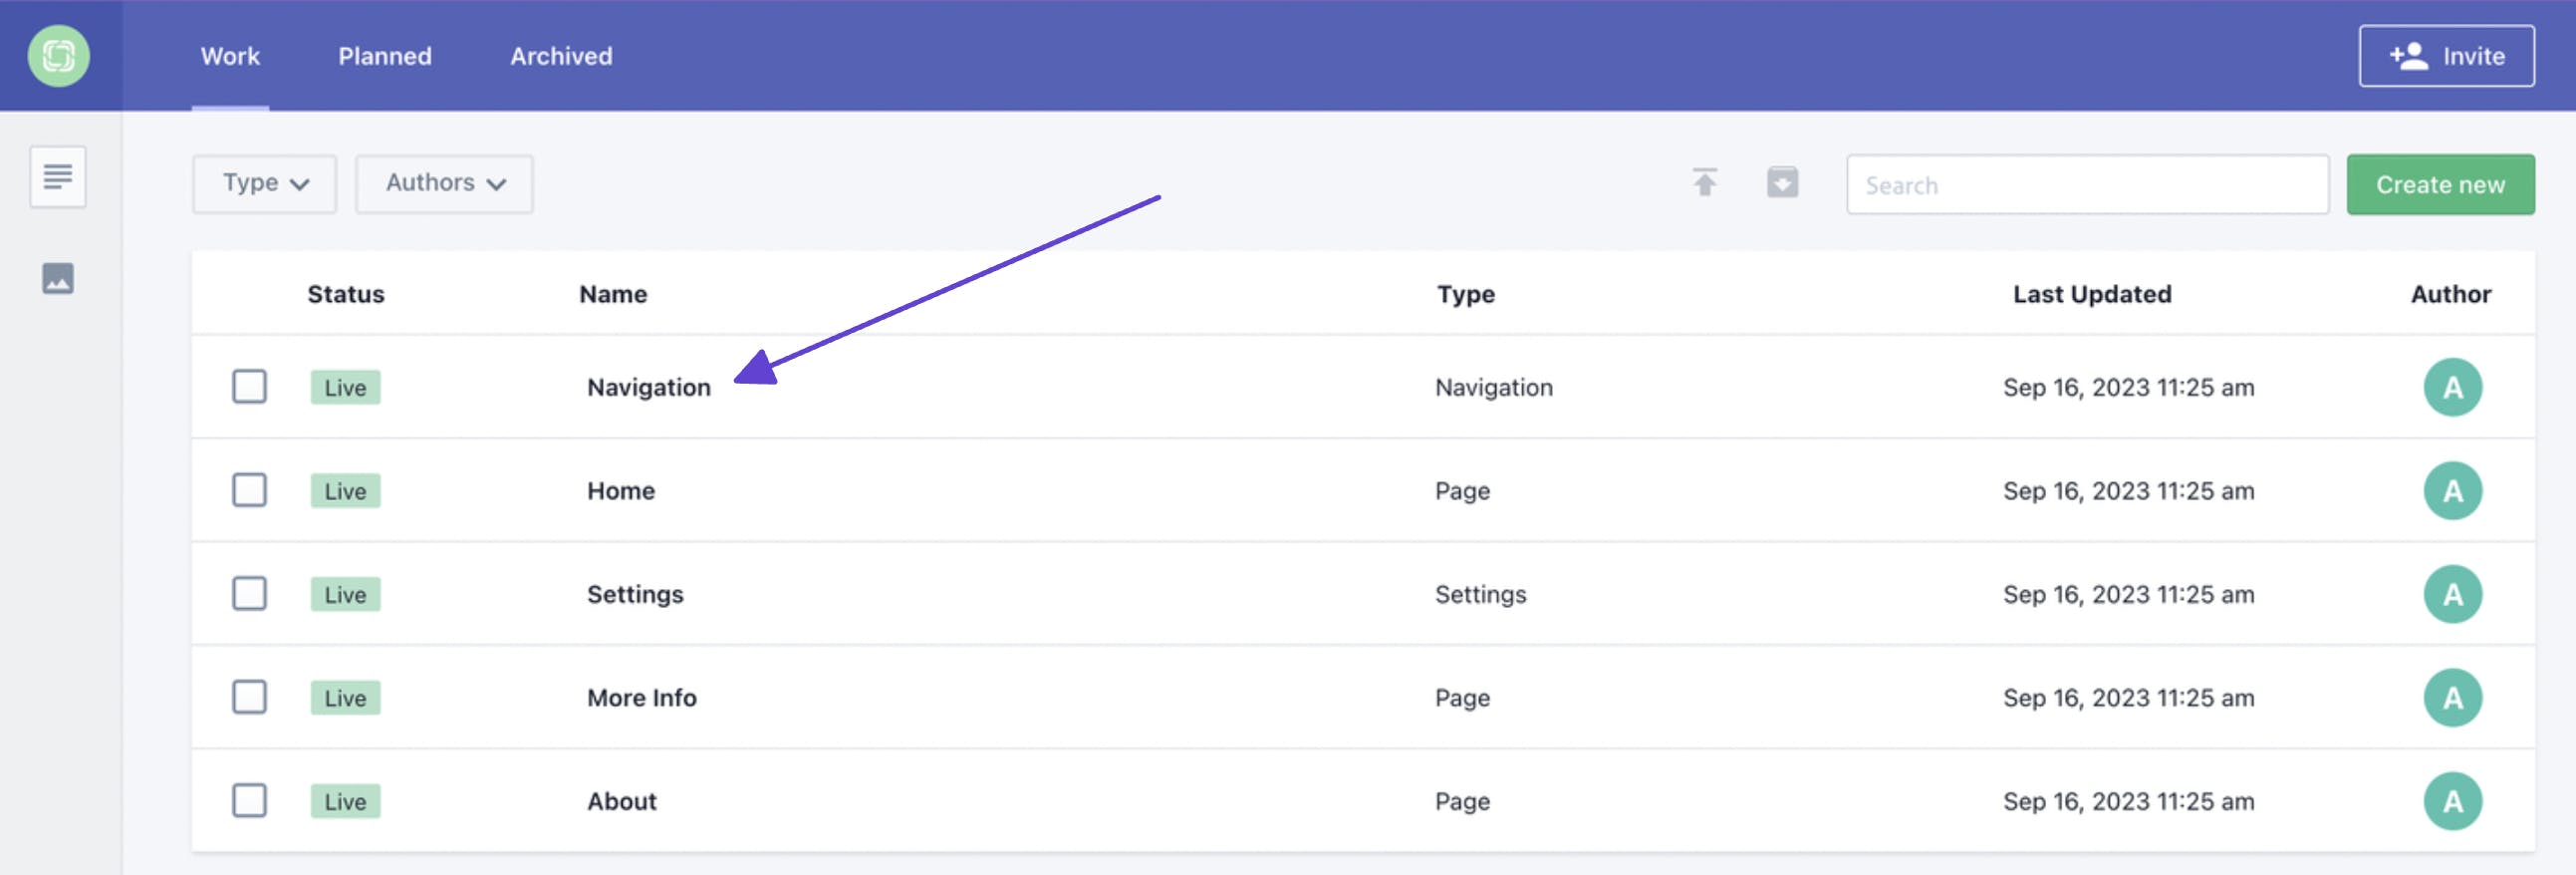
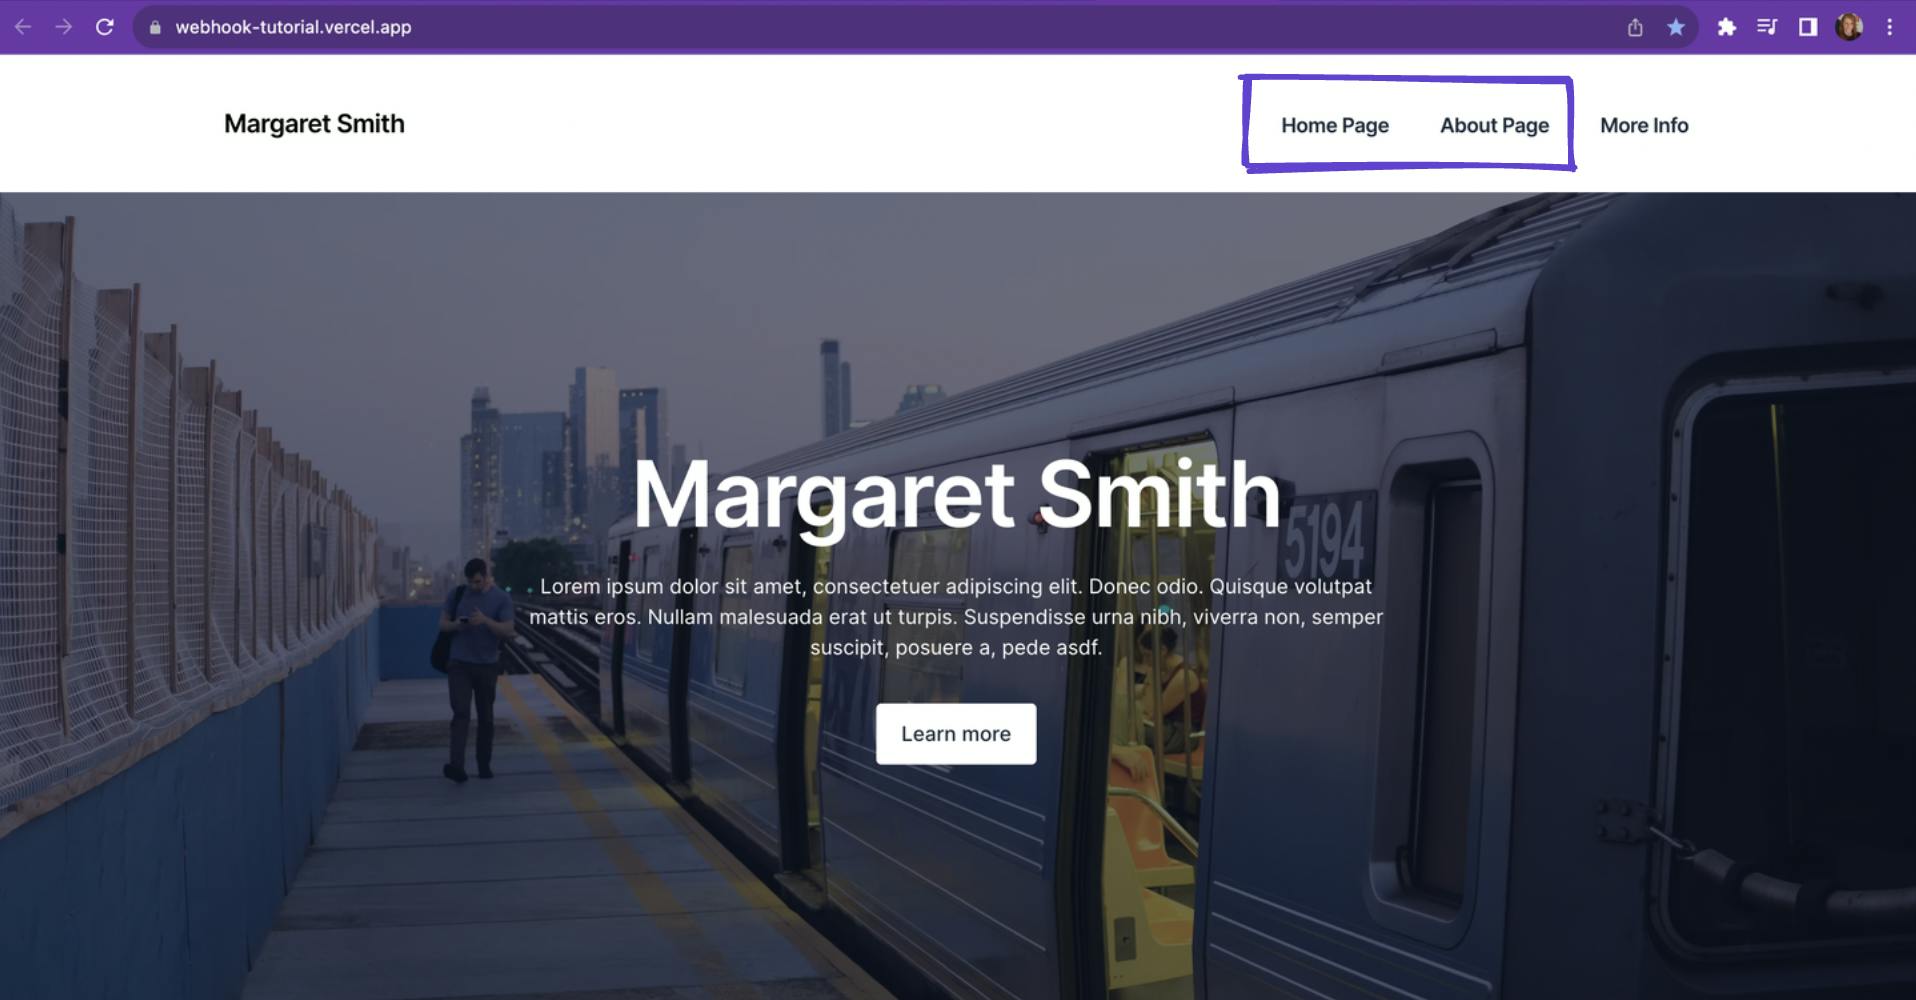
Currently, the first two menu items say ‘Home’ and ‘About.’ Let’s just simply add the word ‘Page’ after each of these items. Then, let’s save our page and click ‘Publish.’

And now, if we navigate back to our deployed URL on Vercel and refresh the page, we will see our changes! 🚀
Final thoughts on webhooks
I hope you’ve found where webhooks can fit into your workflow! If you ever find yourself:
- Looking for a small batch of events without needing a continuous connection
- Building a content-focused site with an external trigger to rebuild
…then definitely give webhooks a try.


