

We’ve seen some awesome APIs we could test out so far in our series, so now we will learn how to test APIs using Postman. If you're not sure what an API is, we recommend you read our previous guide to get an excellent overview.
We chose Postman because it makes API testing easy. It is an intuitive platform with many options. It helps you to have a visual reference of how API calls are made to servers with queries. It is important to learn these concepts when we are learning front-end so you can explore and leverage APIs in your projects more easily.
What is Postman?
Postman is an API development environment tool that’s great for learning how to use APIs in a simple and professional way. It helps you organize queries, test them, and visualize the lifecycle of an API call.
You can use it in the browser or download the desktop app. Download it from Postman’s official page.
Stay on Top of New Tools, Frameworks, and More
Research shows that we learn better by doing. Dive into a monthly tutorial with the Optimized Dev Newsletter that helps you decide which new web dev tools are worth adding to your stack.

How do you use Postman?
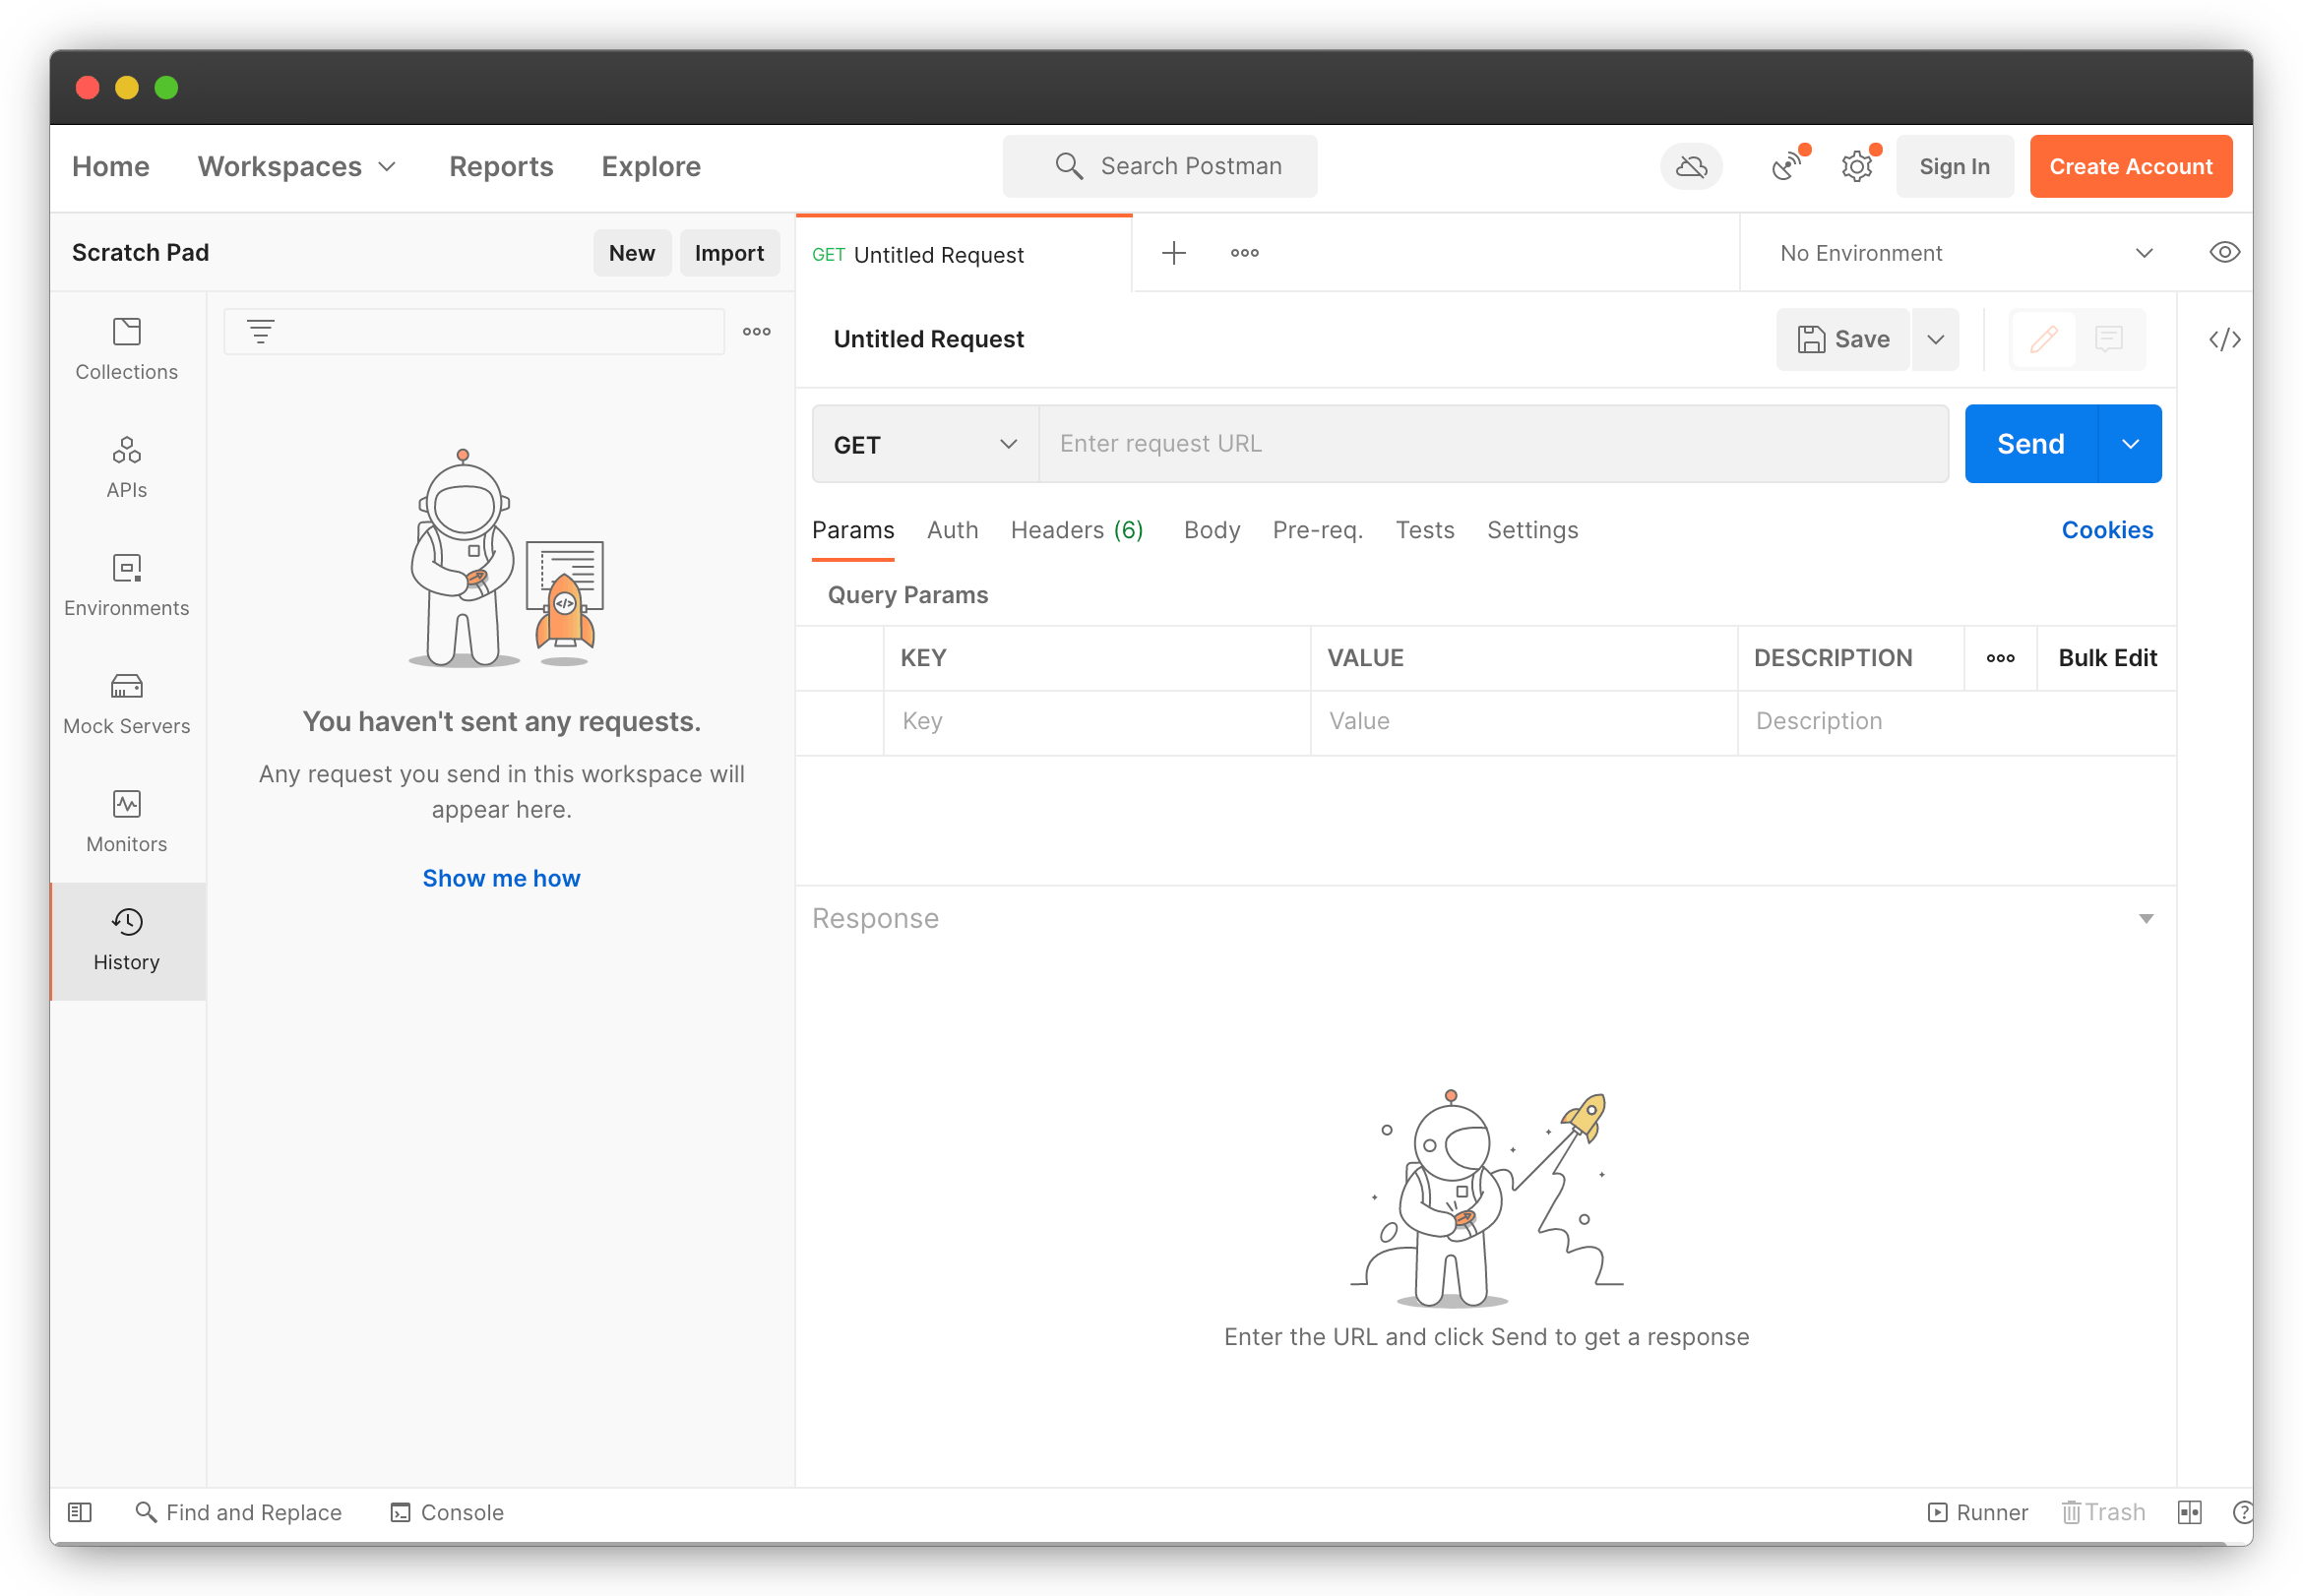
Now let's learn how you can run an API on Postman. Open the app or the website. You will see that there are many elements with which you can interact; let’s look at the more frequently used options so you understand the interface before diving in.
The request URL field
The first and most important element is the request URL field. This is where you paste your API endpoint URL.
In the upper left corner of the center Scratch pad overview, click the + button to open a new work area and set up your calls. Here’s a preview of how the Dashboard looks in the desktop app:
Methods
As we have already seen in the post on how APIs work, we know that they allow us to request data structures that we use in our apps.
Requests in your code can be made with many languages and structures, but in general, they happen as follows: you give your application an API endpoint and a query request written in REST or GraphQL. When the query request is sent, it communicates with the server with a CRUD HTTP request method that enables you to interact with the content of the API.
Requests in Postman are made similarly but in a more didactic way. Here we will see the list of the most commonly used methods:
GETretrieves content that is read-onlyPOSTallows you to write new content or update the existing onePATCHorPUTallows you to update existing contentDELETEhelps you delete content from the API
The server then receives the request and returns a response, usually in the form of JSON.
Params, headers, and authentication
Each API has requirements or specifications that are unique to each endpoint. Each API usually has its own documentation that tells you what kind of options you have for making your queries.
To provide the required options, there are three tabs in Postman’s requests dashboard that you will use more frequently: Params, Auth, and Headers. These are optional values that you can pass to your API.
Params and Headers help you make your request more specific and authentication is used to access private APIs that require tokens.
Status codes
Status codes are a series of standardized three-digit codes that represent the status of a response. They tell you if everything is fine or if there is an error with your API call. For example, 200 means that your response is correct, 400 that your request failed due to an error in your configuration, and 500 means there’s an error coming from the server.
You can learn more about status codes here.
Other functions
Once you gain experience using Postman you will find it very useful to use other organizational elements. These options allow you to structure your projects if you have more than one endpoint, if you have lots of queries, and if you work with a large team.
- Environment Variables: they allow you to group a set of values that you can reuse in your requests. They help you not to repeat information and to have order when managing the access of the data in your team.
- Collections: they allow you to group your requests. They are useful when you want to separate them by application, by feature, etc.
You should also check out:


Make your first request
Now let’s use our understanding of the Postman interface to make our first request. In this example, our goal is to retrieve a successful 200 status code API response. Let's see our to-do list:
- Add the URL of our endpoint. In this case, we will use an API that comes from Prismic.
- Create a request to bring the documents that we need.
- Send the request and read the JSON.
Prismic's endpoint
Prismic is a headless website builder that allows you to build the structure of your own API and add content to it through the Prismic editor. Learn more about this tool and how you can create your own endpoint here.
In this example, we’re going to use a test Prismic API endpoint that’s already configured for you. This endpoint delivers data that a content team created in Prismic’s editing interface for their website about an online coffee shop.
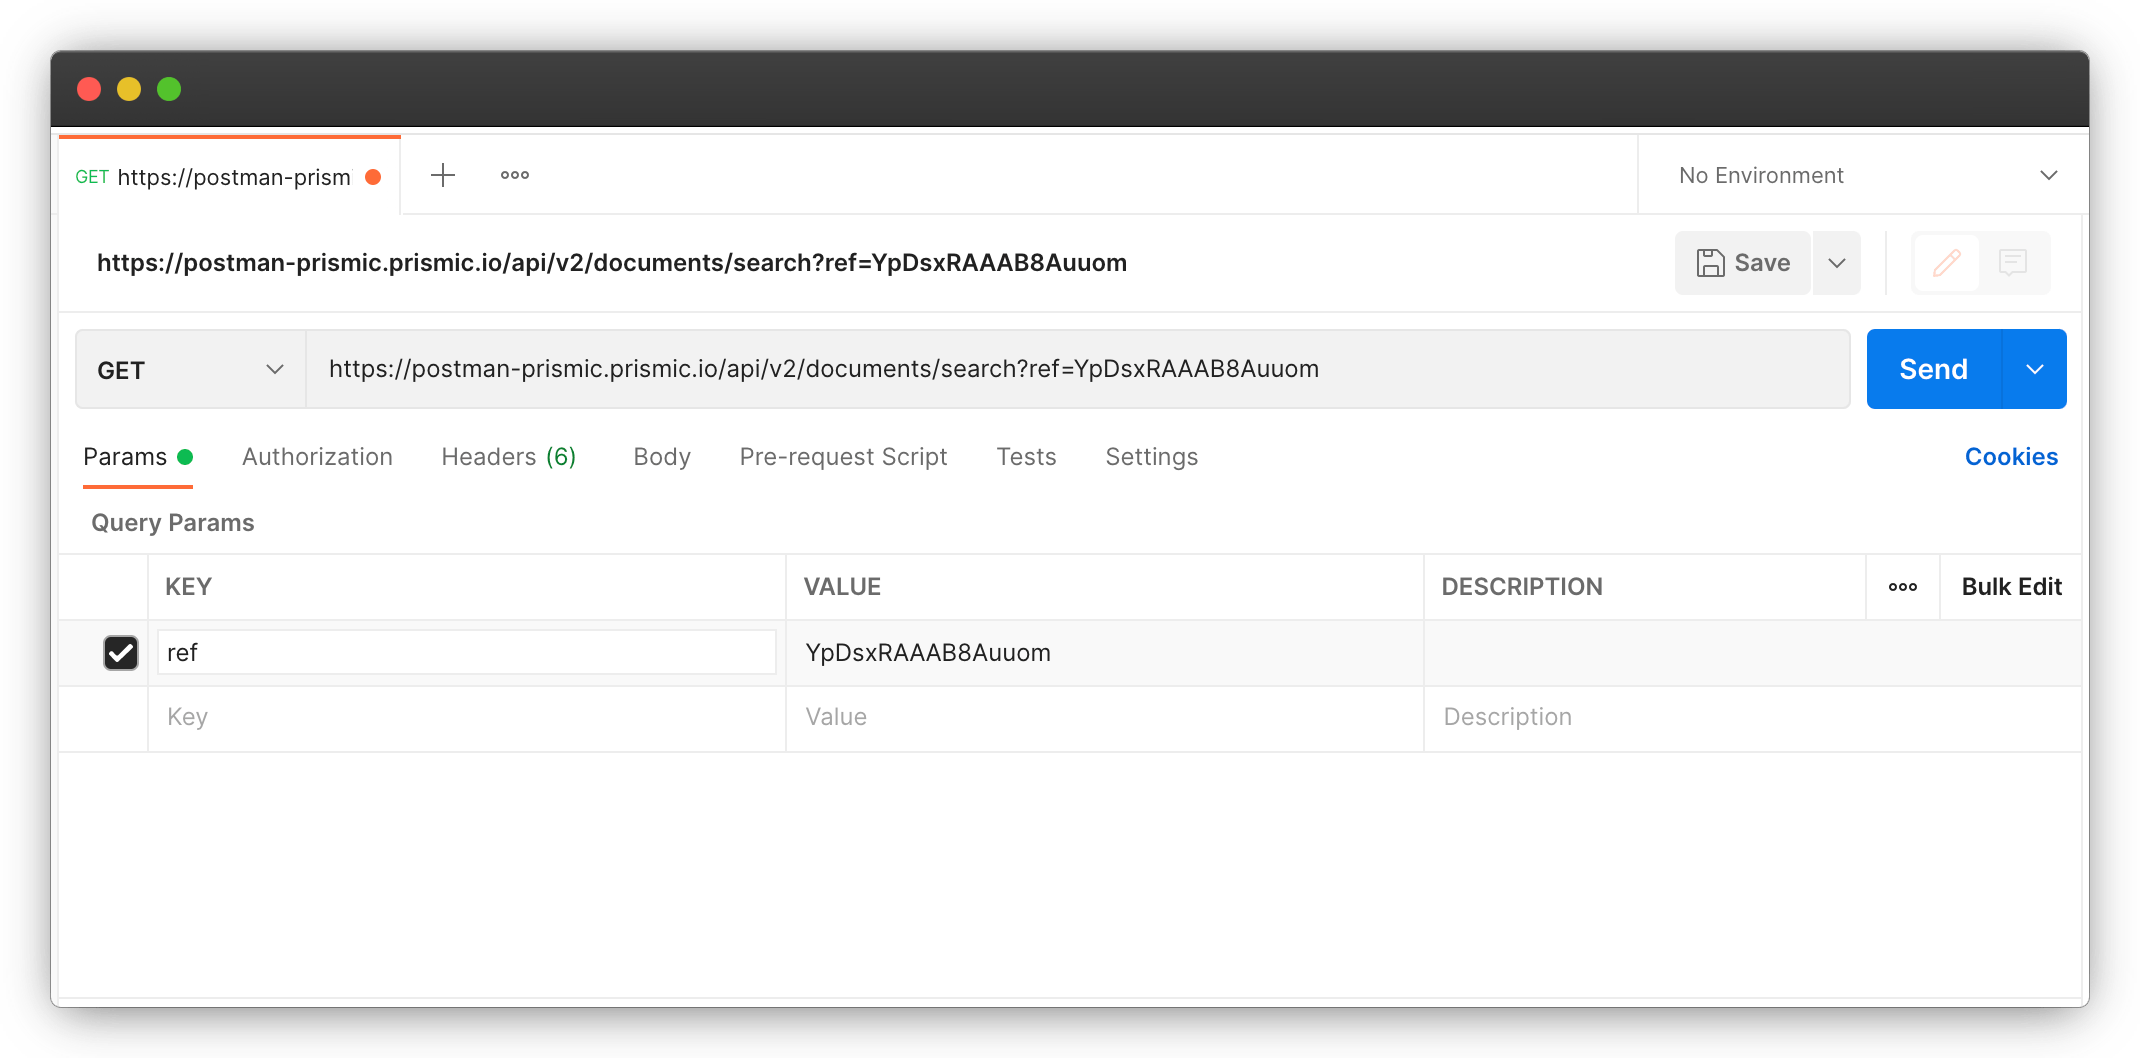
We are going to use REST API parameters to filter the response. Click the + button to open a new request window and paste the following endpoint in the request URL field.
https://postman-prismic.prismic.io/api/v2/documents/searchThen, in the Params tab add the following values. Add ref as key and YpDsxRAAAB8Auuom as value. It should look like this:
Click Send. Go to the body tab and you’ll see a successful 200 status and the JSON response.
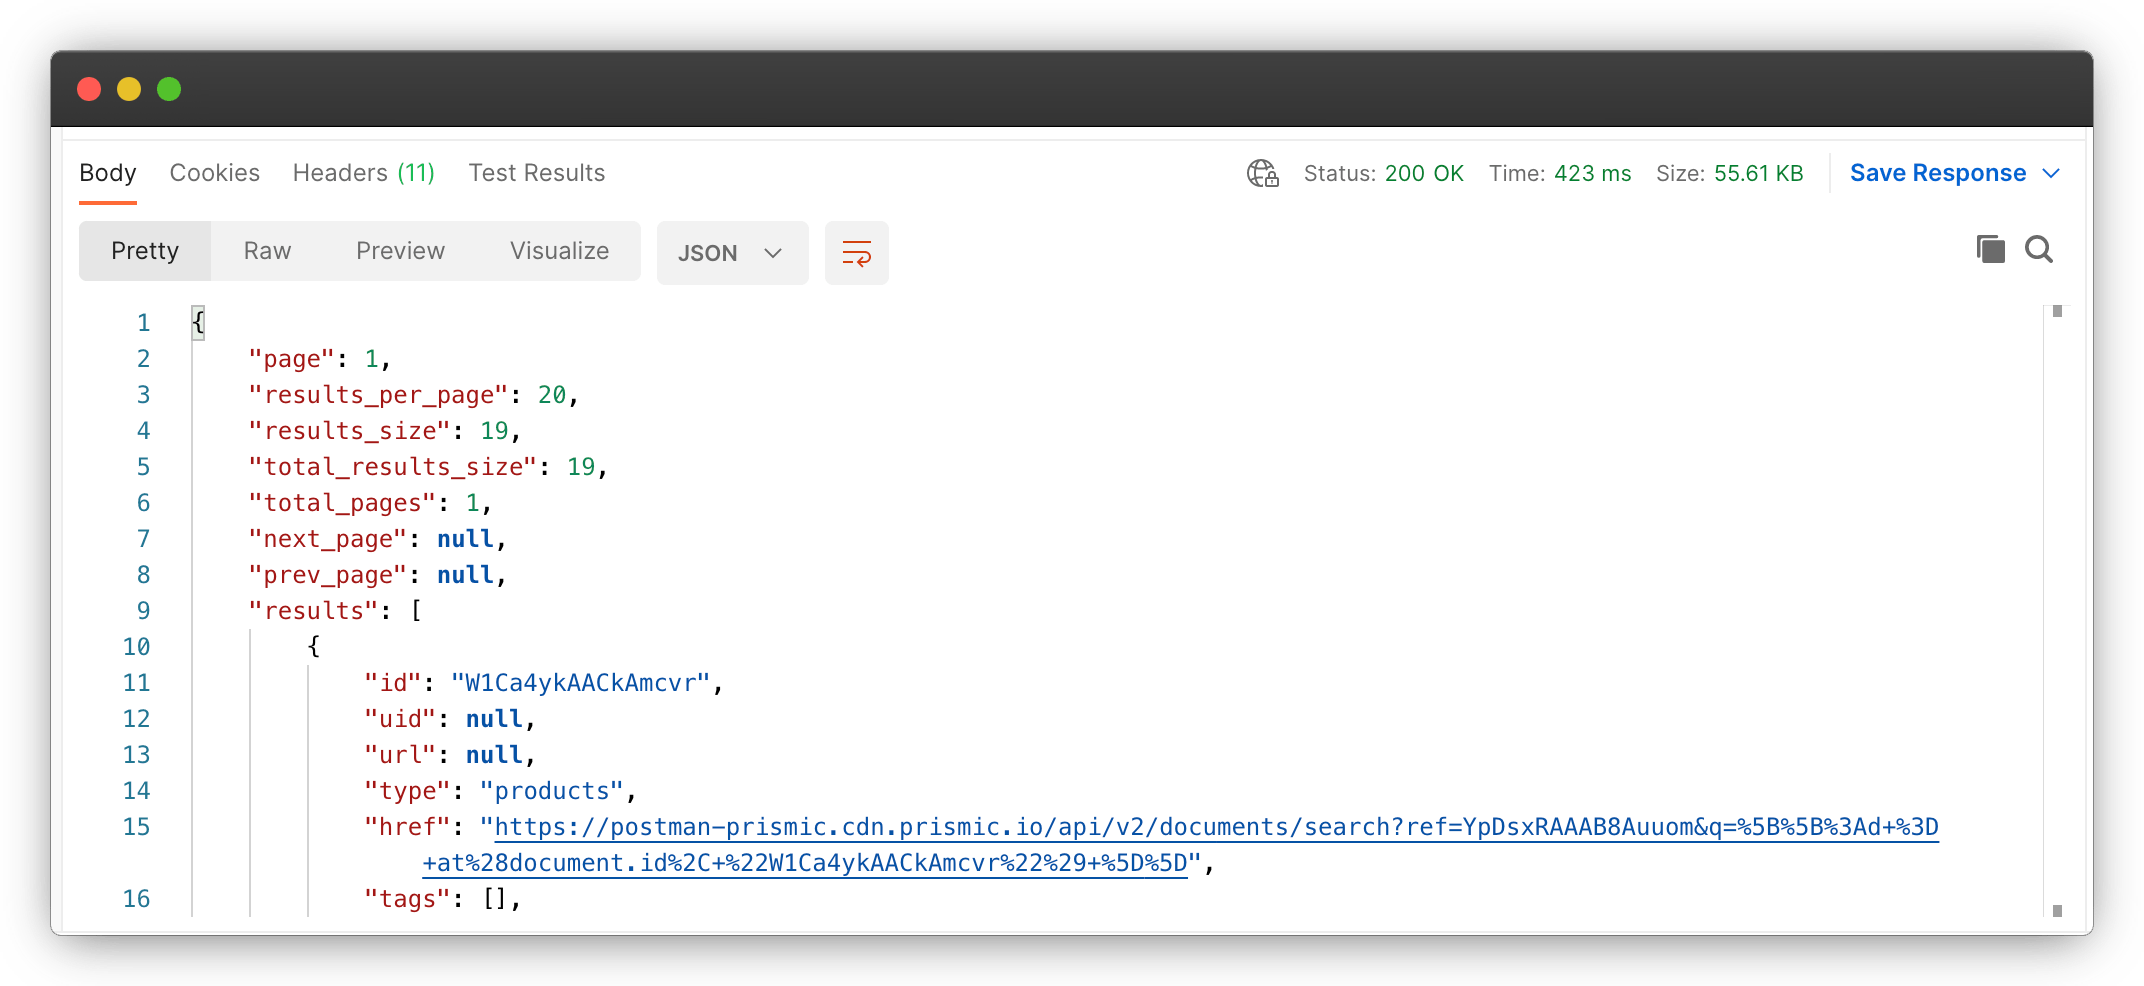
Congratulations you just made your first Prismic API call in Postman!
Write a query
Now you know that your endpoint works. So far the JSON response showed us the first 20 items of the API.
Items or “documents” are individual content entities. These structures help us separate, for example, the content of each blog post or article on a website, or the information of each user or author profile.
Now we want to get something more specific. Let’s retrieve all product-type documents.
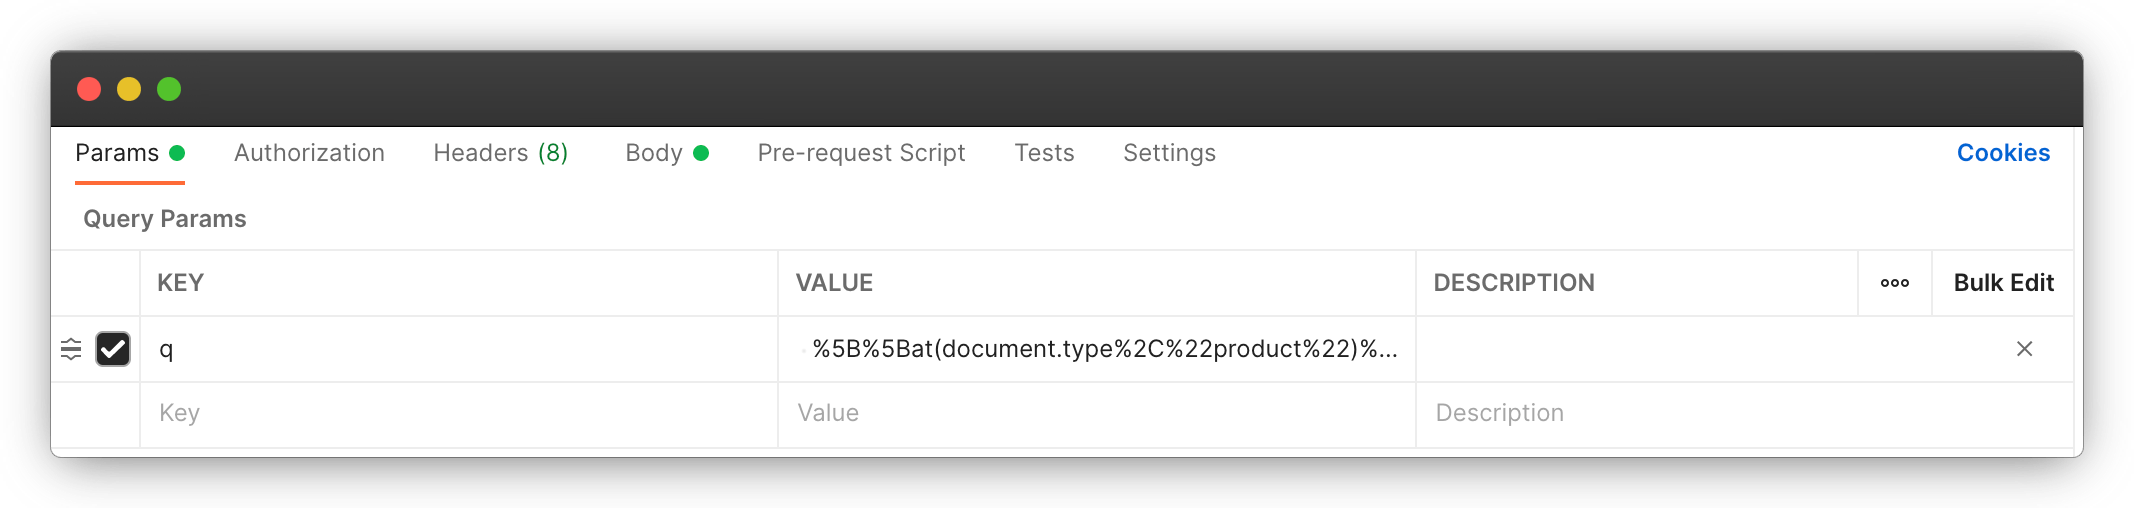
In a new key add a new parameter. Type q as the key and the following code as the value:
%5B%5Bat(document.type%2C%22product%22)%5D%5DIt should look like this:
The value snippet may seem somewhat confusing. This is an encoded text string that can be read by the endpoint's URL. If we decode this in a URL Decoder/Encoder we can see the actual form of our query:
parameter: q=[[at(document.type,"product")]]For now, what you should know is that this query will help you separate the items or documents that are of the product type from those that are not.
What is a type?
In Prismic terminology, types are the models that shape “documents”. They are useful because each type of content needs a different structure. For example, the format to write an article will not have the same input fields as a format to write the homepage of a site, or a list of products, a table of contents, etc. In our example, we just want the “product” type so that we can access product content.
Click, Send. That's it! The result should return a successful response and a JSON with 10 items of the type “product.”
The JSON response
JSON is the favorite data structure of JavaScript. It is extremely easy to read and consume. If we see the response that our API has given us, we can see within the data node that we have a lot of information. For example, the url of the product_image field takes us to this image:
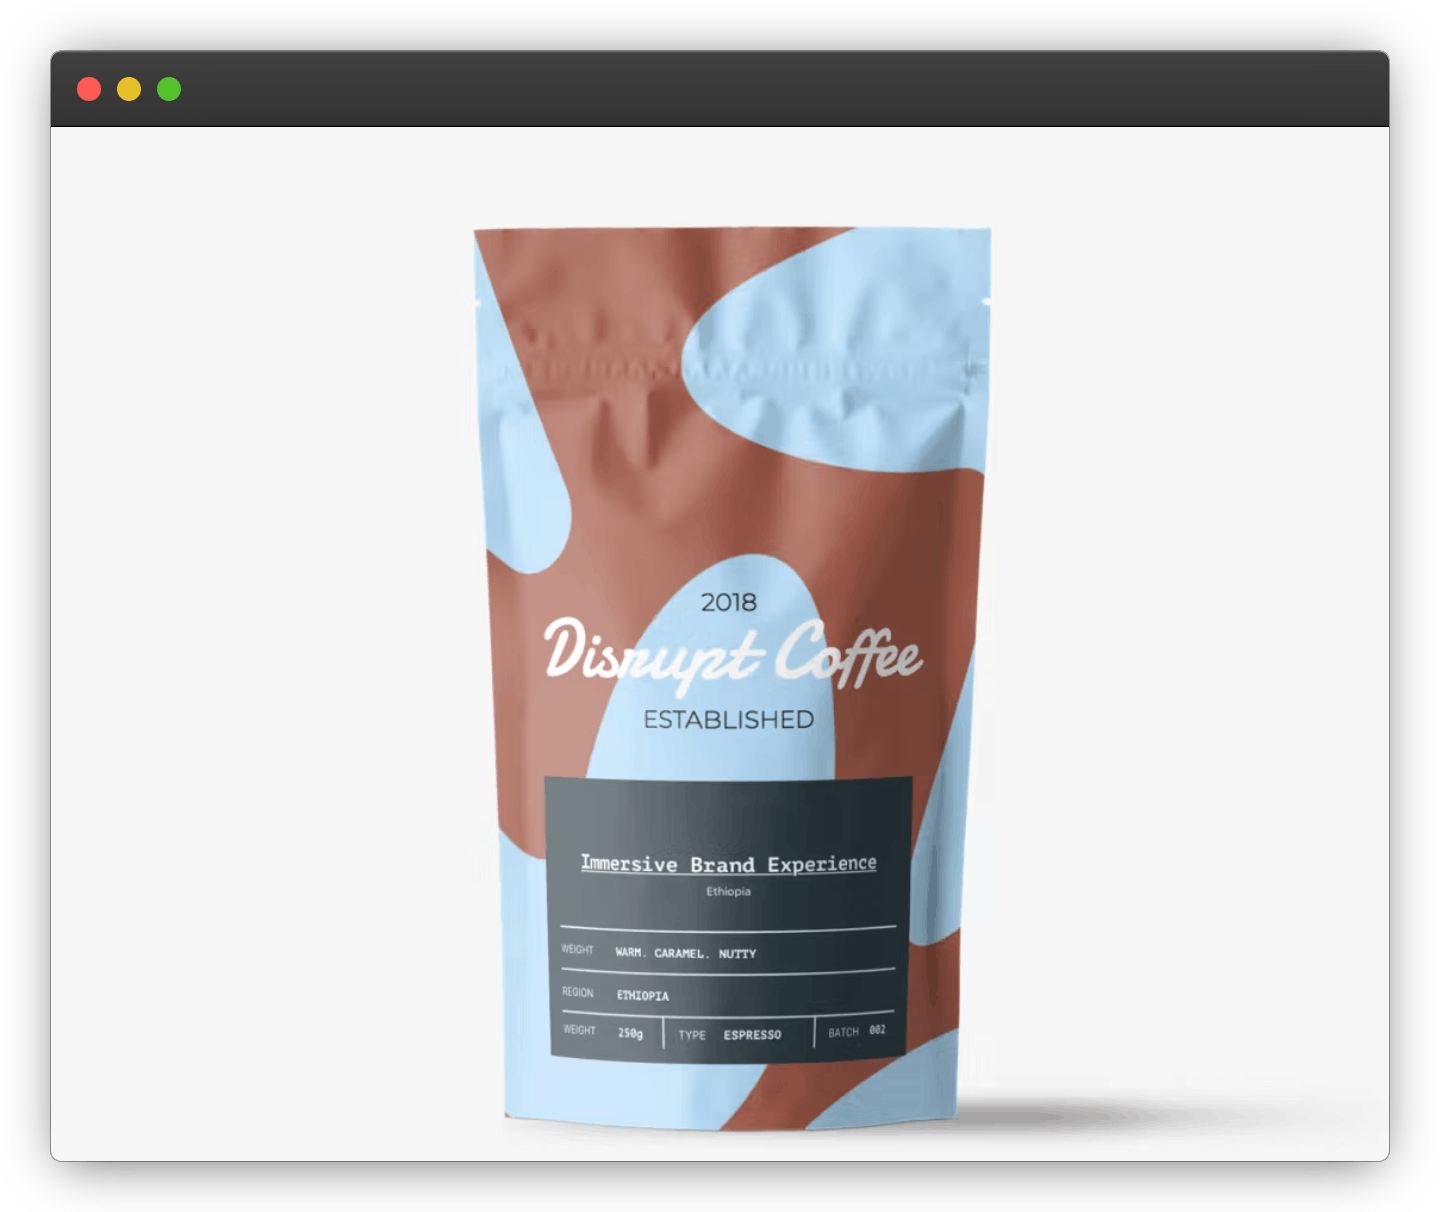
And one node further down in the product_name text field we can read: “Immersive Brand Experience”. This is how you’ll read and consume APIs to build your site or application.
After calling an API the last thing that remains is to save the content of the response and render it. Here you can see an example of how you can create a site with the API endpoint that we just tested:
https://gatsby-coffee-demo.netlify.app/Now you know how to test and read the content of an API using Postman. Below you can also read our post about cool APIs you can try with Postman to keep putting everything you've learned into practice.


