Headless Commerce: Build an eComm Site with Prismic, Next.js, and Stripe
 By Coner Murphy
With the advent of headless technologies, building an e-commerce website has become easier than ever. Now, there are tons of e-commerce solutions on the market (Shopify, Paddle, etc) that facilitate the taking of payment from users and make things as easy as possible for you, the vendor.
But, if you don’t need all of their features, sometimes those products can be overkill and expensive. So, in this post, we’re going to be focusing on the payment provider that often underpins them all: Stripe. In this tutorial, we’re going to take a look at how we can build a headless commerce website that makes use of Stripe for handling our product catalog and payments as well as Prismic for handling our website’s content.
By the end of this tutorial, you’ll have built an example e-commerce application that displays a list of products from Stripe on a Next.js app and allows people to purchase them at the click of a button by being redirected to Stripe. Here is a sneak preview of what it’ll look like.

What is headless commerce?
Before we jump into the tutorial, let’s take a moment to explore what headless commerce is. We have an in-depth guide on it here if you want to read more, but essentially, headless commerce is a commerce solution that centers around the separation of the frontend visual layer the user sees and the backend e-commerce application that handles payments. Then, we tie these two layers together using API requests from the frontend to the backend to process requests and fetch data as required.
Headless commerce isn’t just a tech choice either, there are many benefits you can receive by adopting headless commerce such as reducing costs, improving your scalability, building your website’s resilience, and improving uptime.
If you want to dig deeper into headless commerce and learn more about it, as well as how it compares to more traditional commerce setups, make sure to check out our detailed guide on headless commerce.
Headless commerce tech stack
With our introduction to headless commerce out of the way, let’s take a moment to explore the tech stack we’re going to be using for our tutorial.
Stripe
First, we have Stripe, one of the largest payment providers on the web today. You’ve likely used it at some point if you’ve bought something online before. In this tutorial, Stripe is going to handle our products as well as their data, such as titles, descriptions, images, and prices. It’ll also facilitate the taking of payments from users when they click on a “Buy now” button on our website.
Finally, as we’ll see later in this tutorial, we’re going to be focusing on using Stripe Checkout Links for our method of taking payment as it fits our use case the best, and they’re simple to set up.
Prismic
Outside of the products we want to sell on our website, there will be other content, such as titles and descriptions of pages, etc. To handle this content, we’re going to be making use of Prismic as our headless CMS/website builder.
Learn more about Prismic here.
Next.js
Finally, the last major piece of technology in our tech stack is Next.js. Next.js is effectively going to be the glue in our stack and take all of the individual pieces of technology (Prismic, Stripe, etc), hold them all together in one place, and make sure they work together.
Building our application
Now that we have a grasp of what we’ll be building in this tutorial let's get started actually building!
Creating our Prismic repository
The first thing we’ll need to do is to signup for Prismic to create our repository and configure our local development environment.
To create a new repository on Prismic, log into your account and then create a new repository on Prismic by clicking the "Next.js" framework and selecting the “Minimal starter.” Next, give your repo a unique name, choose the “free plan,” and click "Get started with Slice Machine." You should now have a created repository and be shown a screen like the one below.
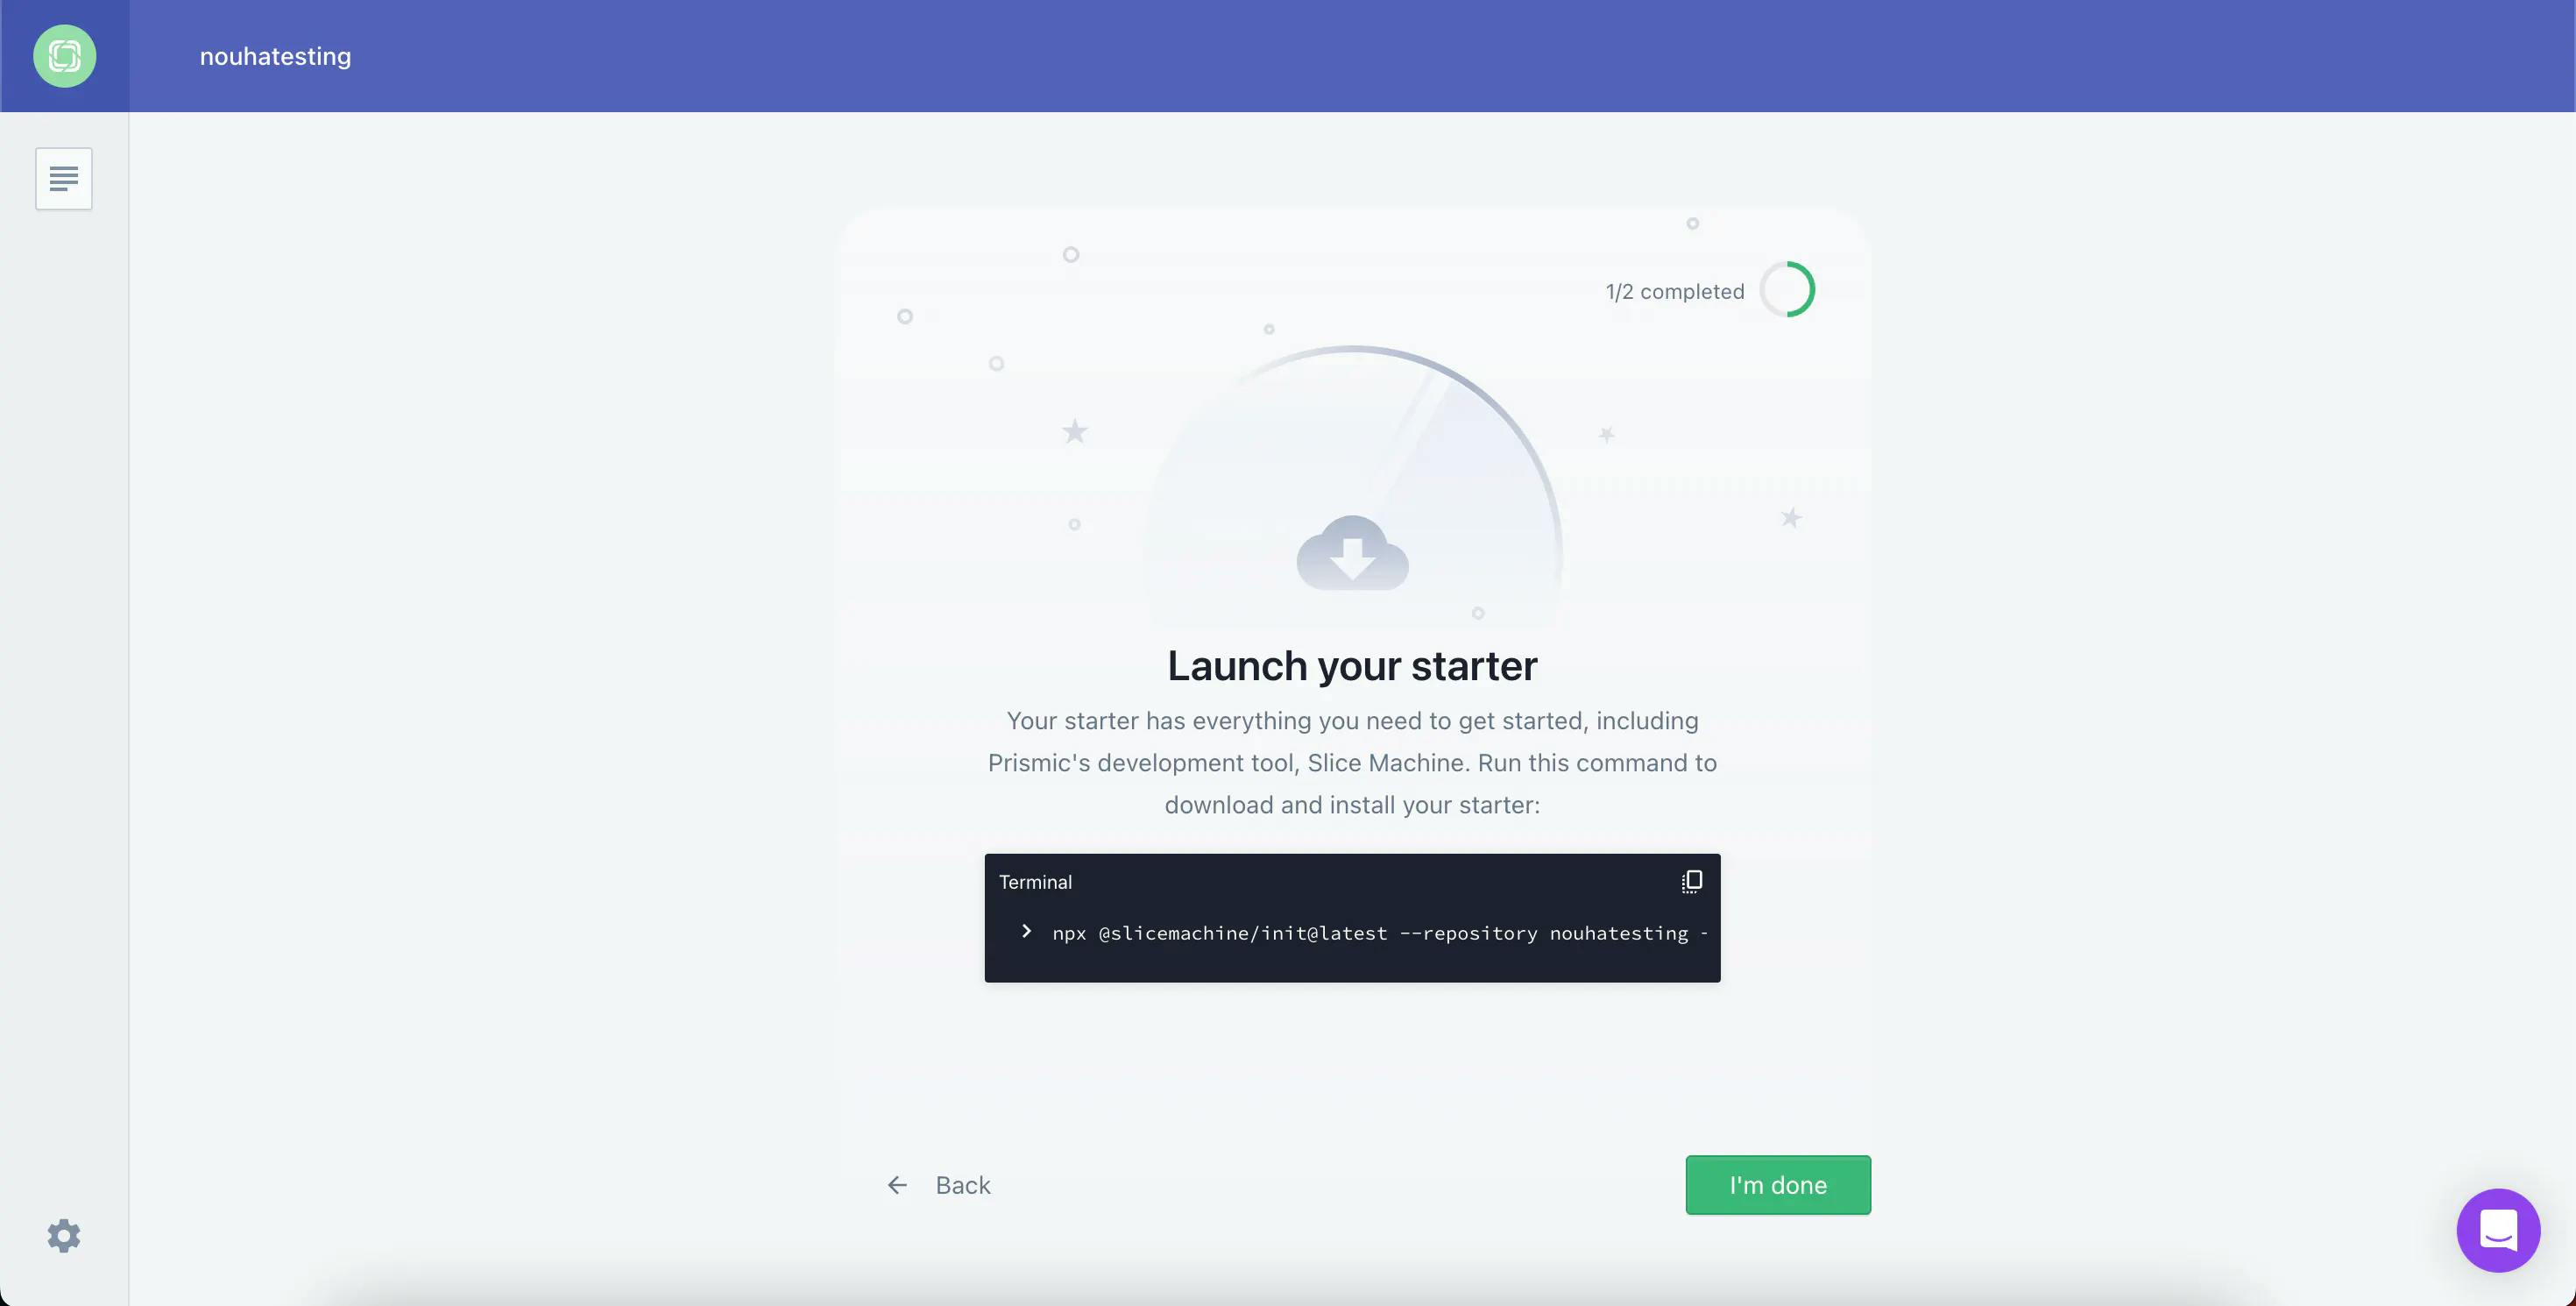
Take the command displayed to you and then run it locally in your terminal to clone and set up all of the files you’ll need to communicate between your local code and Prismic.
Once that command finishes, you can start your application locally by running npm run dev in your project from your terminal. After running this command, two processes should start up, the Slice Machine editor on http://localhost:9999/ and the local version of your website/app on http://localhost:3000/. At this point, for the Slice Machine editor, you may need to sign into your Prismic account so if this is required, follow the prompts and complete the sign-in process.
Configuring our local environment
With our Prismic repository now created, we’re almost ready to start building our application, but first, there are a couple of things we need to take care of.
First, we need to configure Tailwind CSS for our project, as we’ll use that for styling. To do this, you can follow their excellent getting started guide. Make sure to use the src directory content path when configuring your tailwind.config.js file. Also, as you likely won’t have an existing globals.css file, you can create this inside the ./src/app directory and add an import for it inside the layout.tsx file in the same directory.
Finally, with Tailwind CSS now installed and configured, all that we need to do is install the Stripe SDK that we’ll be using to communicate with Stripe. To do this, run the command npm i stripe in your terminal.
Updating our page’s layout and styles
With all of the dependencies now installed for the project and our repository set up and ready to go, the next step we want to do is to set up some base styles and layout for our project as well as configure our Prismic slices for us to add content to in the next section.
To update the base styles of our application, update your ./src/app/layout.tsx to contain the code below which adds some basic Tailwind CSS styles to the page to make the page look a bit less plain.
// ./src/app/layout.tsx

import { PrismicPreview } from "@prismicio/next";
import { repositoryName } from "@/prismicio";
import "./globals.css";

export default function RootLayout({
  children,
}: Readonly<{
  children: React.ReactNode;
}>) {
  return (
    <html lang="en">
      <body className="flex flex-col items-center bg-slate-50">
        <div className="bg-white max-w-7xl min-h-screen border-x border-solid border-gray-200 p-12 w-full flex flex-col gap-20 items-center text-slate-700">
          {children}
          <PrismicPreview repositoryName={repositoryName} />
        </div>
      </body>
    </html>
  );
}
After doing this, our page should look a bit more interesting, but it’s still showing some plain placeholder text from the Prismic template, so let’s look at styling that next. The text you should be seeing on the page is being rendered by a RichText slice that was created for you when you configured the project earlier on.
Now, for this tutorial, we don’t need to change any of the properties or fields of the RichText slice, which is all fine as is. But we want to update some of its styles. So, the first thing we’re going to do is to create a new components directory inside the src directory. Then, inside the components directory, we’re going to create a new file called RichText.tsx and add the code below.
// ./src/components/RichText.tsx

import { RichTextField } from "@prismicio/client";
import { JSXMapSerializer, PrismicRichText } from "@prismicio/react";

export const richTextComponents: JSXMapSerializer = {
  label: ({ node, children }) => {
    if (node.data.label === "codespan") {
      return <code>{children}</code>;
    }
  },
  heading1: ({ children }) => (
    <h1 className="font-bold text-4xl">{children}</h1>
  ),
  heading2: ({ children }) => <h2 className="font-bold text-xl">{children}</h2>,
  heading3: ({ children }) => <h3 className="font-bold text-lg">{children}</h3>,
  paragraph: ({ children }) => <p>{children}</p>,
  hyperlink: ({ children, node }) => (
    <a href={node.data.url} className="font-bold underline">
      {children}
    </a>
  ),
};

interface IProps {
  field: RichTextField;
}

export const RichText = ({ field }: IProps) => {
  return <PrismicRichText field={field} components={richTextComponents} />;
};
There isn’t too much going on in the file, but what we’re doing is taking some of the different elements that can be used in a RichText field and then returning their corresponding elements and adding some classes to them to make them look how we want them to.
Finally, to complete the styling of the RichText slice, we’ll need to update the RichText slice file, which can be found at ./src/slices/RichText/index.tsx. Update this file to contain the code below.
// ./src/slices/RichText/index.tsx

import type { Content } from "@prismicio/client";
import { SliceComponentProps } from "@prismicio/react";
import { RichText } from "@/components/RichText";

type RichTextProps = SliceComponentProps<Content.RichTextSlice>;

export default function RichTextSlice({ slice }: RichTextProps) {
  return (
    <section className="flex flex-col gap-2">
      <RichText field={slice.primary.content} />
    </section>
  );
}
Updating our content in Prismic
With our slices now all updated, the next thing to do is to update the content that renders inside the slices. For this, we’re going to update our home page on Prismic as well as create one new page that will show to users after they purchase something from our website.
To do this, head over to your Prismic repository’s dashboard in your browser. From here, we’ll first want to perform some housekeeping and archive the page we won’t need for this tutorial called “Another Page.” To archive this page, select it by clicking on its checkbox and then clicking the “Archive” button near the search box in the top right.
Once that page is archived, click on your home page to edit it.
See Prismic's visual Page Builder in action!
Experience a new way to build and manage websites with Prismic! See first-hand how developers can empower marketers to release on-brand pages independently.

Configuring your live preview URL
After you’ve clicked on the homepage for the first time, you should receive a popup that allows us to configure our live preview URL so we can see changes in the previews on the Prismic page editor. You can populate the URL as http://localhost:3000/slice-simulator and then click “Save.”
If you ever need to edit this URL in the future, when your website is live, you can access it under the three dots in the top right and then click “Live preview settings.”
Now, update the content of the homepage to look like the one below.
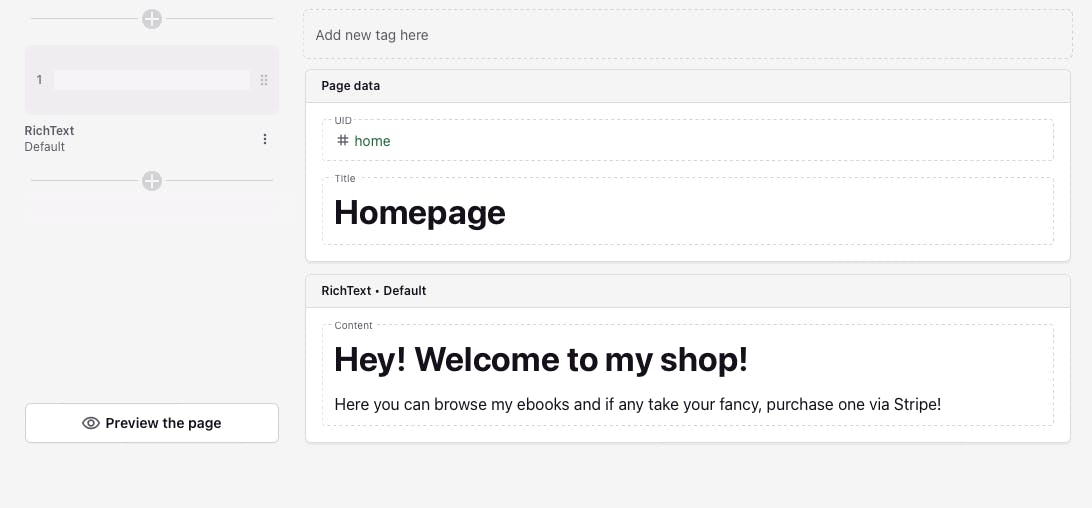
Once updated, make sure to click “Save” and then “Publish” to make these changes live. Then, after a few seconds, you should be able to refresh your local app on http://localhost:3000 and you should be able to see your new content rendering on the page.
With that change our home page is now updated and finished, ready for us to add our Stripe products. But before we look at doing that, let’s turn our attention to that second page we mentioned a moment ago. To create this page, go back to your Prismic dashboard and click on the “Create new” button in the top right.
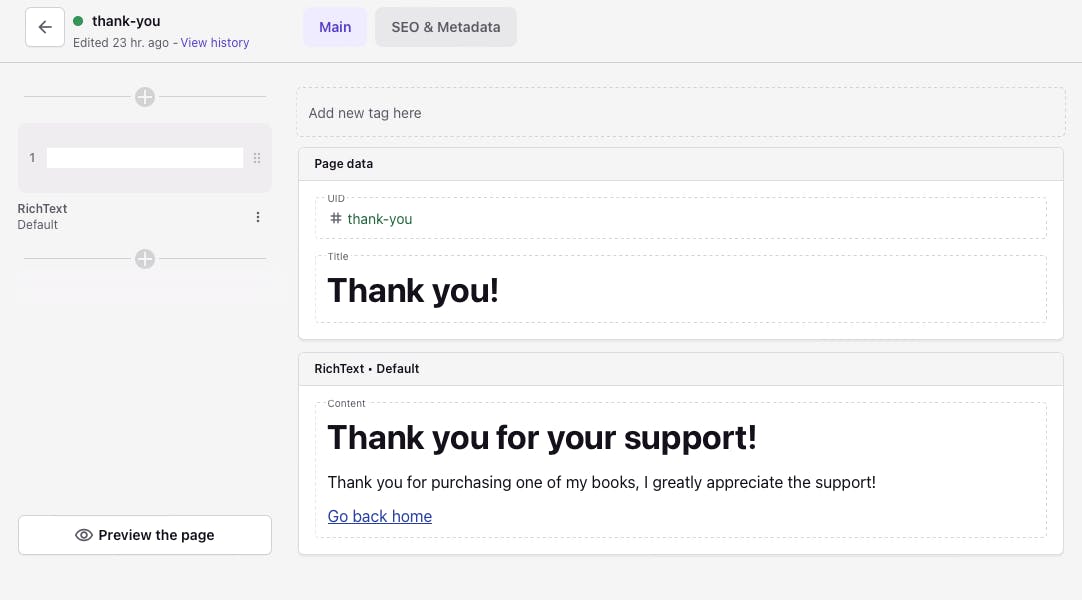
After pressing this button, a new page will open for you to customize. Populate the fields and add a new RichText slice by clicking "Add slice" on the left. Add the content shown in the screenshot below. Then press “Save” and “Publish” and you’ll have created your thank you page that we’ll redirect users to after completing a purchase.
How to set up Stripe and create our products
With our content in Prismic all configured, let’s focus on Stripe and configuring our products.
To do this, you’ll need a Stripe account, which you can create for free here. Then, once you have your account and you’re on your Stripe dashboard, head over to the “Developers” tab from the top menu and then click “API Keys” and copy your “Secret Key” from the dashboard.
Once you have your secret key, head back to your application and add it into a .env.local file (see example below). We’ll use this environment variable in the next section when we configure the Stripe SDK to pull through the data we configure in this section.
// ./.env.local
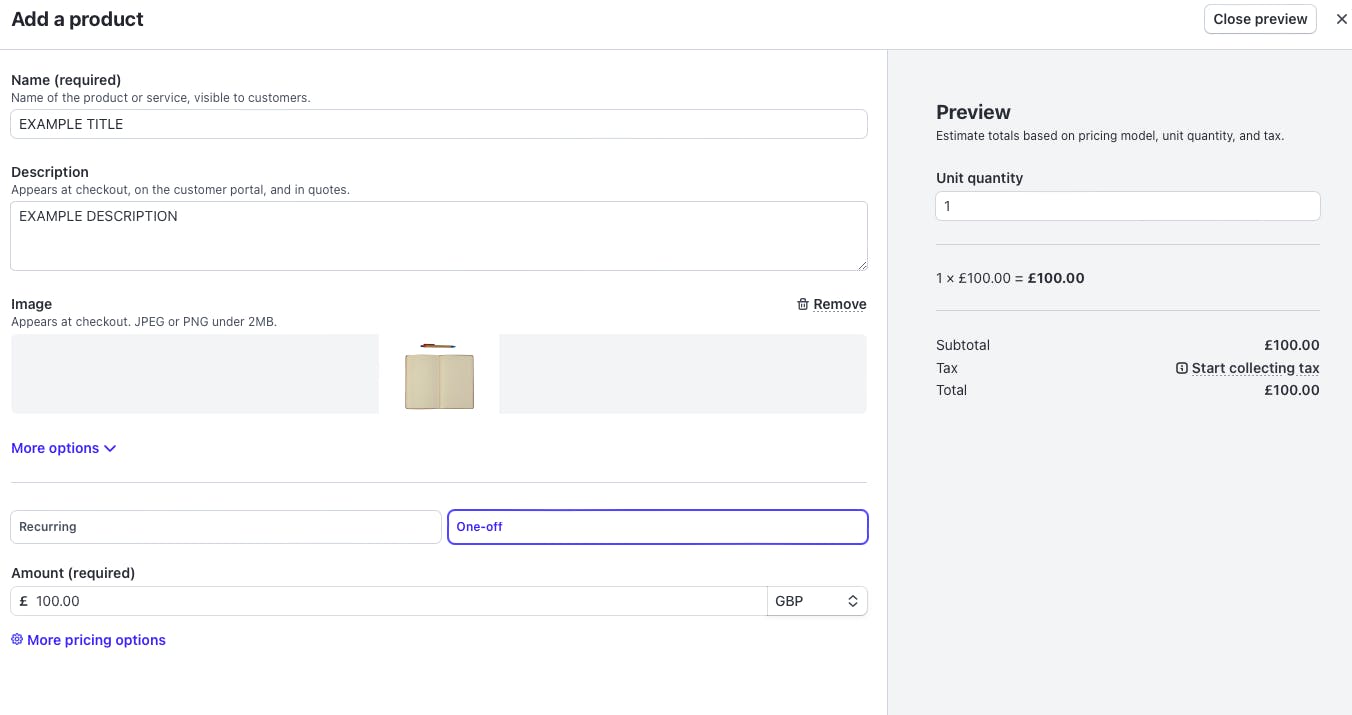
STRIPE_SECRET_KEY="INSERT_YOUR_SECRET_KEY"With your Stripe secret key added to the application, head back to your Stripe dashboard and then head to the product catalog page by searching for “Products” in the search bar. Once on your product catalog page, click the “Add Product” button and then populate the name, description, image, and price fields (make sure to use “one-off” pricing). Here is an example of the populated fields.
Once you’ve created one product, repeat this process a couple more times so you have three products in total to pull into your application for users to purchase. Once you have your three products created, you’re ready to move on to the next section!
Configuring Stripe in our application
With our products now configured on Stripe and our secret key added to our application, we’re ready to pull that data into our app and display our products for users to purchase.
How to Fetch Products from Stripe
To get started, we’re going to create a new utils directory inside the app directory. This directory will contain two utility functions, one for fetching our products from Stripe and another for creating the checkout links. Let’s focus on fetching the products from Stripe first, to do this create a new file inside our utils directory called get-stripe-products.ts and add the code below to it.
// ./get-stripe-products.ts

import Stripe from "stripe";

const stripe = new Stripe(process.env.STRIPE_SECRET_KEY || "", {
  apiVersion: "2024-04-10",
});

export async function getStripeProducts() {
  const { data } = await stripe.prices.list({
    expand: ["data.product"],
  });

  const products = data as (Stripe.Price & { product: Stripe.Product })[];

  return products;
}
In this file, we use the Stripe SDK to fetch all our products and prices from Stripe. We do this by first fetching all the prices we’ve created on Stripe and expanding their data.product field to then include their product’s data.
This is required because when we create checkout links in a moment, we need a Stripe price ID to create the checkout link against and this isn’t included in the product’s data. This is why we need to perform the lookup in what might seem a counterintuitive way of prices to products.
Creating Checkout Links
With our get-stripe-products.ts utility function now created, let’s turn our attention to creating checkout links, which we’ll do with a utility function that we’ll call on our home page before we render the products out.
To create this utility function add a new file called create-checkout-link.ts in the utils directory we created in the last step and add the code below to it.
// ./app/utils/create-checkout-link.ts

import Stripe from "stripe";

const stripe = new Stripe(process.env.STRIPE_SECRET_KEY || "", {
  apiVersion: "2024-04-10",
});

export async function createCheckoutLink(price: string) {
  const params: Stripe.Checkout.SessionCreateParams = {
    mode: "payment",
    line_items: [
      {
        price,
        quantity: 1,
      },
    ],
    success_url: `http://localhost:3000/thank-you`,
    cancel_url: `http://localhost:3000/`,
  };

  const checkoutSession: Stripe.Checkout.Session =
    await stripe.checkout.sessions.create(params);

  if (!checkoutSession.url) {
    throw new Error("Checkout session URL was undefined");
  }

  return checkoutSession.url;
}
In this file, we take in the price ID we mentioned in the last section when fetching the products from Stripe, and then we use that ID to create a new checkout session for it via the Stripe SDK. When creating the checkout session, we also define the success_url and cancel_url, which will be URLs the user is redirected to when they either complete a purchase or back out of one.
Finally, after creating the checkout session, we return the URL of the checkout link back from the function for us to display on the home page.
Displaying Our Products
With both our utility functions now complete, let’s now bring it all together and update our ./src/app/page.tsx file to display our products and allow users to purchase them using the links we generate!
To do this, replace your page.tsx file with the below code, taking into account the exported Index function.
// ./src/app/page.tsx

// ...rest of file

export default async function Index() {
  // The client queries content from the Prismic API
  const client = createClient();
  const home = await client.getByUID("page", "home");

  // Fetch all of our products from Stripe
  const products = await getStripeProducts();

  // Loop through our products and create checkout links for each of them.
  const productsWithCheckoutLinks = await Promise.all(
    products.map(async (prod) => {
      const checkoutLink = await createCheckoutLink(prod.id);

      return {
        ...prod,
        checkoutLink,
      };
    }),
  );

  return (
    <>
      {/* Display any slices from Prismic for this page */}
      <SliceZone slices={home.data.slices} components={components} />
      <section className="grid grid-cols-3 items-center w-full gap-20">
        {/* Loop through our products and display a product card for each of them */}
        {productsWithCheckoutLinks.map(
          ({ product: prod, unit_amount, checkoutLink }) => {
            if (!unit_amount) return;

            return (
              <div key={prod.id} className="flex flex-col items-center">
                <div className="flex flex-col gap-4">
                  <div className="w-64 h-64 relative rounded-lg overflow-hidden">
                    <Image src={prod.images[0]} alt="" fill />
                  </div>
                  <div className="self-start">
                    <h2 className="text-xl font-bold">
                      {prod.name} : £{unit_amount / 100}
                    </h2>
                    <p className="text-base max-w-[256px]">
                      {prod.description}
                    </p>
                  </div>
                  <a
                    className="w-full bg-slate-700 text-white font-bold py-2 px-4 rounded-lg"
                    href={checkoutLink}
                  >
                    Buy Now
                  </a>
                </div>
              </div>
            );
          },
        )}
      </section>
    </>
  );
}
If you visit our project in your browser after updating the page.tsx file to look like the above code, you’ll notice that we receive an error from Next.js informing us that we’re using an invalid src prop. This is because we haven’t configured Next.js to allow images hosted on Stripe’s servers, so let’s do that now by updating our next.config.mjs file to look like the below.
// ./next.config.mjs

/** @type {import('next').NextConfig} */
const nextConfig = {
  images: {
    remotePatterns: [
      {
        protocol: "https",
        hostname: "files.stripe.com",
      },
    ],
  },
};

export default nextConfig;
Now, with our config file updated, we should have a working home page that displays our three products from Stripe and generates checkout links for them allowing users to purchase them.
Testing our complete headless commerce application
With all of the code now added to the project and updated, our example project is finished, so the last thing we need to do is test it to make sure everything is working as expected. To do this, load up our local development server on localhost:3000 and then follow one of the checkout links, and use the Stripe test card details to purchase one of the products. After completing the purchase, you should be redirected to our /thank-you page we created earlier. Here is an example of what that should look like.
Closing Thoughts
With our project now finished and working as expected, the tutorial is complete! In this tutorial, we looked at how to build an example headless commerce application that uses Prismic for content and Stripe for handling our product catalog and payment handling.
If you would like to learn more about Stripe, make sure to check out their documentation. And, if you would like to learn more about headless commerce make sure to check out our guide on it.
Thank you for reading.
Further learning
Build a full Next.js website with Next.js, Tailwind CSS, Prismic, and TypeScript!
If you're looking to take your skills to the next level, try this Next.js full website tutorial course! See the power of Prismic as a Headless website builder alongside Next.js, the popular React framework. In this tutorial, you'll create a trendy, dark, and modern website and use GSAP to add wonderful animations, both on page load and on scroll. You'll also use Tailwind CSS to style the super-polished website.


