Integrating Comments in a Next.js Blog with Supabase and Slack


Enhancing static websites with interactivity not only enriches the user experience but also invites users to actively engage with your site. Fortunately, tools like Supabase make it easier than ever to integrate interactivity. Supabase enables developers to create and deploy modern, feature-rich applications without the need to manage multiple backend systems.
In this step-by-step guide, we'll learn how to create an interactive Next.js blog by integrating commenting functionality using Supabase and Slack. We'll highlight the simplicity and scalability of Supabase, which makes it suitable for both small teams and large enterprises.
The guide covers the following topics:
- Configuring Supabase.
- Integrating Supabase in a Next.js application.
- Enabling comment moderation through Slack.
By following the instructions in this blog post, readers can learn how to use Next.js and Supabase to enhance interactivity on their own static websites.
What is Supabase?
Supabase is an open-source alternative to Firebase that aims to offer developers a thoroughly baked back-end service. By providing tools and capabilities such as a real-time database, user authentication, auto-generated APIs, and storage, it facilitates the establishment of full-stack applications with ease and speed.
Supabase uses popular, production-ready open-source tools, including PostgreSQL database, PostgREST, and GoTrue, and knits them into a cohesive, manageable platform. It maintains the granularity and flexibility of these tools while still providing the integration and ease of use of an all-in-one backend service.
Being open-source and easy to use, Supabase removes the need to manage multiple backend systems and allows developers to create feature-rich, full-stack apps.
Whether you're a small team needing a quick tool to get your app off the ground or a larger enterprise requiring a robust back-end service, Supabase offers an efficient and scalable solution.
In essence, Supabase impresses as a foundational platform offering a free, scalable, and fast back-end service for your next web or mobile application.
Building interactivity into a static site with Supabase
This guide will help you install and configure Supabase in a Next.js application. It will also show you how to add comment moderation through Slack. We will use a recent version of Next.js and the app router and configure it with Prismic as a CMS.
Downloading our blog starter
To make this setup simple, we will use a preconfigured blog starter. We can get this installed in just a couple of steps:
- Login or create a Prismic account.
- Run the following commands in your terminal to install the starter.
npx degit https://github.com/prismicio-community/nextjs-starter-prismic-blog nextjs-starter-prismic-blog

cd nextjs-starter-prismic-blog

npx @slicemachine/init@latest
In your terminal, you'll be prompted to give your repository a name and asked if you want to open Slice Machine. We won’t modify any slices for our project since we utilized a starter, so you don't need to run it, but if you're curious, you can run it and then access the UI at http://localhost:9999/.
Now, in a new tab in your terminal, cd into your project and run npm run dev.
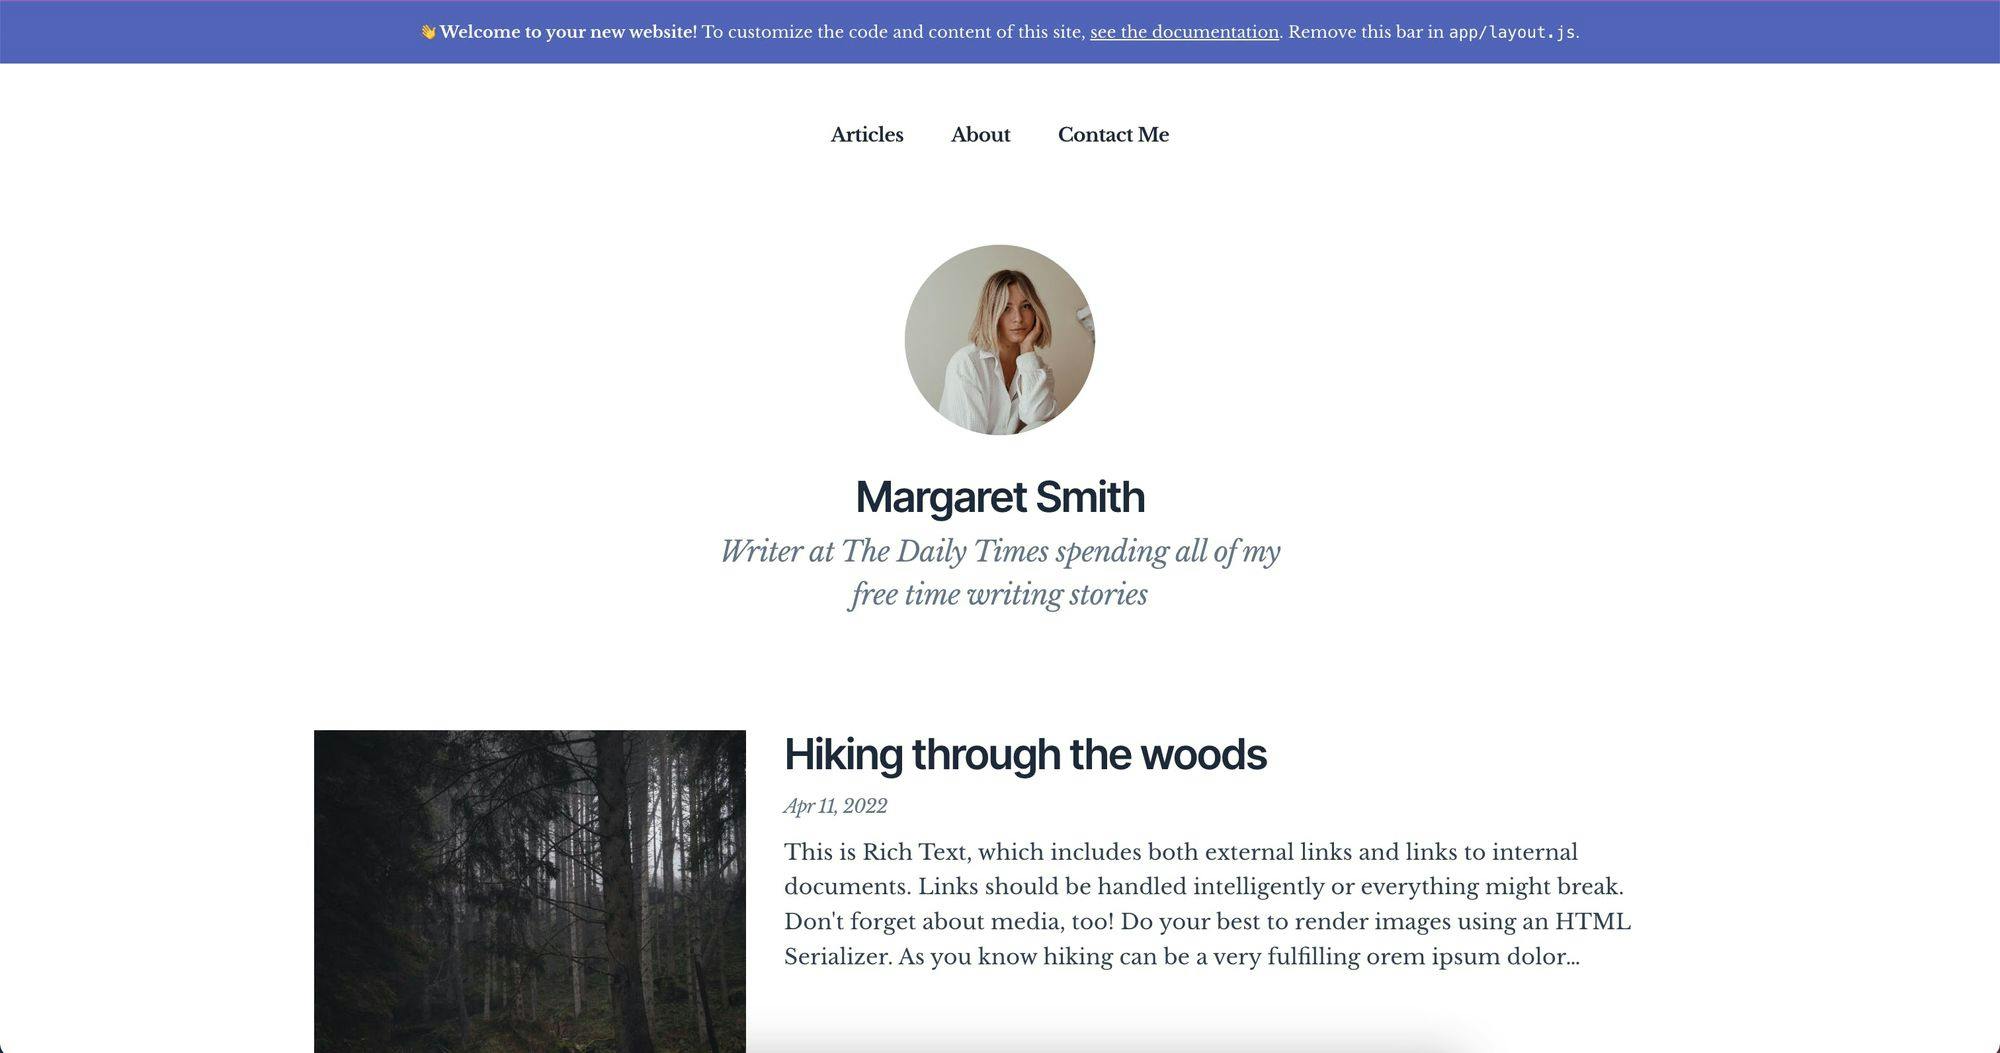
If you go to http://localhost:3000/, you can see our blog starter.
Now, let's open our project in our favorite IDE and get started building our Supabase app!
Initial Setup
Before we start building the app, we need to get some things in place. So, let’s get started with these simple steps. 👇🏻
1. Create a Supabase Account
To get started, we first need a Supabase account. Start by creating one.
2. Install the needed packages
To interact with our database over at Supabase, we need to install Supabase’s SDK. You can do that by running npm i @supabase/supabase-js in your newly created project.
Setting up the database
On your Supabase dashboard, you should see a green button for creating a new project; let’s do that.
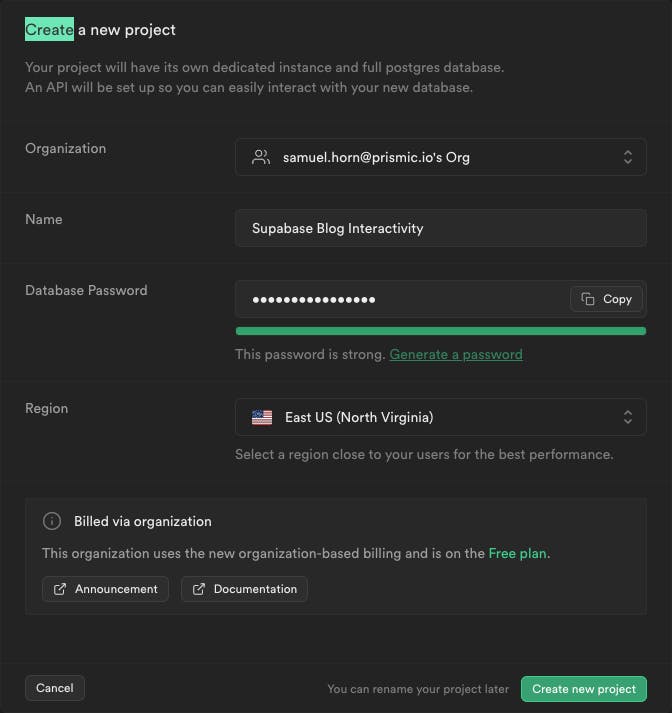
Once on this screen, give your project a suitable name, choose a region, and set a secure password. Finally, click on "Create new project".
Once your project is created, you will land on the project's dashboard. To integrate your API keys for future communication with Supabase, click on the settings cog icon in the bottom of the left sidebar. Then, navigate to the API section, where you'll find your API keys.
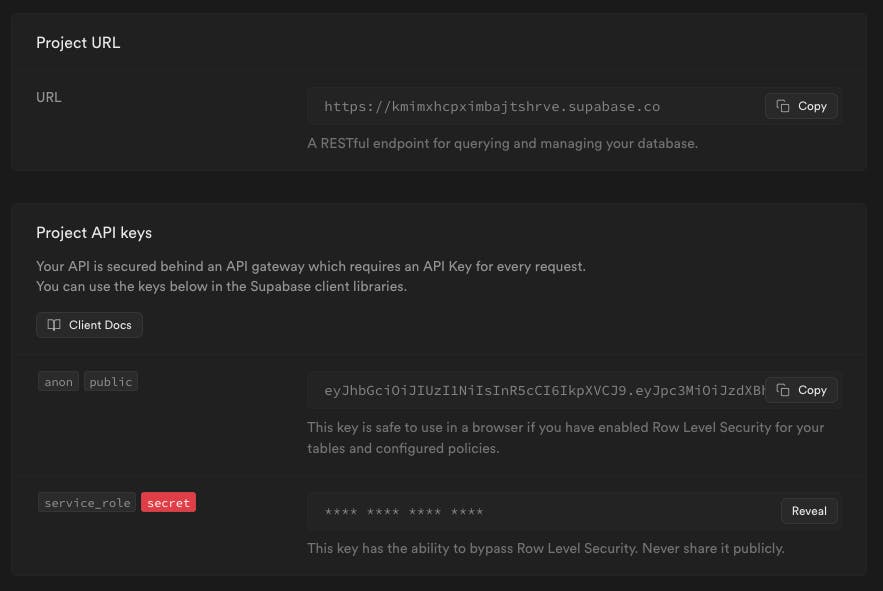
To add these to your app, create a file named .env.local in your project's root directory. Then, add the following three environment variables to the file:
NEXT_PUBLIC_SUPABASE_URL=<Your URL>
NEXT_PUBLIC_SUPABASE_CLIENT_KEY=<Your anon public key>
SUPABASE_SERVICE_KEY=<Your service role>
Now, let's create a table to store our comments. Go to the Supabase project dashboard and navigate to the tables section in the sidebar. Click on "Create a new table" and name it "comments" - all lowercase.
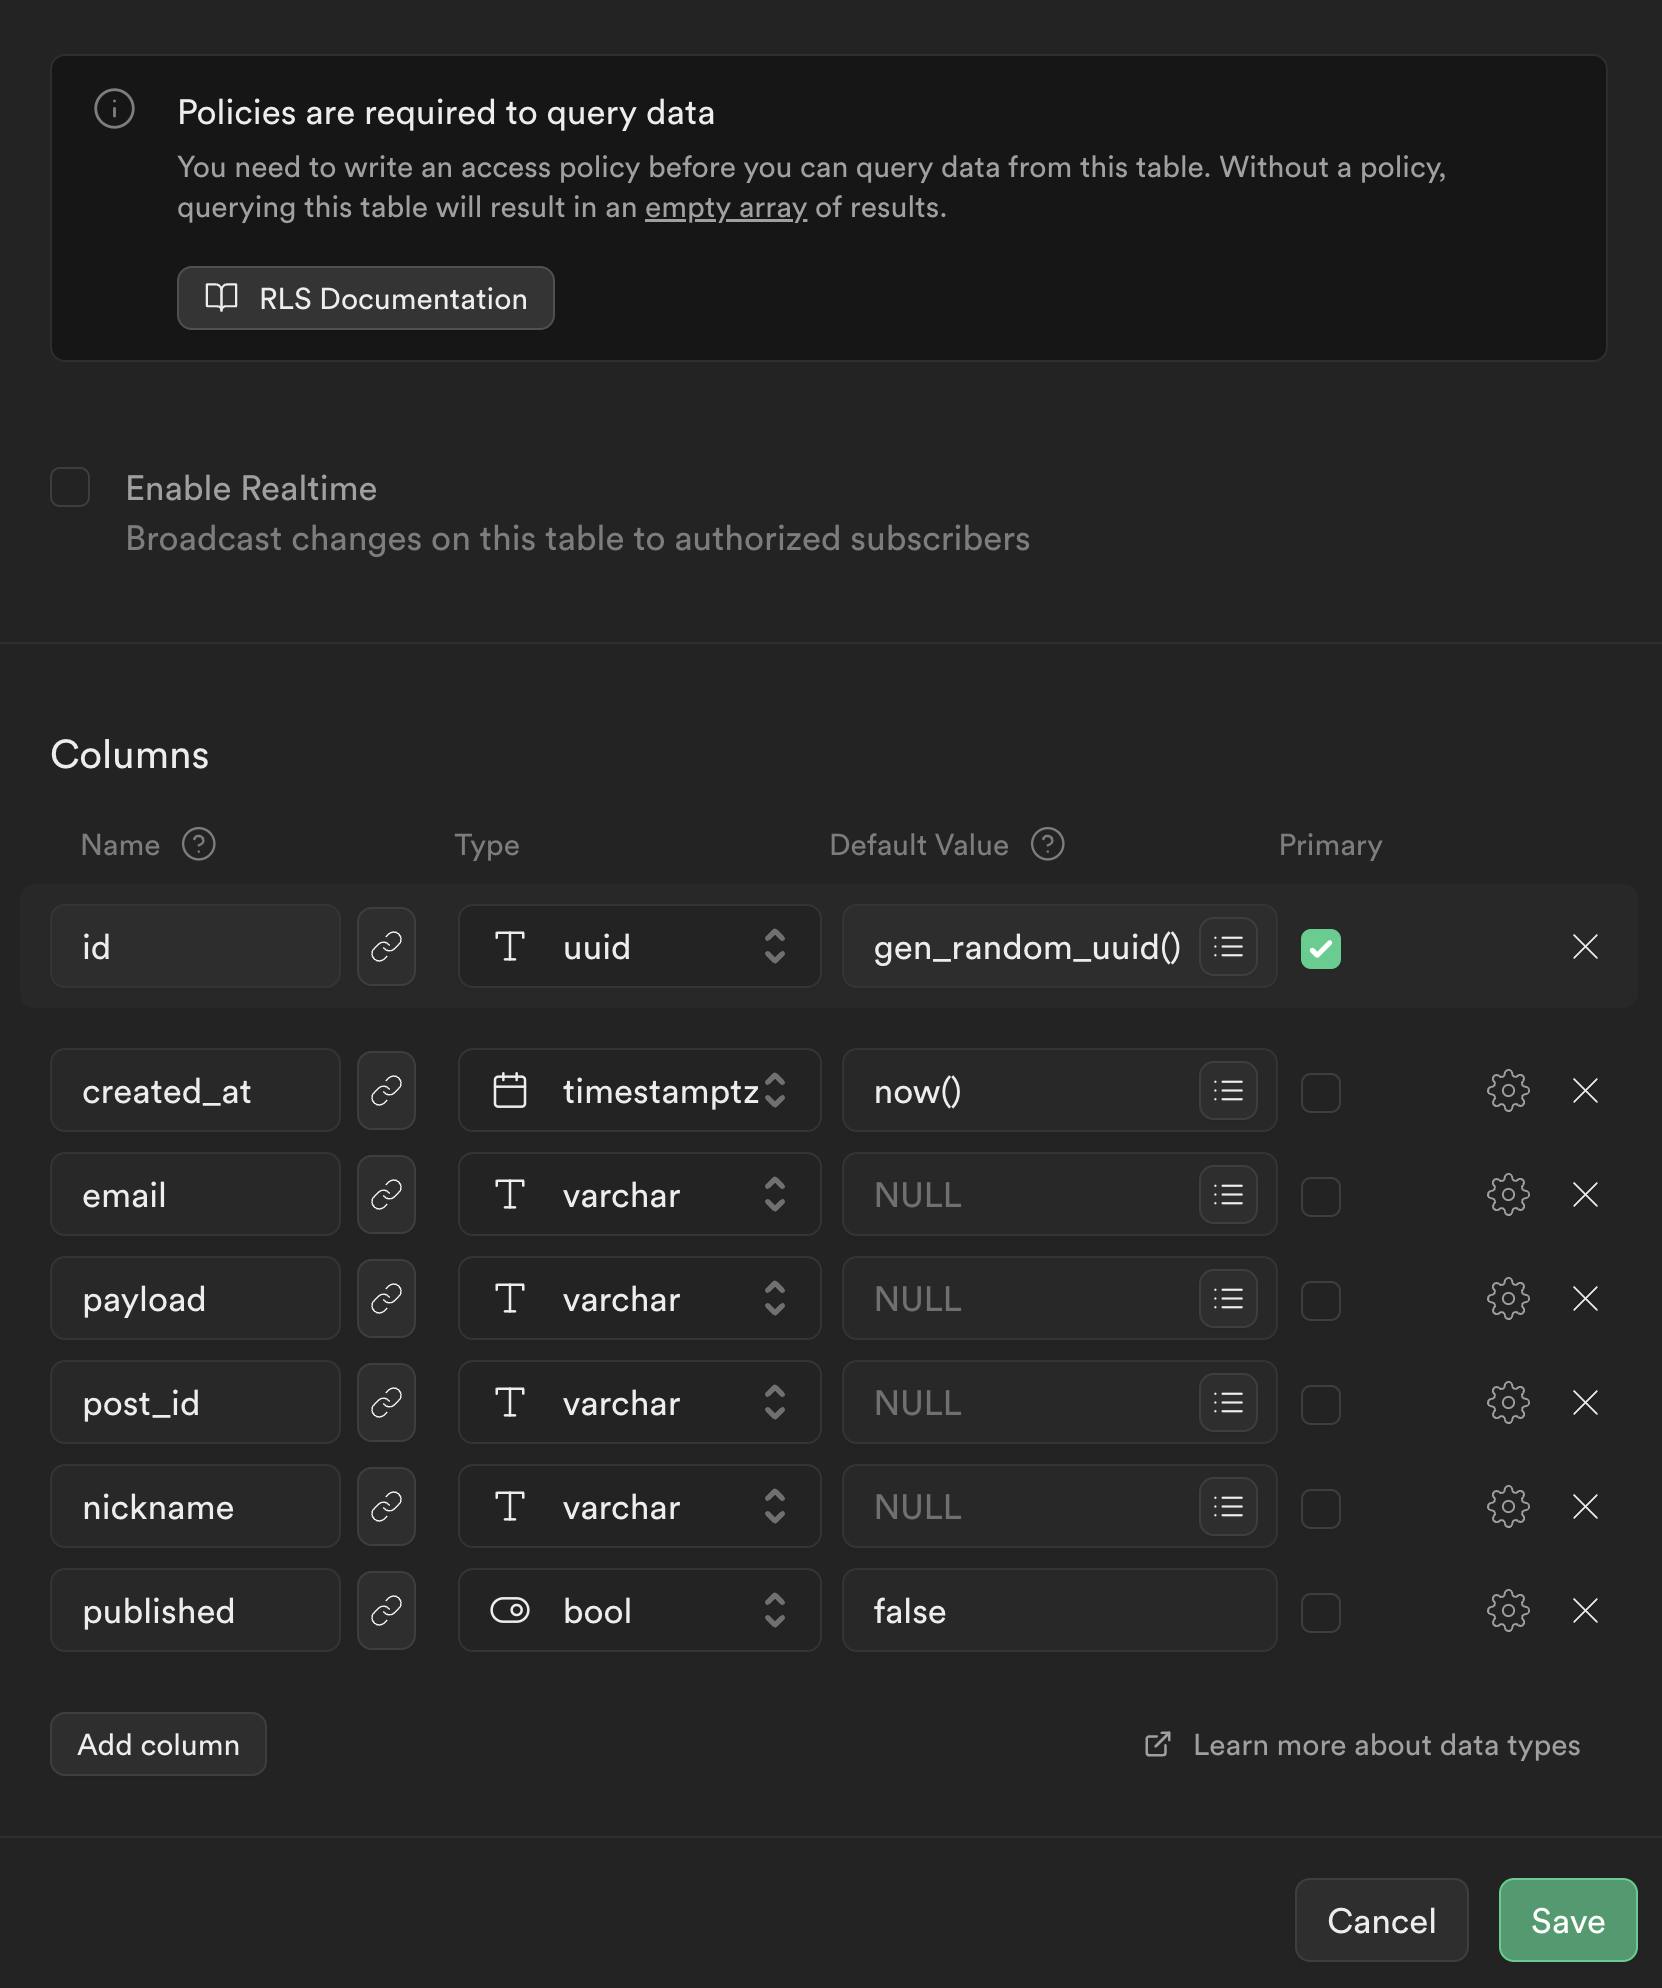
Fill in the table with the following information:
Let’s go through what we have here in terms of database rows:
id: This will be populated with a randomuuidto identify that specific comment. It will also be used as the primary row.created_at: This will be filled with a timestamp reflecting the time this comment was created. We will use this to show when it was created on the front end and also to show comments in the correct order.email: Here, we will fill in the users' email from the form when they submit a comment.payload: This will be the content of the comment, also submitted by the user.post_id: We will populate this with the blog post ID from Prismic to know which post to reference this comment to.nickname: Filled in by the user when submitting the form, it will be the display name on the front end.published: Make sure to make this false by default, to only make comments visible when we have approved them.
On your screen, you will notice a notification on the settings cogs for all fields except the first two. This indicates that these fields are nullable. However, we don't want any field to be nullable. To fix this, click on each cog, deselect the "is nullable" option, and save the table.
Building our commenting form
Before creating the actual form, let’s create a client that we can use to communicate with Supabase in our project. Where you put this is a personal preference, but I will put mine in ./src/lib/supabase.
In this directory, create a server.js file and add the code below:
// ./src/lib/supabase/server.js

import { createClient } from "@supabase/supabase-js";

const supabaseUrl = process.env.NEXT_PUBLIC_SUPABASE_URL || "";
const supabaseKey = process.env.SUPABASE_SERVICE_KEY || "";

const supabase = createClient(supabaseUrl, supabaseKey);

export { supabase };
A note about our Supabase Key
Note that we’re using the SUPABASE_SERVICE_KEY here. This key can bypass Supabase’s row-level security and is easier to use without too much additional setup. It’s safe to use since we will only interact with our Supabase client server side. If you, for some reason, need to interact with Supabase client side, create a similar file called client.js, only changing the key to use NEXT_PUBLIC_SUPABASE_CLIENT_KEY from our .env file instead.
Now that we have the client all set up and ready to go, it’s time to build our form.
To do that, let’s create a component by creating a new file at ./src/components/Comments.js.
// ./src/components/Comments.js

"use client";

import { Bounded } from "./Bounded";
import { Heading } from "./Heading";
import { useState } from "react";

export function Comments({ id, uid }) {
  const [comment, setComment] = useState("");
  const [email, setEmail] = useState("");
  const [nickname, setNickname] = useState("");

  const onSubmit = async (e) => {
    e.preventDefault();
    console.log("comment", comment);
    console.log("email", email);
    console.log("nickname", nickname);
    console.log("post_id", id);
  };

  return (
    <Bounded>
      <Heading as="h2" size="3xl">
        Share your thoughts
      </Heading>
      <form onSubmit={onSubmit}>
        <div>
          <label htmlFor="comment" className="mb-2 mt-6 text-lg block">
            Comment
          </label>
          <textarea
            id="comment"
            onChange={(e) => setComment(e.target.value)}
            placeholder="Your comment"
            className="w-full border p-4"
            value={comment}
          />
        </div>
        <div>
          <label htmlFor="email" className="mb-2 mt-6 text-lg block">
            Email
          </label>
          <input
            id="email"
            onChange={(e) => setEmail(e.target.value)}
            type="email"
            placeholder="Your email"
            className="w-full border p-4"
            value={email}
          />
        </div>
        <div>
          <label htmlFor="nickname" className="mb-2 mt-6 text-lg block">
            Nickname
          </label>
          <input
            id="nickname"
            onChange={(e) => setNickname(e.target.value)}
            type="text"
            placeholder="Your nickname"
            className="w-full border p-4"
            value={nickname}
          />
        </div>
        <button className="p-4 bg-slate-700 text-white mt-6" type="submit">
          Send comment
        </button>
      </form>
    </Bounded>
  );
}
For now, this is just a simple form that logs the form fields on submission. We give it props for the post uid and id since we will need them when we store the comment in our comments table created earlier.
Now, import this component in ./src/app/articles/[uid]/page.js simply by adding the import at the top of the file, just below your other imports.
import { Comments } from "@/components/Comments";Then, place the component right below the <SliceZone /> on line 104, passing the post’s id and uid.
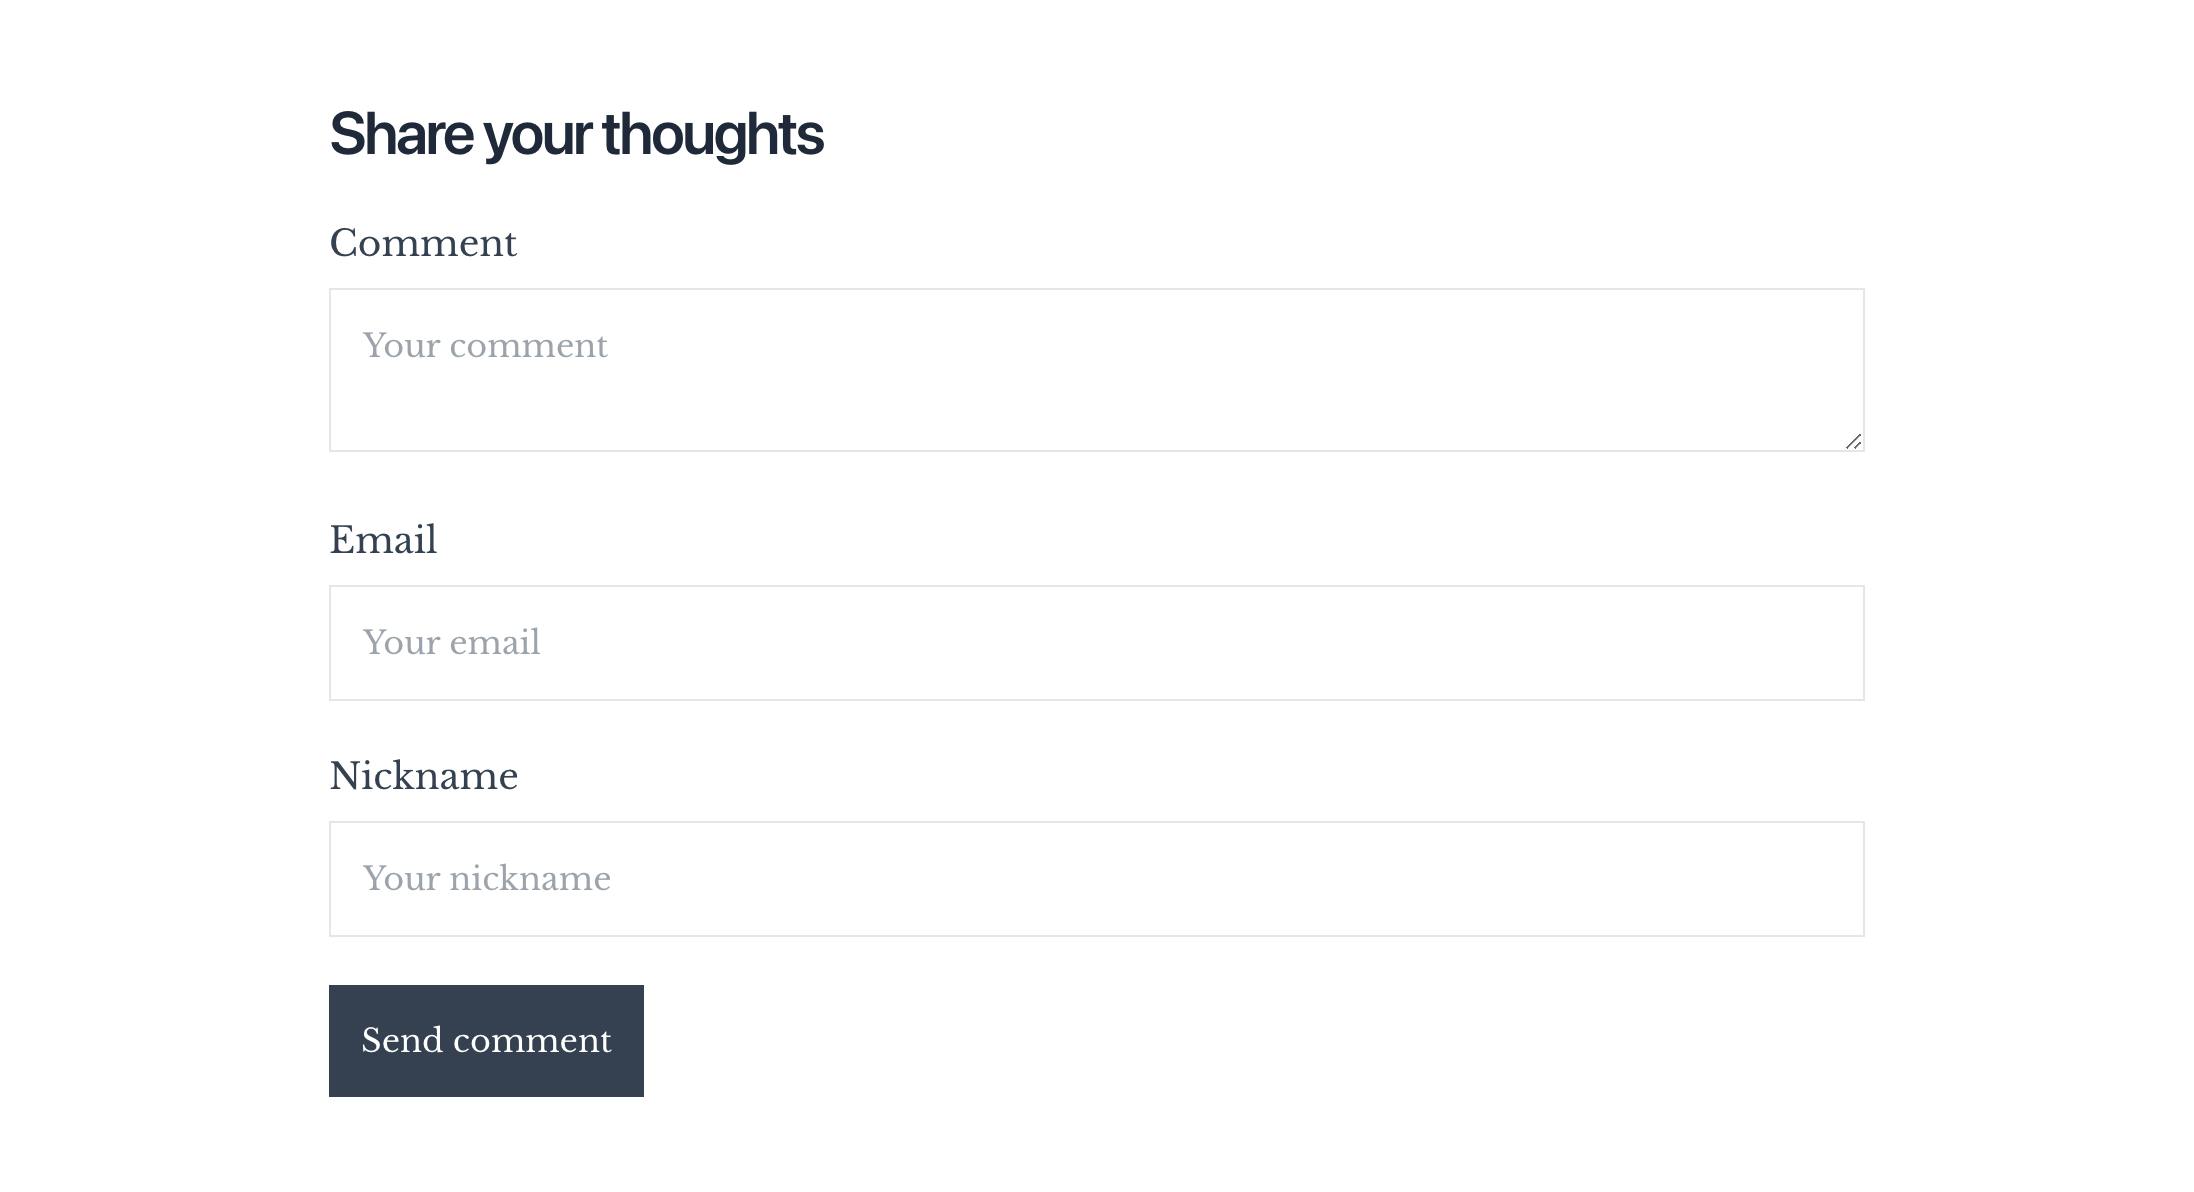
<Comments id={article.id} uid={article.uid} />When saving, you should have a form looking like this right below your post content on an individual post page (for example, if you navigate to http://localhost:3000/articles/hiking-through-the-woods). If you fill it out and look in your browser's console, you should see the filled data logged there when submitting.
Submitting our form data to Supabase
Now, we will attempt to submit this data to Supabase. To achieve this, we require an API route to handle our additions on the server side.
To do that, create a new file in ./src/app/api/comments/submit/route.js.
// ./src/app/api/comments/submit/route.js

import { supabase } from "@/lib/supabase/server";
import { NextResponse } from "next/server";

export async function POST(req) {
  const body = await req.json();

  const { post_id, email, comment, nickname, uid } = body;

  const { data, error } = await supabase
    .from("comments")
    .insert({
      post_id,
      email,
      nickname,
      payload: comment,
    })
    .select("id");

  if (error) {
    return new NextResponse(JSON.stringify({ error: error.message }), {
      status: 500,
    });
  }

  return new NextResponse(JSON.stringify({ success: true }), {
    status: 200,
  });
}
In this file, we use the Supabase client we created for server-side operations earlier. Then, we create a POST request that will await the Supabase client, selecting the comments table we created earlier. Then, in that table, do an insert operation, submitting the post_id, email, nickname, and payload. If we get an error from Supabase, we return a response with a 500 status containing the error message; else, we return a 200 response.
Now, let’s update our <Comments /> component in ./src/components/Comments.js to use this route for submitting a comment. First, we need to update the rather basic onSubmit() function to look like this:
const [loading, setLoading] = useState(false);

const onSubmit = async (e) => {
    e.preventDefault();
    setLoading(true);

    await fetch(`/api/comments/submit`, {
        method: "POST",
        headers: {
        "Content-Type": "application/json",
        },
        body: JSON.stringify({
        post_id: id,
        nickname,
        email,
        comment,
        uid,
        }),
    }).then((data) => {
        if (data.error) {
        console.error(data.error);
        } else {
        setLoading(false);
        setComment("");
        setEmail("");
        setNickname("");
        }
    });
};
This is now setting a loading state while submitting, which we added to our list of useState() constants just above the function.
Then, it calls the API route we just created, sending our form data as JSON in the body.
If we get an error from the API, we log it for now; else, we clear the form and set the loading state back to false, indicating the form has been submitted.
To show the user that the form is submitting, we can alter the "submit" button when it's in the loading state. In ./src/components/Comments.js, swap the code for the button element for this:
<button
    className="p-4 bg-slate-700 text-white mt-6 disabled:opacity-50 disabled:cursor-not-allowed"
    type="submit"
    disabled={loading}
>
    {loading ? "Loading..." : "Send comment"}
</button>
Confirmation messages
It's a good idea to include a confirmation message in your form, letting users know their comments have been submitted and will be reviewed before approval. However, we won't cover that part in detail to keep this tutorial concise.
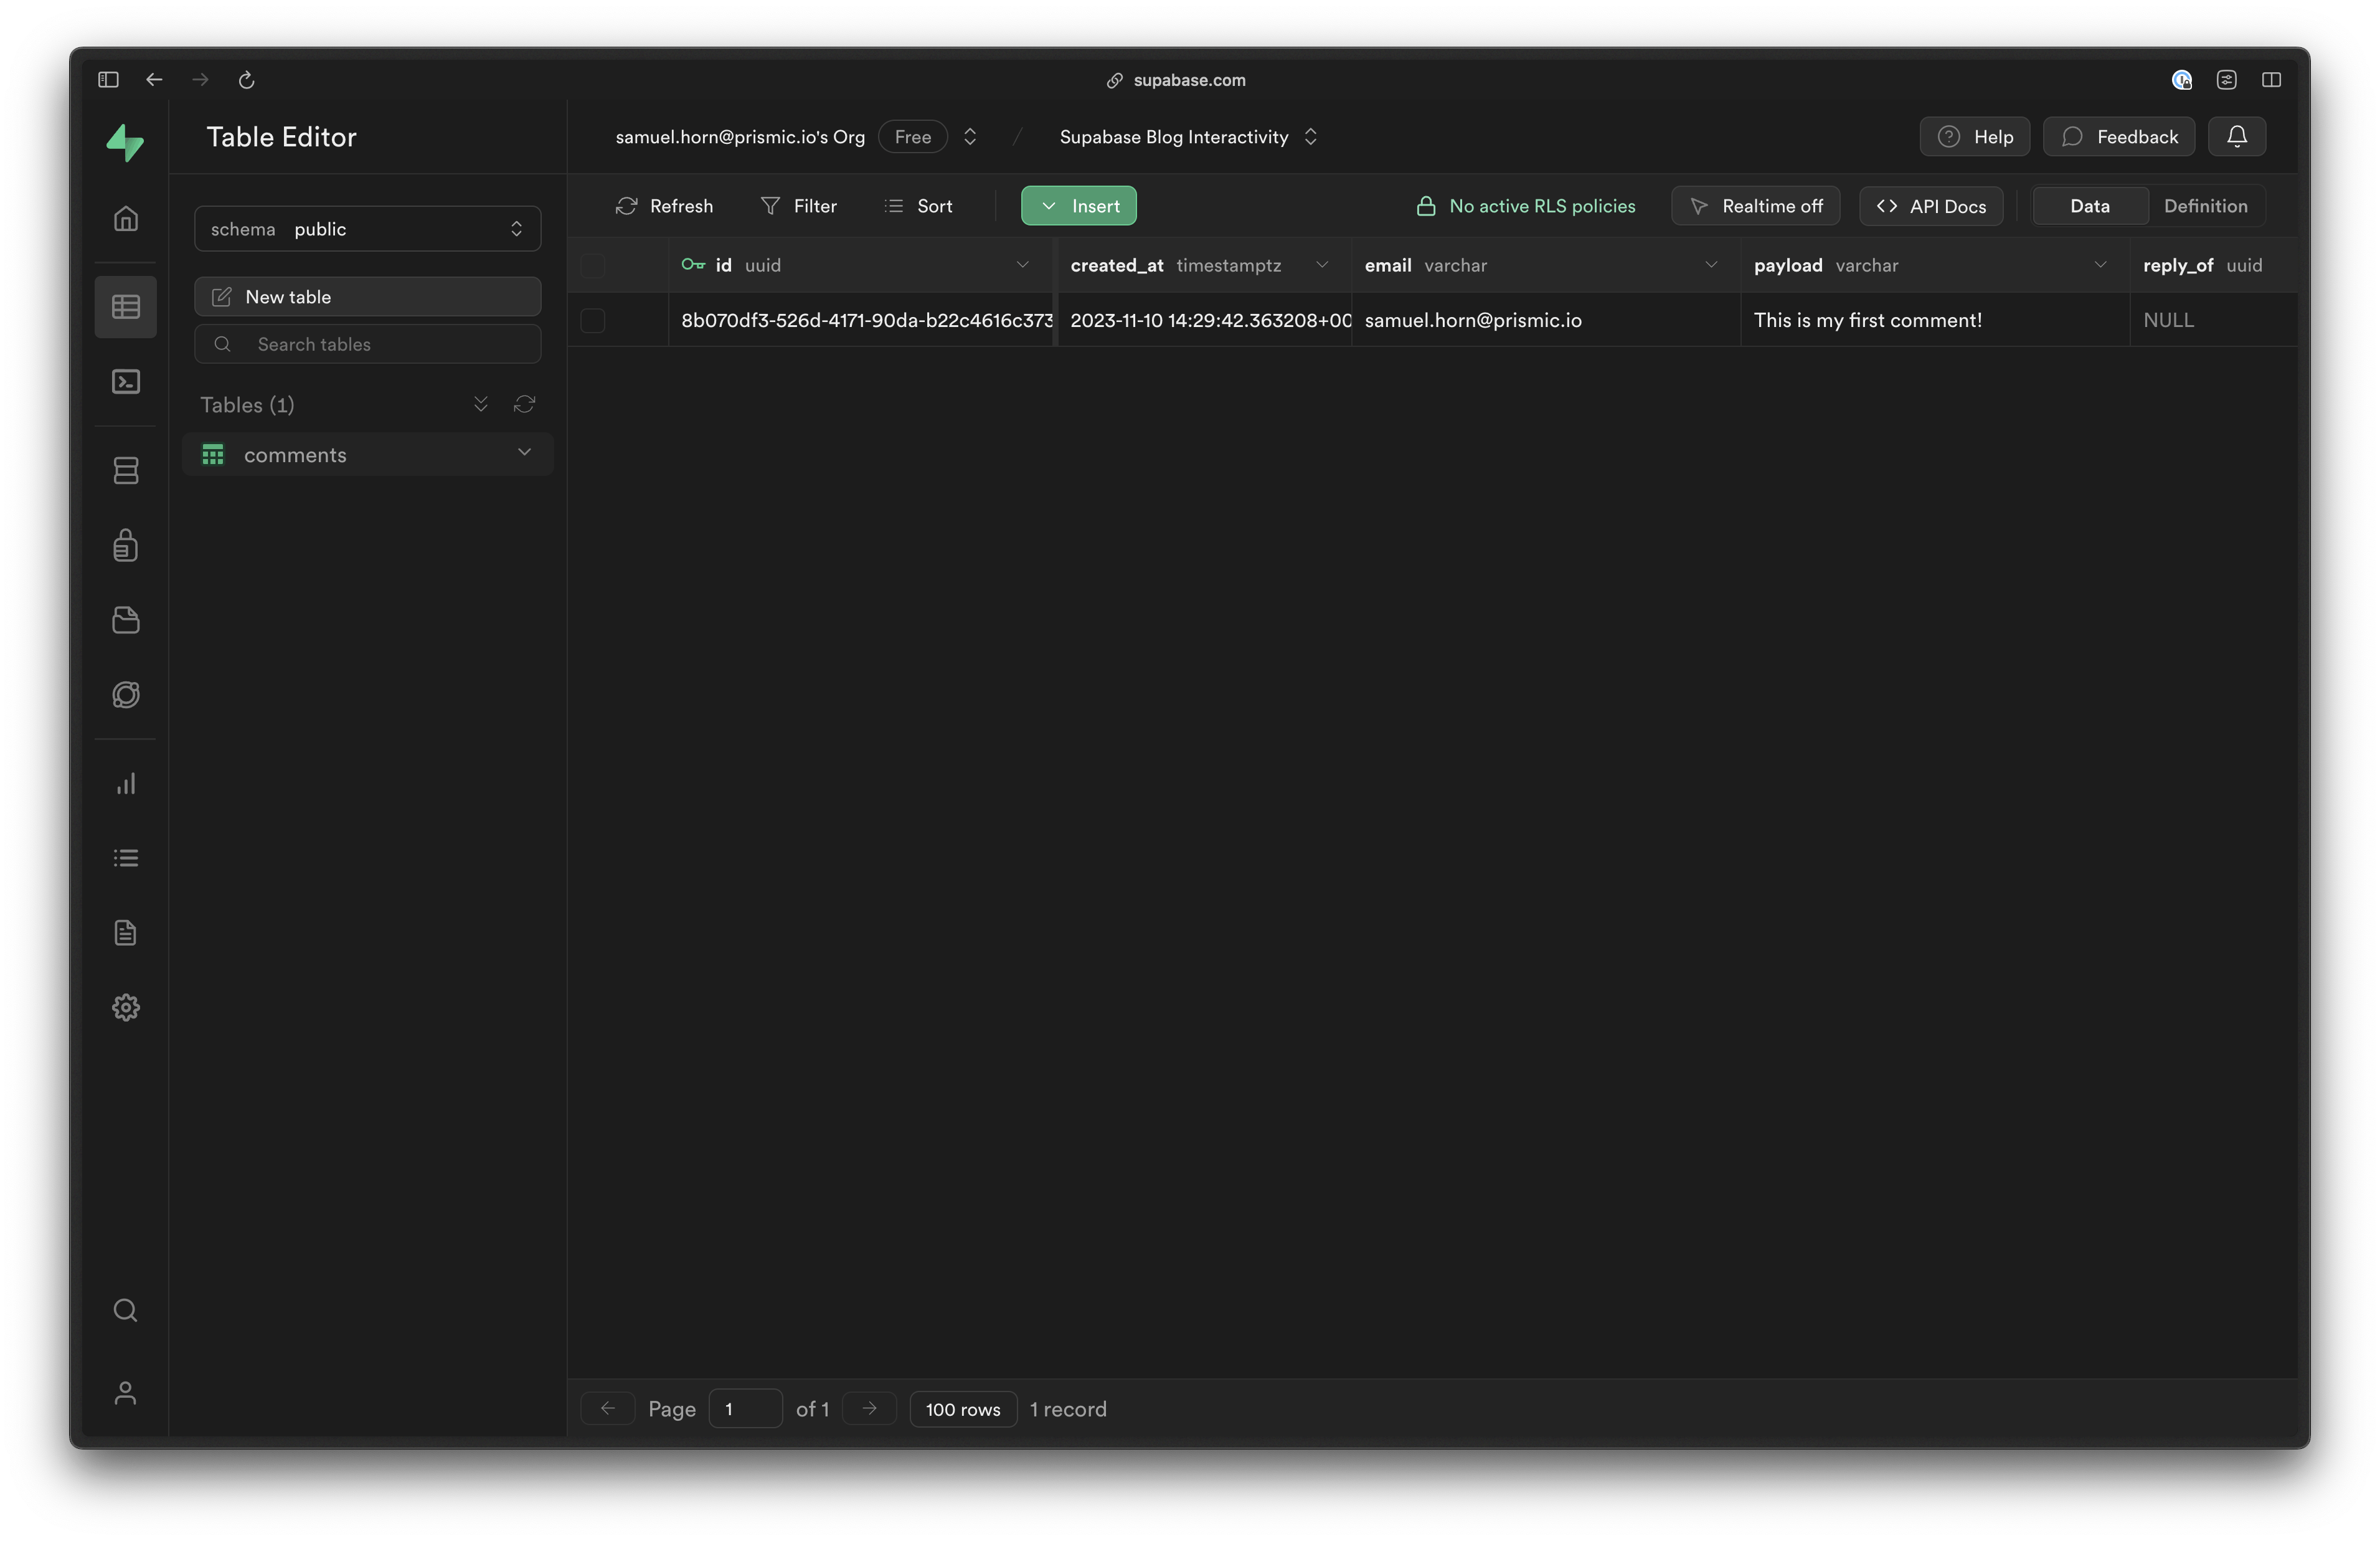
Now, everything should be set up so we can submit our first comment. When we submit the comment, it will populate our comments table in Supabase.
Make sure to check the comments table in the table editor. It should look like this:
Listing comments on the post
🎉 Congrats on successfully posting the first comment! Now that we have it in the database, we can render it on the front end, so let’s do that!
To statically generate our comment along with the article, we can fetch the comments together with the article itself. Navigate to ./src/app/articles/[uid]/page.js where we already have a Server Component. Import the server client for Supabase at the top of the file.
import { supabase } from "@/lib/supabase/server";And then in the Page() function of the same file, somewhere after we fetch our article, fetch our comments for it as well:
const comments = await supabase
  .from("comments")
  .select("post_id, nickname, payload, created_at, id, published, email")
  .eq("post_id", article.id)
  .order("created_at", { ascending: true });
Then we can pass these comments to the <Comments /> component. To do so, swap out the <Comments /> component in ./src/app/articles/[uid]/page.js with the following code:
<Comments id={article.id} uid={article.uid} comments={comments.data} />Now, head back to that component in ./src/components/Comments.js to handle these comments.
First, we need to feed the component with the comments property.
export function Comments({ id, uid, comments }) {Then, right above our comment form, we add this:
{comments.length > 0 && (
	<>
	  <Heading as="h2" size="3xl" className="mt-12">
	    What people are saying
    </Heading>
    {comments.map((comment, index) => (
      <div className="p-6 border my-4" key={index}>
				<header className="text-sm">
		      {`Posted by ${comment.nickname} on ${new Date(
	          comment.created_at
          ).toLocaleTimeString("en-US", {
	          year: "numeric",
            month: "short",
            day: "numeric",
          })}`}
        </header>
        <p className="mt-4">{comment.payload}</p>
      </div>
    ))}
  </>
)}
The code verifies that comments exist, shows the headline, and then maps through the comments to print the nickname, date, and payload of each comment.
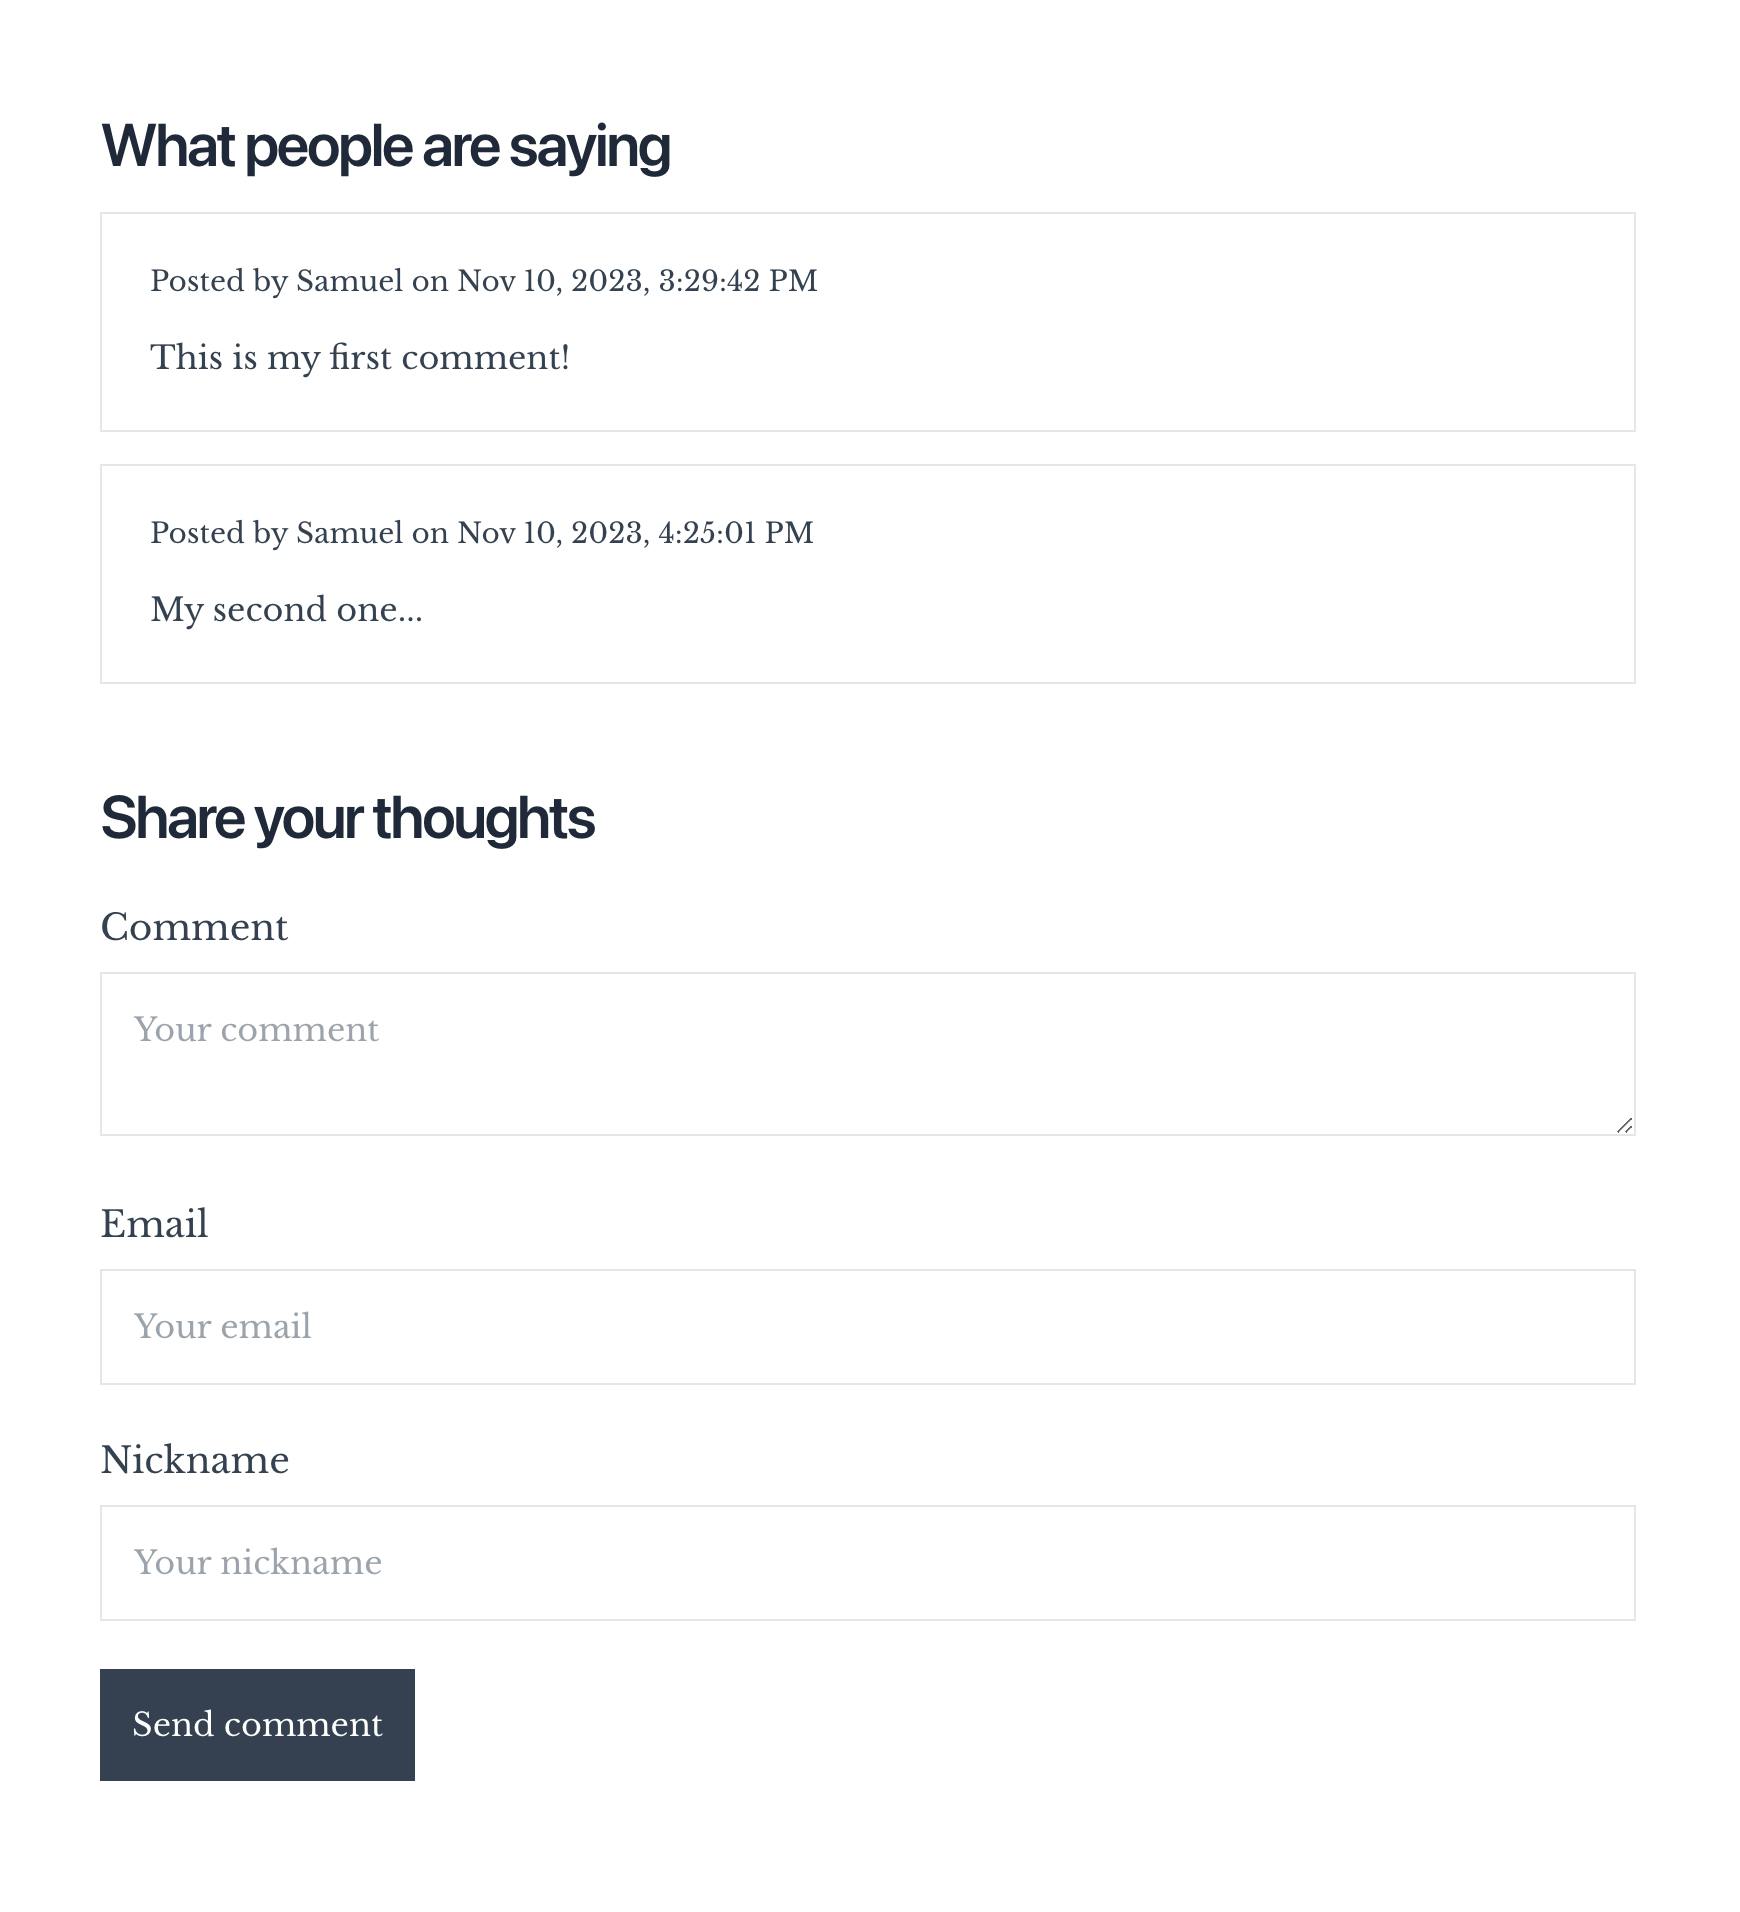
We now have a functional commenting system. Posting a comment on a post will display it in the next site rebuild. In development mode, it will appear after refreshing the page.
To confirm it's working, post another comment and refresh the page. You should see something similar to this.
This should be sufficient, but you may want to moderate the comments. Remember that we added a "published" column in the commenting table. Let's use this to exclude unapproved comments. To do that, we can add a check while retrieving comments on our article page in ./src/app/articles/[uid]/page.js. I've commented on the line of code to add to fetch only published comments below:
const comments = await supabase
  .from("comments")
  .select("post_id, nickname, payload, created_at, id, published, email")
  .eq("post_id", article.id)
  .eq("published", true) // only fetch published comments
  .order("created_at", { ascending: true });
After adding this, refresh the page to see that the comments have disappeared.
We could stop here and start monitoring our Supabase database and manually updating the "published" value from false to true for the comments we want to include in the next build. However, there is a better solution.
To enhance the workflow for Prismic.io, I implemented a moderation process in Slack. Whenever a comment is submitted, we receive a notification in a designated channel. Moderators can then choose to approve or reject the comment. Now, let's explore how to implement this feature.
Building commenting moderation within Slack
To create comment moderation in Slack, we will assume you already have a Slack account. We also need to have our app deployed online to send webhooks from Slack.
So, first, let’s deploy our app to Vercel.
Not signed up for The Optimized Dev?
Staying on the leading edge of web development just got easier. Explore new tech with a fun, scaffolded coding challenge that lands in your inbox once a month.

Deploying to Vercel
When deploying to Vercel, don’t forget to add the environment variables we have in .env.local to our environment variable section on Vercel.
Then, logged in to your Slack account, head over to their API dashboard and create a new app.
Give your app a suiting name and select the workspace you want to add it to.
Once your app is created, activate the feature “Incoming Webhooks”, and connect it to a channel you want the moderation messages to appear in. For the sake if this tutorial, I’m just connecting it to my own DM’s.
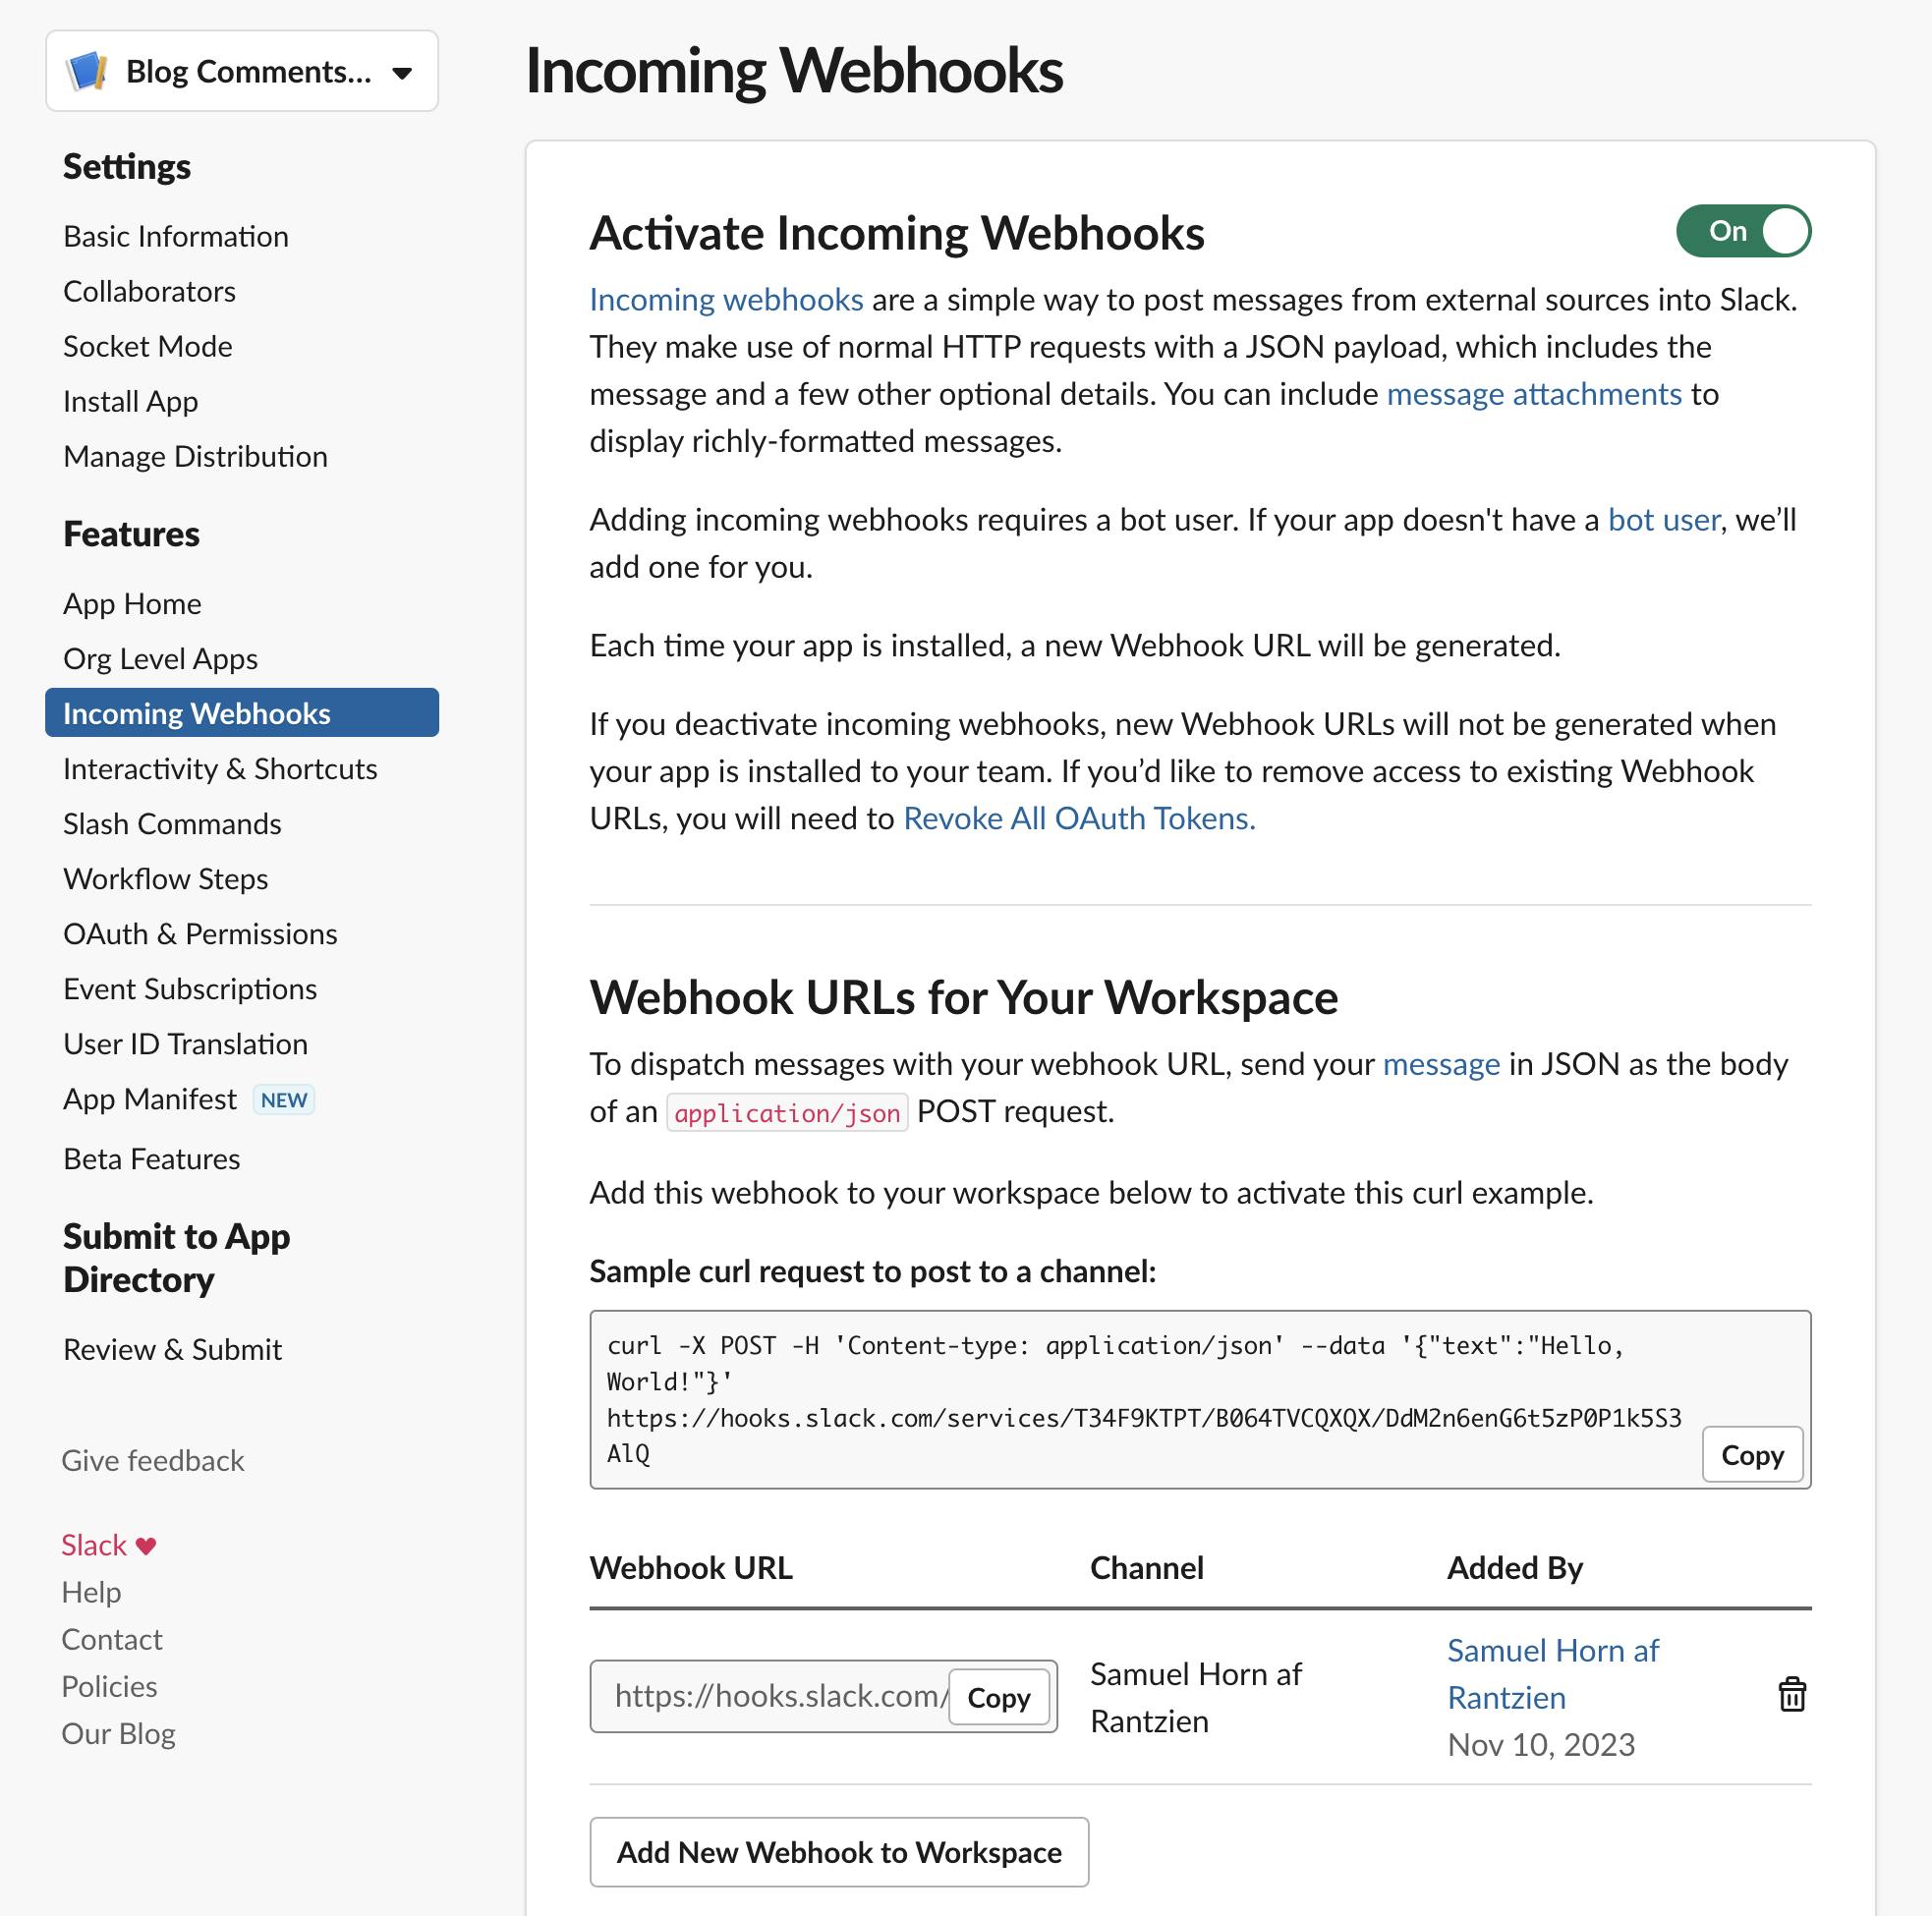
Once this is done, we have a webhook we can use to send messages to the connected channel.
Let’s try this out by editing our ./src/app/api/comments/submit/route.js to send a message to Slack when a comment is successfully submitted. Update this file with the following code, making sure to replace the hook URL (https://hooks.slack.com/services/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) with your own Webhook URL previously created on the Slack dashboard (copy from the "Incoming Webhooks" section in Slack):
// ./src/app/api/comments/submit/route.js

import { supabase } from "@/lib/supabase/server";
import { NextResponse } from "next/server";

export async function POST(req) {
  const body = await req.json();

  const { post_id, email, comment, nickname, uid } = body;

  const { data, error } = await supabase
    .from("comments")
    .insert({
      post_id,
      email,
      nickname,
      payload: comment,
    })
    .select("id");

  if (error) {
    return new NextResponse(JSON.stringify({ error: error.message }), {
      status: 500,
    });
  }

	await fetch(
	    "https://hooks.slack.com/services/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",
	    {
	      method: "POST",
	      body: JSON.stringify({
	        blocks: [
	          {
	            type: "header",
	            text: {
	              type: "plain_text",
	              text: "New comment waiting for approval! :meow_party:",
	              emoji: true,
	            },
	          },
	          {
	            type: "section",
	            fields: [
	              {
	                type: "mrkdwn",
	                text: `*Blog post:*\nhttp://localhost:3000/articles/${uid}`,
	              },
	              {
	                type: "mrkdwn",
	                text: `*Comment ID:*\n<https://supabase.com/dashboard/project/kmimxhcpximbajtshrve/editor/28564|${post_id}>`,
	              },
	            ],
	          },
	          {
	            type: "section",
	            text: {
	              type: "mrkdwn",
	              text: `*Comment:*\n${comment}`,
	            },
	          },
	          {
	            type: "context",
	            elements: [
	              {
	                type: "mrkdwn",
	                text: `*Submitted by:* ${nickname} (<mailto:${email}|${email}>)`,
	              },
	            ],
	          },
	          {
	            type: "divider",
	          },
	          {
	            type: "actions",
	            elements: [
	              {
	                type: "button",
	                text: {
	                  type: "plain_text",
	                  emoji: true,
	                  text: "Approve",
	                },
	                style: "primary",
	                action_id: "approve_comment",
	                value: data[0].id,
	              },
	              {
	                type: "button",
	                text: {
	                  type: "plain_text",
	                  emoji: true,
	                  text: "Delete",
	                },
	                style: "danger",
	                action_id: "delete_comment",
	                value: data[0].id,
	                confirm: {
	                  title: {
	                    type: "plain_text",
	                    text: "Are you sure?",
	                  },
	                  text: {
	                    type: "mrkdwn",
	                    text: "This will delete the comment permanently.",
	                  },
	                  confirm: {
	                    type: "plain_text",
	                    text: "Delete",
	                  },
	                  deny: {
	                    type: "plain_text",
	                    text: "Cancel",
	                  },
	                  style: "danger",
	                },
	              },
	            ],
	          },
	        ],
	      }),
	    }
	  );

		return new NextResponse(JSON.stringify({ success: true }), {
	    status: 200,
	  });
}
The above code will send a POST request to the channel on your Slack you defined when configuring the hook. To format this message, we use Slack’s Block Kit. I chose to send the following info:
- Link to the blog post.
- The post's
idwith a link to the Supabase dashboard. - The comment itself.
- The person who submitted the comment.
But with that said, the above code is just an example of how it could be set up. Feel free to experiment with the Block Kit and build something different.
The unique part here is the last block, which is of type: actions. This is the block adding approve/delete buttons to the Slack message, enabling us to get notified of new comments and moderate them from within Slack.
To preview what the above code does, let’s now post a new comment on our blog, and we should receive a new Slack message looking something like:

If you try to click on one of the action buttons in the message, you will get a warning triangle next to it. That’s because Slack has no idea what to do when someone clicks these buttons right now. Let’s fix that next!
To tell Slack what it should do when receiving commands from this integration, head over to the Slack dashboard and click “Interactivity & Shortcuts.” Toggle it on, add a URL to your deployed app appended by /api/comments/moderate, and click save:
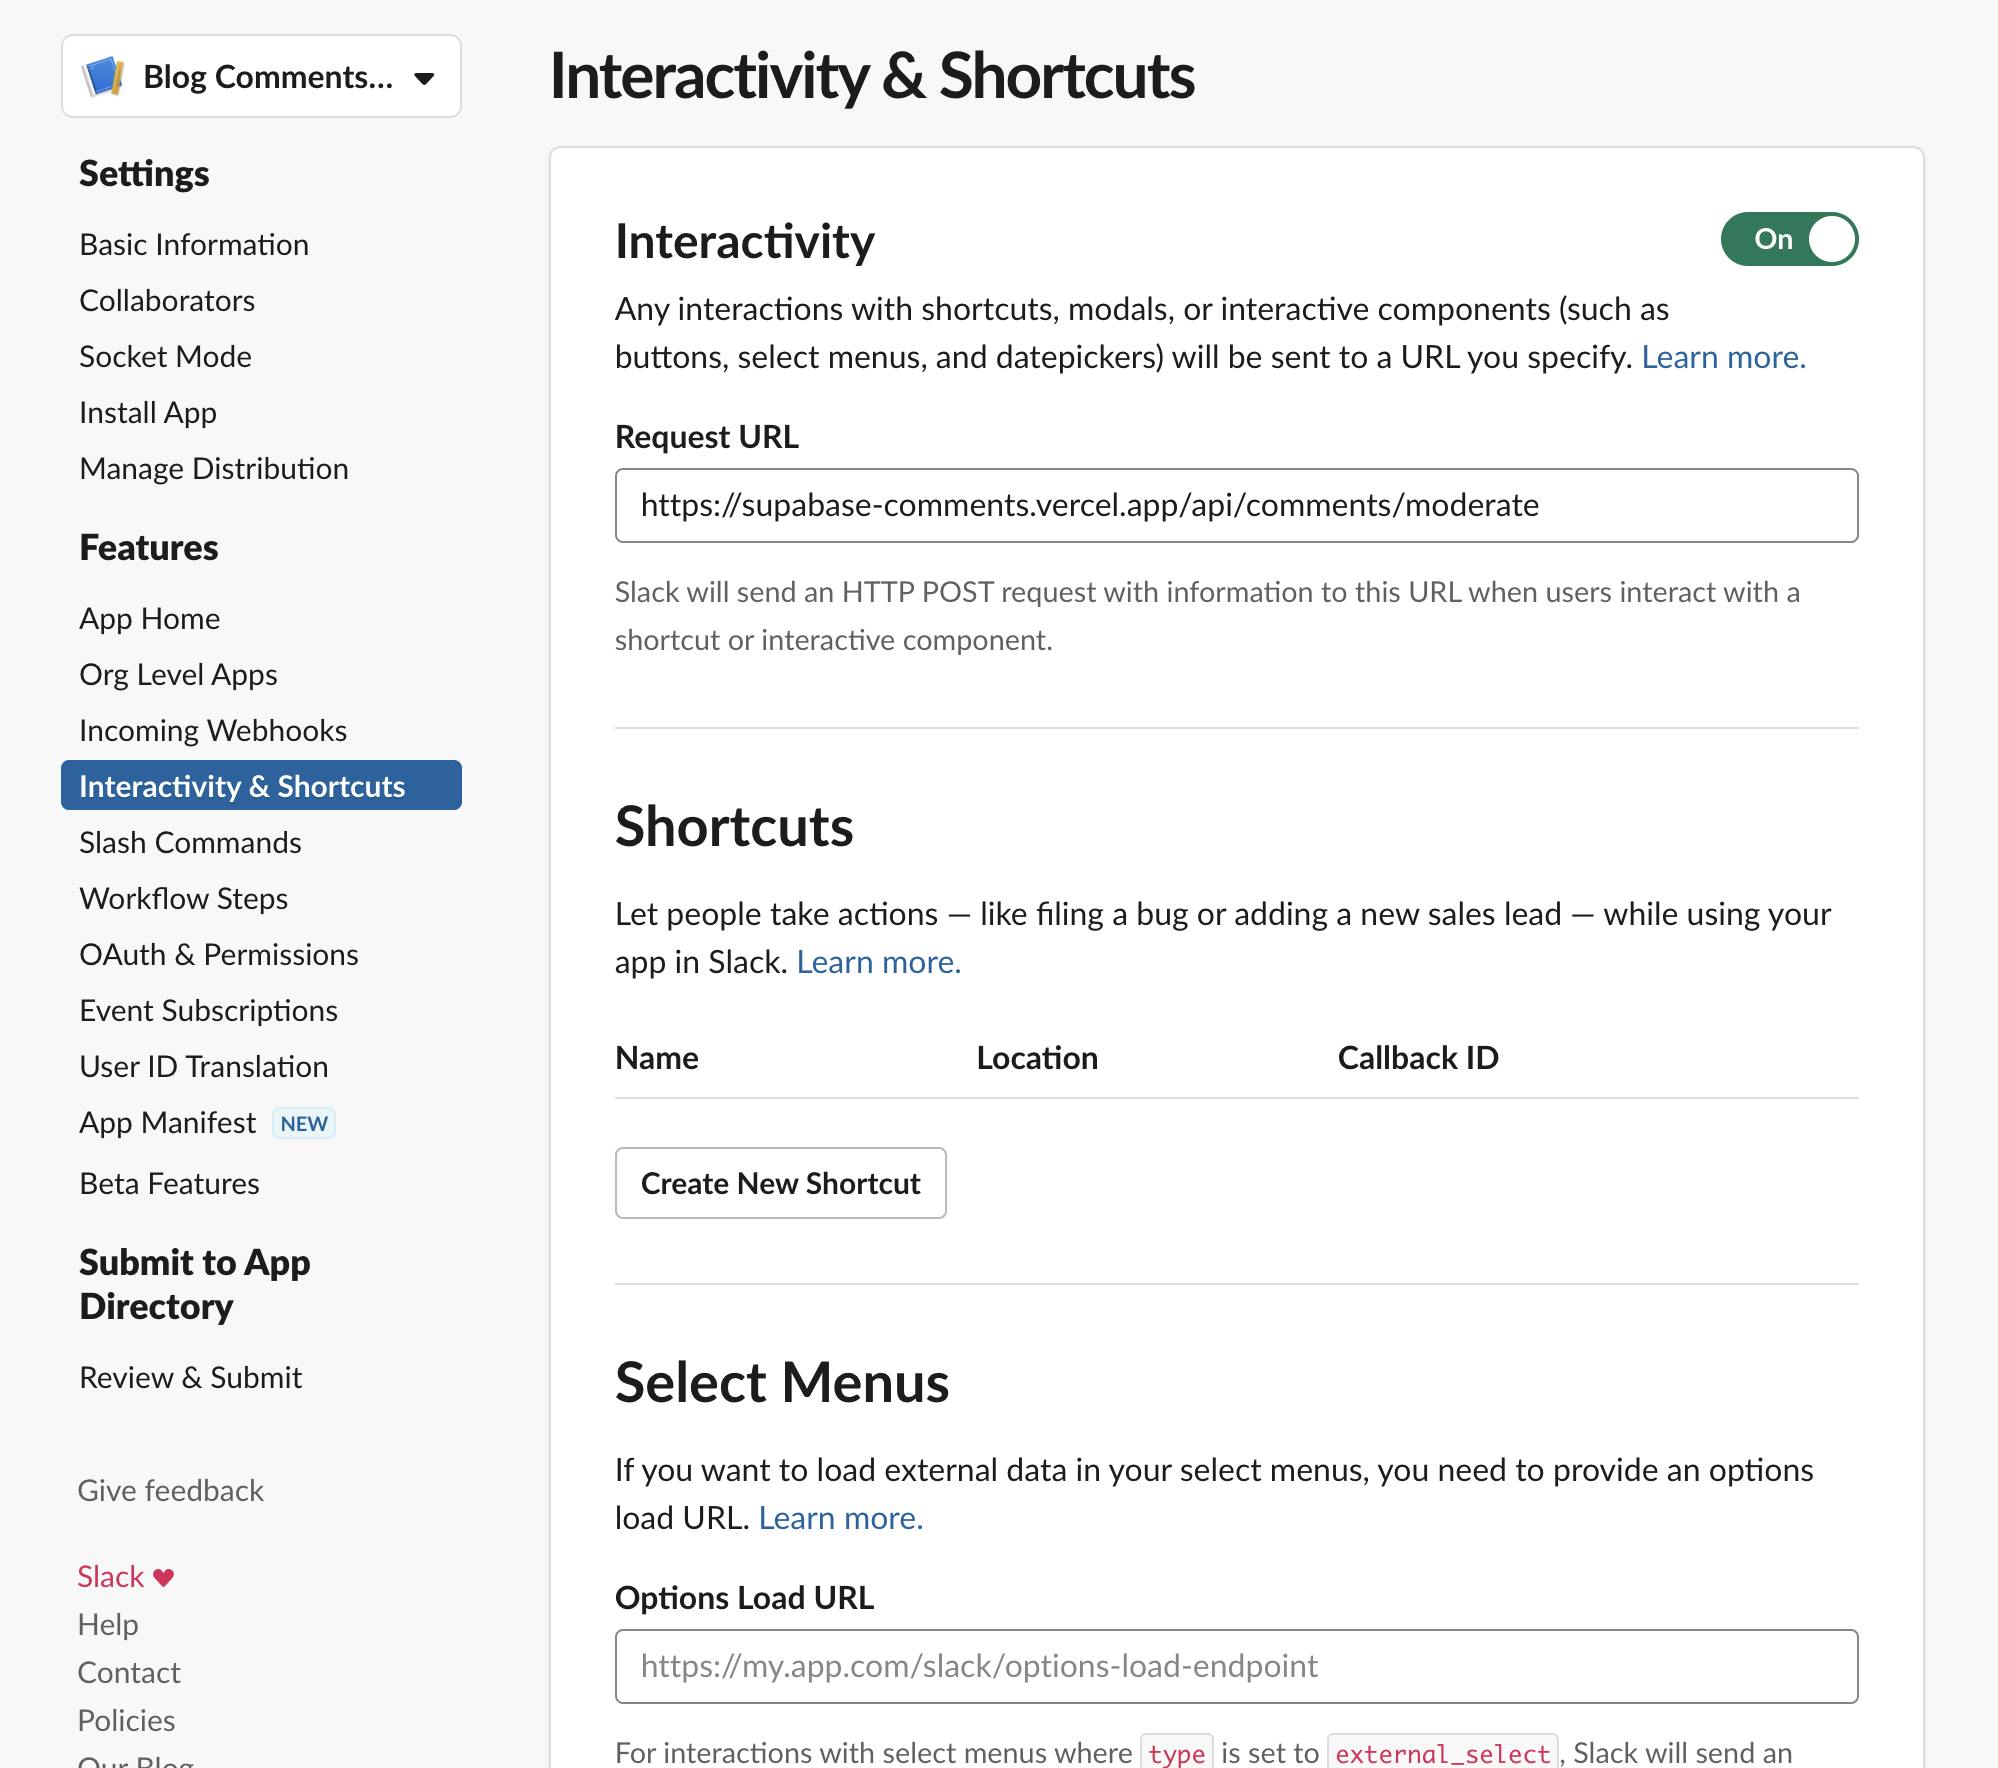
We have added a URL to an API route that is currently not present in our app. Let's add the necessary route to handle requests from Slack.
Create a new file in ./src/app/api/comments/moderate/route.js.
// ./src/app/api/comments/moderate/route.js

import { NextResponse } from "next/server";
import { supabase } from "@/lib/supabase/server";

export async function POST(req) {
  const formData = await req.formData();
  const payload = await formData.get("payload");

  const { response_url, actions, user } = JSON.parse(payload);

  let res = "";

  if (actions[0].action_id === "approve_comment") {
    res = await approveComment(user.id, actions[0].value);
  } else if (actions[0].action_id === "delete_comment") {
    res = await deleteComment(user.id, actions[0].value);
  }

  await respondToSlack(response_url, res, actions[0].action_id);

  return new NextResponse(null, {
    status: 200,
  });
}

// Delete comment from Supabase
const deleteComment = async (userID, id) => {
  const { error } = await supabase.from("comments").delete().eq("id", id);

  if (error) {
    return `Error deleting comment (${id})!`;
  } else {
    return `Comment (${id}) deleted by *<@${userID}>*!`;
  }
};

// Approve comment in Supabase
const approveComment = async (userID, id) => {
  const { error } = await supabase
    .from("comments")
    .update({ published: true })
    .eq("id", id);

  if (error) {
    return `Error approving comment (${id})!`;
  } else {
    return `Comment (<https://supabase.com/dashboard/project/kmimxhcpximbajtshrve/editor/28564|${id}>) approved by *<@${userID}>*!`;
  }
};

// Respond to Slack with a message
const respondToSlack = async (responseURL, text, type) => {
  await fetch(responseURL, {
    method: "POST",
    headers: {
      "Content-Type": "application/json",
    },
    body: JSON.stringify({
      blocks: [
        {
          type: "header",
          text: {
            type: "plain_text",
            text: `${
              type === "approve_comment" ? "Approvement" : "Deletion"
            } succesful! ${
              type === "approve_comment"
                ? ":white_check_mark:"
                : ":octagonal_sign:"
            }`,
            emoji: true,
          },
        },
        {
          type: "section",
          text: {
            type: "mrkdwn",
            text: text,
          },
        },
      ],
      response_type: "in_channel",
    }),
  });
};
First, the system will receive a POST request from Slack. It will extract response_url for sending a response back, the passed actions, and the user who approved or deleted the request from Slack.
We will call one of the two functions below, depending on whether the action is approve_comment or delete_comment. These functions handle approval or deletion. We pass the action value (post_id) and the user who approved/deleted from Slack to these functions. In the functions, we send a request to Supabase to either set "published" to true if we approve or delete the row if deleted.
After receiving a response from Supabase regarding approval or deletion, we use the respondToSlack() function to send a confirmation response back to Slack. In this function, we respond to the provided URL and create a message for the user using the Block Kit.
Redeploy your app
Next, we need to redeploy our app to Vercel to make the new API route available in production. This is necessary because Slack requires a public URL for communication.
Once that’s done, try submitting another comment, and we should get a new message on Slack. This time, the moderation actions will work. So, when you approve or delete a comment, Slack will now respond like this:
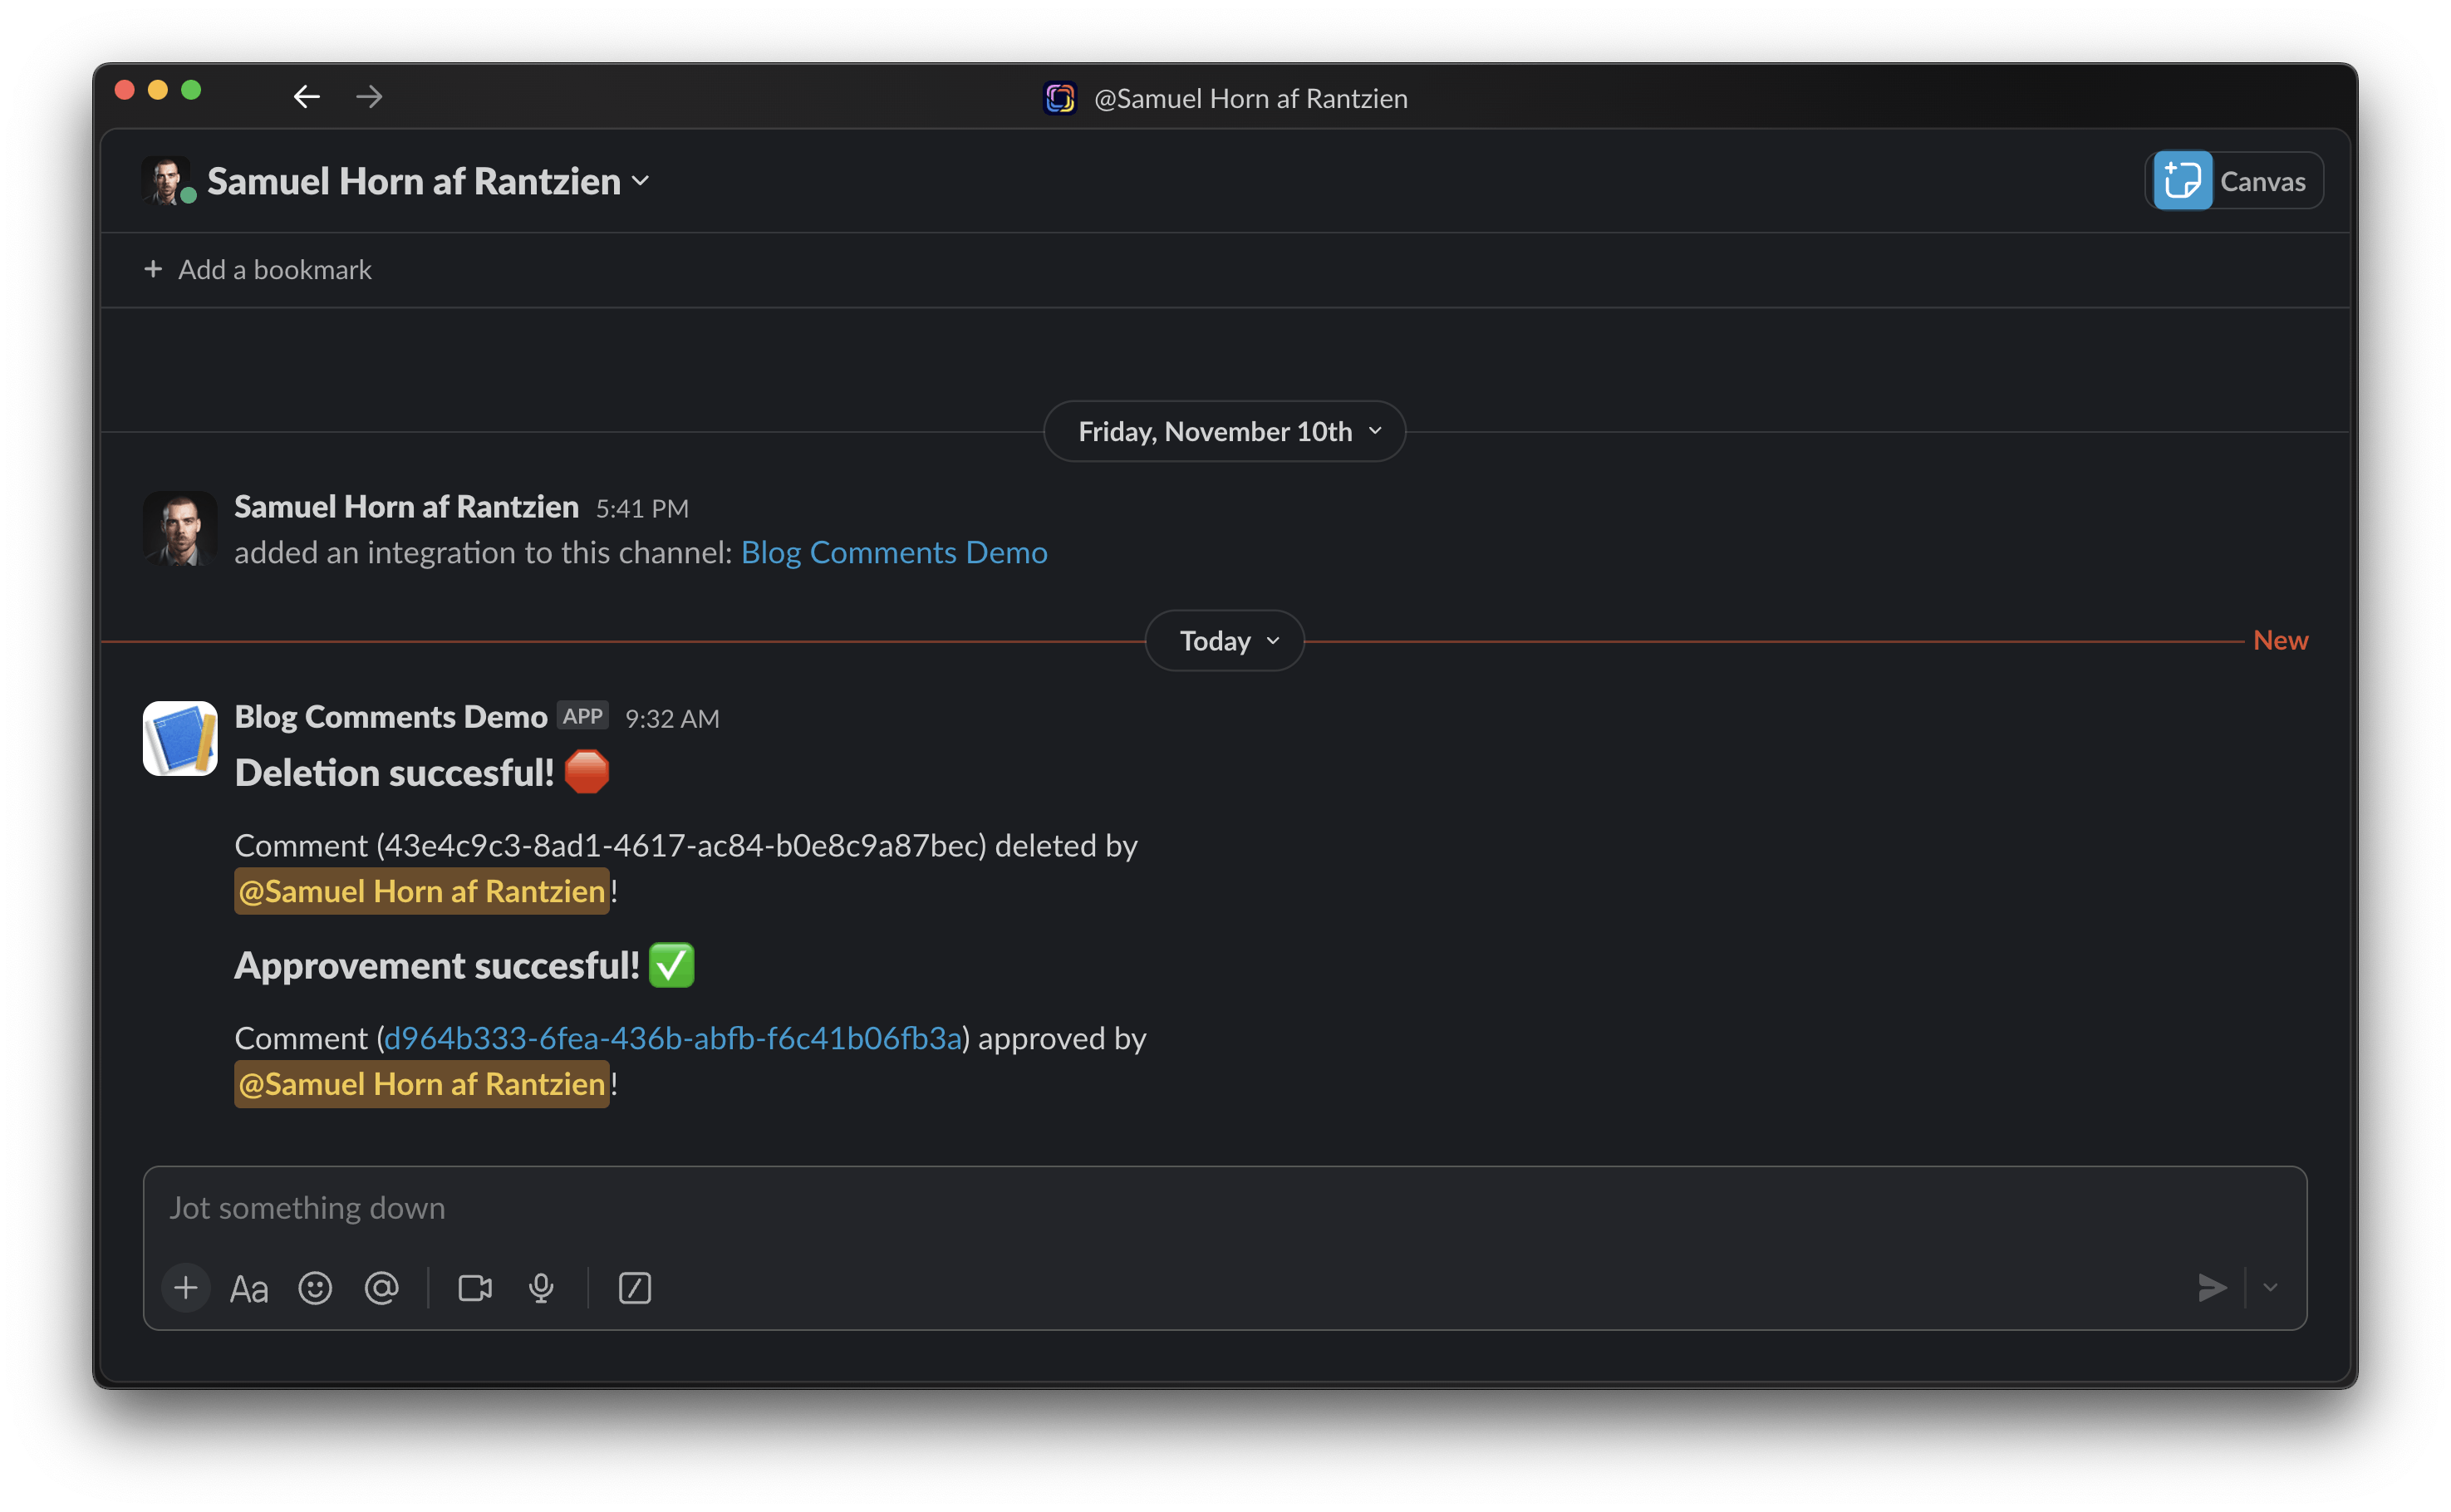
Now, when we have approved a comment, its status has changed from published: false to published: true in Supabase, and we can see the comment on the front end of our blog.
Security
Since this app only handles blog comments, it will be difficult for anyone to figure out API endpoints and send the correct formatted data. However, it's important to have some level of security.
One simple step we can take is to verify that moderation requests (approve/delete) come from our Slack app before executing them.
This can be done easily. In your Slack app dashboard, under "Basic Information," you can find a unique "Verification Token" for your app. Let's use this token.
Add it as SLACK_VERIFICATION_TOKEN to your .env.local and Vercel environment variables.
Next, in your moderation endpoint (./src/app/api/comments/moderate/route.js), extract the token from the request and add a conditional statement. If the provided token is not equal to the one in our environment, throw a 401 response.
const { response_url, actions, user, token } = JSON.parse(payload);

// Check if the request is coming from Slack
if (token !== process.env.SLACK_VERIFICATION_TOKEN) {
  return new NextResponse("You're not authorized!", {
    status: 401,
  });
}
That’s it!
We have successfully implemented static blog interactivity using Next.js and Supabase. By integrating Supabase for storing and retrieving comments, we have created a functional commenting system that allows users to post comments, which are then displayed on the blog post.
Additionally, we have explored how to moderate comments using a Slack integration, enabling comment approval or deletion directly from Slack. This enhances the workflow and allows for efficient comment management.
With the completion of this project, we have enhanced our blog with interactivity and engagement, providing a platform for readers to share their thoughts and opinions. By leveraging the power of Next.js and Supabase, we have created a seamless experience for both content creators and readers.
Thank you for following along! We hope this tutorial has been informative and helpful in expanding your knowledge and skills in web development. Stay tuned for more exciting projects and tutorials!


