

Finding what you need quickly on a website is crucial for a positive user experience. However, ineffective search functionality can often cause frustration and lead to users leaving the site. This is why integrating efficient and user-friendly search capabilities is so important! It enables users to easily find specific products in online stores or relevant blog articles. A good search experience can ultimately enhance the user interface of a website, resulting in higher engagement and conversion rates.
We recently rebuilt our Prismic blog, and a positive search experience was a high priority for us. We ultimately chose to use Algolia Instant Search for a multitude of reasons, which will be discussed in this article.

So, in this blog post, we will explore website search capabilities using Algolia Instant Search and cover:
- Algolia Instant Search and the benefits it provides.
- How Algoila works.
- An inside perspective and quick tutorial on integrating Algolia Instant Search with Prismic.
So let’s get started! 👇
What is Algolia Instant Search?
Algolia Instant Search is an API-centric product offering powerful, customizable, responsive search functionality for websites and applications. With minimal code, developers can empower users to quickly find what they're looking for from the moment they start typing. It excels at transforming a basic search into an interactive and captivating experience, delivering personalized and highly relevant results to users with impressive speed.
What are the benefits of using Algolia Instant Search?
Integrating Algolia Instant Search offers numerous benefits thanks to its well-designed and powerful features.
Speed
Algolia delivers search results within milliseconds, ensuring a fast and responsive user experience.
Relevancy
Algolia's advanced relevance engine, equipped with typo-tolerance and language processing, helps users find precisely what they need, even with ambiguous queries.
Pre-made components
Algolia provides ready-to-use components that enable easy integration of advanced search, filtering, and discovery features into your application, minimizing development effort.
Customizable
Algolia gives you complete control over your search experience, allowing you to fine-tune various aspects such as aesthetics, custom ranking, and relevance configuration.
Technology Agnosticism
Algolia's API is platform-agnostic and language-agnostic, making it compatible with any technology stack or development environment that can make HTTP requests to its RESTful API.
Analytics
Algolia offers detailed analytics, enabling you to track user search behavior, identify trends, and optimize your search to improve conversions effectively.
How does Algolia work?
Let's dive into the technical details of how Algolia functions with ease and speed.
Feeding Data
The first step involves feeding your data into the Algolia engine. This can be in any form, such as a database of products, an array of article titles, or any other information your users might search for.
Indexing
Algolia indexes your data and processes it for maximum searching efficiency. The data is then ready for the user to search at high speed.
Searching
When users start typing in their queries, Algolia's unique instant search feature comes into play. It begins sourcing results from the very first keystroke.
Matching and Ranking
Algolia incorporates sophisticated algorithms for matching and ranking to ensure search outputs are both highly relevant and ranked in order of importance based on predefined criteria.
Displaying Results
Once the typed query matches the indexed data, the search results are returned and presented to the user.
In the following sections, we'll explore how to implement this powerful search engine into your Prismic project. We'll cover the initial setup, including the registration on Algolia's platform, getting the API keys, installing necessary Algolia packages, and exploring how data indexing works. So, let's dive in.
Not signed up for The Optimized Dev?
Staying on the leading edge of web development just got easier. Explore new tech with a fun, scaffolded coding challenge that lands in your inbox once a month.

How to implement Algolia Search
This guide will assist you in installing and configuring Algolia in a Next.js application. We will demonstrate the process using a recent version of Next.js and the app router, configured using Prismic as a CMS.
Downloading our blog starter
To make this setup simple, we will use a preconfigured blog starter. We can get this installed in just a couple of steps:
- Login or create a Prismic account.
- Run the following commands in your terminal to install the starter.
npx degit https://github.com/prismicio-community/nextjs-starter-prismic-blog nextjs-starter-prismic-blog
cd nextjs-starter-prismic-blog
npx @slicemachine/init@latest
In your terminal, you'll be prompted to give your repository a name, and asked if you want to open Slice Machine. We won’t modify any slices for our project since we utilized a starter so you don't need to run it, but if you're curious you can run it and then access the UI at http://localhost:9999/.
What is Slice Machine?
Slice Machine is Prismic’s developer tool that allows you to build slices, or reusable website sections, as components in your code. You can create, preview, and test slices locally without affecting your live environment. Then, you can ship the slices directly to marketers in a custom page builder so they can start using them as building blocks to create on-brand, customizable pages independently.
Now, in a new tab in your terminal, cd into your project and run npm run dev.
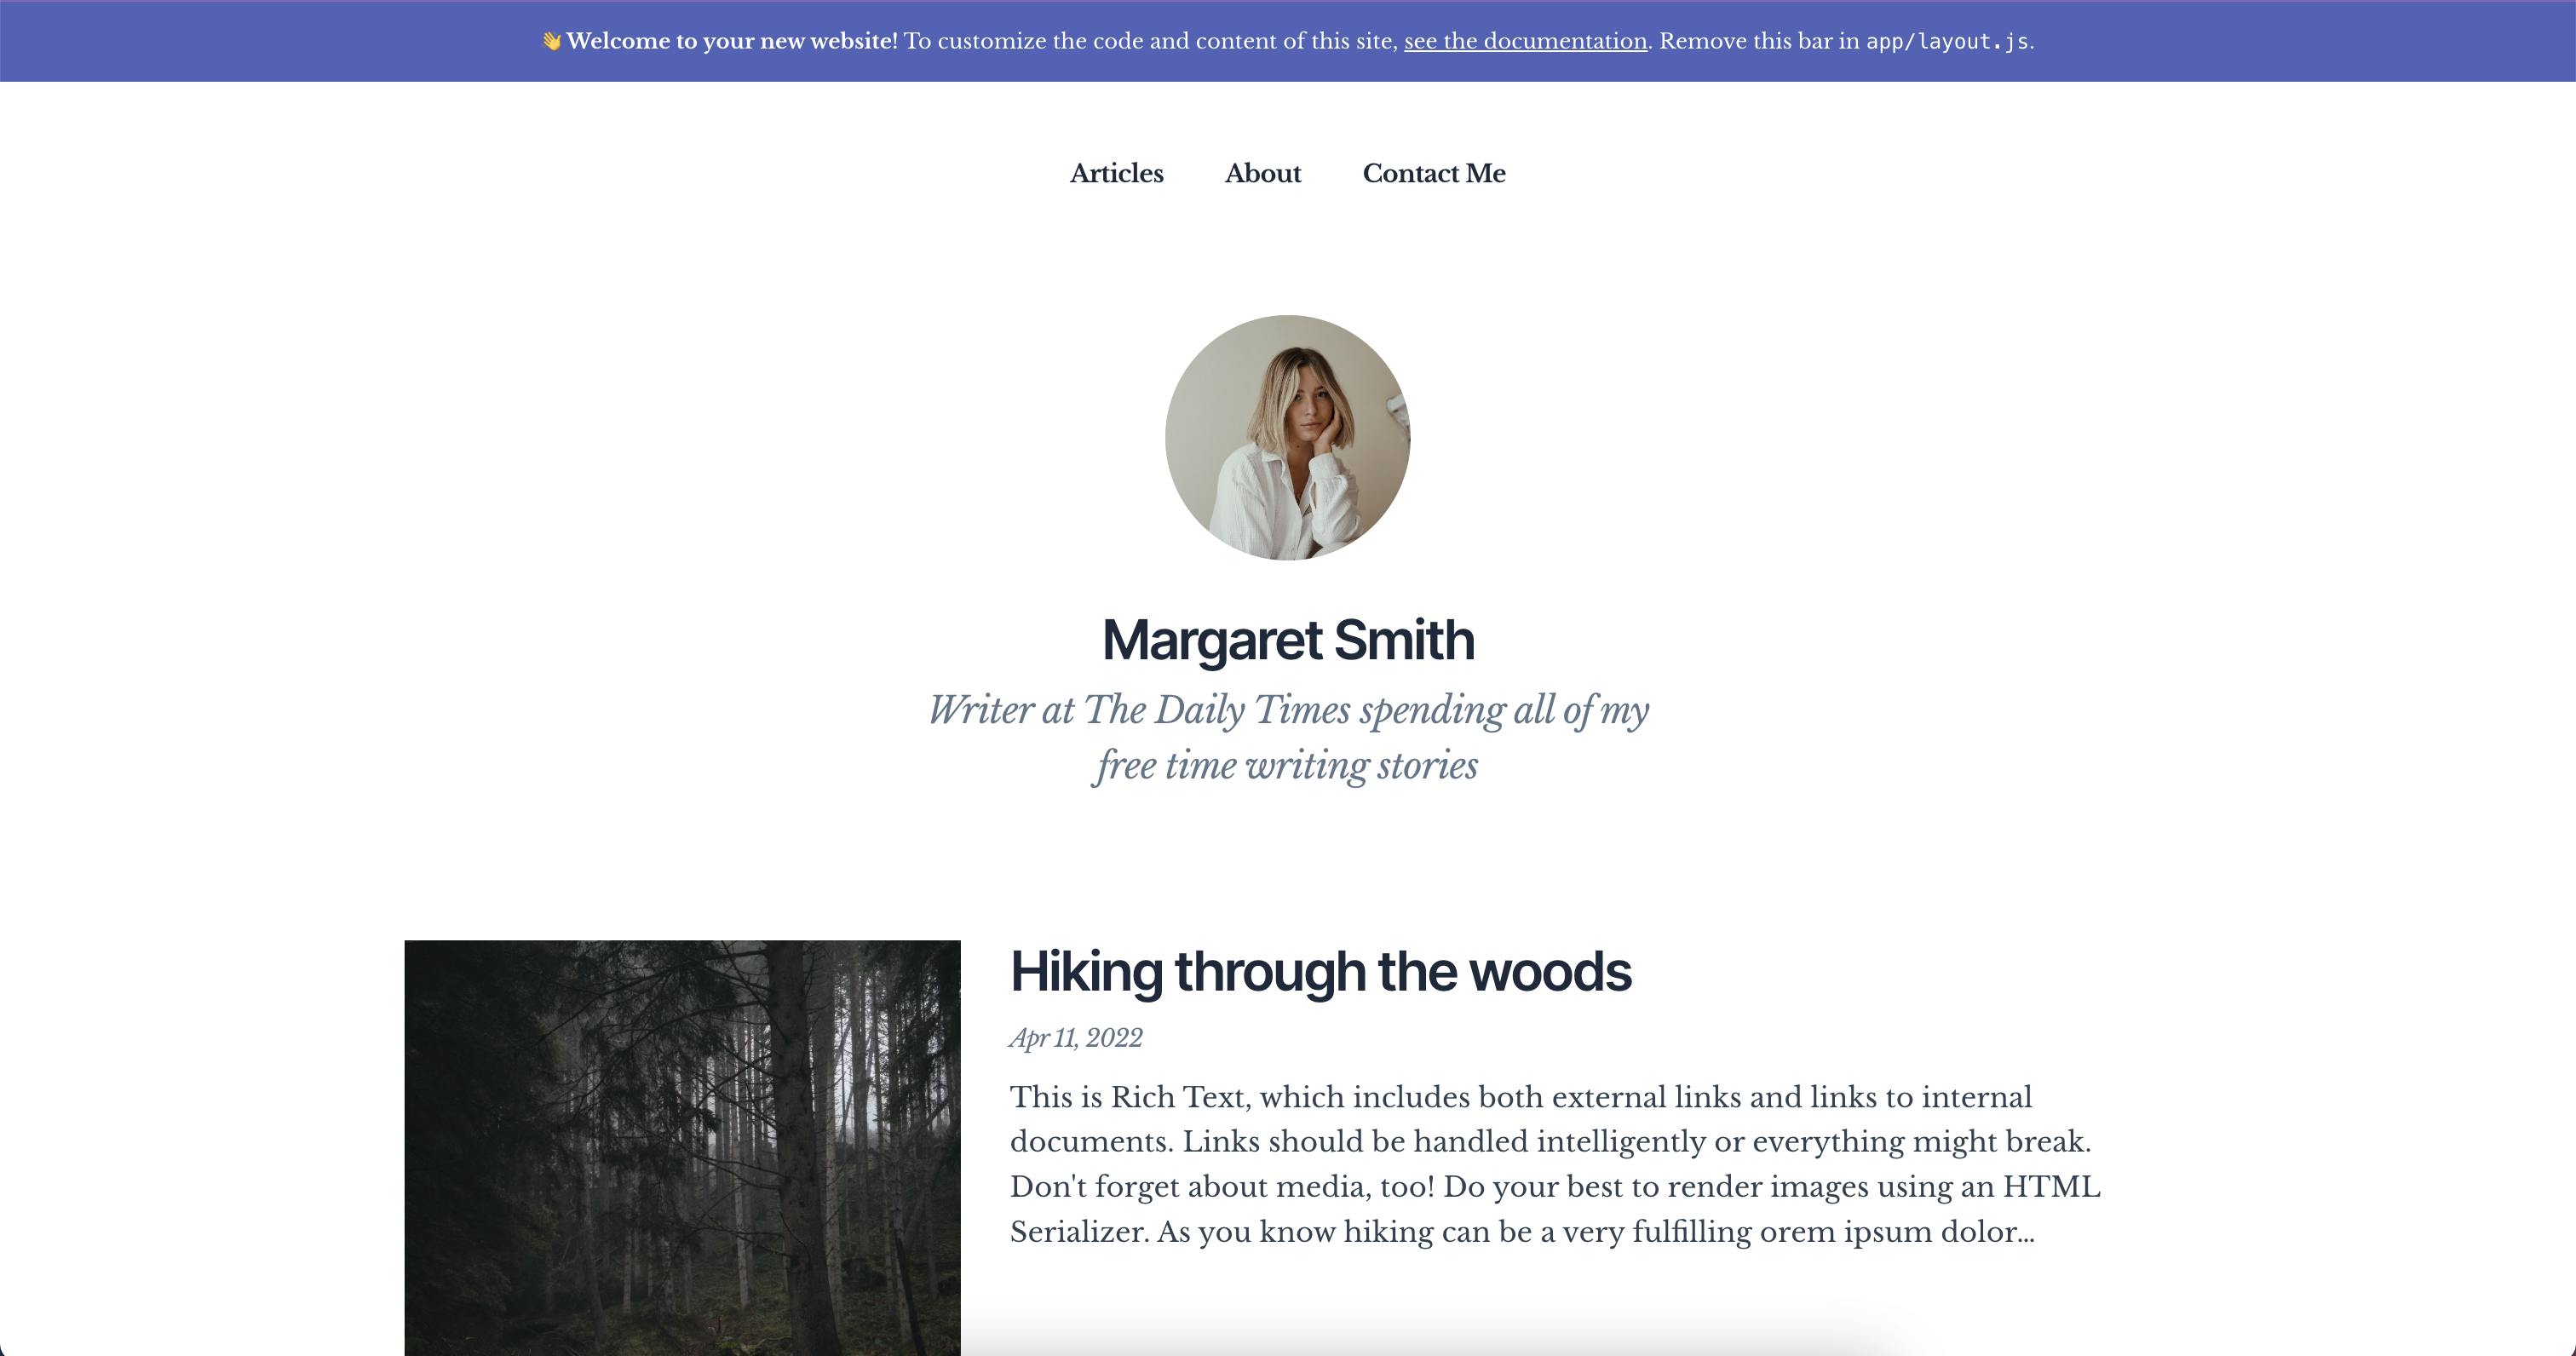
If you go to http://localhost:3000/, you can see our blog starter.
Now let's open our project in our favorite IDE and get started setting up Algolia!
Initial Setup
Before starting, you need to get some setup in place:
1. Create an Algolia Account
To use Algolia's search functionalities, you first need to create an account.
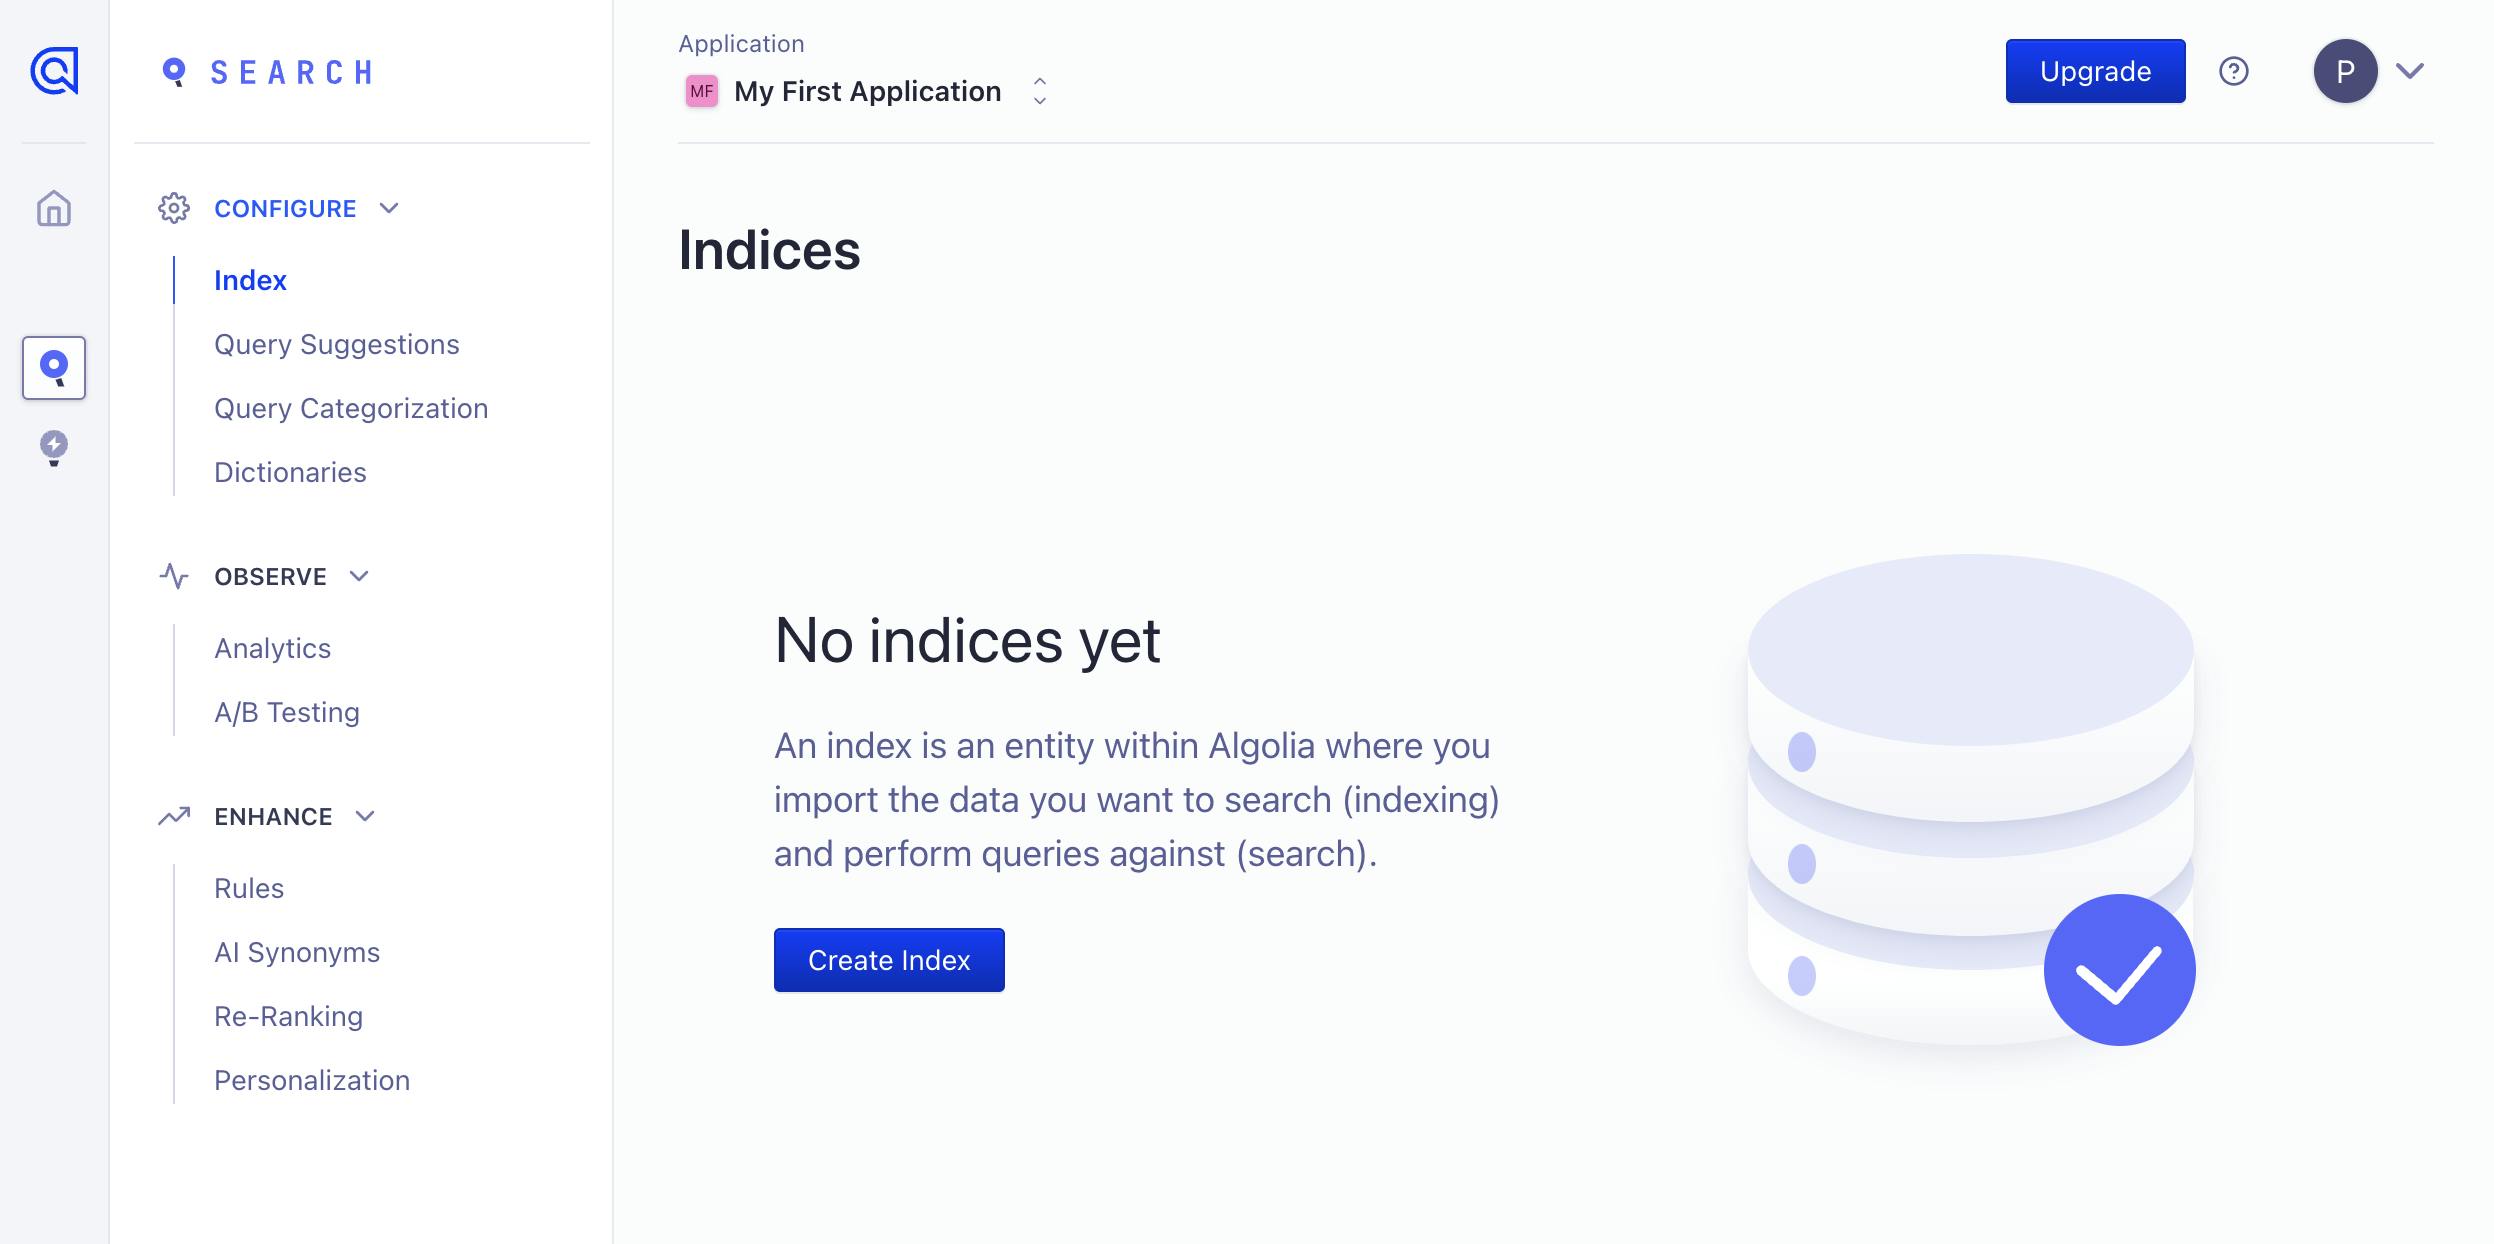
2. Creating an Index
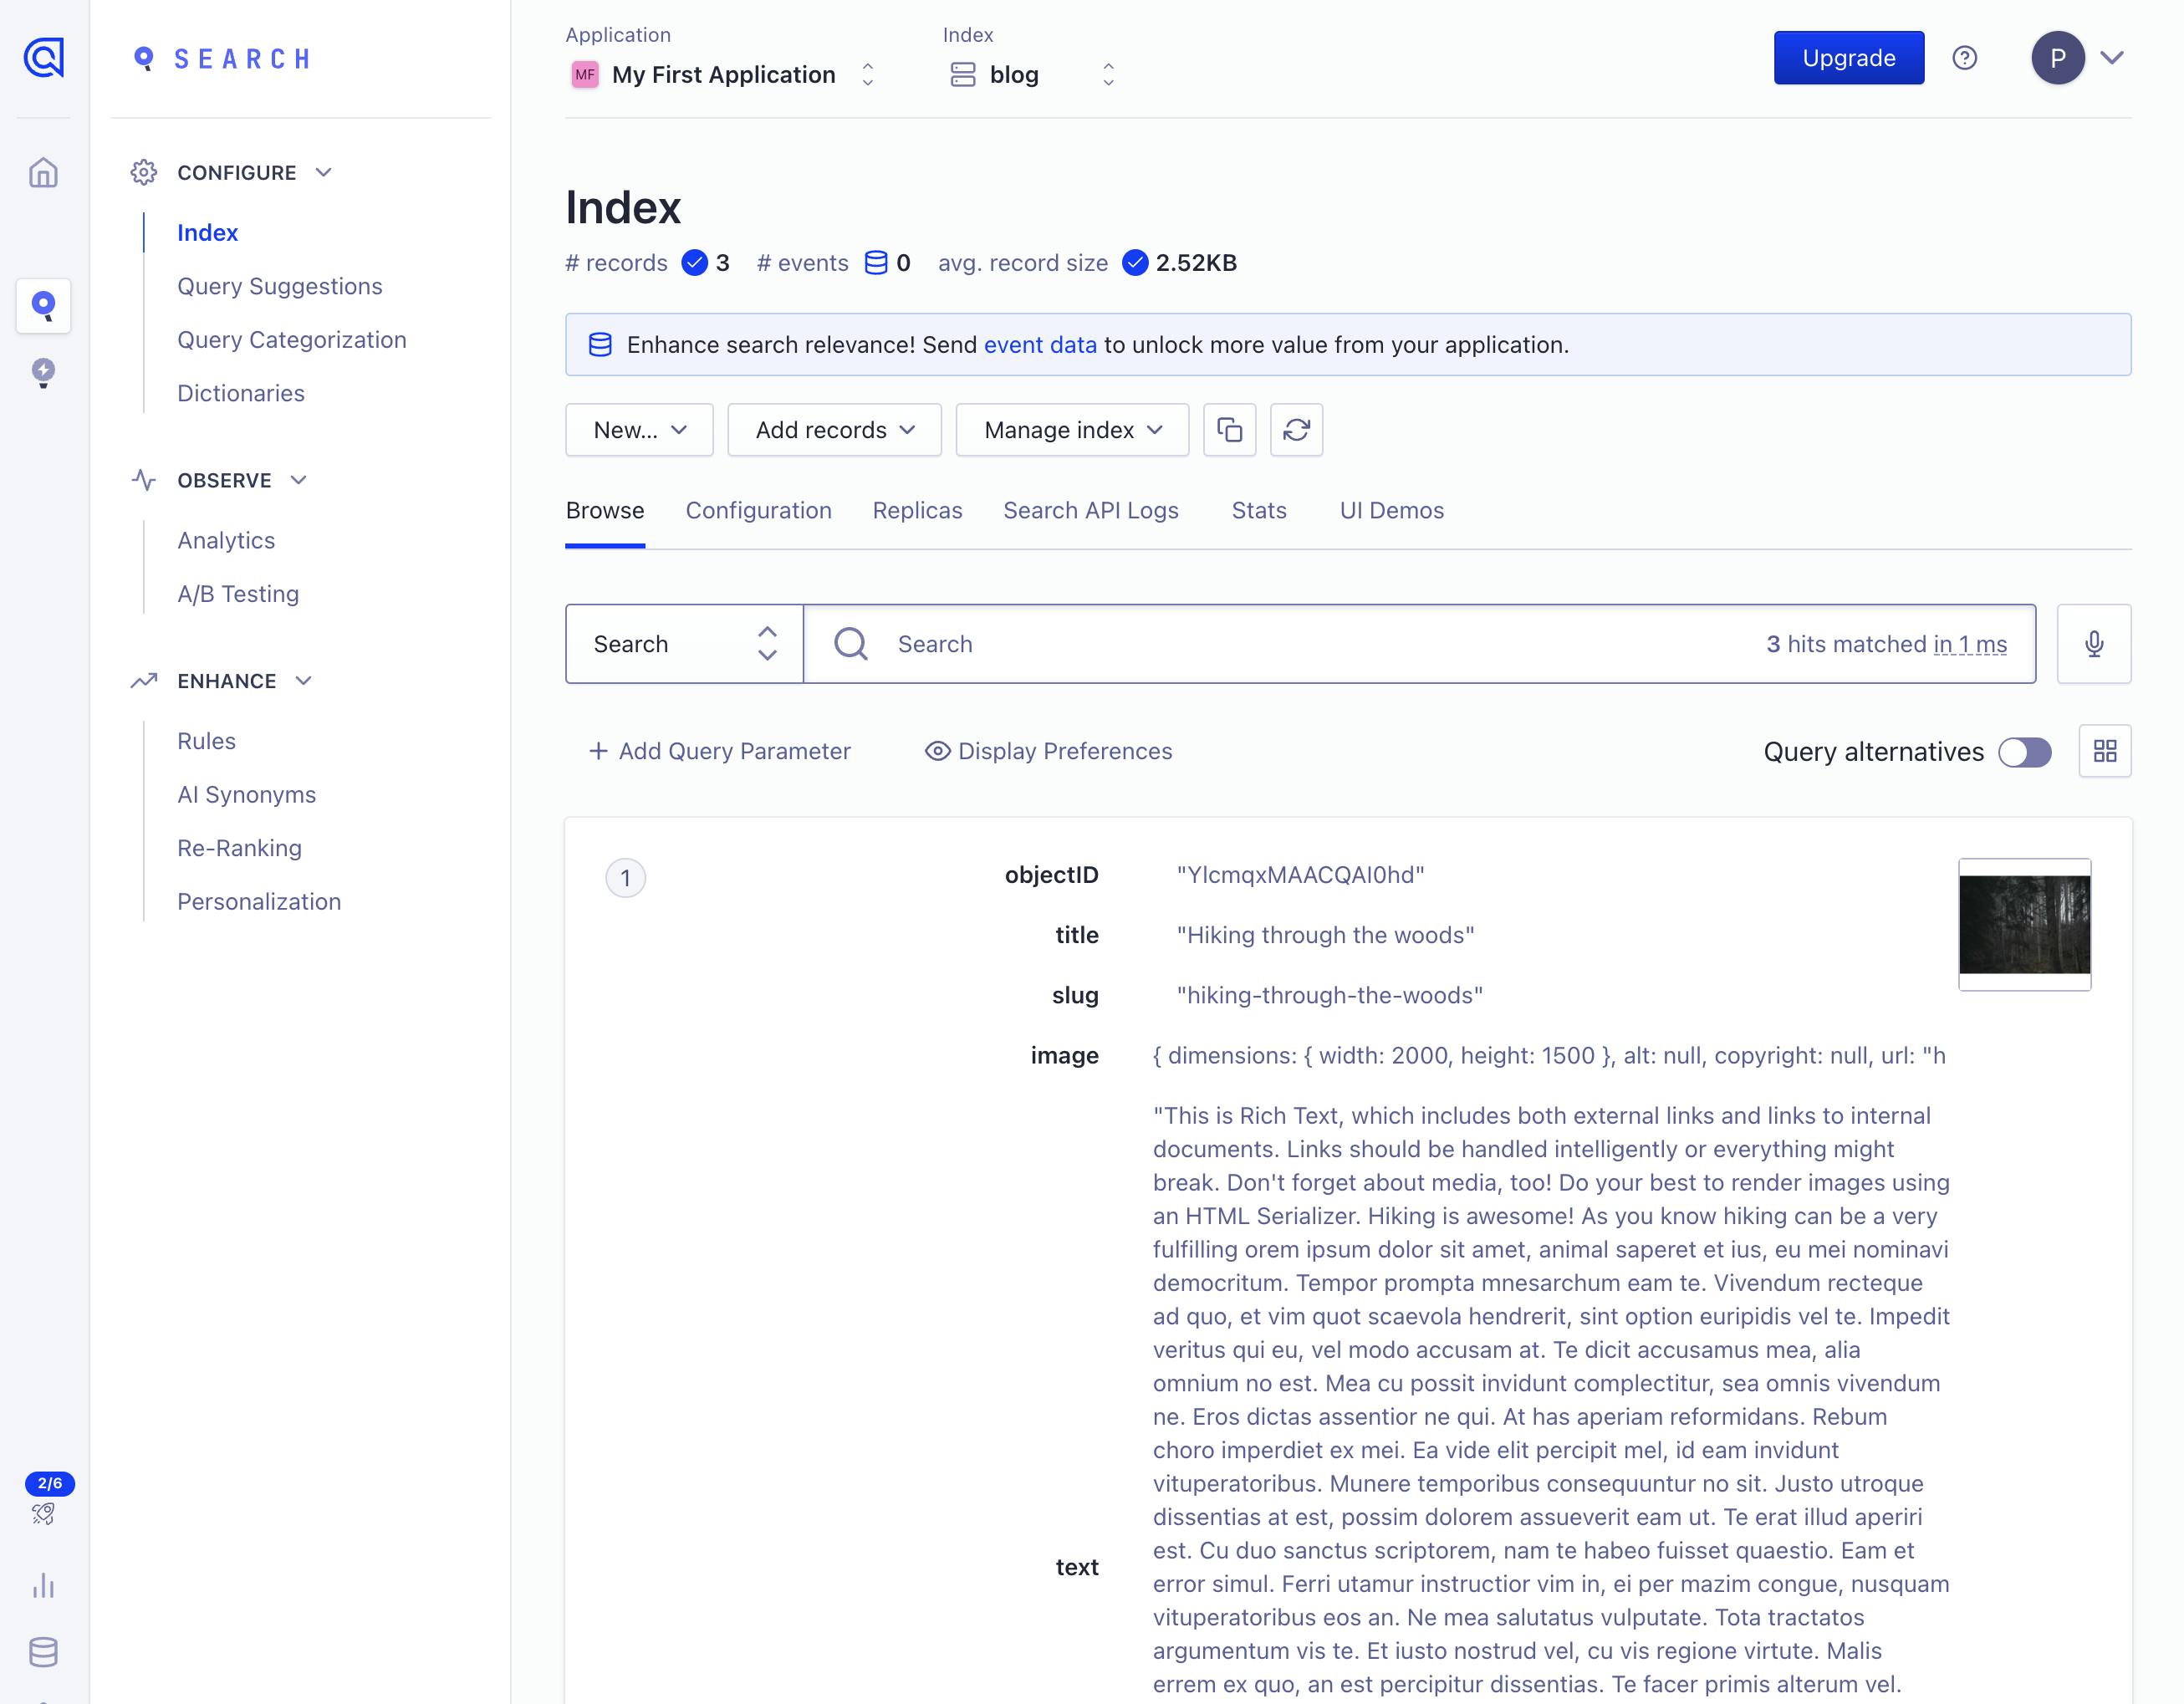
Next, you have to create an index in Algolia, which is a way to tell Algolia where to send and store your data. Navigate to the 'Search' tab and create a new index. We will call our index blog, but you can call yours whatever you want.
3. Install Algolia Packages
Finally, install the necessary Algolia search packages using your favorite package manager: npm install algoliasearch react-instantsearch-dom
Indexing Your Data to Algolia
Before we index the data, let's inform our application about the Algolia credentials. You can find them in the 'API Keys' section in the Algolia dashboard'. From here, you want to copy your 'Application ID,’ 'Search-Only API Key,' and 'Admin API Key'.
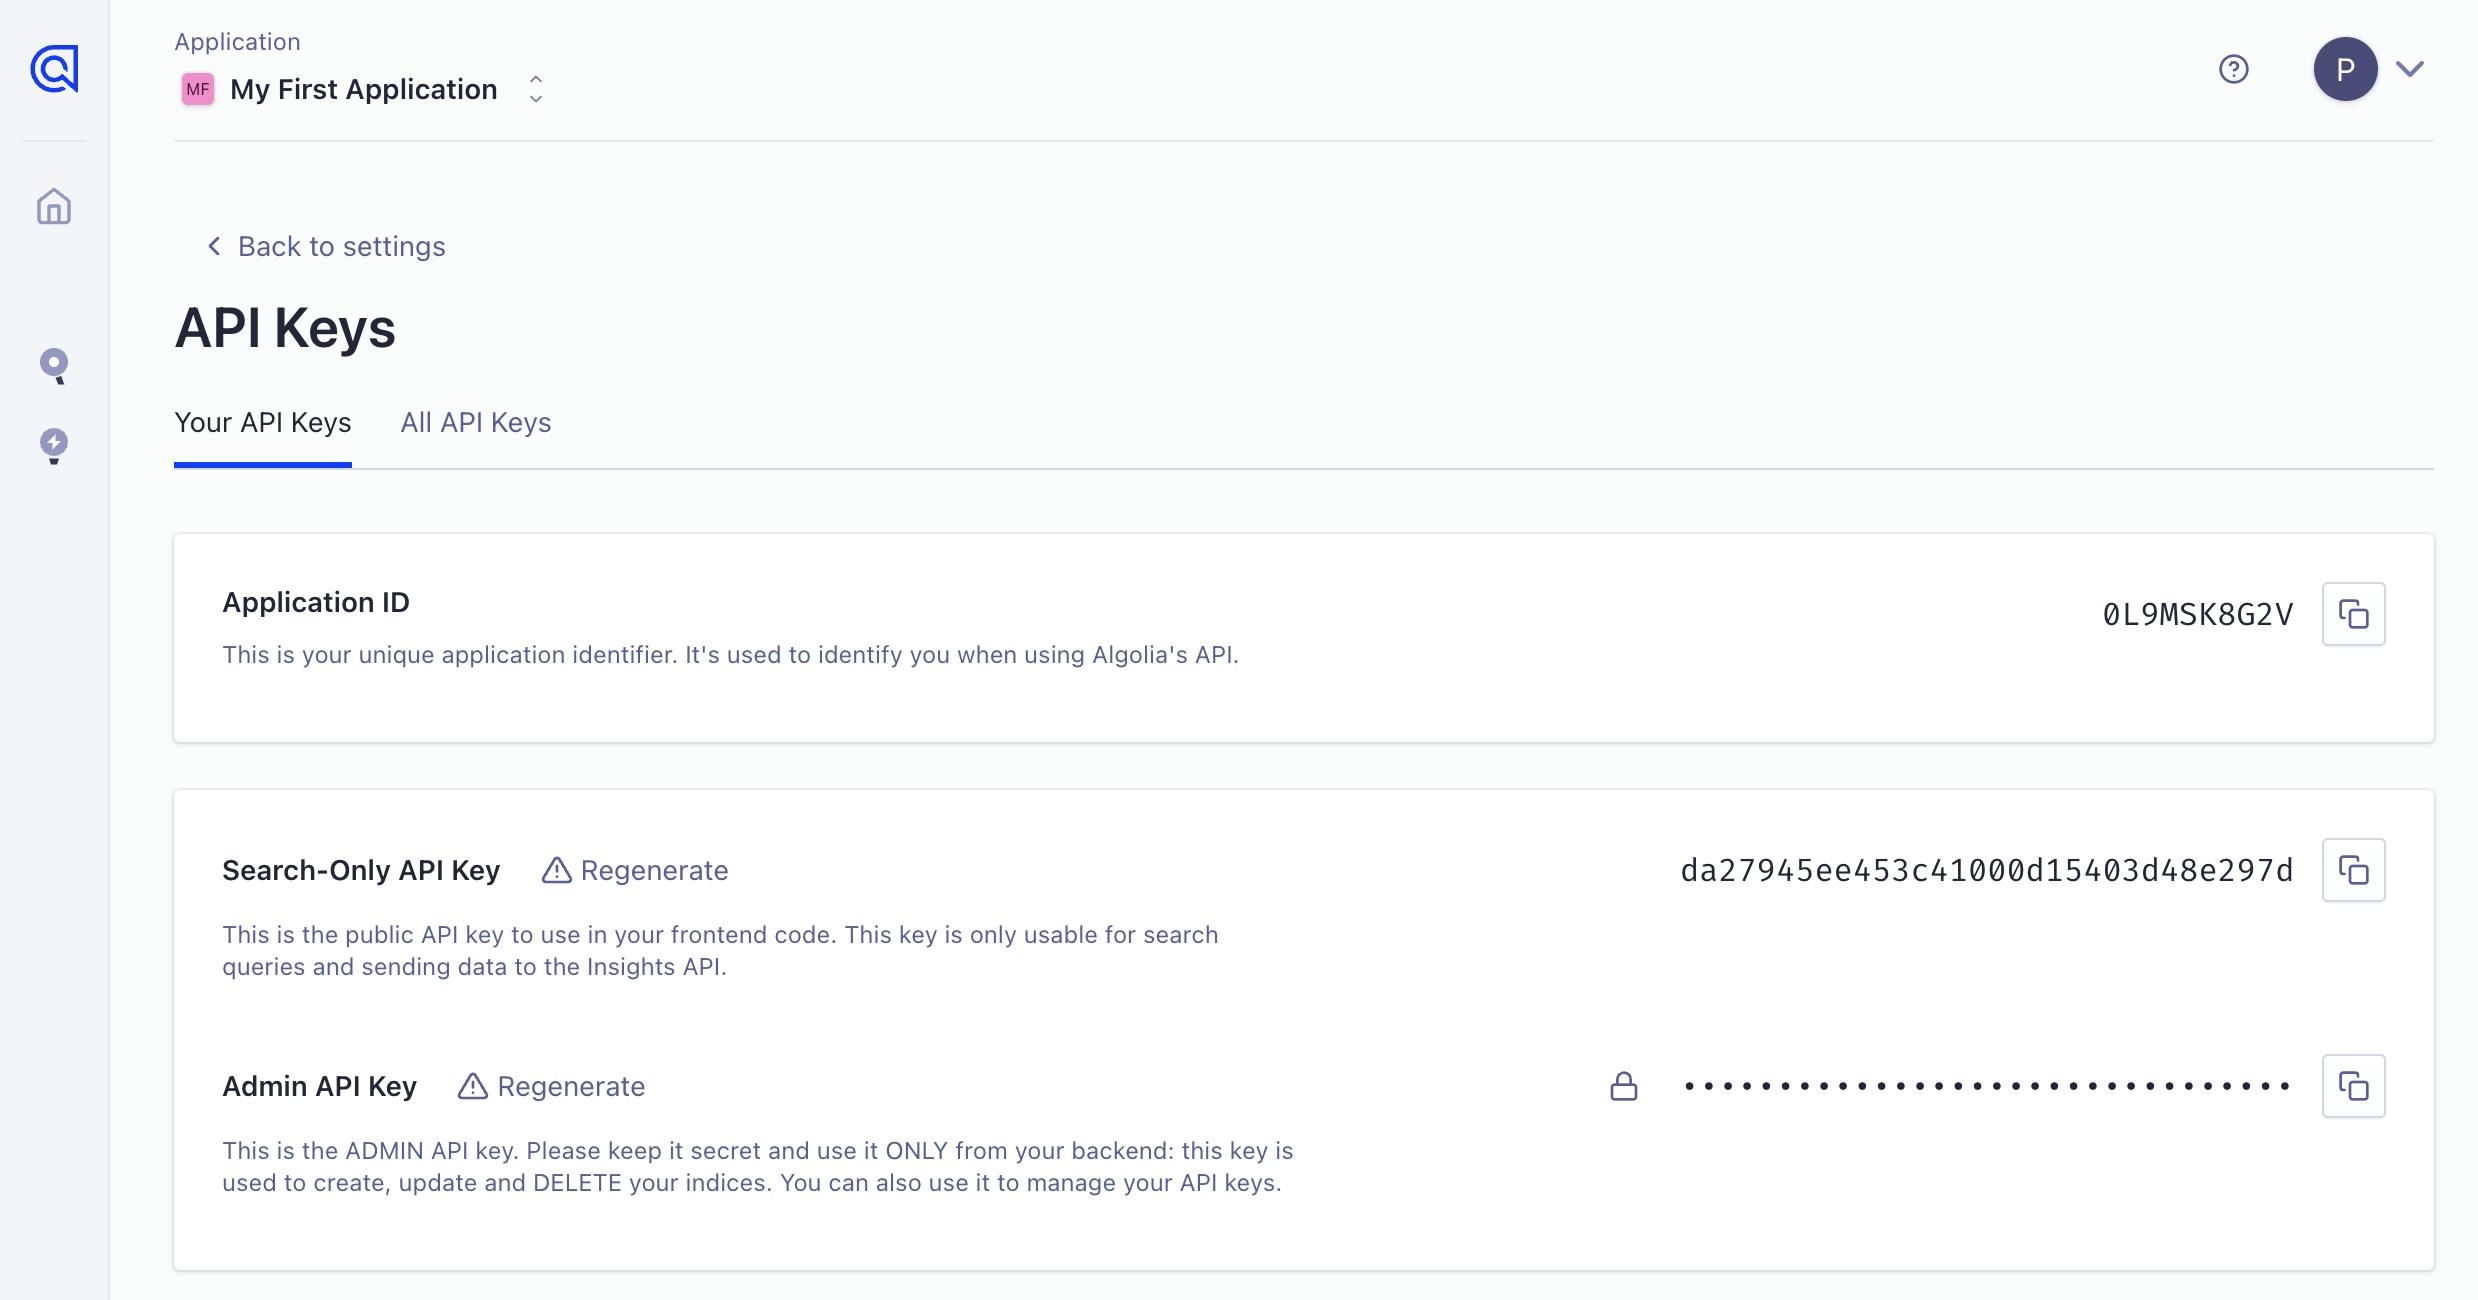
Then, at the root of your project, create a .env.local file. In this file, include the credentials as follows:
NEXT_PUBLIC_ALGOLIA_APPLICATION_ID=Your Application ID
NEXT_PUBLIC_ALGOLIA_SEARCH_ONLY_API_KEY=Your Search-Only API Key
ALGOLIA_ADMIN_KEY=Your Admin API Key
To index your data on Algolia, you need to send the content from the CMS to Algolia. This data also needs to be processed correctly. A good solution for this is to create an API route in Next.js. Let’s create a new directory in ./app/api/algolia, and inside, add a file called route.js, then add the following code:
// ./app/api/algolia/route.js

import algoliasearch from "algoliasearch";
import { createClient } from "@/prismicio";
import { asText } from "@prismicio/client";

// Function that takes Prismic slices and transforms them into searchable text for Algolia.
const transformSlices = (slices) => {
  const textStrings = slices.map((slice) => {
    if (slice.slice_type === "text") {
      return asText(slice.primary.text);
    }
    if (slice.slice_type === "image") {
      return asText(slice.primary.caption);
    }
    if (slice.slice_type === "quote") {
      return asText(slice.primary.quote) + " " + slice.primary.source;
    }
  });

  return textStrings.join(" "); // Join items into a single string
};

export async function POST(request) {
  // Check if Algolia credentials exist, return error if not
  if (
    !process.env.NEXT_PUBLIC_ALGOLIA_APPLICATION_ID ||
    !process.env.ALGOLIA_ADMIN_KEY
  ) {
    return new Response("Algolia credentials are not set", {
      status: 500,
    });
  }

  try {
    // Instantiate Prismic and Algolia clients
    const prismicClient = createClient();
    const algoliaClient = algoliasearch(
      process.env.NEXT_PUBLIC_ALGOLIA_APPLICATION_ID,
      process.env.ALGOLIA_ADMIN_KEY
    );

    // Initialize an Algolia index named 'blog'
    const index = algoliaClient.initIndex("blog");

    // Get all articles from Prismic
    const articles = await prismicClient.getAllByType("article");

    // Map articles to Algolia records
    const articleRecords = articles.map((post) => ({
      objectID: post.id, // Unique identifier in algolia
      title: asText(post.data.title), // Post title
      slug: post.uid, // Post URL slug
      image: post.data.featuredImage, // Post featured image
      text: transformSlices(post.data.slices), // Post content transformed to search text
    }));

    // Index records to Algolia
    await index.saveObjects(articleRecords);

    // Return success response if the process completes without any issue
    return new Response(
      "Content successfully synchronized with Algolia search",
      {
        status: 200,
      }
    );
  } catch (error) {
    // Log the error and return error response if any error occurs
    console.error(error);
    return new Response("An error occurred while synchronizing content", {
      status: 500,
    });
  }
}
Here's what it does step by step:
- First, we create a function that can map trough the Slices of each post, and extract the fields we want to index as plain text for Algolia, to do this we use the imported helper function
asTextfrom@prismicio/client. - Then we create the actual POST request, where we first check if the environment variables for Algolia are set. If they do not exist, we immediately return a response with a status code of 500.
- If the credentials exist, we create a Prismic client (with
createClient) and an Algolia client (withalgoliasearch). - With the Algolia client, we then initialize an Algolia index named 'blog'.
- After that, we fetch all articles from Prismic with a document type of 'article' using the Prismic client.
- Each Prismic article is then transformed into Algolia records with specific fields such as:
- unique objectID (the Prismic article ID)
- title (the article's title, transformed to text with a helper function)
- slug (the URL slug for the article)
- image (the article's featured image)
- text (the article content transformed into searchable text) - We try to save these transformed records into the Algolia 'blog' index using
saveObjects(). - If it's successful in completing all those above, it returns a successful response message that the content has been successfully synchronized with the Algolia search index, along with a status code of 200.
- If any errors occur during the process of fetching, transforming, or saving the articles, it logs the error to the console and returns an error response notifying that an error occurred while synchronizing content, along with a status code of 500.
Thats it for syncing our content to Algolia, next up we should test it, so see that everything works.
Testing our API route in Postman
For testing API requests, I like to use Postman because of its simplicity and versatility. It lets me construct and send various types of HTTP requests, view responses within the same tool, and automate testing processes.
Getting started with Postman is really easy. Just download their desktop app from here.
Postman Account
While you can use the Postman app without an account for simple use cases like this, I highly recommend creating a free account to be able to access additional powerful features. With a free account, you can save your API requests, sync and share your collections with others, and utilize Postman's built-in collaboration features. It also enables you to organize your requests into collections for specific projects or teams, making it easier to manage and re-use these over time. Additionally, a free account allows you to back up your work to the Postman cloud, providing an extra layer of data safety.
Once you have Postman installed, fire it up and open a new tab. Change the request type from GET to POST and fill the http://localhost:3000/api/algolia to the URL field next to it.
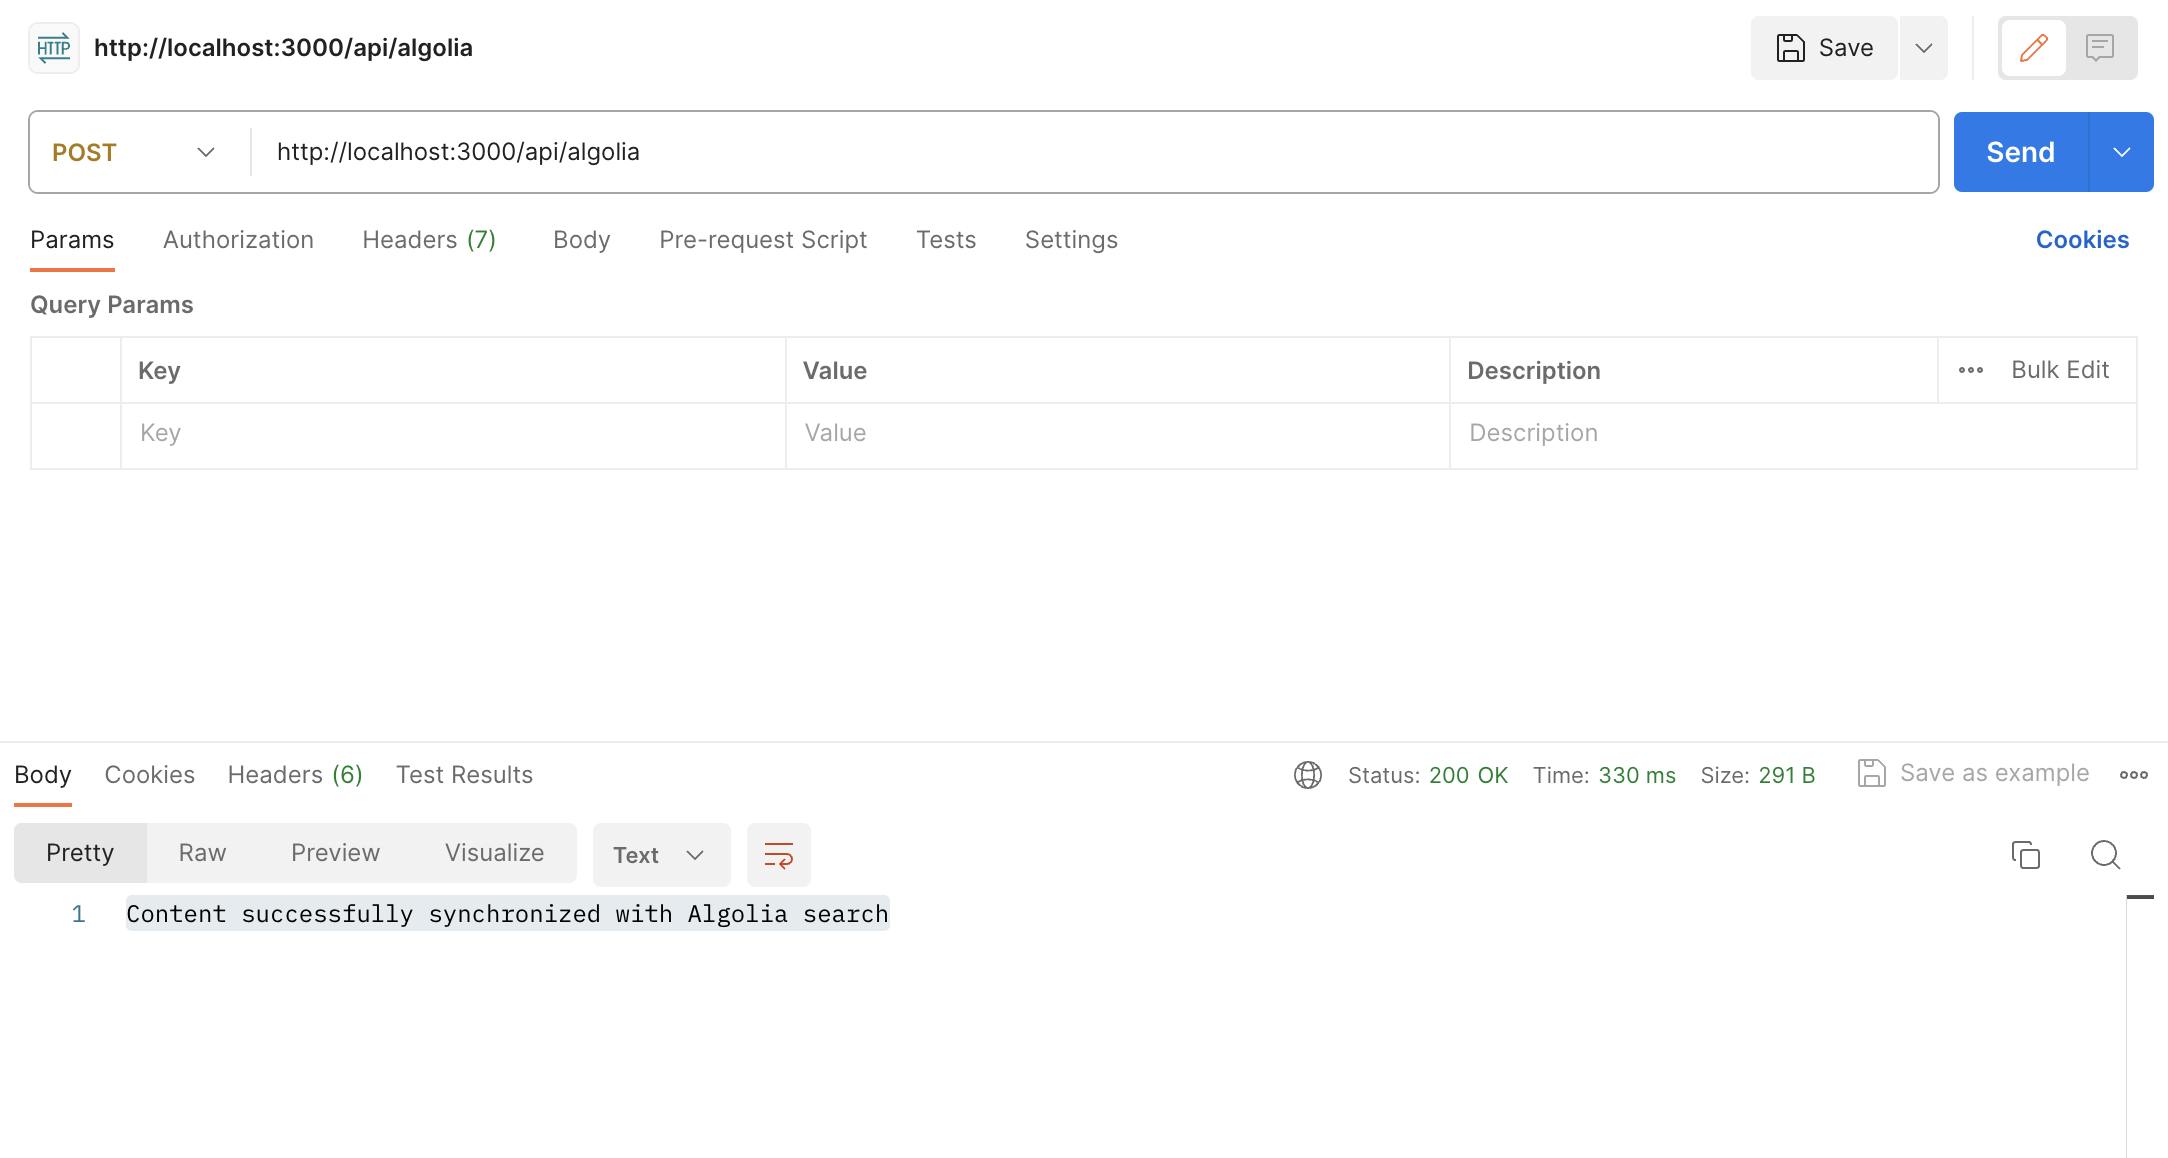
Then click on “Send”, and you should hopefully get the body “Content successfully synchronized with Algolia search” back. And if we then visit our index in the Algolia dashboard and refresh the page, we should see our new data there.
We will tackle the automation of updating this data once we update our post later. For now, we have the data in Algolia, so let’s start building the search functionality! 🎉
Implementing Search on Your Application
To implement the search, we’re going to use the react-instantsearch-dom library we installed in the beginning. But first, let’s create the basic component that will host our search functionality. For the simplicity of this guide, let’s not worry too much about layout, we will just put it above the nav items in our header.
First, let’s create a <Search /> component. Create a new file ./src/components/Search.js, and just add this code for now:
// ./src/components/Search.js

export function Search() {
  return <div>Search</div>;
}
Then, in ./src/components/Header.js, import this new search component, and add it over the nav items. I also added the tailwind class gap-y-8 to the wrapping container to not have to much space between them.
// ./src/components/Header.js
...
import { Search } from "./Search";
...
<div className="grid grid-cols-1 justify-items-center gap-20 gap-y-8">
  <Search />
  <nav>
...
Now, to the fun part, let’s add the search. Update your search component to look like this instead.
// ./src/components/Search.js

"use client";

import { InstantSearch } from "react-instantsearch-dom";
import algoliasearch from "algoliasearch/lite";
import SearchBox from "./SearchBox";
import SearchHits from "./SearchHits";

export function Search() {
  const searchClient = algoliasearch(
    process.env.NEXT_PUBLIC_ALGOLIA_APPLICATION_ID,
    process.env.NEXT_PUBLIC_ALGOLIA_SEARCH_ONLY_API_KEY
  );

  return (
    <InstantSearch searchClient={searchClient} indexName="blog">
      <div className="flex flex-col relative z-50">
        <SearchBox />
        <SearchHits />
      </div>
    </InstantSearch>
  );
}
To summarize what we just did, here’s a simple breakdown:
- First, this needs to be a client component, hence the
“use client”on top of the file. - Then, we import the necessary dependencies/packages from Algolia's libraries and two new components we’ll make next (SearchBox and SearchHits).
- Then, in the function itself, we set up the Algolia client, this time using the
NEXT_PUBLIC_ALGOLIA_SEARCH_ONLY_API_KEY, which is safe to use on the client side. - Within the return statement of the Search component, we use the
<InstantSearch>component that provides the context for the search functionality. It sets up the instance of Algolia's search client and specifies the index called "blog" - Inside the
InstantSearchcomponent, we create divelement containing two sub-components: SearchBox (for receiving the user's search input) and SearchHits (for displaying search results).
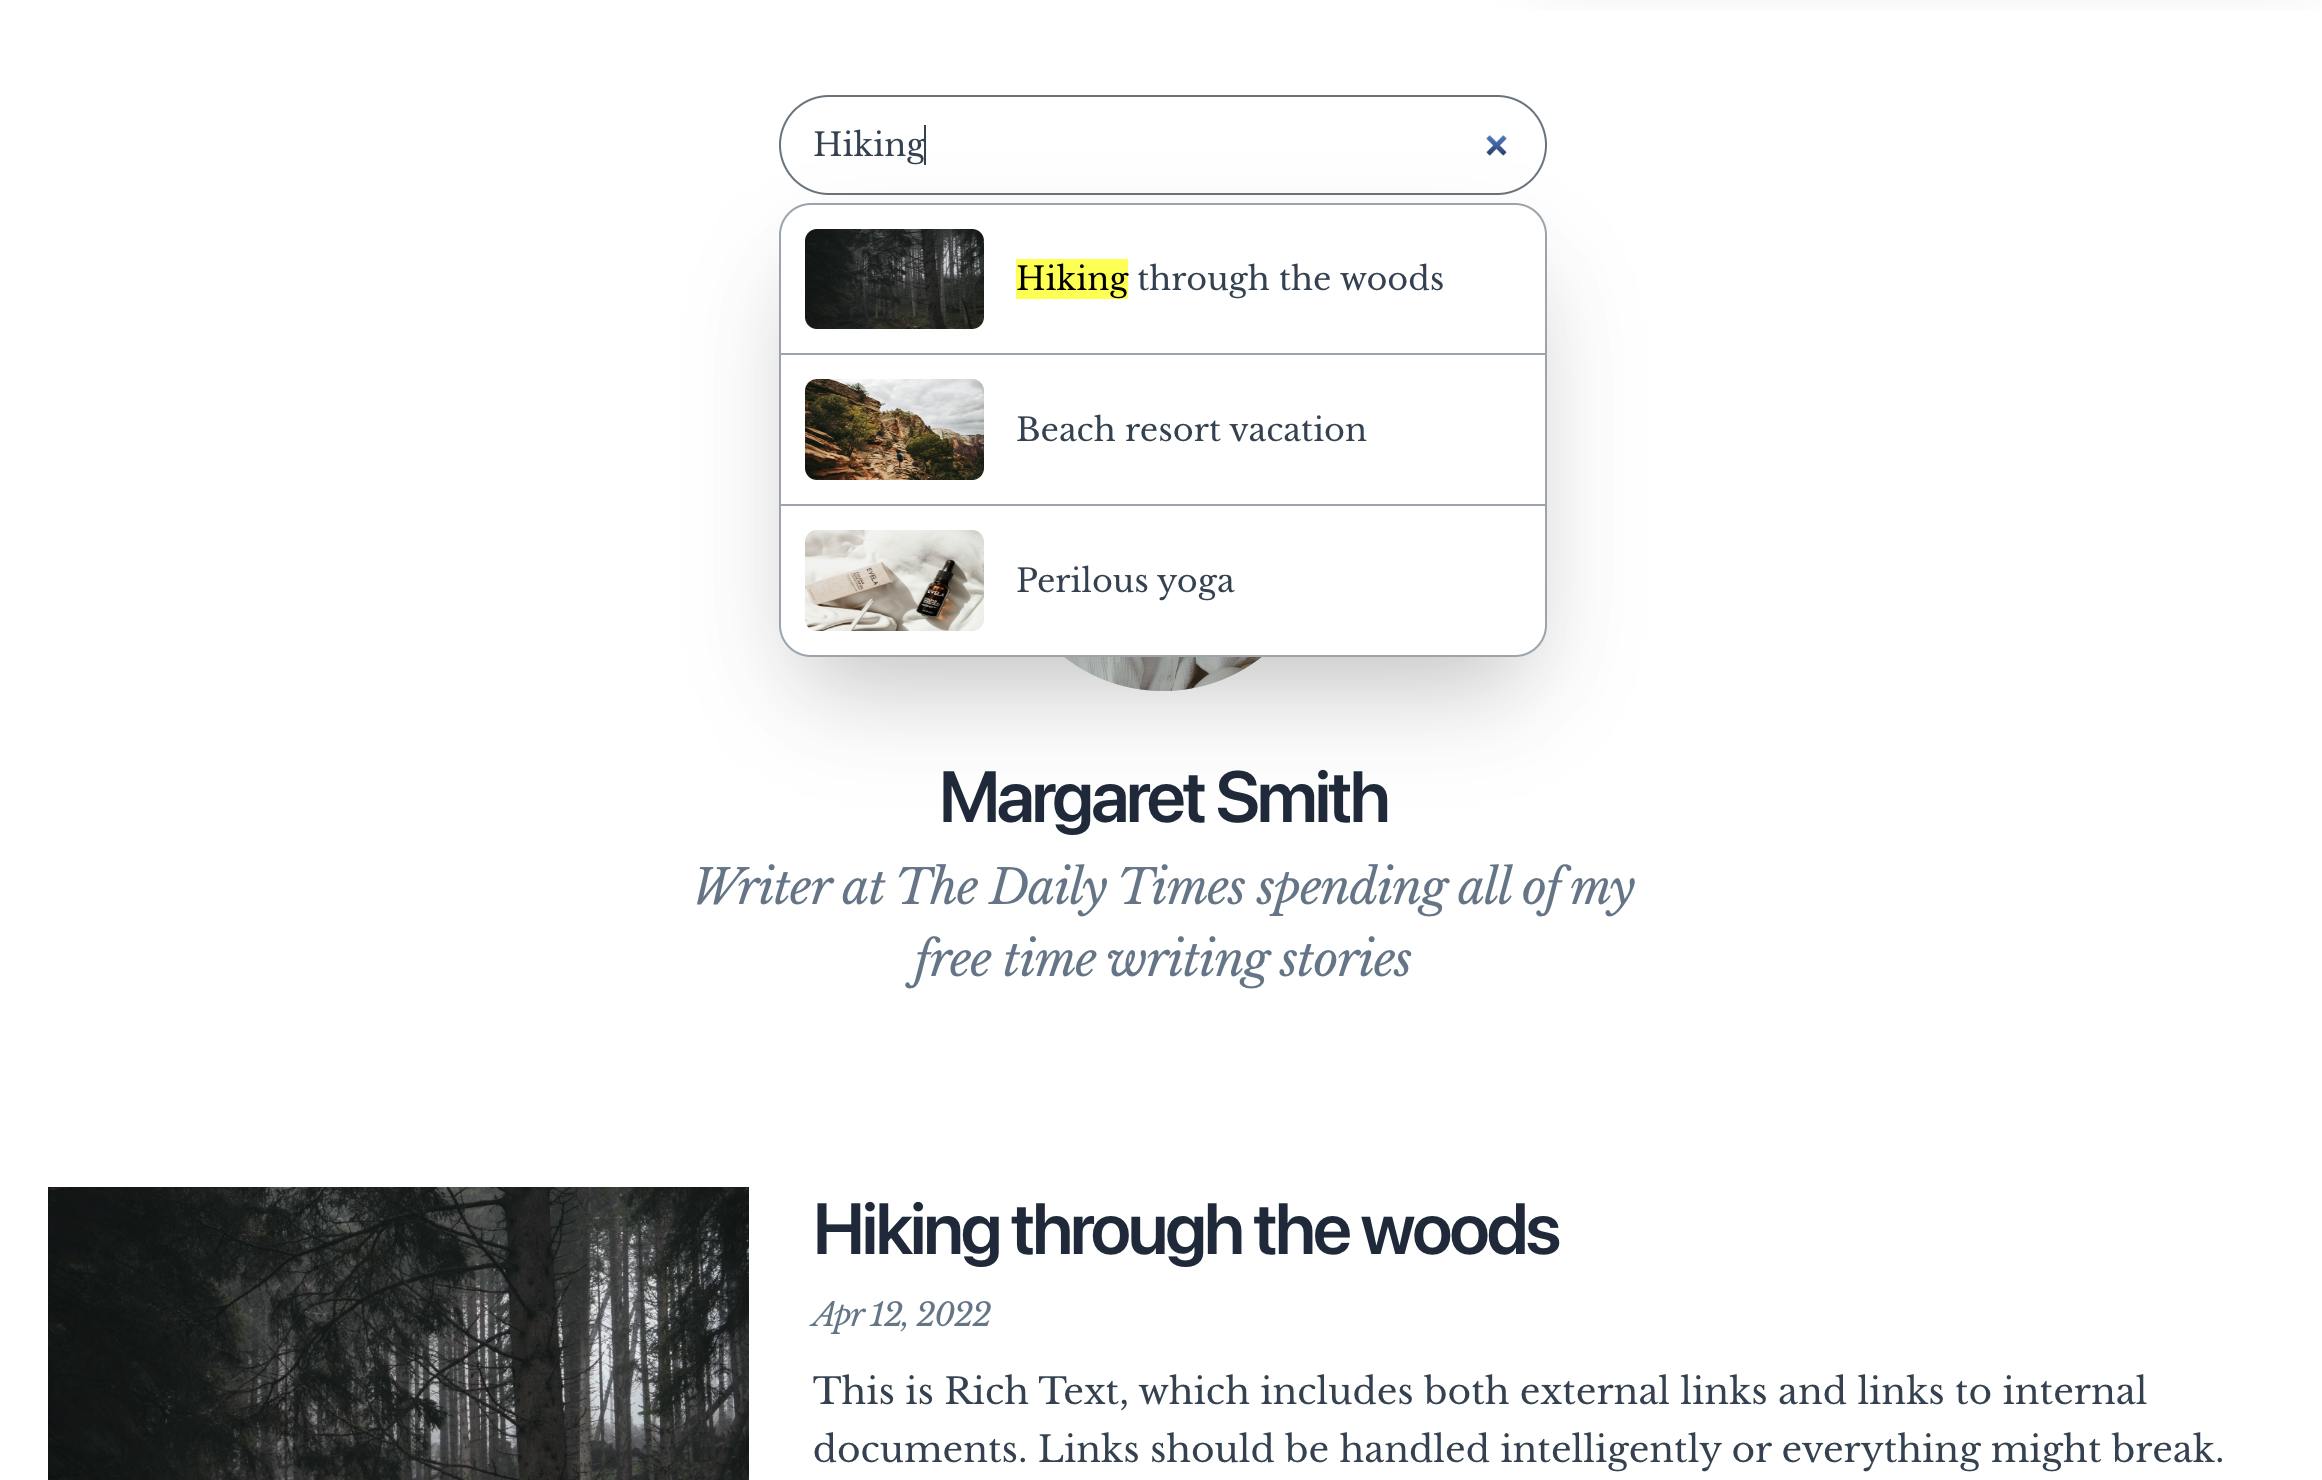
Now, let’s create the first of our two new components, the <SearchBox/>. Create a new file called ./src/components/SearchBox.js and add the following code.
// ./src/components/SearchBox.js

import { connectSearchBox } from "react-instantsearch-dom";

function SearchBox({ refine }) {
  return (
    <input
      type="search"
      className="w-96 mx-auto border border-gray-400 rounded-full px-4 py-3 focus:outline-none focus:border-gray-500"
      placeholder="What are you looking for?"
      onChange={(e) => refine(e.currentTarget.value)}
    />
  );
}

export default connectSearchBox(SearchBox);
This is a pretty small component containing the search input. First we need to import Algolias connector component connectSearchBox . Then we define our function passing the refine function from that higher order connectSearchBox component so be able to pass the inputed value trough it. We add some basic styling with tailwind and then export our function connecting it to connectSearchBox, that will make this component come prewired with Algolia each time we import it somewhere.
Now, over to the <SearchHits/> component. Create the component and add the following code:
// ./src/components/SearchHits.js

import { connectStateResults, Highlight } from "react-instantsearch-dom";
import { PrismicNextImage } from "@prismicio/next";
import Link from "next/link";

function SearchHits({ searchState, searchResults }) {
  return searchState.query ? (
    <div className="relative">
      <div className="bg-white border border-gray-400 rounded-2xl absolute top-1 right-0 left-0 shadow-2xl">
        {searchResults?.hits.length === 0 && (
          <div className="py-3 px-6">No results found!</div>
        )}
        {searchResults?.hits.length > 0 &&
          searchResults.hits.map((hit) => {
            return (
              <Link
                key={hit.objectID}
                className="flex items-center gap-4 border-t border-gray-400 first:rounded-t-2xl last:rounded-b-2xl first:border-0 py-3 px-3 focus:outline-none focus:ring-4 ring-inset ring-gray-100 transition-colors hover:bg-gray-100"
                href={`/articles/${hit.slug}`}
              >
                {hit.image.url && (
                  <PrismicNextImage
                    field={hit.image}
                    className="w-1/4 aspect-[16/9] rounded-md block"
                  />
                )}
                <Highlight attribute="title" hit={hit} tagName="mark" />
              </Link>
            );
          })}
      </div>
    </div>
  ) : (
    <></>
  );
}

export default connectStateResults(SearchHits);
Here, we created the component for showing search results by:
- Importing the necessary components from
react-instantsearch-dom, as with the previous component, theconnectStateResultsis used to connect this component to Algolia and the search box. TheHighlightcomponent is used to highlight the matched search string.PrismicNextImageis imported from@prismicio/nextto show the blog's image in the result. And finally, we importLinkfromnext/linkto link to the found posts. - If there's a query in
searchState, the component returns adivelement with various child elements; else, it returns an empty fragment. - The component first checks if there are any hits (
searchResults). If there are no hits, it displays a message saying, "No results found!" - If there are hits, it maps over the hits array, and for each hit, it creates a new
Linkcomponent.
- If there's a URL for the hit's image, the PrismicNextImagecomponent is used to display the image
- The Highlight component fromreact-instantsearch-domhighlights the title attribute of each hit - The component then exports the
SearchHitswrapped with connectStateResults, just like what we did with our previous component.
That’s it. Our search should now be working, and if we head over to https://localhost:3000 in our browser, we can see a search field has been added and try it out!
Connecting Prismic and Algolia
There’s still one thing left to do, though. We need to know that our Algolia index stays in sync with our data in Prismic. That's why we went through the troubles of setting that API route up in the beginning. Fortunately, this is very easy.
Once you have your app deployed on a public URL somewhere, all you need to do is add the webhook for calling our API route to the Prismic dashboard.
Once you arrive at the dashboard, follow these simple steps:
- Click your new project.
- Click the cog icon down left to access your settings.
- Click “Webhooks” in the sidebar.
- Click the “Create Webhook” button.
- Give your webhook a name.
- Fill the URL to your deployed app, adding
/api/algoliaat the end. - Choose the triggers “A document is published” and “A document is unpublished”.
- Click “Add this webhook”.
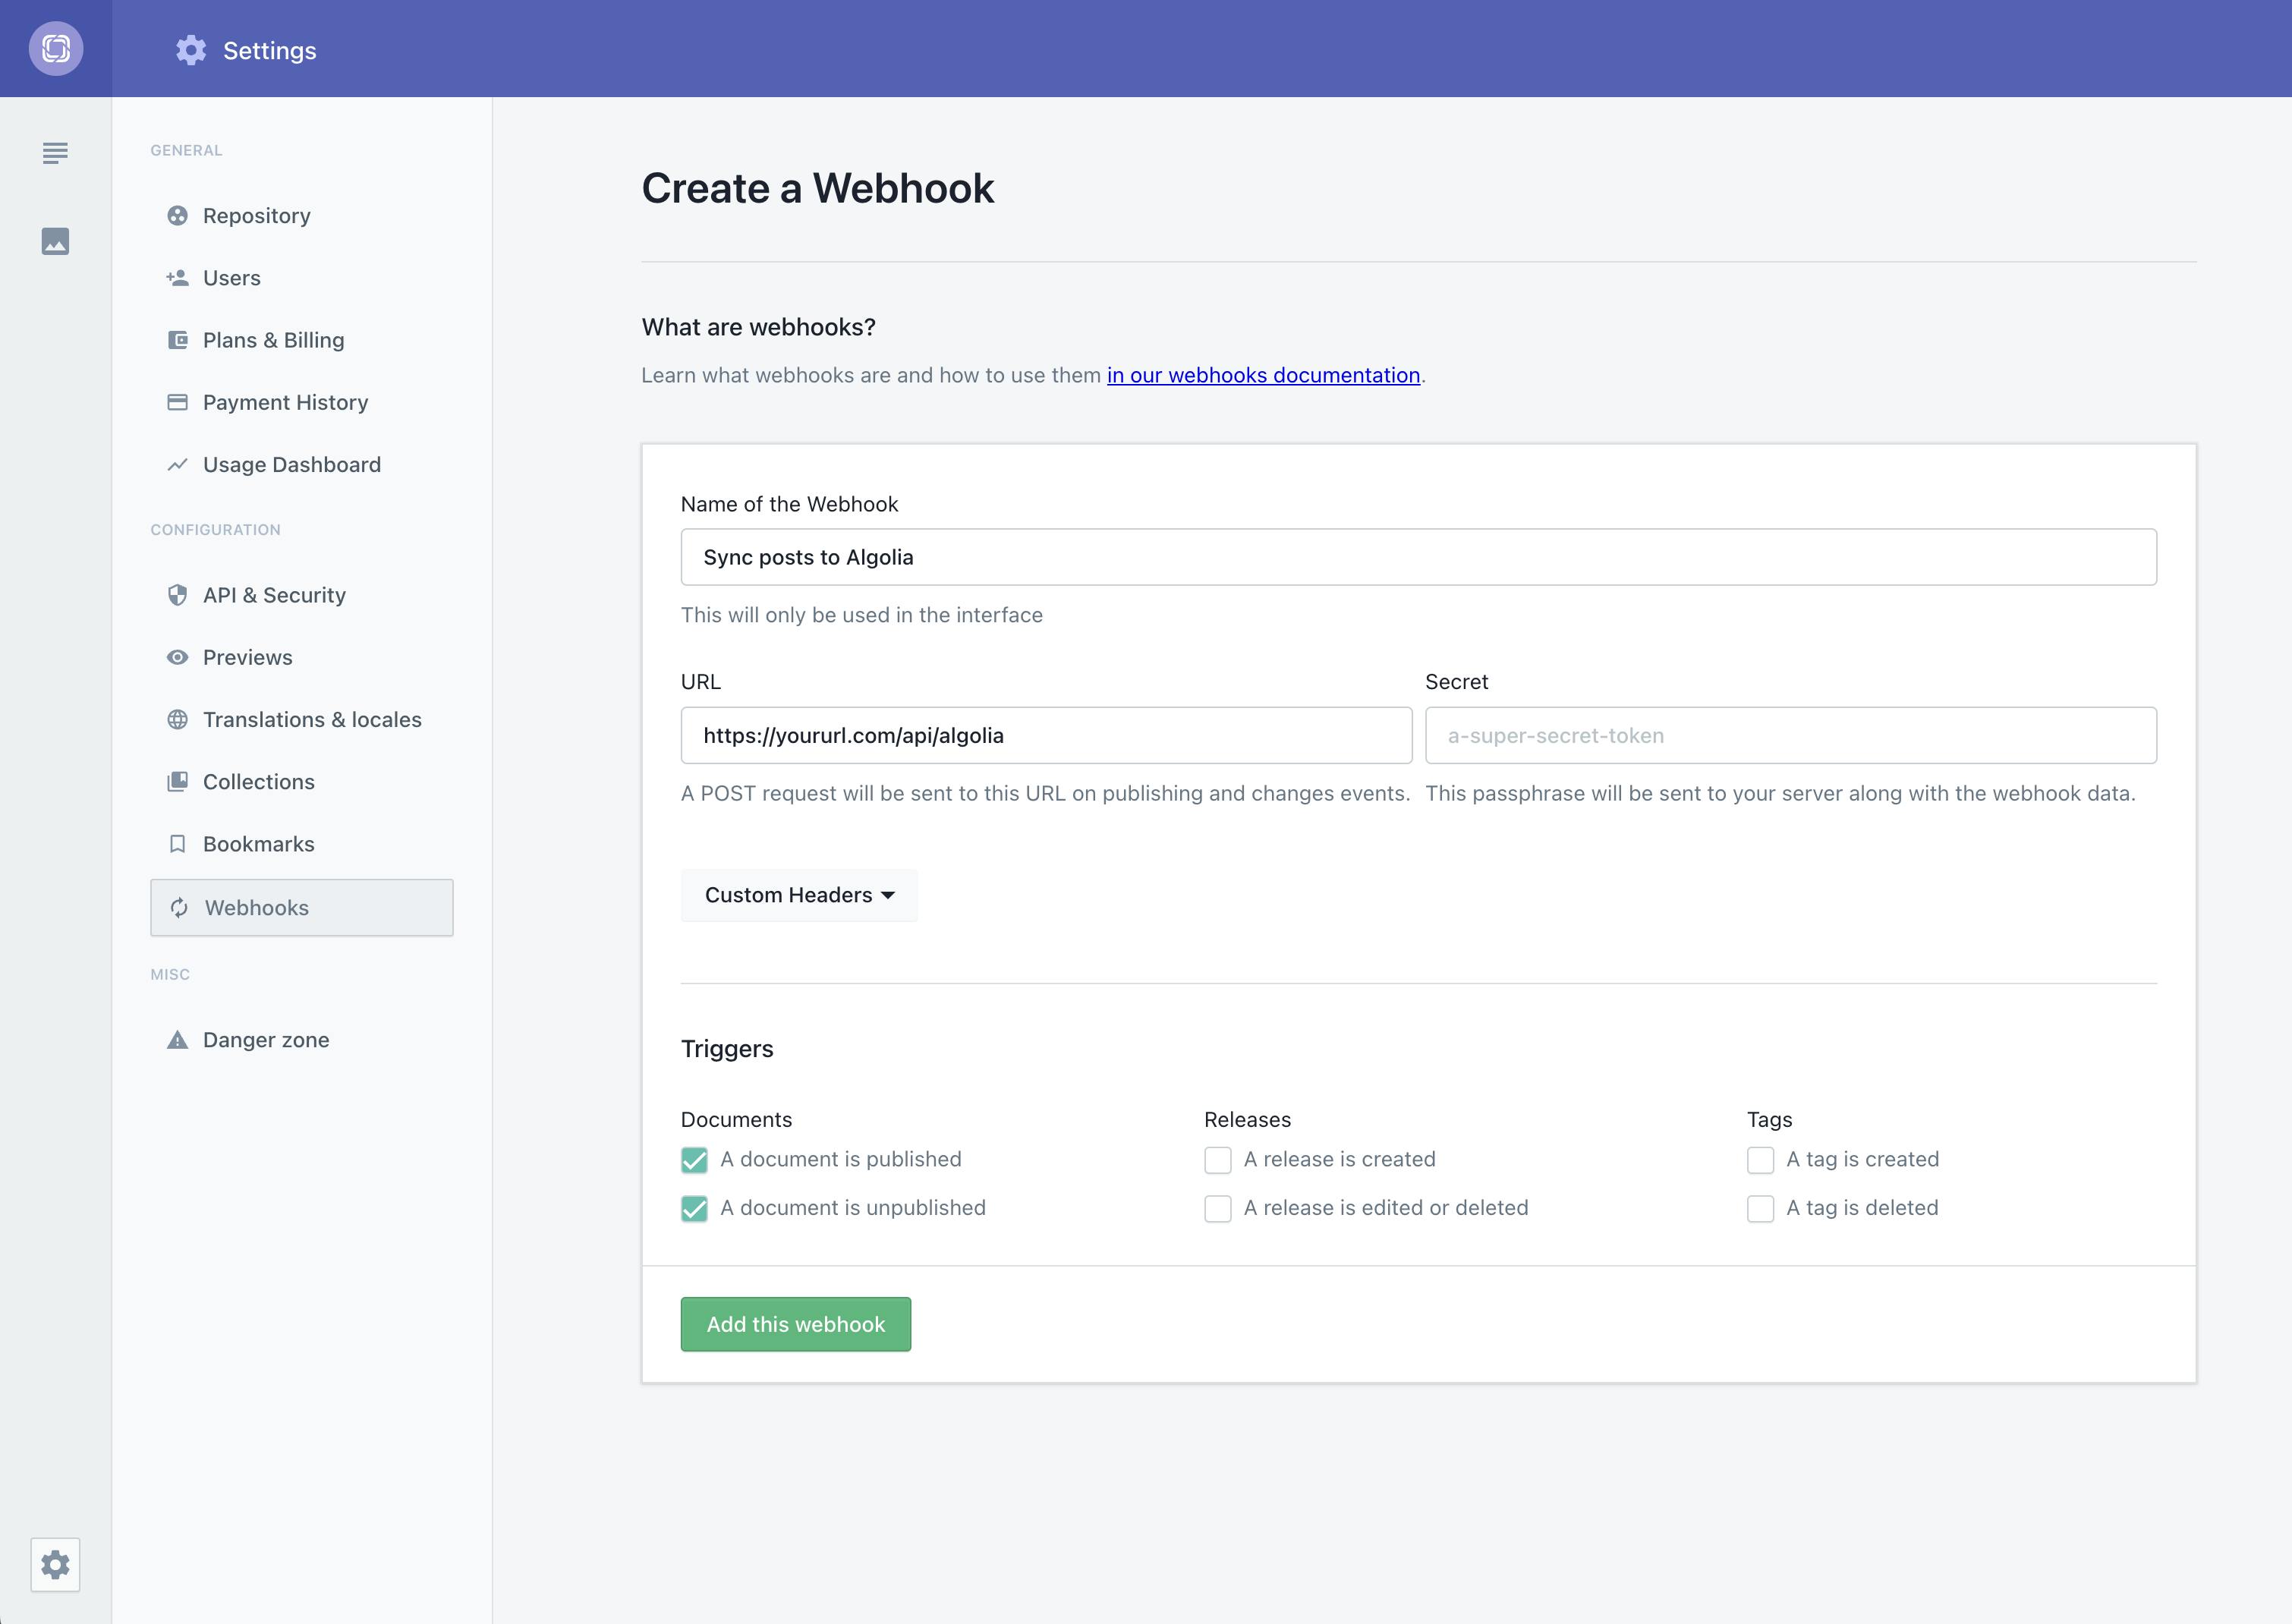
Once that's added and active, each time you publish or unpublish a document in Primsic, this webhook will fire and trigger that API route we previously created, sending all your data to Algolia.
Final thoughts on Algolia Instant Search
We've successfully added Algolia to a blog! We went through how to add website search capabilities with Algolia Instant Search and Prismic in a Nextjs application.
This guide marks your first step into incorporating Algolia Instant Search with Prismic and Nextjs, but it's just the beginning! Algolia is highly customizable and packed with features for you to explore.
Consider tweaking Algolia's advanced tuning parameters, adjusting its user interface, or using the analytics feature for better insights into user behavior. Align the tool to offer your users a personalized, efficient, and unique search experience.
Learning comes with experimenting - don't hesitate to dig deeper into Algolia's potential. Variety is the spice of successful projects, and yours is no different. Happy exploring, and feel free to drop us a comment below if you have any questions!


