
Prismic, a headless page builder, gives you server-rendered, as-you-type, effortless live editing with Next.js. It works with all of Next.js’ best features, like the App Router, Server Components, Server Actions, Draft Mode, on-demand revalidation, and more.
How is that possible?
In this article, I’ll walk you through the three parts that power live editing: the Page Builder, the iframe bridge, and the Next.js website.
You don’t need to know how live editing works to use it
This article is for those interested in the feature’s technical implementation.
We aim for simple solutions. We avoid reinventing and being too clever. Thus, the strategy explained here will be simple, not a technical marvel. We aren’t inventing brand new tech to render websites, but we are making the best experience for both developers and content writers.
Act 1: The Page Builder
The Page Builder is where content writers manage and write content. Every piece of content that appears on a Prismic-powered website is composed in the Page Builder.
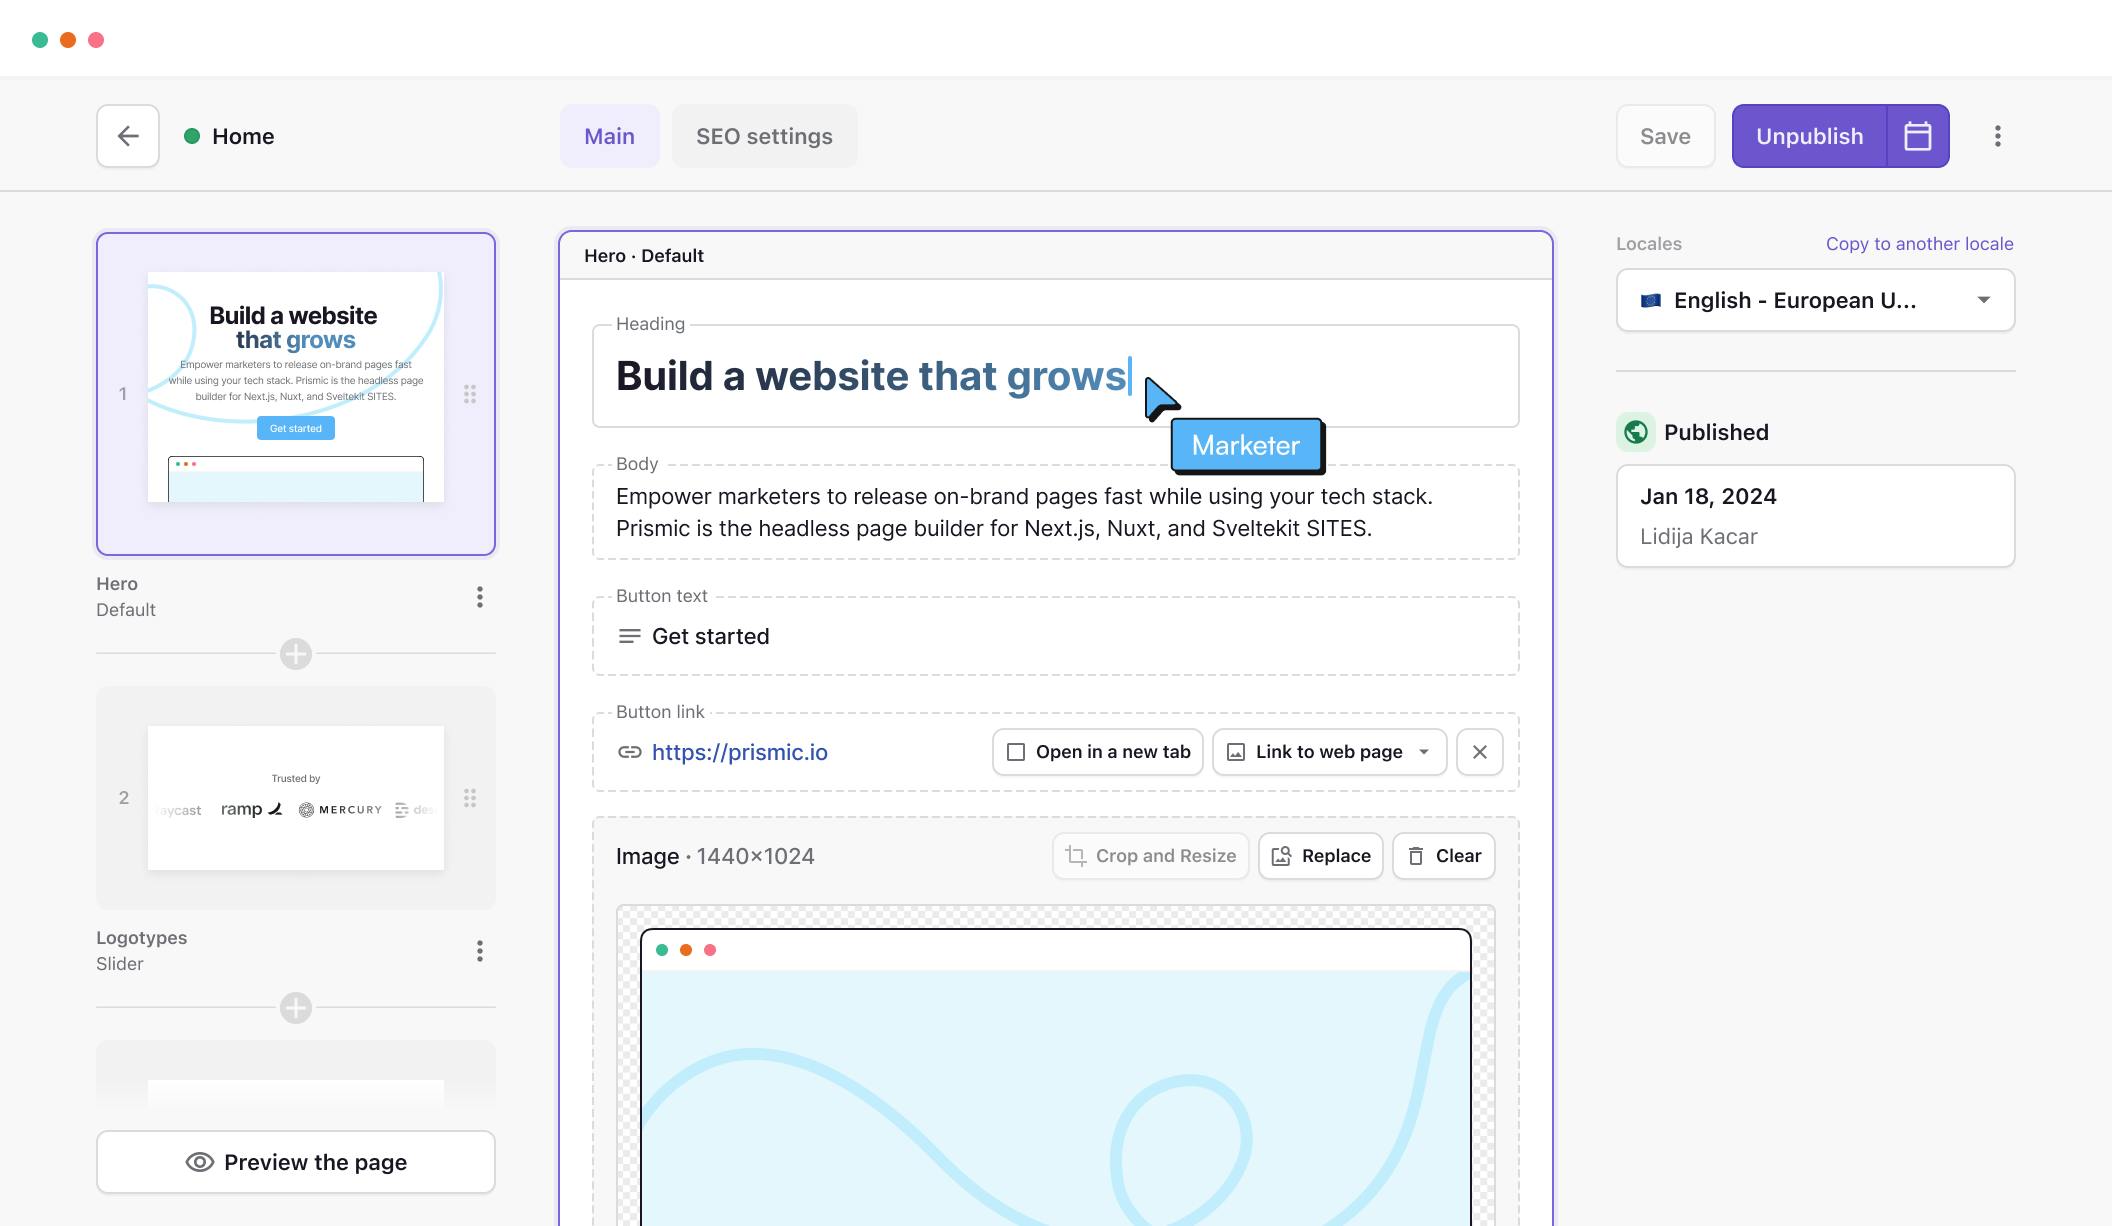
As writers build pages with slices, previews of each slice are rendered in real-time through individual iframes—all before saving a draft or publishing globally.
Slices are sections of a page
Developers create React components for each slice and render them using the <SliceZone> component. Content writers use these slices to build pages without technical knowledge. Learn more about slices.
The Page Builder is the first part of the live editing system. It is responsible for packaging each content field’s value and converting it to Prismic’s Document API format, the same format provided when querying content from Prismic’s API. The conversion happens in the browser, allowing for quick and responsive updates.

The content needs to travel from the Page Builder to the Next.js website iframes. Cue the iframe bridge.
Empower your marketing team to release pages quickly!
Sign up for free to see how Prismic lets you build with your preferred tech stack while enabling marketers to create high-performing, on-brand pages independently. Free up your time for the dev work you love!
Act 2: The iframe bridge
Using iframes for each slice preview unlocks some nice capabilities while also introducing some challenges.
Iframes let us embed the Next.js website directly in the Page Builder. The iframes load a dedicated route, bootstrapped when starting a new Prismic website. Using a route from within the website means everything native to it, such as its CSS, fonts, and libraries, are loaded just like any other page on the website.
Communication through an iframe, however, can be challenging. Browsers block interaction between an iframe and its parent to prevent unauthorized access. Without that restriction, a website could load, for example, your bank’s website and read your information.
Browsers do, however, allow sending authorized messages between an iframe and its parent via the window.postMessage() API. We built a library that facilitates communication through iframes based on window.postMessage(). The library creates a persistent connection between the pages and allows for passing typed messages across the connection. If the iframe suddenly disconnects, the parent is notified, giving the parent an opportunity to clean up and display an error message.
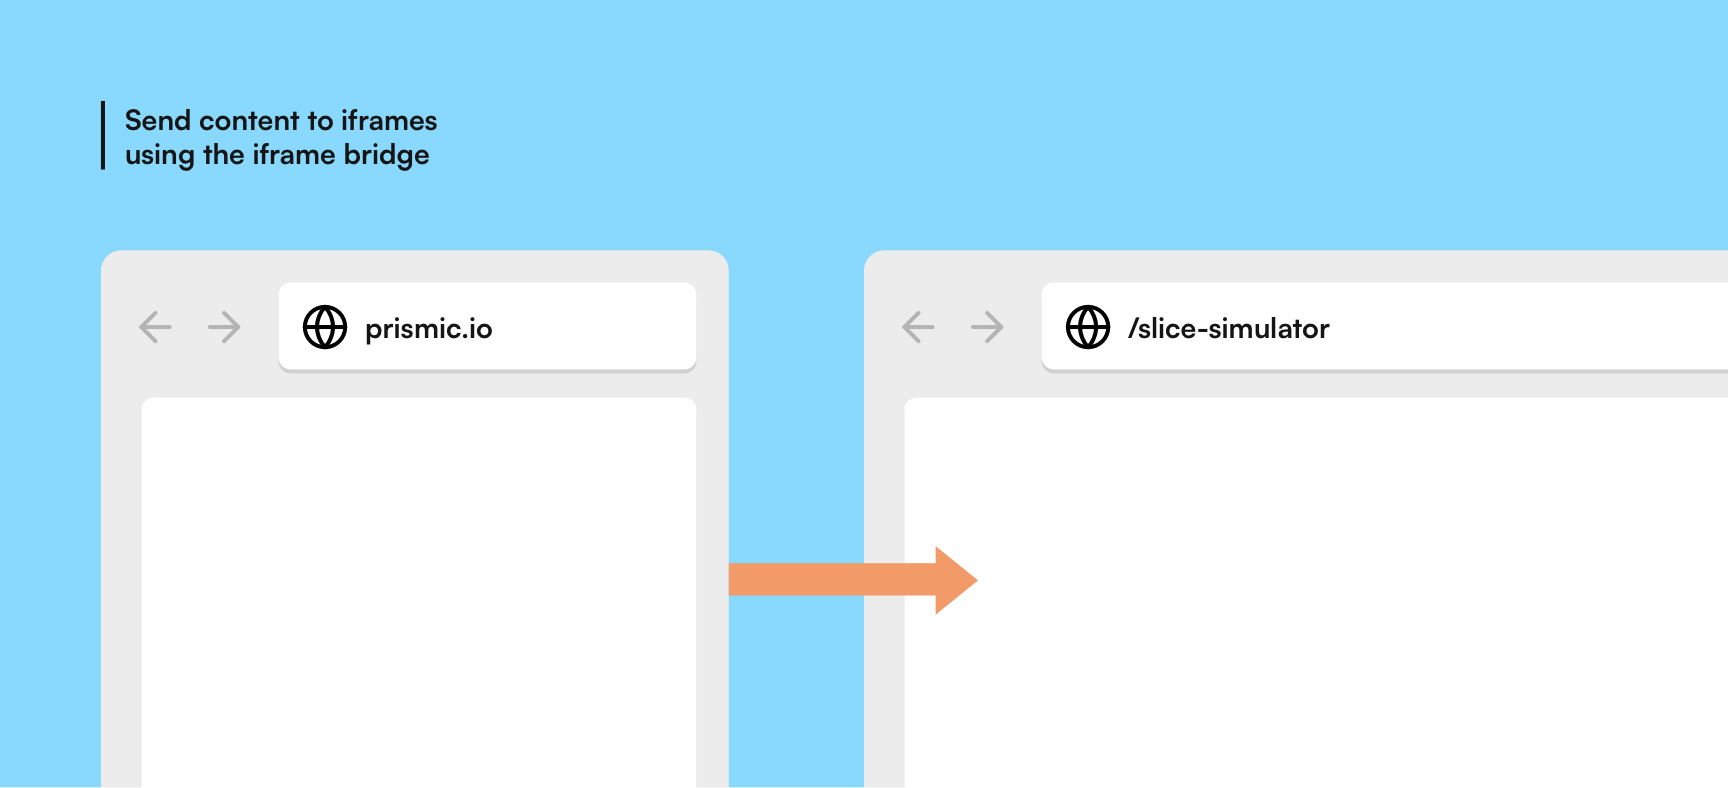
The Page Builder sends content to the Next.js website using code similar to the following:
import { SimulatorClient } from "@prismicio/simulator";

// Create a client with a reference to the iframe.
const client = new SimulatorClient(iframeRef.current);

// Connect to the Next.js website and wait for
// a successful handshake.
await client.connect();

// Send the latest page content to the Next.js website.
await client.setSliceZone(content);
Let’s see how the other end of the bridge reacts.
Act 3: The Next.js website
The Next.js website has a dedicated route for rendering live previews: /slice-simulator. The route hosts the receiving end of the iframe bridge, as well as code to render the live preview. Everything is packaged into a single component: <SliceSimulator>.
<SliceSimulator>
  <SliceZone slices={slices} components={components} />
</SliceSimulator>
<SliceSimulator> is a Client Component that listens for messages from the iframe bridge.
// Within the <SliceSimulator> component...

// Listen for new content.
simulator.state.on(
  StateEventType.Slices,
  (content) => {
    // Do something with the content.
  },
);
When the component receives a message with content, we somehow need to forward that content to the <SliceZone> component. We have some requirements: the live preview must be compatible with Server Components, support Next.js’ dynamic functions like cookies() and headers(), and render like any other page on the website.
Here’s the magic that makes it work: we send the content to the URL as a URL parameter. Storing the content in the URL allows the page to render on the server; the URL and its parameters are available on the server, unlike client-side in-memory variables or localStorage. Once it’s in the URL, the parameter can be read and passed to the <SliceZone> component.
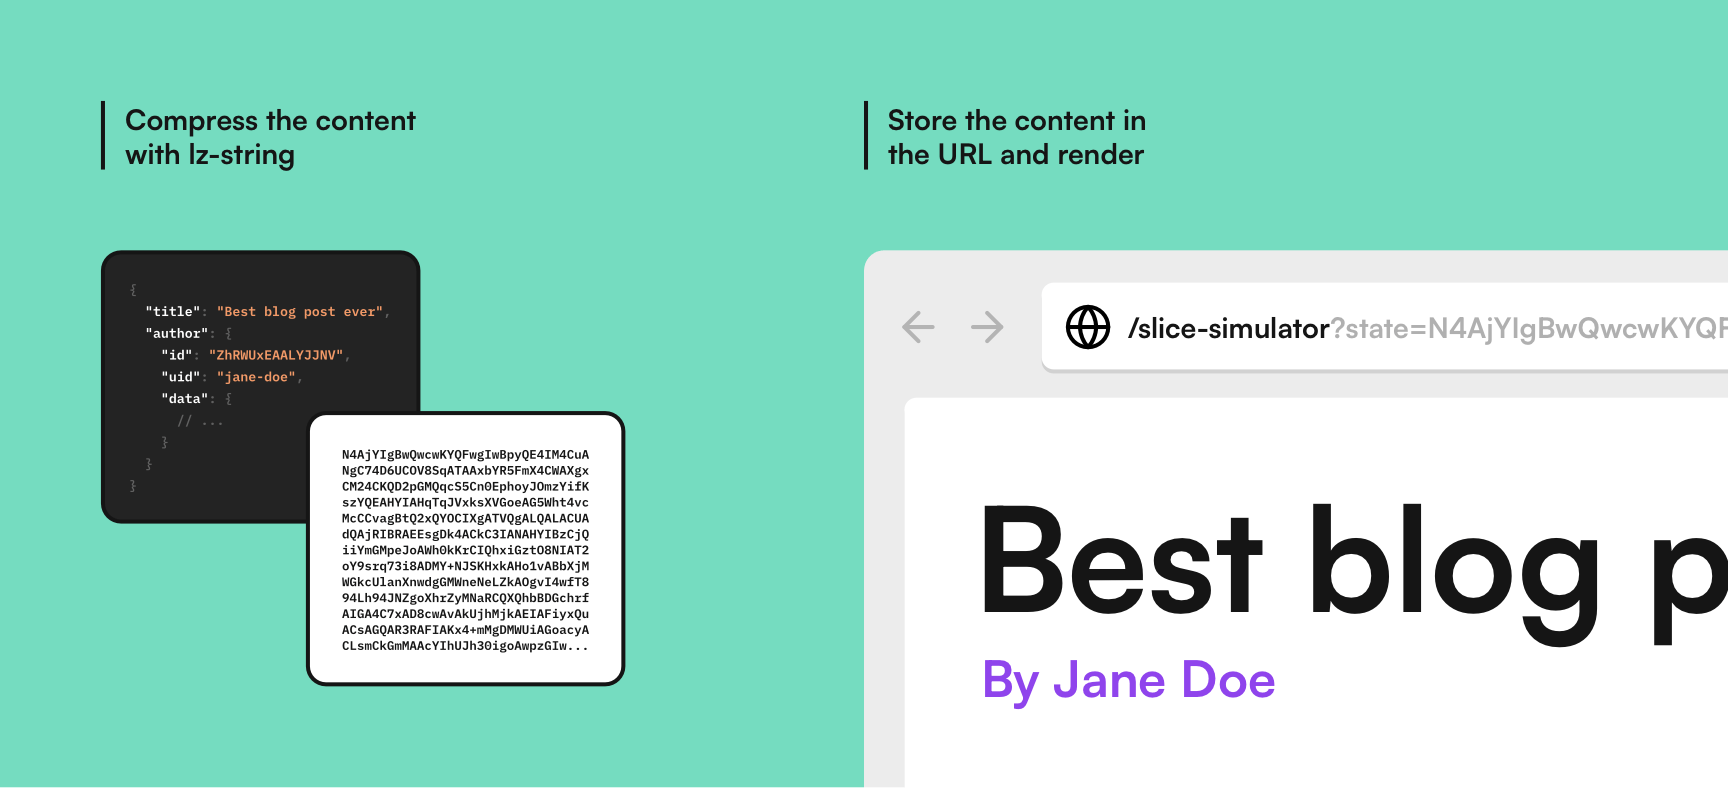
The content is a big JSON object and needs to be serialized before storing in the URL. <SliceSimulator> uses lz-string to compress the content and turn it into a string, perfect for our needs.
import { compressToEncodedURIComponent } from "lz-string";

const content = { foo: "bar" };

compressToEncodedURIComponent(JSON.stringify(content));
// => "N4IgZg9hIFwgRgQwE4gL5A"
You may have used lz-string in the wild
The TypeScript Playground and Prettier Playground use lz-string to store your code in the URL.
Once the content is compressed and serialized in the URL, the <SliceSimulator> component calls a Server Action to revalidate the route via Next.js' revalidatePath(), prompting a re-render.
The URL parameter is read on the server, converted back to a JSON object, and rendered on the page with <SliceZone>, just like the website’s other pages.
// src/app/slice-simulator/page.tsx

import {
  SliceSimulator,
  getSlices,
} from "@slicemachine/adapter-next/simulator";
import { SliceZone } from "@prismicio/react";

import { components } from "@/slices";

export default function SliceSimulatorPage({ searchParams }) {
  const slices = getSlices(searchParams.state);

  return (
    <SliceSimulator>
      <SliceZone slices={slices} components={components} />
    </SliceSimulator>
  );
}
The <SliceSimulator> component continues to listen for new content sent from the Page Builder. When it receives new content, the process starts again and updates the preview.
With that, we have live editing that updates as quickly as Next.js can render.
Wrap-up
The live editing system can be summarized as the following flow:
- As content is written in the Page Builder, convert it to Prismic’s Document API format in the browser.
- Send that data to the slice preview iframes via the iframe bridge.
- Receive the data in the Next.js website, store it in a URL parameter, and re-render the page on the server.
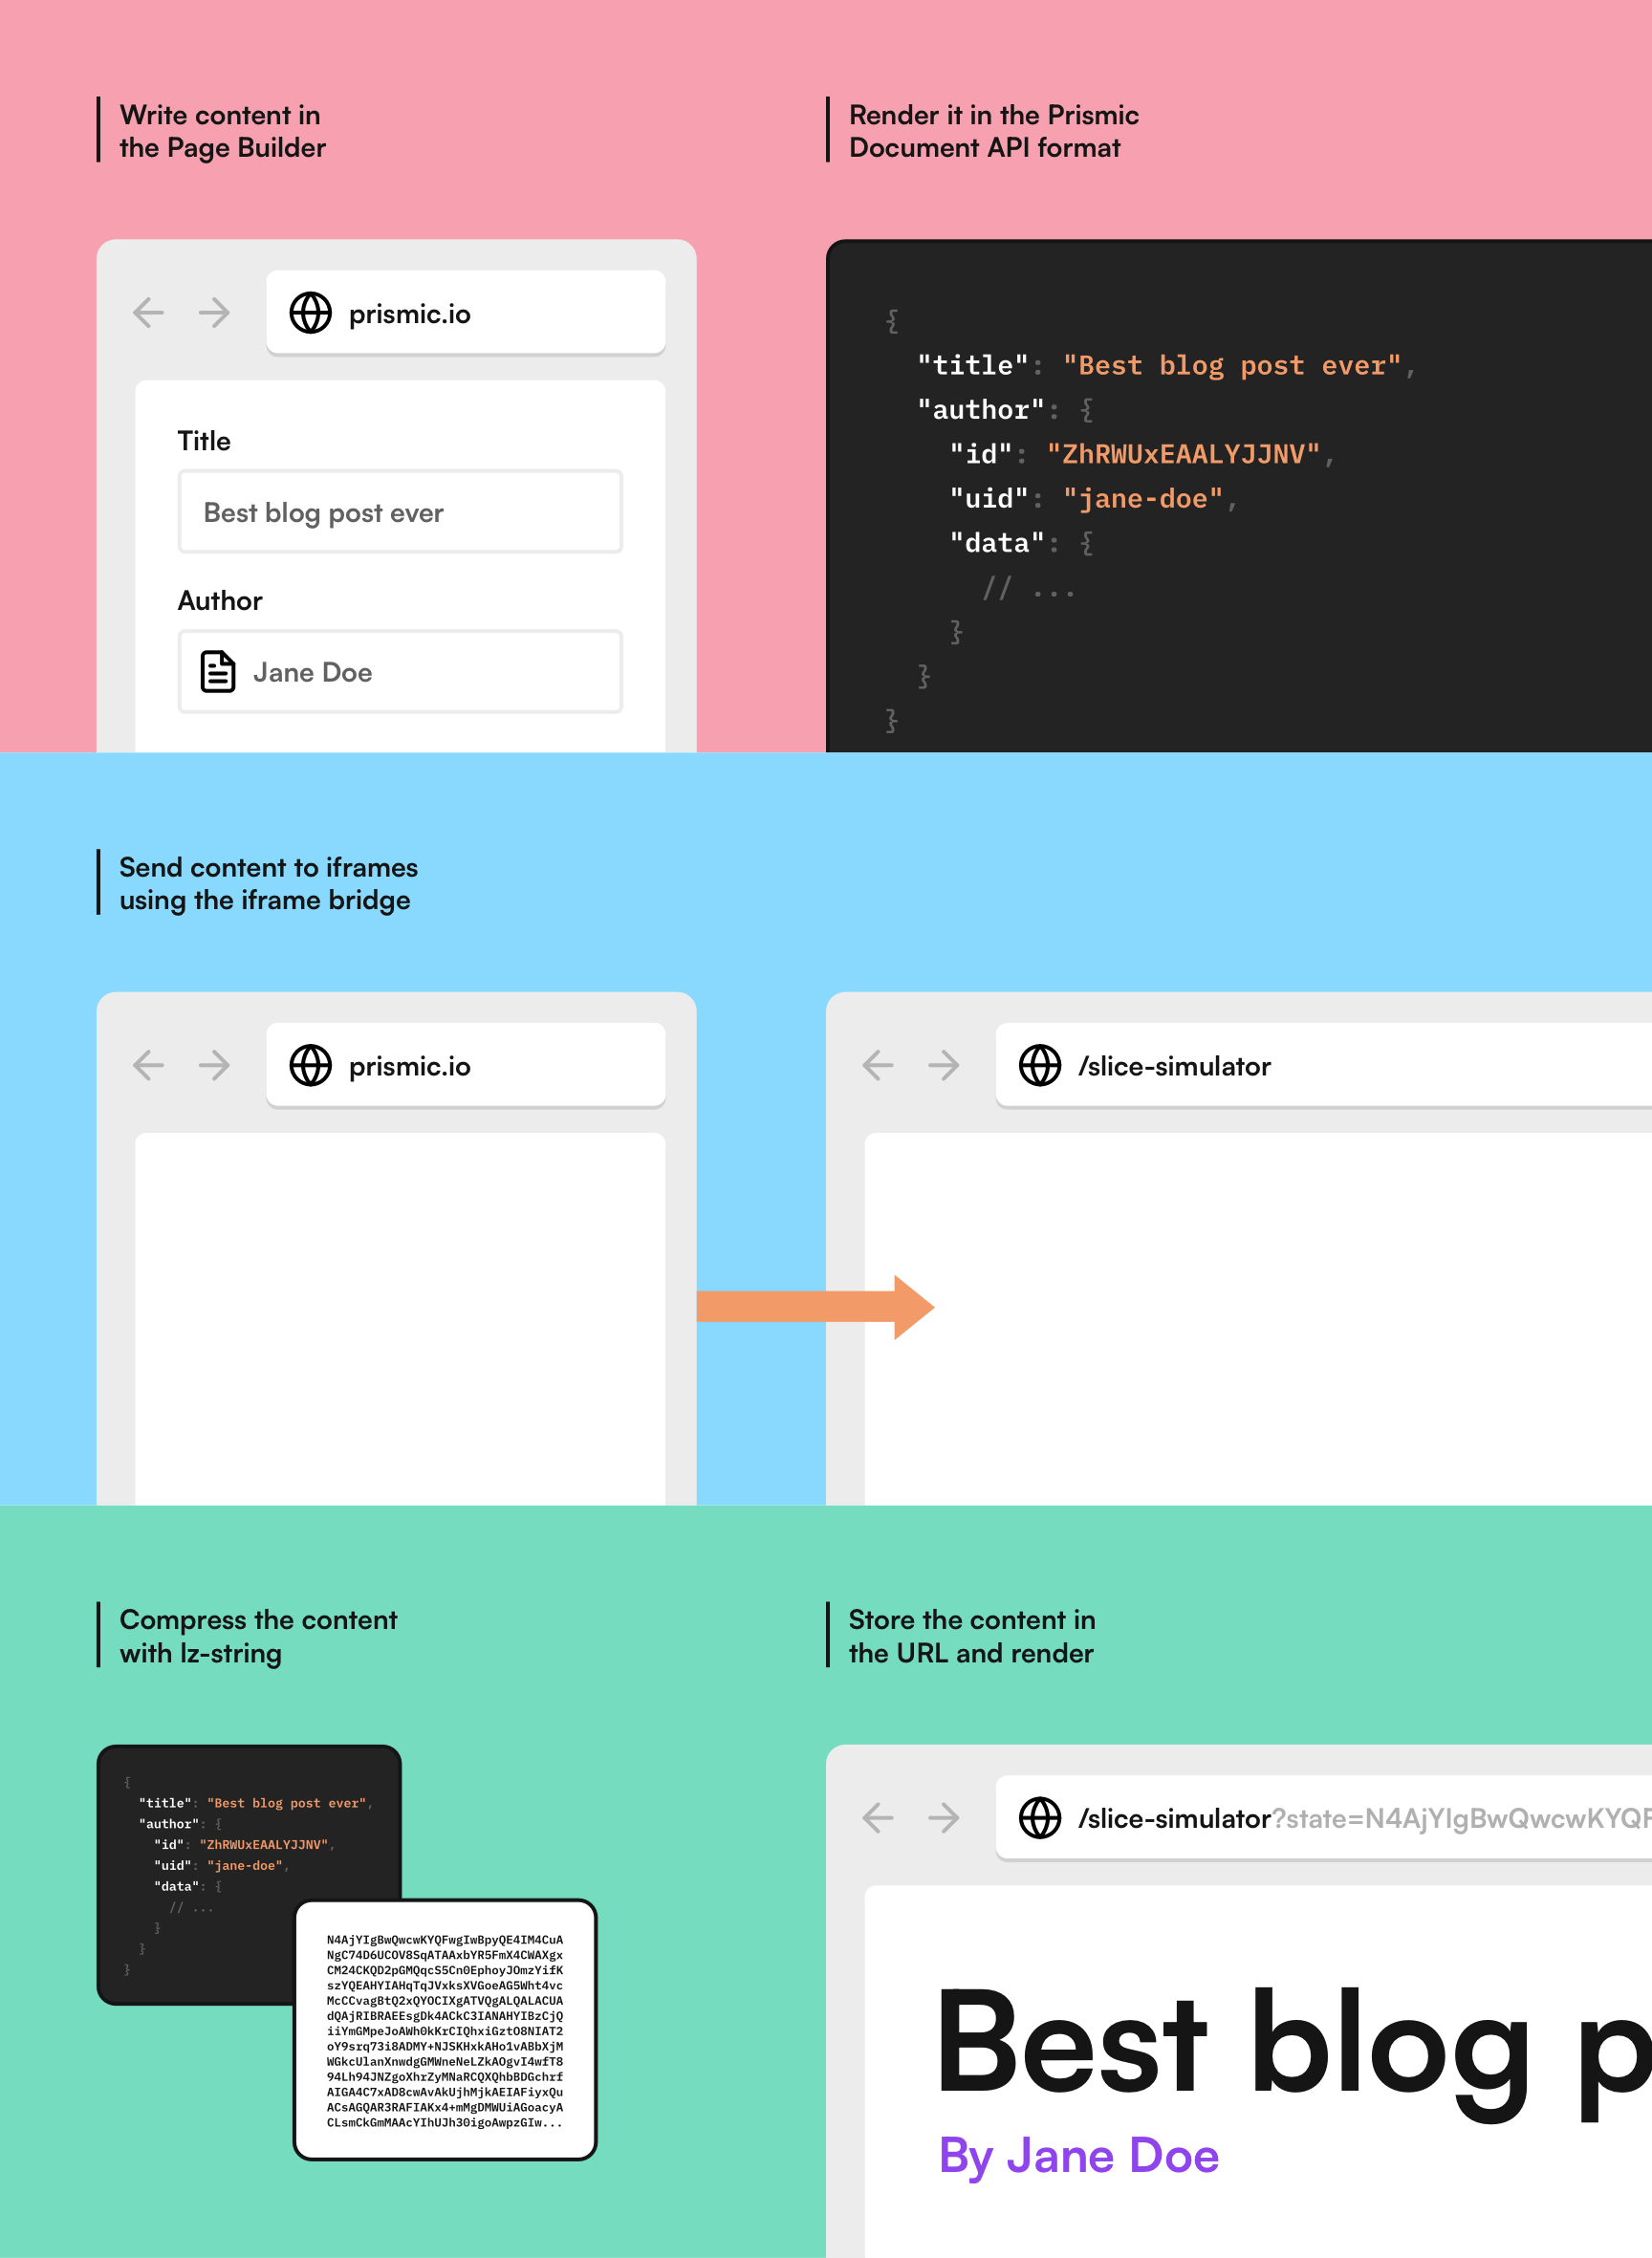
We combined existing technologies to build a simple, yet effective, live editing system. Structuring pages around slices means we can reduce the scope of live editing to just the slices, a simpler task than rendering a whole page.
Developers get live editing out-of-the-box when bootstrapping with a Prismic starter or the @slicemachine/init CLI—no in-depth knowledge necessary.
This article focused on live editing with Next.js, but similar techniques are used for Prismic’s Nuxt and SvelteKit integrations. If you aren’t using Next.js, don’t worry; we still have you covered. 😉


