

Forms are an important part of any application. They allow users to send us data and interact with our applications in various ways. In the past, when it came to adding forms to a Next.js application, the default was to reach for an external NPM package like Formik or React Hook Form. But, with the upcoming React 19 and Next.js updates, that might be able to change.
In this tutorial, we will look at how we can build a small IMDB clone that allows users to add films to a database, rate those films, and then delete a film when it’s no longer required. Check out the video below to see it in action!

For this tutorial, we’re going to be making use of Next.js App Router and its Server Actions functionality. If you’re not already familiar with them, make sure to check out the documentation here. Finally, we will use Neon and Drizzle for our database and ORM and of course, we will use Prismic (sign up for free here) to manage the content we show on the page.
Why use Next Forms?
As mentioned in the previous section, in the past when working with forms in Next.js, it was commonplace to reach for an external dependency like Formik or React Hook Form. But, with the upcoming updates, we can make use of React’s extended form element and Server Actions so we can avoid installing any extra dependencies while not sacrificing functionality.
This has many benefits, such as fewer dependencies to manage, less setup required, and everything being native to Next and React, so there is no package-specific code you need to remember and/or adapt to when changing packages or projects that use different dependencies.
Setting up our Prismic project
Once logged into your Prismic account, you’ll need to create a new repository, which can be done by clicking the "Next.js" framework and then selecting the “Minimal starter.” After this, give your repo a unique name, choose the “free plan,” and click "Get started with Slice Machine." You should now have a created repository and be shown a screen like the one below.
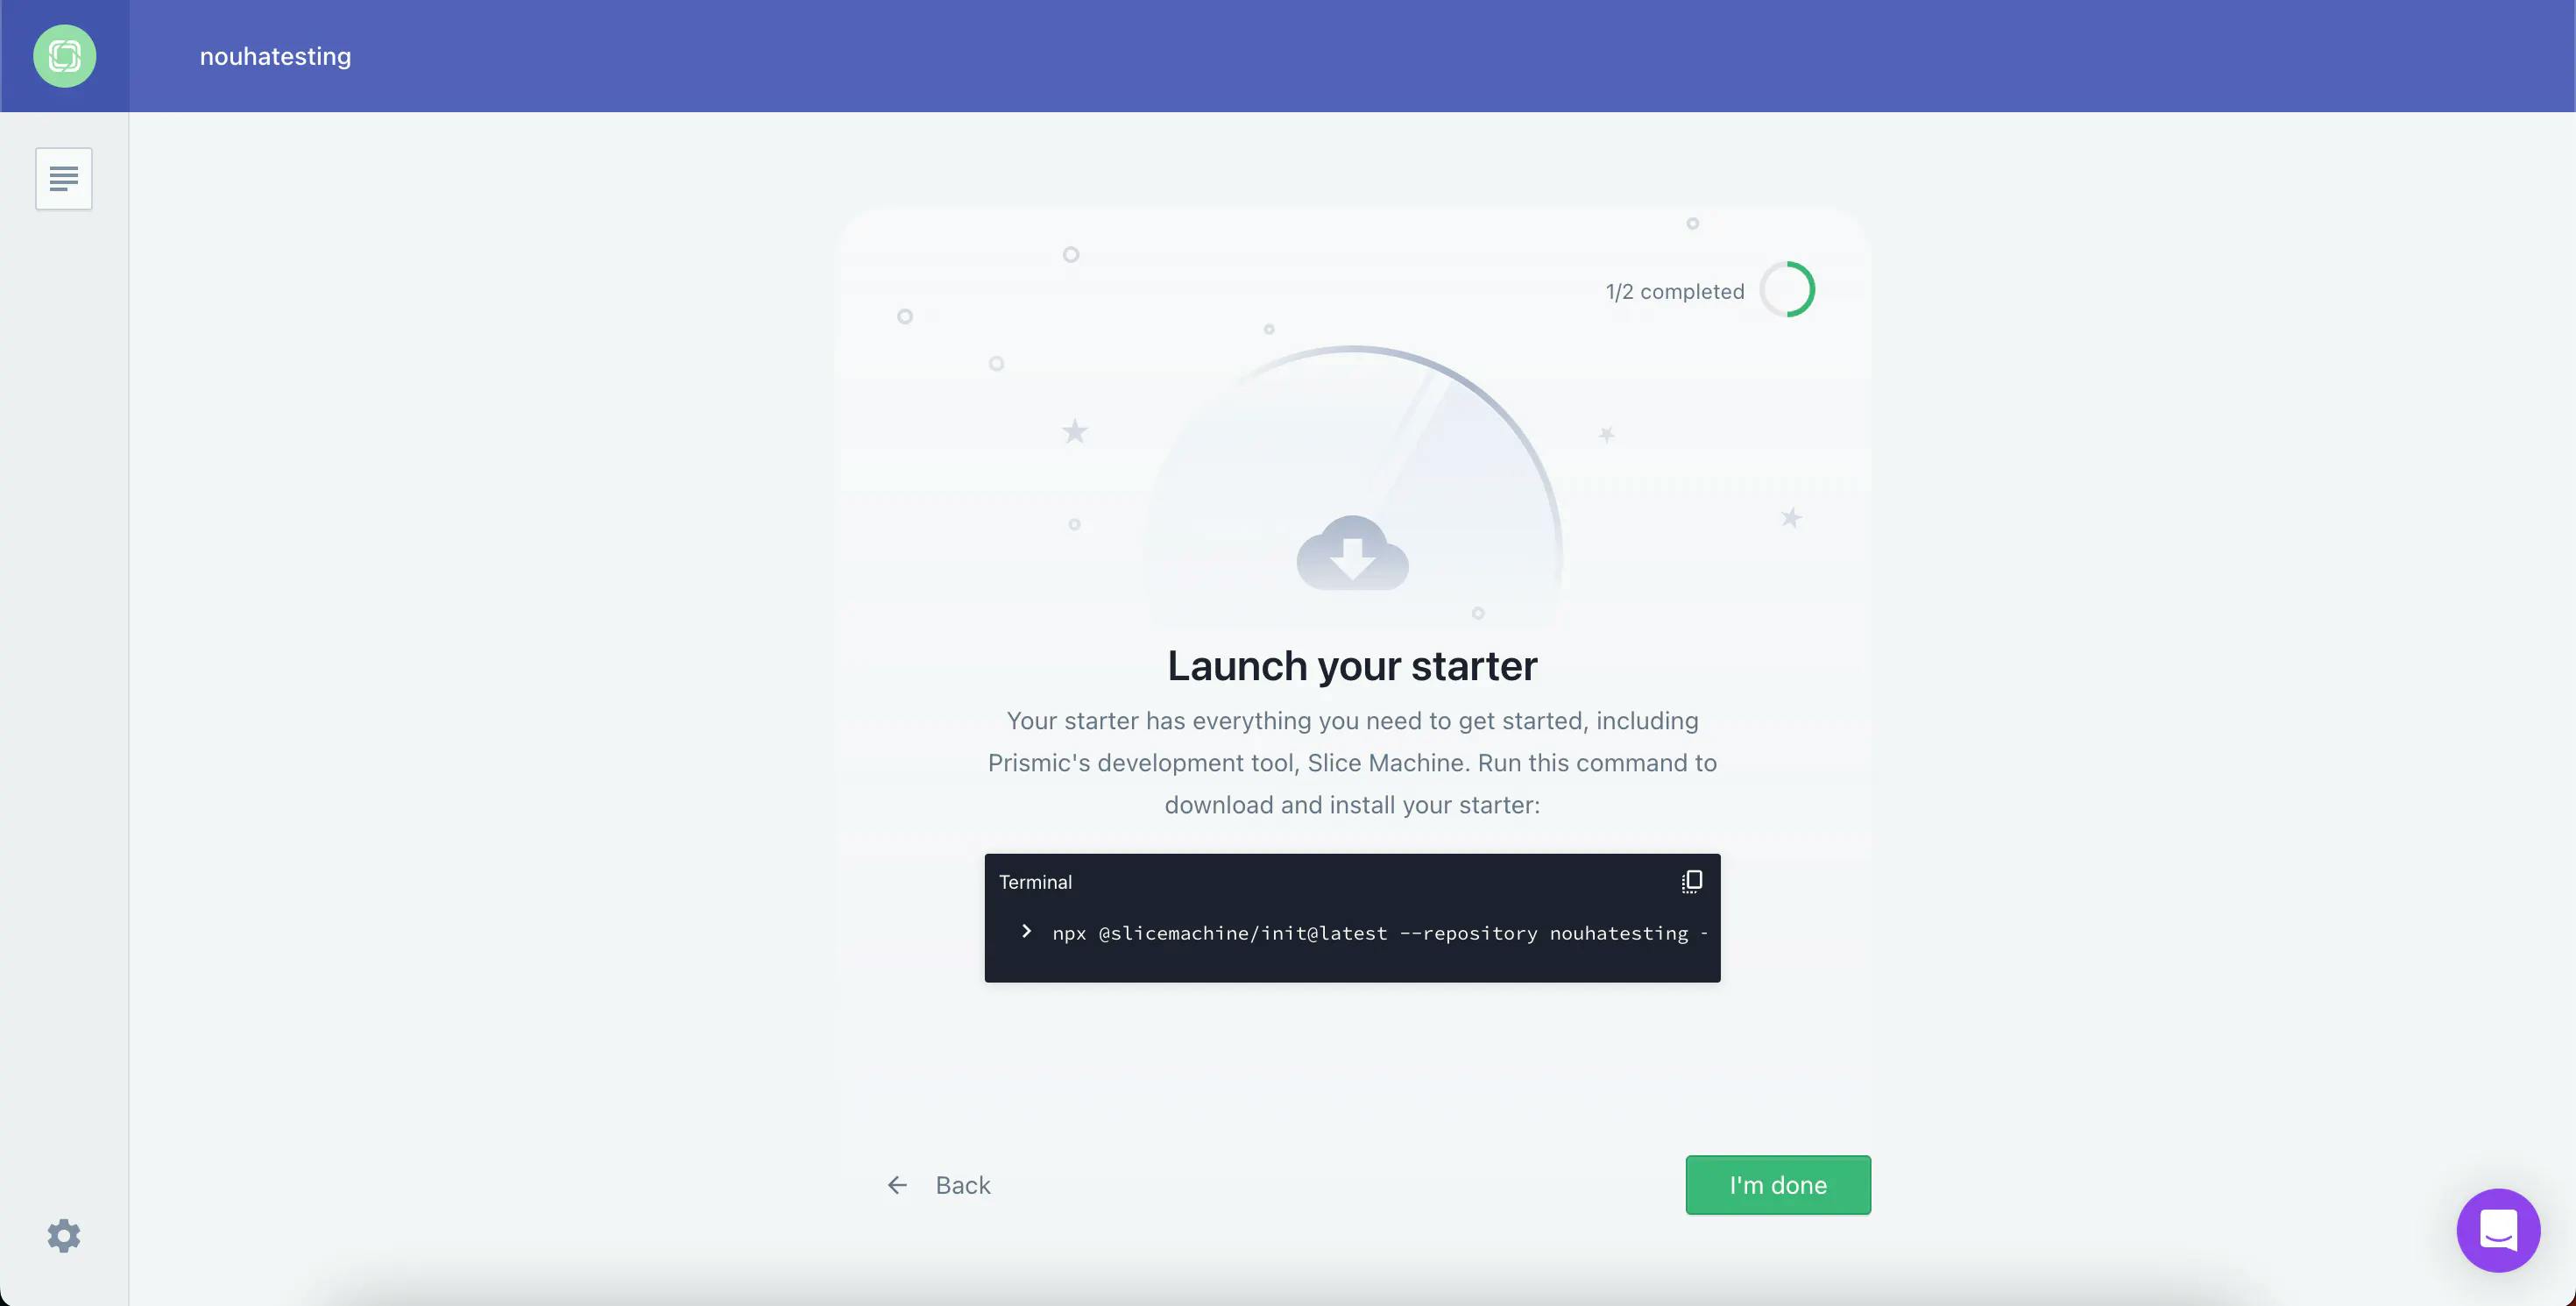
At this point, you’ll want to take this command and run it locally in your terminal to clone and set up your Prismic repository on your local machine. After this command finishes, you should then have all of the files you need to build your Next.js project powered by Prismic! Open your project in your preferred IDE, and let’s get started!
Updating React and Next.js Versions
With our code now set up on our local machine there is some housekeeping we need to take care of before we can start building our application. Most notably we need to bump our React and Next.js versions to use the upcoming canary releases. This is because, at the time of writing, the features we’re going to be using useFormStatus (docs) and useActionState (docs) are only available in the upcoming React canary versions.
To bump your package versions, go into your package.json file and change both your react and react-dom versions to 19.0.0-rc-f994737d14-20240522 and your next version to 14.3.0-canary.87. Then, after making these changes run the command npm i --force to install the new versions.
A note about --force
The --force is required to force the installation of the new versions and ignore dependency warnings/errors due to unsupported versions from packages. These errors happen because we’re installing canary versions of React that other NPM packages we have installed haven’t been updated to support yet. Once these features are in stable releases and the other packages have been updated to support the new releases, you can omit the --force.
Configuring Neon and Drizzle
With our React and Next.js version updates now taken care of the next step is to set up our database and ORM for the project. For this tutorial, I’m going to be using Neon for my database as it’s currently my favorite way to work with a relational database since it makes it painless to set up and build projects.
Prefer to use a different database provider?
If you don’t want to use Neon and would rather use another database provider, the steps I cover below for setting up the database connection in the app and pushing the schema should work for you as well.
If you want to follow along with me, head over to Neon’s website and sign up for a new account on their free tier. Then, create a new project by adding a name, selecting a region close to your location, and clicking “Create project.”
Once your database project is set up, we’ll need to get our connection string environment variable, which we can get from the project dashboard under the “Connection string” heading. Copy the connection string shown and then add it to a new .env.local file at the root of your project, like so.
// .env.local

NEON_DATABASE_URL=YOUR_CONNECTION_STRING
Then, with our connection string added to the project, we’re ready to install the dependencies we’ll need to set up our connection to Neon from our Next.js app and interact with it later in our Server Actions.
To install these dependencies, run the command npm i --force @neondatabase/serverless drizzle-orm zod followed by npm i --force -D drizzle-kit.
Connecting to our database
With the required NPM packages now installed, we can add the required files to our project to allow us to connect to and interact with our database. The first one of these files is our Drizzle config file which is how we’ll push schema changes and updates to our database using drizzle-kit. To add this file, create a new file in the root of the project called drizzle.config.ts and add the code below.
// ./drizzle.config.ts

import { config } from "dotenv";
import { defineConfig } from "drizzle-kit";

config({
  path: ".env.local",
});

export default defineConfig({
  schema: "./src/db/schema.ts",
  out: "./drizzle",
  dialect: "postgresql",
  dbCredentials: {
    url: process.env.NEON_DATABASE_URL!,
  },
});
Then after adding this file, we need to create the config file that will allow us to connect to our database from within our Server Actions. To create this file, create a directory inside the src directory called db add a new file inside it called config.ts, and add the code below.
// ./src/db/config.ts

import { neon } from "@neondatabase/serverless";
import { drizzle } from "drizzle-orm/neon-http";
// NOTE: we're going to add this in the next step
import * as schema from "./schema";

const sql = neon(process.env.NEON_DATABASE_URL!);
const db = drizzle(sql, { schema });

export default db;
Defining our database schema
Finally, with our config files created, we can now define the database schema that we’ll be using for our project. To define the schema, create a new file in the db directory called schema.ts and add the below code to it.
// ./src/db/schema.ts

import { relations } from "drizzle-orm";
import { integer, pgTable, serial, text } from "drizzle-orm/pg-core";

export const films = pgTable("films", {
  id: serial("id").primaryKey(),
  title: text("title").notNull(),
});

export const ratings = pgTable("ratings", {
  id: serial("id").primaryKey(),
  rating: integer("rating").notNull(),
  filmId: integer("film_id").references(() => films.id, {
    onDelete: "cascade",
  }),
});

export const filmsRelations = relations(films, ({ many }) => ({
  ratings: many(ratings),
}));

export const ratingsRelations = relations(ratings, ({ one }) => ({
  author: one(films, {
    fields: [ratings.filmId],
    references: [films.id],
  }),
}));
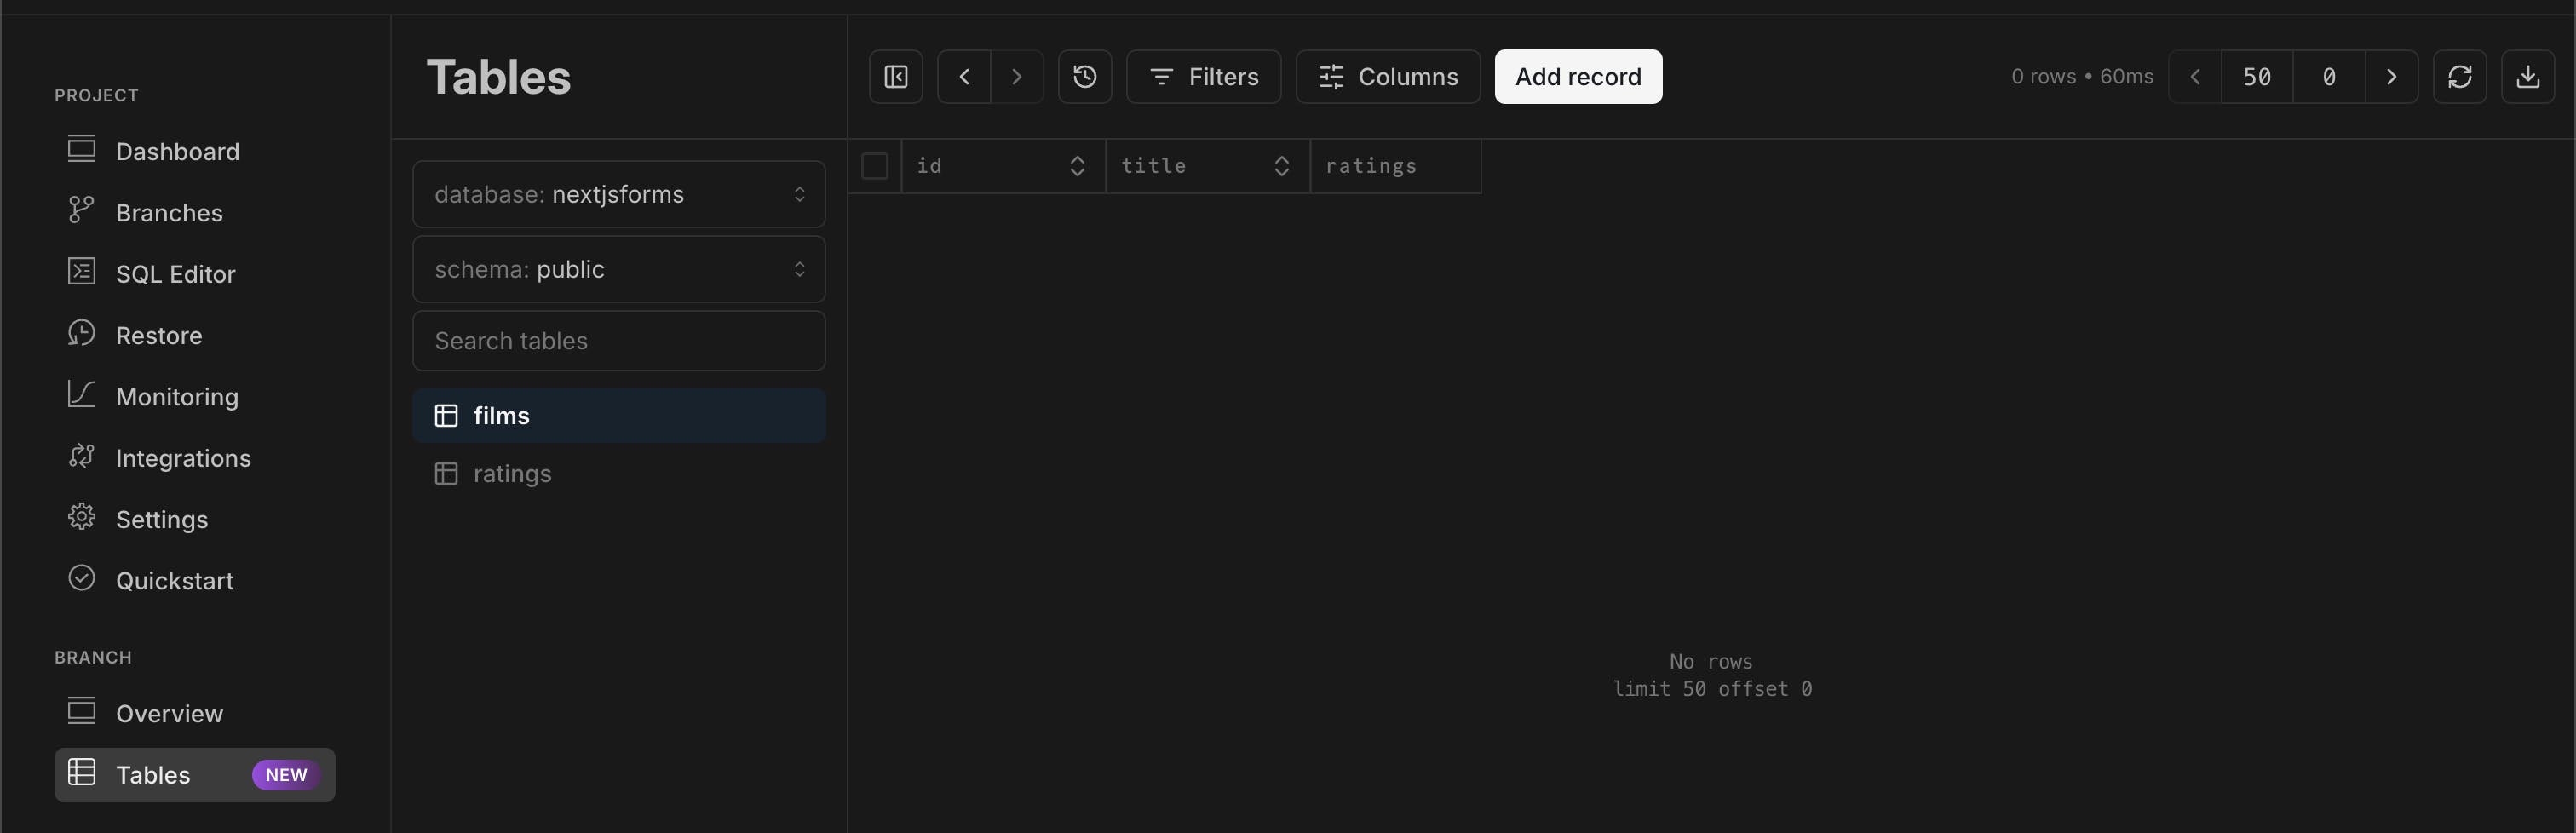
Finally, the last thing we need to do is push our schema changes to Neon. To do this, run the command npx drizzle-kit push in your terminal. Once this command finishes, if you visit the “Tables” page in your Neon dashboard, you should see the two new tables: films and ratings that we defined in our schema.
Your database is now configured, and we’re almost ready to start building our app!
Styling our app and adding static content
With our database and ORM now configured in the app, the last thing I want to do before we start building is add some base styling and some introductory content from Prismic to the app.
For the styling, we’re going to be using Tailwind CSS. To configure Tailwind CSS, run the command npm i -D --force tailwindcss postcss autoprefixer followed by npx tailwindcss init -p, which should create a new Tailwind config file in your root directory. Inside your tailwind.config.js file, ensure your content property has the value ["./src/**/*.{js,ts,jsx,tsx,mdx}"] as we’re using the src directory in this project.
Then inside your /src/app directory add a new file called globals.css and add the below code to it.
@tailwind base;
@tailwind components;
@tailwind utilities;
To finish off the Tailwind CSS configuration, we just need to reference this new CSS file in our layout.tsx file in the same /src/app directory. To reference the CSS file and add some base styles to your app, update the layout.tsx file to look like the below.
// ./src/app/layout.tsx

import { PrismicPreview } from "@prismicio/next";
import { repositoryName } from "@/prismicio";
import "./globals.css";

export default function RootLayout({
  children,
}: Readonly<{
  children: React.ReactNode;
}>) {
  return (
    <html lang="en">
      <body className="flex flex-col items-center bg-zinc-50">
        <div className="bg-white max-w-5xl min-h-screen border-x border-solid border-gray-200 p-12 w-full flex flex-col gap-20">
          {children}
          <PrismicPreview repositoryName={repositoryName} />
        </div>
      </body>
    </html>
  );
}
Updating the static content
Finally, before we jump into creating the forms and Server Actions let’s update the static content we show on the page to users. To add this, head back to your Prismic documents (if you’ve closed this tab, you can get there directly by going to the URL your-repo-name.prismic.io/documents/). Then, click the “Homepage” page, and update the content so it looks like the one below (note: ‘Welcome to Filmable!’ is an h2 heading).
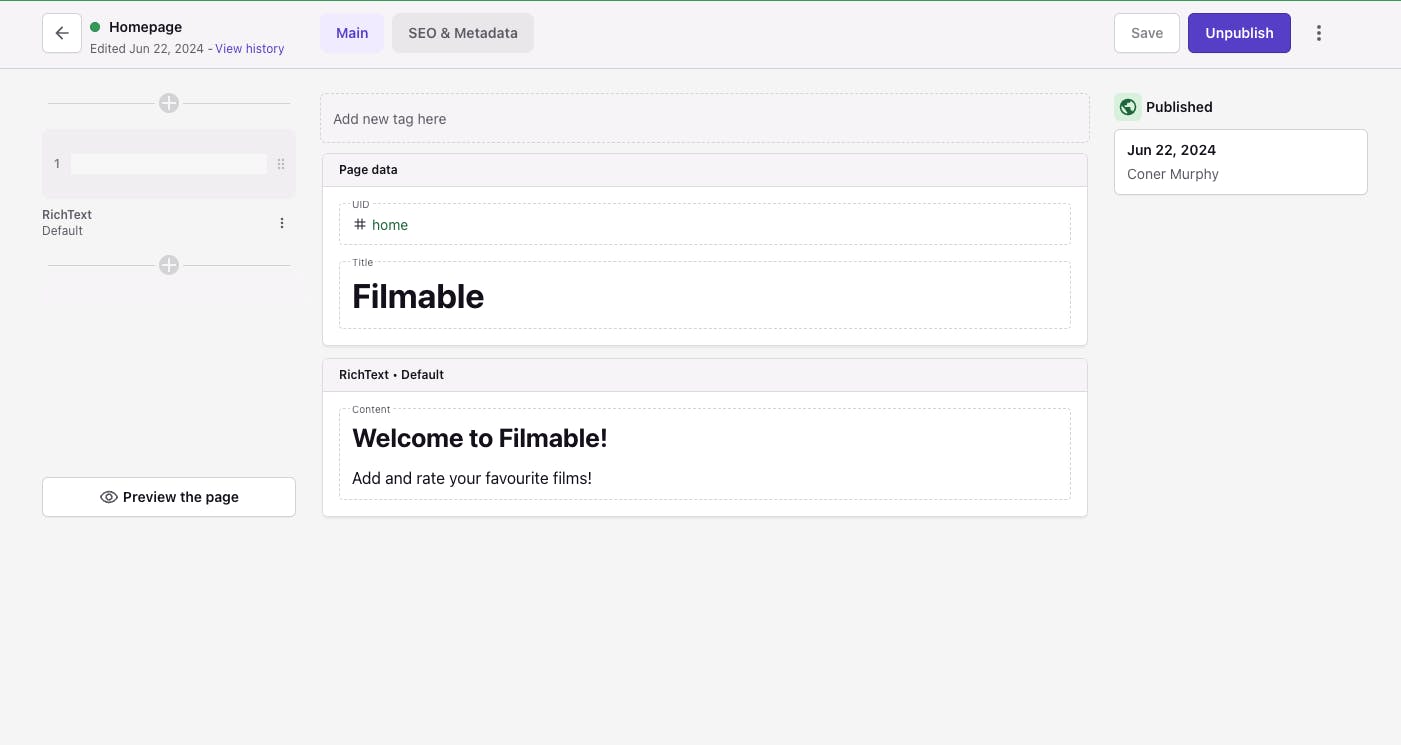
Once the page is updated, click “Save” and then “Publish” in the upper right to make the new content live. At this point, if you start up your application’s dev server by running the command npm run dev you should see this content on the page and the base styles for the page we added. But, at this point, the text we added in Prismic looks a bit out of place stylistically so let’s fix that by updating the styles for our RichText slice.
To update the styles of your RichText slice and therefore the content we just added in Prismic to show on our app, update the code in the /src/slices/RichText/index.tsx file to look like the below.
// ./src/slices/RichText/index.tsx

import type { Content } from "@prismicio/client";
import {
  PrismicRichText,
  SliceComponentProps,
  JSXMapSerializer,
} from "@prismicio/react";

const components: JSXMapSerializer = {
  label: ({ node, children }) => {
    if (node.data.label === "codespan") {
      return <code>{children}</code>;
    }
  },
  heading2: ({ children }) => (
    <h2 className="font-bold text-4xl">{children}</h2>
  ),
  paragraph: ({ children }) => <p className="text-slate-700">{children}</p>,
  hyperlink: ({ children, node }) => (
    <a href={node.data.url} className="font-bold underline">
      {children}
    </a>
  ),
};

type RichTextProps = SliceComponentProps<Content.RichTextSlice>;

export default function RichText({ slice }: RichTextProps) {
  return (
    <section className="flex flex-col gap-2">
      <PrismicRichText field={slice.primary.content} components={components} />
    </section>
  );
}
Deliver a fast website with a visual page builder!
Prismic is a headless solution with a visual page builder for your marketing team to release pages independently.

Server Actions
At this point, we’re ready to start adding the Server Actions that will handle the forms submitted by our users. There will be three of them in total: one for adding a film, rating a film, and then deleting a film. So, let’s go through each one now and add the code required for it.
Create a film
The first Server Action we’re going to add is for creating a new film. To create this Server Action, create a new directory in the src directory called actions and then a new file inside that directory called create-film.ts and add the below code to it.
// ./src/actions/create-film.ts

"use server";

import db from "@/db/config";
import { films } from "@/db/schema";
import { sql } from "drizzle-orm";
import { revalidatePath } from "next/cache";
import { z } from "zod";

export async function createFilm(
  prevState: {
    message: string;
  },
  formData: FormData,
) {
  const schema = z.object({
    film: z.string().min(1),
  });
  const parse = schema.safeParse({
    film: formData.get("film"),
  });

  if (!parse.success) {
    return { message: "Failed to create film" };
  }

  const requestedFilm = await db
    .select()
    .from(films)
    .where(sql`lower(${films.title}) = ${parse.data.film.toLowerCase()}`);

  if (requestedFilm.length) {
    return {
      message: "Film already created...",
    };
  }

  try {
    await db.insert(films).values({
      title: parse.data.film,
    });

    revalidatePath("/");
    return { message: "film successfully added!" };
  } catch (e) {
    return {
      message: "Failed to create film, please try again.",
    };
  }
}
In this file, we define a new Zod schema which we then use to pass the formData that is passed in from the frontend’s request to the Server Action.
Providing the data is successfully parsed by the Zod schema, we query the database to check if the film the user wants to add is already present or not. If the film is present we return a helpful error message informing the user it’s already been added otherwise if the film isn’t in the database we then create the film in the database and revalidate the home page to show the new data.
Rate a film
For the Server Acton to rate a film, it follows a similar pattern to the create Server Action we just looked at but with a slight difference in the logic. This time instead of passing in the name of a film, we pass in a rating value along with the film ID we want to rate, we then use these values to add a new value to the ratings table in our database. To do this, create a rate-film.ts file in the actions directory and add the code below.
// ./src/actions/rate-film.ts

"use server";

import db from "@/db/config";
import { ratings } from "@/db/schema";
import { revalidatePath } from "next/cache";
import { z } from "zod";

export async function rateFilm(
  prevState: {
    message: string;
  },
  formData: FormData,
) {
  const schema = z.object({
    id: z.string().min(1).transform(Number),
    rating: z.string().min(1).transform(Number),
  });

  const data = schema.parse({
    id: formData.get("id"),
    rating: formData.get("rating"),
  });

  try {
    await db.insert(ratings).values({
      rating: data.rating,
      filmId: data.id,
    });
    revalidatePath("/");
    return { message: `Successfully rated the film` };
  } catch (e) {
    return { message: "Failed to rate film" };
  }
}
Delete a film
Finally, we have the delete Server Action which is the simplest of all of the Server Actions. With this Server Action, we pass in the ID of the film we want to delete and then delete it from the database. It’s worth noting that when we perform the delete, it will cascade the delete to any ratings that are related to the deleted film ID to help us avoid having orphaned data in the database. Create a delete-film.ts file in the actions directory and add the code below.
// ./src/actions/delete-film.ts

"use server";

import db from "@/db/config";
import { films } from "@/db/schema";
import { eq } from "drizzle-orm";
import { revalidatePath } from "next/cache";
import { z } from "zod";

export async function deleteFilm(
  prevState: {
    message: string;
  },
  formData: FormData,
) {
  const schema = z
    .object({
      id: z.string().min(1),
    })
    .transform((values) => ({
      id: parseInt(values.id),
    }));

  const data = schema.parse({
    id: formData.get("id"),
  });

  try {
    await db.delete(films).where(eq(films.id, data.id));
    revalidatePath("/");
    return { message: `Successfully deleted the film` };
  } catch (e) {
    return { message: "Failed to delete film" };
  }
}
Adding the forms
With our Server Actions now added we’re ready to add the frontend forms that will make use of these Server Actions. So, like we did with the Server Actions code, let’s break it down by the action we’re performing and look at each one individually.
Create a film
To add this form, we’re going to create a new components directory inside the src directory and then add a new file to it called add-film-form.tsx with the below code.
// ./src/components/add-film-form.tsx

"use client";

import { useActionState } from "react";
import { useFormStatus } from "react-dom";
import { createFilm } from "@/actions/create-film";

const initialState = {
  message: "",
};

function SubmitButton() {
  const { pending } = useFormStatus();

  return (
    <button
      type="submit"
      disabled={pending}
      className="bg-blue-200 px-3 py-1 rounded-md"
    >
      Add Film
    </button>
  );
}

export function AddFilmForm() {
  const [state, formAction] = useActionState(createFilm, initialState);

  return (
    <form action={formAction} className="flex flex-row items-center gap-3">
      <input
        type="text"
        id="film"
        name="film"
        required
        className="border border-blue-100 rounded-lg px-2 py-1"
        placeholder="Add a film..."
      />
      <SubmitButton />
      <p aria-live="polite" role="status">
        {state?.message}
      </p>
    </form>
  );
}
There isn’t too much going on in this file but the important parts to pay attention to are the use of the useFormStatus hook to get access to if the form is pending submission or not to disable the submit button.
We also make use of the useActionState hook to define the formAction (trigger our Server Action) that will run when the form is submitted, and get access to the state that contains the messages we return from Server Actions.
Rate a film
With the form for adding a film added, let’s take a look at adding the form to rate a film that follows a similar pattern but with an extra input added to pass in the rating we want to provide a film with. To create this form add the code below in a file called rate-film-form.tsx alongside the create form we just created.
// ./src/components/rate-film-form.tsx

"use client";

import { rateFilm } from "@/actions/rate-film";
import { useActionState } from "react";
import { useFormStatus } from "react-dom";

const initialState = {
  message: "",
};

function RateButton() {
  const { pending } = useFormStatus();

  return (
    <button
      type="submit"
      disabled={pending}
      className="bg-blue-200 px-3 py-1 rounded-md"
    >
      Rate
    </button>
  );
}

export function RateFilmForm({ id }: { id: number }) {
  const [state, formAction] = useActionState(rateFilm, initialState);

  return (
    <form action={formAction} className="flex flex-row gap-2 h-fit">
      <input type="hidden" name="id" value={id} />
      <input
        type="number"
        min={1}
        max={5}
        name="rating"
        defaultValue={1}
        className="border border-gray-400 w-10 text-center rounded-md"
      />
      <RateButton />
      <p aria-live="polite" className="sr-only" role="status">
        {state?.message}
      </p>
    </form>
  );
}
As you can see this form is very similar to the form for adding the film, with the difference being the extra input we mentioned above and the hidden input that will contain the id of the movie it relates to. This hidden input is important as it allows us to easily pass the id of the film we want to rate to the Server Action without visually showing it to the user.
Delete a film
Finally, let’s take a look at the form to delete a film, which follows a similar pattern to the other forms we’ve looked at. For this form, add the code below in a new file alongside the other forms called delete-film-form.tsx.
// ./src/components/delete-film-form.tsx

"use client";

import { useActionState } from "react";
import { useFormStatus } from "react-dom";
import { deleteFilm } from "@/actions/delete-film";

const initialState = {
  message: "",
};

function DeleteButton() {
  const { pending } = useFormStatus();

  return (
    <button
      type="submit"
      disabled={pending}
      className="bg-red-200 px-3 py-1 rounded-md"
    >
      Delete
    </button>
  );
}

export function DeleteFilmForm({ id }: { id: number }) {
  const [state, formAction] = useActionState(deleteFilm, initialState);

  return (
    <form action={formAction}>
      <input type="hidden" name="id" value={id} />
      <DeleteButton />
      <p aria-live="polite" className="sr-only" role="status">
        {state?.message}
      </p>
    </form>
  );
}
The delete form is the simplest of all of the forms we’ve looked at. In this form, we have another hidden input that contains the id of the film that is passed in as a prop. This id is then sent to the Server Action when the form is submitted to allow us to identify which film to delete in the database.
Displaying the forms
With all of the Server Actions and forms now added, the last thing we need to do is bring them all together and display them on the home page for users to interact with. To do this, update your ./src/app/page.tsx file to look like the one below.
// ./src/app/page.tsx

import { Metadata } from "next";

import * as prismic from "@prismicio/client";
import { SliceZone } from "@prismicio/react";

import { AddFilmForm } from "@/components/add-film-form";
import { DeleteFilmForm } from "@/components/delete-film-form";
import { RateFilmForm } from "@/components/rate-film-form";
import db from "@/db/config";
import { films, ratings } from "@/db/schema";
import { createClient } from "@/prismicio";
import { components } from "@/slices";
import { avg, count, eq } from "drizzle-orm";

// This component renders your homepage.
//
// Use Next's generateMetadata function to render page metadata.
//
// Use the SliceZone to render the content of the page.

export async function generateMetadata(): Promise<Metadata> {
  const client = createClient();
  const home = await client.getByUID("page", "home");

  return {
    title: prismic.asText(home.data.title),
    description: home.data.meta_description,
    openGraph: {
      title: home.data.meta_title ?? undefined,
      images: [{ url: home.data.meta_image.url ?? "" }],
    },
  };
}

export default async function Index() {
  // The client queries content from the Prismic API
  const client = createClient();
  const home = await client.getByUID("page", "home");

  const filmRecords = await db
    .select({
      id: films.id,
      title: films.title,
      totalRatings: count(ratings.filmId),
      averageRating: avg(ratings.rating),
    })
    .from(films)
    .leftJoin(ratings, eq(films.id, ratings.filmId))
    .groupBy(films.title, films.id);

  return (
    <>
      <SliceZone slices={home.data.slices} components={components} />
      <div className="flex flex-col gap-6">
        <AddFilmForm />
        <section className="flex flex-col gap-6">
          <h2 className="text-xl font-bold">Current Films</h2>
          <ul className="flex flex-col gap-2">
            {filmRecords.map(({ id, title, totalRatings, averageRating }) => {
              return (
                <li
                  key={id}
                  className="grid grid-cols-3 items-center border-b pb-4"
                >
                  <div className="flex flex-col">
                    <span className="font-bold text-lg">{title}</span>
                    {averageRating ? (
                      <span className="text-sm">
                        Average Rating:{" "}
                        {Math.round(parseFloat(averageRating) * 10) / 10}
                      </span>
                    ) : null}
                    <span className="text-sm">
                      Total Ratings: {totalRatings}
                    </span>
                  </div>
                  <RateFilmForm id={id} />
                  <DeleteFilmForm id={id} />
                </li>
              );
            })}
          </ul>
        </section>
      </div>
    </>
  );
}
In this file, we perform a database query to select all of the films from the database as well as their related ratings from the ratings table. We then map over these values and display the title of the film, its total ratings, its overall average rating, and the forms for adding new ratings and deleting the film. Finally, above all of the listed films we render the add a new film form to allow users to add new films to the database.
At this point, with your dev server started up you should now have an application that looks like the below video.
Closing Thoughts
In this post, we’ve looked at how we can build a simple IMDB clone using the new useFormStatus (docs) and useActionState (docs) hooks that are being introduced in the next React and Next.js versions. In this project, we also made use of Neon and Drizzle for our database and ORM as well TailwindCSS for styling and of course, Prismic for managing our content.
If you’re interested in learning more about this way of implementing forms in a Next.js App Router project, make sure to check out the documentation. Finally, if you want to continue building with Primsic and Next.js, why not consider checking out our tutorial on building a Headless Commerce application with Stripe?
I hope you found this post helpful, and thank you for reading.
Coner
Further learning - ready to build a full Next.js website?
If you're looking to take your skills to the next level, try this Next.js full website tutorial course! See the power of Prismic as a Headless website builder alongside Next.js, the popular React framework. In this tutorial, you'll create a trendy, dark, and modern website and use GSAP to add wonderful animations, both on page load and on scroll. You'll also use Tailwind CSS to style the super-polished website.


