How to Add an Automated Table of Contents to a Next.js Blog


In this time of information overload, providing a seamless user experience is key to capturing and retaining visitor attention. Clear readability and intuitive site navigation enable users to quickly find relevant content that meets their needs and interests.
One important but often overlooked feature that can greatly enhance readability and navigation is a Table of Contents (ToC). A ToC can offer an effortless content overview and swift navigation, especially for in-depth blog posts and comprehensive documentation.
In this blog article, we will guide you through the process of building an automated ToC for your blog content using Prismic and Next.js. Whether you're new to these technologies or looking to utilize them more effectively, this guide promises practical insights and hands-on examples. So, let's dive in and improve our user's navigational experience!

Why do I need a table of contents?
As the digital landscape rapidly expands with an abundance of valuable content, providing an organized user experience has become increasingly important. This is where a Table of Contents comes into play, particularly for blog posts.
Blogs, especially long-form ones, can sometimes seem overwhelming for readers. A well-structured ToC can make your content more digestible, offering users a clear roadmap of your blog post while allowing them to navigate conveniently.
Furthermore, a ToC improves both SEO and user engagement metrics. From an SEO perspective, including a ToC allows search engines to identify key topics covered in your post, potentially enhancing keyword relevancy and ranking. For user engagement, the ability to quickly navigate to intriguing sections increases time spent on the page and overall user satisfaction, reducing the bounce rate.
Prioritizing accessibility, a ToC also caters to readers using assistive technologies by providing an easy-to-understand content layout.
Overall, a ToC provides a more enriched, user-friendly reading experience, enhancing navigation, content consumption, SEO, and usability, making it crucial for your blog.
How we used to create a Table of Contents
In the past, on the old version of our blog, creating a ToC required manual effort and modifications to the content structure. We would have to fill in a specific field on each slice where we could input custom IDs. Then, we would need to create a separate content slice specifically for the ToC and manually add the links to each heading.

This approach was time-consuming and prone to errors, as it involved manually updating the ToC slice whenever changes were made to the content. It also required keeping track of the IDs for each heading and ensuring they matched the corresponding links in the ToC.
Overall, the process was cumbersome and not scalable, especially for larger and more complex content structures.
On our new blog, we programmatically generate the ToC. This approach works much better as we don't have to worry about the ToC at all. We simply write our content, and the ToC is automatically generated for us. Keep reading to find out how!
Blog Starter Preparations
Download the blog starter
To keep focus on building the ToC, we will use one of Prismic's preconfigured starters, the blog starter. We can get this installed in just a couple of steps:
- Login or create a Prismic account.
- Run the following commands in your terminal to install the starter.
npx degit https://github.com/prismicio-community/nextjs-starter-prismic-blog nextjs-starter-prismic-blog

cd nextjs-starter-prismic-blog

npx @slicemachine/init@latest
In your terminal, you'll be prompted to give your repository a name and asked if you want to open Slice Machine. Since we used a starter, we won’t modify any slices, so you don't need to run it. However, if you're curious, you can run it and access the UI at http://localhost:9999/.
What is Slice Machine?
Slice Machine is Prismic’s developer tool that allows you to build slices, or reusable website sections, as components in your code. You can create, preview, and test slices locally without affecting your live environment. Then, you can ship the slices directly to marketers in a custom page builder so they can start using them as building blocks to create on-brand, customizable pages independently.
Now, inside your project in the terminal, run npm run dev.
If you go to http://localhost:3000/, you can see our blog starter. Since this is already pre-populated with content, we have all we need to start building the ToC. But first, we must set up the content to be easily navigated by the ToC.
Open the project in your favorite text editor, and let’s start adjusting some code! 👇
Giving the existing headings IDs
To create a ToC for our blog, we need to assign IDs to all the headings we want to include in it. As a first step, we will modify the blog starter to add IDs to our headings.
First, let’s locate where our titles are coming from. We know our blog posts are made up of slices, so a good place to look would be in the ./src/slices folder. Here, we can find a slice called Text, which is used on blog posts for rich text content.
So, let’s open the ./src/slices/Text/index.js file. Here, on line 4, we can see that the blog starter imports a component for rendering the text:
import { PrismicRichText } from "@/components/PrismicRichText";So let’s jump over to that file instead at ./src/components/PrismicRichText.js.
Let’s break down what’s happening in this file:
- On line 2,
PrismicRichTextis imported from the package@primicio/reactasBasePrismicRichText. - On line 56, we can see that we use the
<BasePrismicRichText />. This is Prismic’s helper component for rendering rich text. - On line 57, the
componentsprop is passed to tell this component how to render certain elements by passing serializer functions to it. In this case, we’re interested in the headings. - From lines 8 to 22, in the serializer function we pass to the component, we tell Next.js how to render
heading1,heading2, andheading3elements. We only worry about these three because they are the only ones we have enabled in our Text slice. Since this slice was made for blog posts, we have already included anh1tag for each post that inserts the document title from Prismic (we’ll explore this more in later steps). Therefore, it makes sense to mapheading1toh2,heading2toh3, and so on. - On line 9 and other lines further down, we can also see that we use another component to render the headings. This is created to keep the code DRY (Don’t Repeat Yourself) since we don’t want to repeat the same Tailwind CSS classes for styling on every heading we use across the project.
So, to give our headings IDs, we first need to modify the <Heading /> component to accept an id property. This can be done by updating ./src/components/Heading.js to look like this:
// ./src/components/Heading.js

import clsx from "clsx";

export const Heading = ({
  as: Comp = "h1",
  size = "4xl",
  children,
  className,
  id, // Pass the ID prop
}) => {
  return (
    <Comp
			/* Add the ID to the heading itself */
      id={id}
      className={clsx(
        "font-sans font-semibold tracking-tighter text-slate-800",
        size === "4xl" && "text-3xl md:text-4xl",
        size === "3xl" && "text-3xl",
        size === "2xl" && "text-2xl",
        size === "xl" && "text-xl",
        className
      )}
    >
      {children}
    </Comp>
  );
};
Once we have this in place, we can pass an ID to our Headings in ./src/components/PrismicRichText.js. The question is how do we find a good ID to put there that we can also use in our ToC component later on? Preferably, we would want a code-friendly version of the heading’s text itself as the ID.
Right now, every heading is passed to the <PrismicRichText /> component like this:
heading1: ({ children }) => (
  <Heading as="h2" size="3xl" className="mb-7 mt-12 first:mt-0 last:mb-0">
    {children}
  </Heading>
),
Looking at that, we can assume that we have the text of our heading somewhere in children. However, if you were to console.log(children), you would notice that it’s buried pretty deep inside.
We need to go this deep just to see our text in the console console.log(children[0].props.children[0]);:
{
  '$$typeof': Symbol(react.element),
  type: Symbol(react.fragment),
  key: '0__line',
   ref: null,
  props: { children: 'This is a heading' },
   _owner: null,
   _store: {}
}
As you can see, we need to get it at children[0].props.children[0].props.children.
Luckily, another property is available to us in the serializer function called node, and by grabbing node.text, we can get the unformatted text of our heading. The problem is that this text won't make a good ID for our HTML as it is now since it likely contains spaces and possibly other characters we don’t want to be included in an ID. We need to do some formatting. For example, we could use some JavaScript formatting functions on the node.text like this:
heading1: ({ children, node }) => (
  <Heading
    as="h2"
    size="3xl"
    className="mb-7 mt-12 first:mt-0 last:mb-0"
    id={node.text
        .toLowerCase()
        .replace(/[^\w\s-]/g, "")
        .replace(/[\s_-]+/g, "-")
        .replace(/(^-|-$)/g, "")}
  >
    {children}
  </Heading>
),
While this would work, we would need to do this in all three heading serializers, which is repetitive. Instead, let’s extract this logic into its own helper.
To do this, create a new file at ./src/lib/slugifyHeading.js, and in this file, export a simple function that takes some text and returns the formatted text.
// ./src/lib/slugifyHeading.js

export const slugifyHeading = ({ text }) => {
  return text
    .toLowerCase() // Make lowercase
    .replace(/[^\w\s-]/g, "") // Remove all non-word chars
    .replace(/[\s_-]+/g, "-") // Replace spaces and hyphens with a single hyphen
    .replace(/(^-|-$)/g, ""); // Remove leading and trailing hyphens
};
Now, back in ./src/components/PrismicRichText.js we can import this functionality at the top of our file like this:
import { slugifyHeading } from "@/lib/slugifyHeading";And then use it for our headings like this:
heading1: ({ children, node }) => (
<Heading
as="h2"
size="3xl"
className="mb-7 mt-12 first:mt-0 last:mb-0"
id={slugifyHeading(node)}
>
{children}
</Heading>
),
heading2: ({ children, node }) => (
<Heading
as="h3"
size="2xl"
className="mb-7 last:mb-0"
id={slugifyHeading(node)}
>
{children}
</Heading>
),
heading3: ({ children, node }) => (
<Heading
as="h4"
size="xl"
className="mb-7 last:mb-0"
id={slugifyHeading(node)}
>
{children}
</Heading>
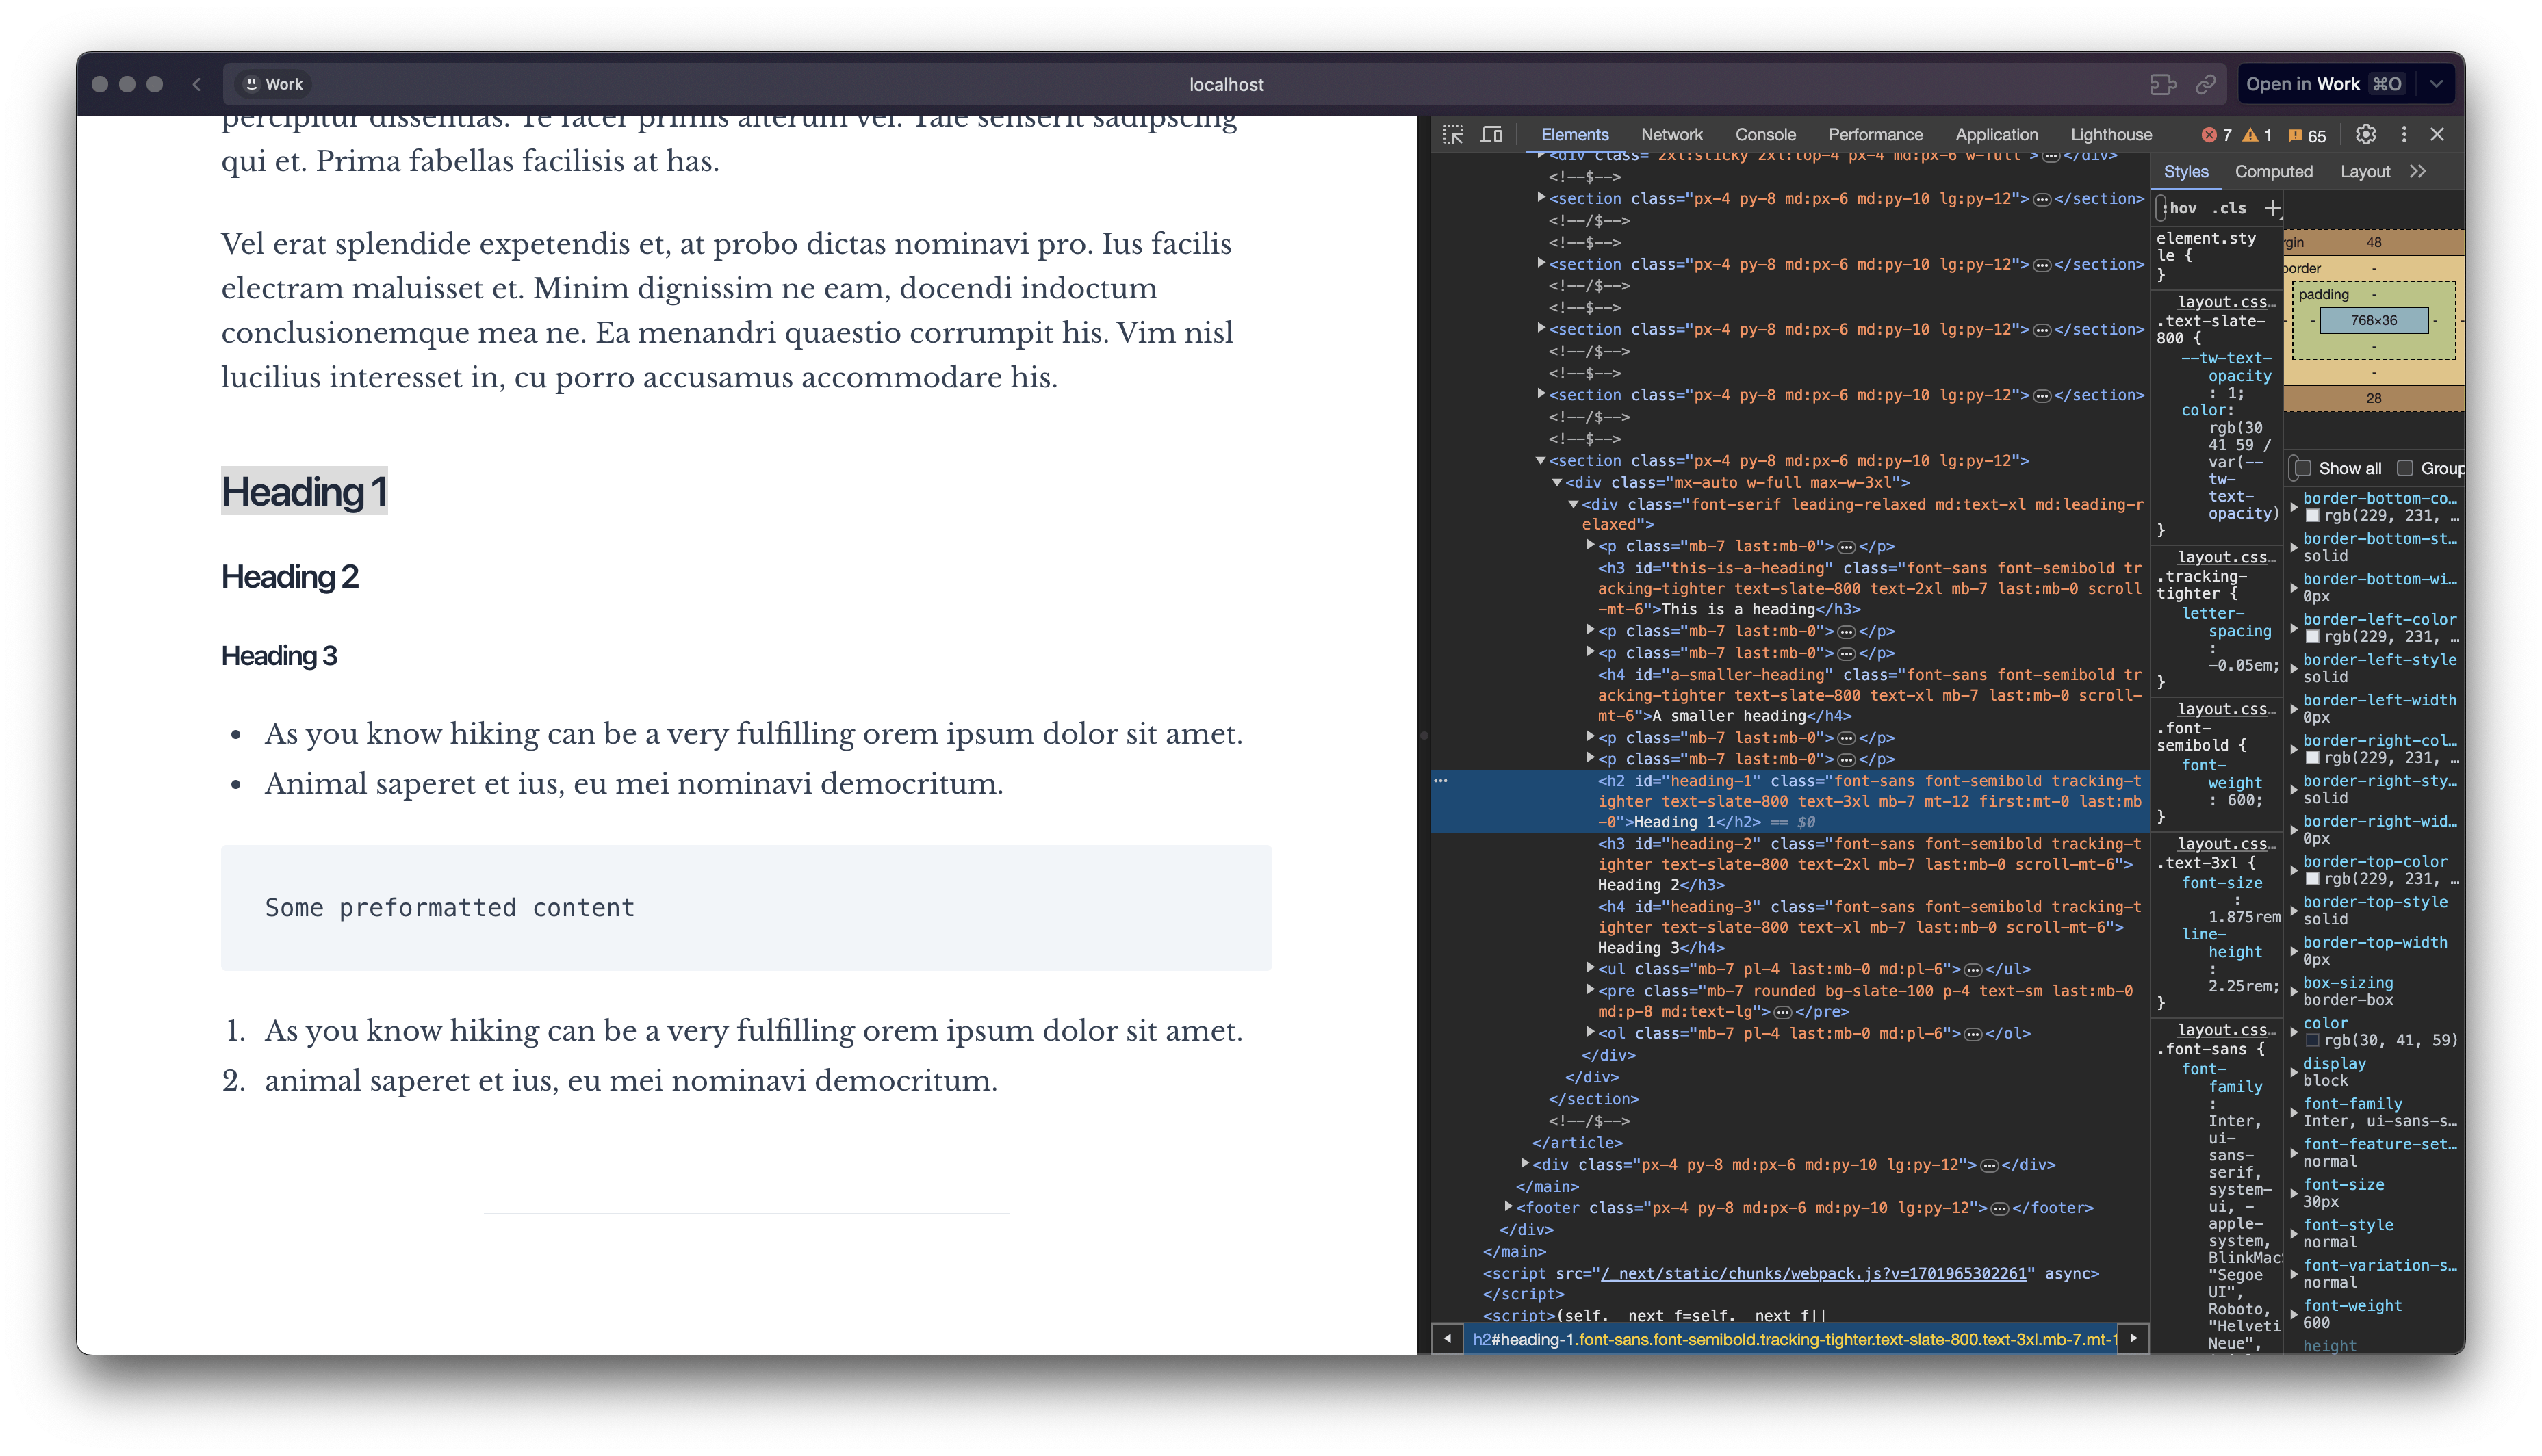
),Now, if you go to http://localhost:3000/articles/hiking-through-the-woods and inspect one of the headings, we should see that it has a good ID.
Add more headings in Prismic
Pheeew, that was a lot of writing for adding a couple of ID’s. Now, with that done, let’s update one of the blog posts in Prismic to have a couple more headings than the example ones since it will make more sense when building the ToC.
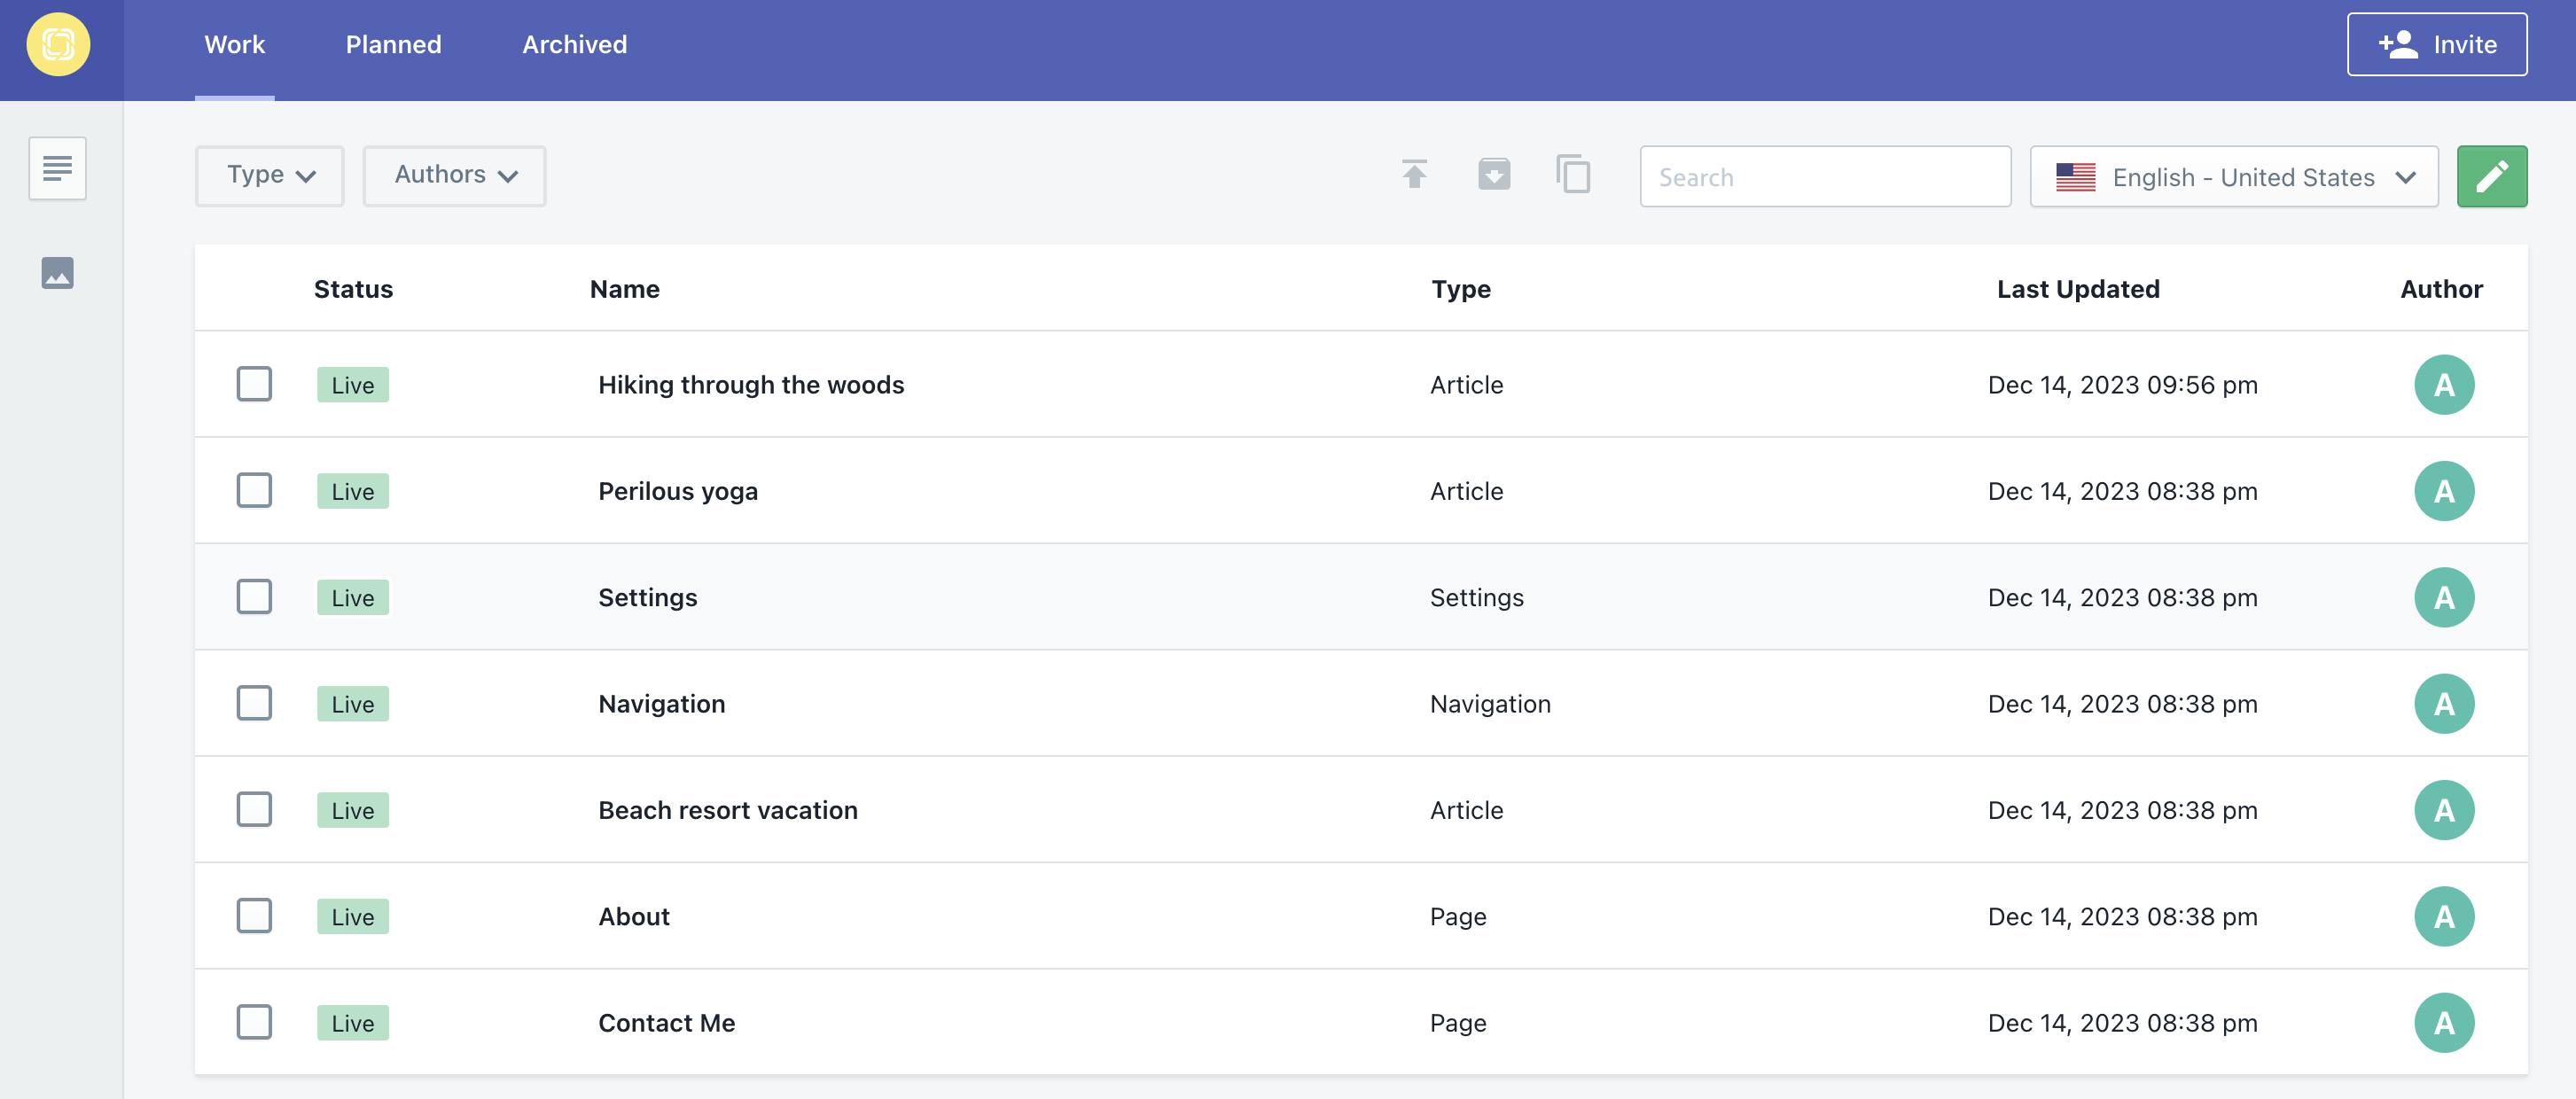
To do this, head to https://prismic.io/dashboard and click on your repository (it will have whatever name you picked in the setup process earlier). You should see a list of all documents created for you by the setup command earlier.
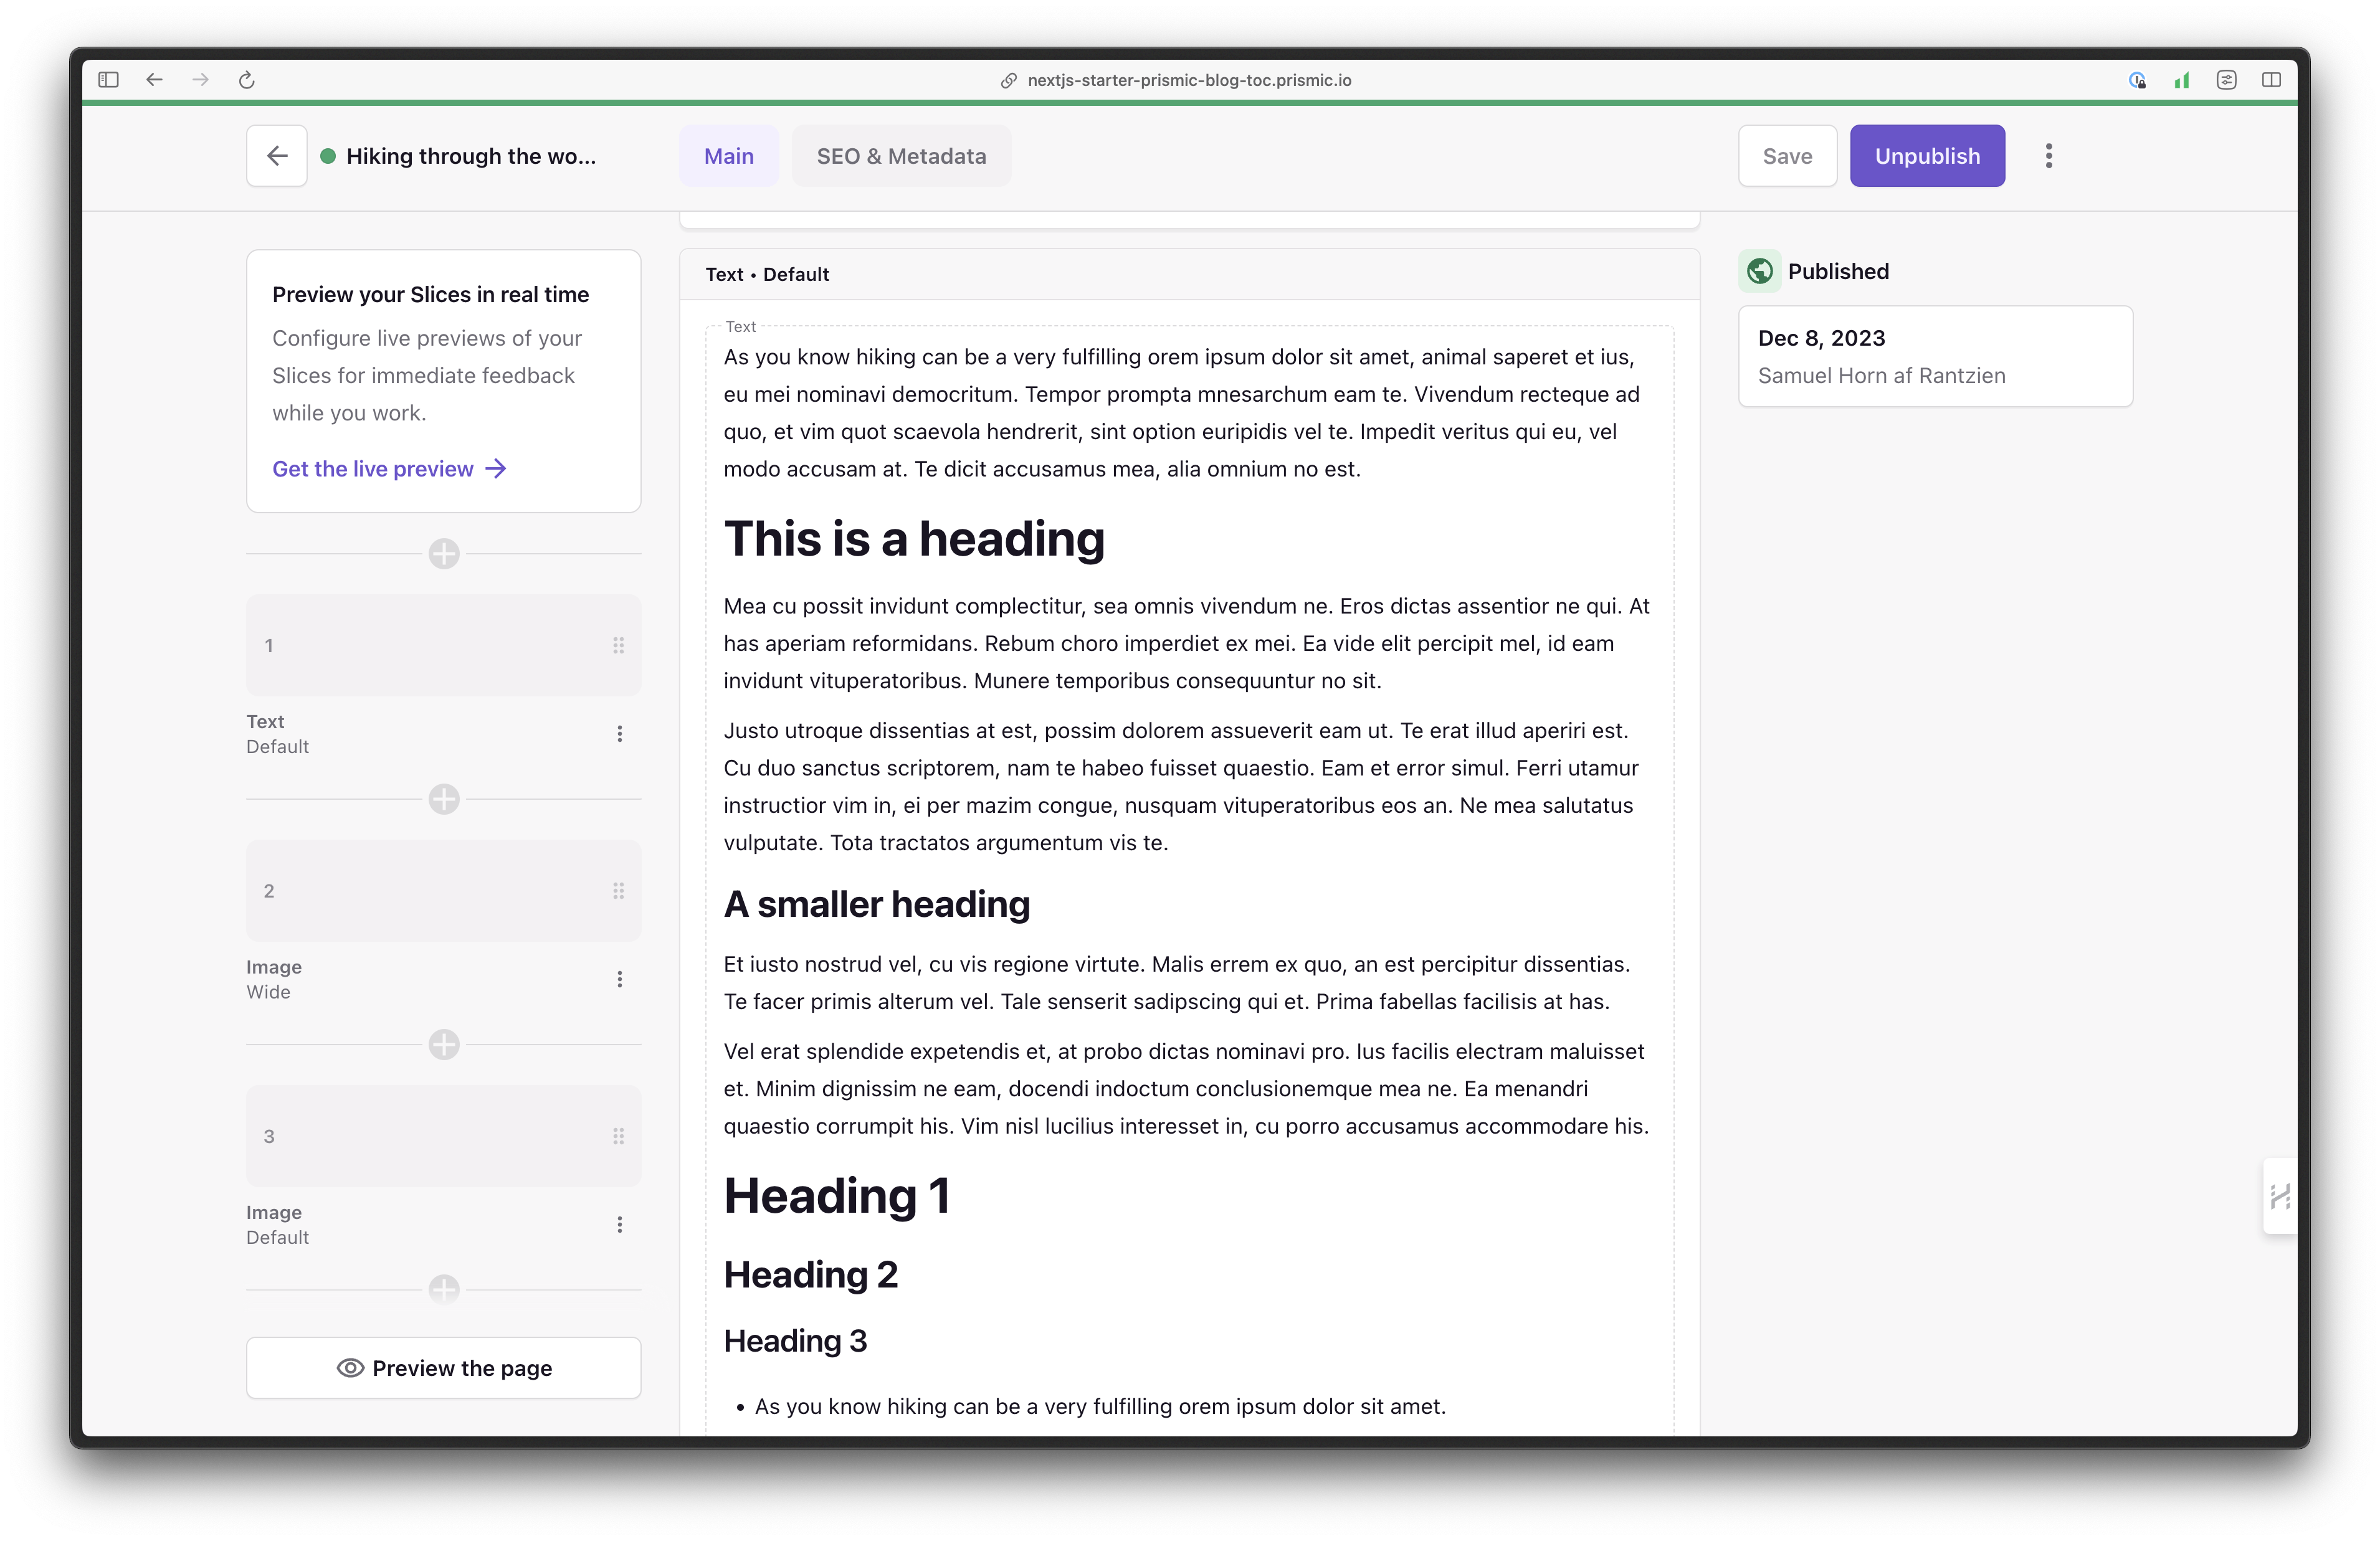
Click on the “Hiking through the woods” document, and you will be presented with Prismic’s Page Builder. If you scroll down a bit, you can find one of the slices containing text. In this slice, add a couple of headings. Then click Save and then Publish in the top right corner.
Stay on Top of New Tools, Frameworks, and More
Research shows that we learn better by doing. Dive into a monthly tutorial with the Optimized Dev Newsletter that helps you decide which new web dev tools are worth adding to your stack.

Building the Toc component
Creating the skeleton
With everything prepared, it’s time to start building on the actual ToC component. Create a new file: ./src/components/Toc.js. In this file, we will build out a first skeleton like this:
// ./src/components/Toc.js

import { PrismicRichText } from "@prismicio/react";
import { slugifyHeading } from "@/lib/slugifyHeading";
import { clsx } from "clsx";
import { Heading } from "./Heading";
import { asText } from "@prismicio/client";

// Create an iterable  nav element
const TocNavElement = ({ node, children, level }) => {
  const id = slugifyHeading(node);

  return (
    <li
      className={clsx("list-disc transition-colors", {
        "pl-2": level === 1,
        "pl-4": level === 2,
      })}
    >
      <a className="block text-slate-700" href={`#${id}`}>
        {children ? children : node.text}
      </a>
    </li>
  );
};

export function Toc({ slices, title }) {
  return (
    <div className="2xl:sticky 2xl:top-4 px-4 md:px-6 w-full">
      <div className="2xl:absolute 2xl:top-0 2xl:left-4">
        <aside className="border p-6 bg-white mx-auto max-w-3xl mt-6 md:mt-0 2xl:w-80">
          <nav aria-labelledby="toc-heading">
            <Heading as="h2" size="xl" id="toc-heading">
              Table of Contents
            </Heading>
            <ol className="pl-4 mt-4" role="list">
              <TocNavElement
                node={{ text: asText(title) }}
                level={1}
              />
              {slices.map(
                (slice) =>
                  slice.slice_type === "text" && (
                    <PrismicRichText
                      key={slice.id}
                      field={slice.primary.text}
                      components={{
                        heading1: ({ node, children, key }) => (
                          <TocNavElement
                            node={node}
                            children={children}
                            key={key}
                            level={1}
                          />
                        ),
                        heading2: ({ node, children, key }) => (
                          <TocNavElement
                            node={node}
                            children={children}
                            key={key}
                            level={2}
                          />
                        ),
                        heading3: () => <></>,
                        paragraph: () => <></>,
                        preformatted: () => <></>,
                        strong: () => <></>,
                        em: () => <></>,
                        listItem: () => <></>,
                        oListItem: () => <></>,
                        list: () => <></>,
                        oList: () => <></>,
                        image: () => <></>,
                        embed: () => <></>,
                        hyperlink: () => <></>,
                      }}
                    />
                  )
              )}
            </ol>
          </nav>
        </aside>
      </div>
    </div>
  );
}
What we created here is a simple component that repeats over our Slices, just like in the article itself. This time though, we use the <PrismicRichText /> to render only heading1 and heading2, since we only want to populate the ToC with h2 and h3 tags. We also output an element with the blog title to be able to return to the absolute top as well.
Now we can go and import that component into our article page in ./src/app/articles/[uid]/page.js. We’ll also want to import the slugifyHeading function since we want an ID for the blog h1 as well, as we added it to our ToC. So at the top of the file, below your other imports, add:
import { Toc } from "@/components/Toc";
import { slugifyHeading } from "@/lib/slugifyHeading";
Then, starting on line 63, we can see the Page function. Locate the h1 within this function and update the h1 to look like this (now giving it an id):
<h1
  className="mb-3 text-3xl font-semibold tracking-tighter text-slate-800 md:text-4xl scroll-mt-12"
  id={slugifyHeading({ text: prismic.asText(article.data.title) })}
>
  <PrismicText field={article.data.title} />
</h1>
Lastly, below the h1, right above our <SliceZone />, add your <Toc /> component like this:
<Toc slices={article.data.slices} title={article.data.title} />
<SliceZone slices={article.data.slices} components={components} />
That should be all the changes we need to make to our article page. And if we look at http://localhost:3000/articles/hiking-through-the-woods again, we should see a ToC rendered. On smaller screens, it’s styled to be displayed inline right after the header, and on larger screens, it’s off to the left and becomes sticky on scroll. We should be able to click each title in the ToC, and it should take us to the corresponding heading in the article.

When you do that, you will notice two things.
- It’s jumping to the article section instead of scrolling down smoothly.
- The heading we get sent to is at the very top of the page; some margin would be nice.
These two things can be very easily fixed. For the first one, you can add a Tailwind class to update the CSS scroll-behavior. Go to ./src/app/layout.js and update the opening <html> tag to look like this:
<html
  lang="en"
  className={`${inter.className} ${libre_baskerville.className} scroll-smooth`}
>
Regarding the top margin of the headings when scrolled to, we can also use a Tailwind CSS class for this, but this time for changing scroll-margin-top. To do that, open ./src/components/PrismicRichText.js again and add the class scroll-mt-6 to all headings.
That’s it; we now have the basics of the ToC created! However, we are still missing some kind of interactivity that would improve the user experience, like highlighting the current heading when the ToC is sticky. So, let’s tackle that next. 👇
Adding interactivity
First, we know we would want to keep the active heading as some kind of state. So let’s set that up. Update your ./src/components/Toc.js file with the below code. I’ve added comments to clarify what changes were made.
// ./src/components/Toc.js

"use client"; // Update to be a client component since we will need to use React hooks

// Import everything needed
import { PrismicRichText } from "@prismicio/react";
import { slugifyHeading } from "@/lib/slugifyHeading";
import { clsx } from "clsx";
import { Heading } from "./Heading";
import { asText } from "@prismicio/client";
import { useEffect, useRef, useState } from "react"; // Import needed hooks

// Make this component take the activeId and add conditional styling based on that
const TocNavElement = ({ node, children, level, activeId }) => {
  const id = slugifyHeading(node);

  return (
    <li
      className={clsx("list-disc transition-colors", {
        "pl-2": level === 1,
        "pl-4": level === 2,
        "text-slate-300": id !== activeId,
        "text-blue-700": id === activeId,
      })}
    >
      <a className="block text-slate-700" href={`#${id}`}>
        {children ? children : node.text}
      </a>
    </li>
  );
};

export function Toc({ slices, title }) {
  const headingsList = useRef(null); // Reference our list of headings
  const [activeId, setActiveId] = useState(null); // Store the id of the active heading

	// Add a useEffect that, when our headings are rendered sets the first heading as active
  useEffect(() => {
    if (!headingsList.current) return;

    const firstHeadingId = slugifyHeading({
      text: headingsList.current.childNodes[0].textContent,
    });

    setActiveId(firstHeadingId);
  }, [headingsList]);

  // Pass the activeId to all TocNavElements
  return (
    <div className="2xl:sticky 2xl:top-4 px-4 md:px-6 w-full">
      <div className="2xl:absolute 2xl:top-0 2xl:left-4">
        <aside className="border p-6 bg-white mx-auto max-w-3xl mt-6 md:mt-0 2xl:w-80">
          <nav aria-labelledby="toc-heading">
            <Heading as="h2" size="xl" id="toc-heading">
              Table of Contents
            </Heading>
            <ol className="pl-4 mt-4" ref={headingsList} role="list">
              <TocNavElement
                node={{ text: asText(title) }}
                level={1}
                activeId={activeId}
              />
              {slices.map(
                (slice) =>
                  slice.slice_type === "text" && (
                    <PrismicRichText
                      key={slice.id}
                      field={slice.primary.text}
                      components={{
                        heading1: ({ node, children, key }) => (
                          <TocNavElement
                            node={node}
                            children={children}
                            key={key}
                            level={1}
                            activeId={activeId}
                          />
                        ),
                        heading2: ({ node, children, key }) => (
                          <TocNavElement
                            node={node}
                            children={children}
                            key={key}
                            level={2}
                            activeId={activeId}
                          />
                        ),
                        heading3: () => <></>,
                        paragraph: () => <></>,
                        preformatted: () => <></>,
                        strong: () => <></>,
                        em: () => <></>,
                        listItem: () => <></>,
                        oListItem: () => <></>,
                        list: () => <></>,
                        oList: () => <></>,
                        image: () => <></>,
                        embed: () => <></>,
                        hyperlink: () => <></>,
                      }}
                    />
                  )
              )}
            </ol>
          </nav>
        </aside>
      </div>
    </div>
  );
}
These updates don’t do much right now, since the only thing we actually do to update the activeId happens in a useEffect hook when the component mounts, and never again. Thus, the first heading (our title) will always be the active one. However, if we visit our front-end again, we should at least be able to see the first heading in the ToC should now have a blue dot instead of a light grey one.
What we need to do next is to update this activeId state on scroll, and to listen to scroll we can use the IntersectionObserver API. So, let’s update the file one last time, again I have made comments for the updates needed:
// ./src/components/Toc.js

"use client";

import { PrismicRichText } from "@prismicio/react";
import { slugifyHeading } from "@/lib/slugifyHeading";
import { clsx } from "clsx";
import { Heading } from "./Heading";
import { asText } from "@prismicio/client";
import { useEffect, useRef, useState } from "react";

const TocNavElement = ({ node, children, level, activeId }) => {
  const id = slugifyHeading(node);

  return (
    <li
      className={clsx("list-disc transition-colors", {
        "pl-2": level === 1,
        "pl-4": level === 2,
        "text-slate-300": id !== activeId,
        "text-blue-700": id === activeId,
      })}
    >
      <a className="block text-slate-700" href={`#${id}`}>
        {children ? children : node.text}
      </a>
    </li>
  );
};

export function Toc({ slices, title }) {
  const headingsList = useRef(null);
  const [activeId, setActiveId] = useState(null);
  const [headings, setHeadings] = useState([]); // Add state to store our heading ID's and their index
  const scrollRef = useRef(0); // Store the previous scroll position

  useEffect(() => {
    if (!headingsList.current) return;

    const firstHeadingId = slugifyHeading({
      text: headingsList.current.childNodes[0].textContent,
    });

    setActiveId(firstHeadingId);

		// Loop over our headings and create an id for each, store it in the new state
		headingsList.current.childNodes.forEach((heading, index) => {
      const id = slugifyHeading({ text: heading.textContent });

      if (id) {
        setHeadings((headings) => [...headings, { id, index }]);
      }
    });
  }, [headingsList]);

	// Add a new useEffect hook with our IntersectionObserver logic
	useEffect(() => {
    const observer = new IntersectionObserver(
      (entries) => {
        entries.forEach((entry) => {
          const id = entry.target.getAttribute("id");

          if (entry.isIntersecting) {
            setActiveId(id);
            scrollRef.current = window.scrollY;
          } else {
            const diff = scrollRef.current - window.scrollY;
            const isScrollingUp = diff > 0;
            const currentIndex = headings.findIndex(
              (heading) => heading.id === id
            );
            const prevEntry = headings[currentIndex - 1];
            const prevId = prevEntry?.id;

            if (isScrollingUp && prevId) {
              setActiveId(prevId);
            }
          }
        });
      },
      {
        rootMargin: "0px 0px -95% 0px",
      }
    );

    const observeHeadings = () => {
      headings.forEach((heading) => {
        const currentHeading = document.getElementById(heading.id);

        if (currentHeading) {
          observer.observe(currentHeading);
        }
      });
    };

    if (headings.length) {
      observeHeadings();
    }

    return () => {
      headings.forEach((heading) => {
        const currentHeading = document.getElementById(heading.id);

        if (currentHeading) {
          observer.unobserve(currentHeading);
        }
      });
    };
  }, [headings]);

  return (
    <div className="2xl:sticky 2xl:top-4 px-4 md:px-6 w-full">
      <div className="2xl:absolute 2xl:top-0 2xl:left-4">
        <aside className="border p-6 bg-white mx-auto max-w-3xl mt-6 md:mt-0 2xl:w-80">
          <nav aria-labelledby="toc-heading">
            <Heading as="h2" size="xl" id="toc-heading">
              Table of Contents
            </Heading>
            <ol className="pl-4 mt-4" ref={headingsList} role="list">
              <TocNavElement
                node={{ text: asText(title) }}
                level={1}
                activeId={activeId}
              />
              {slices.map(
                (slice) =>
                  slice.slice_type === "text" && (
                    <PrismicRichText
                      key={slice.id}
                      field={slice.primary.text}
                      components={{
                        heading1: ({ node, children, key }) => (
                          <TocNavElement
                            node={node}
                            children={children}
                            key={key}
                            level={1}
                            activeId={activeId}
                          />
                        ),
                        heading2: ({ node, children, key }) => (
                          <TocNavElement
                            node={node}
                            children={children}
                            key={key}
                            level={2}
                            activeId={activeId}
                          />
                        ),
                        heading3: () => <></>,
                        paragraph: () => <></>,
                        preformatted: () => <></>,
                        strong: () => <></>,
                        em: () => <></>,
                        listItem: () => <></>,
                        oListItem: () => <></>,
                        list: () => <></>,
                        oList: () => <></>,
                        image: () => <></>,
                        embed: () => <></>,
                        hyperlink: () => <></>,
                      }}
                    />
                  )
              )}
            </ol>
          </nav>
        </aside>
      </div>
    </div>
  );
}
So, to wrap up this last change, we did the following:
- We created a state to keep the heading ID’s and their index.
- Then, we created an
IntersectionObserverthat watches for when each heading reaches the top of the viewport, which we define as 95% from the bottom. When it reach that position we update the activeId to the ID of the intersecting heading. - We use the stored
scrollRefto see if we are scrolling upwards and if so, we change theactiveIdto the previous headings ID, even if it’s not intersecting yet. - With this observer all set up, we loop over the headings and observe each one with the observer.
- Then we clean up the
useEffecthook for when the components unmounts.
If you go to http://localhost:3000 again you should now see that you have a ToC and as you scroll up or down, the active heading’s bullet point gets changed to blue.
Wrapping up
In this blog post, we covered the process of building a Table of Contents using Prismic and Next.js. Here is a summary of what we covered:
- We discussed the importance of having a ToC in a blog post to improve navigation and user experience.
- We explained how to generate unique IDs for headings using the
slugifyHeadingfunction to create code-friendly versions of the heading text. - We showed how to pass the generated IDs to the headings in the
<PrismicRichText>component to create anchor links. - We demonstrated how to create a basic structure for the
ToCcomponent, including rendering the headings and styling them based on their active state. - We implemented interactivity by using the IntersectionObserver API to update the active heading based on scroll position.
- We highlighted the need for smooth scrolling and added CSS classes to achieve smooth scrolling and margin adjustments for heading positions.
Overall, this blog post provides a comprehensive guide on building a ToC with Prismic and Next.js, offering users a better reading experience and easy navigation within lengthy articles.
Further Improvements for the Table of Contents
Here are some ideas on how you can further improve the ToC:
- Collapse Subheadings: If your articles have a hierarchical structure with subheadings, consider adding a collapsed/expanded state for the subheadings in the ToC. This will allow users to navigate more efficiently and focus on the sections they are interested in.
- Back to Top Button: Add a "Back to Top" button at the end of the article or in the ToC. This allows users to easily navigate back to the beginning of the article without scrolling manually.
- More advanced interactivity and animations: For example, instead of using dots to indicate the active heading, you can add a scrollbar to the ToC. This scrollbar can dynamically update its position based on the user's scroll position within the article. With this approach, users can visually see their progress in the article and easily identify the current section they are reading. This could be achieved pretty easily with a good animation library like framer-motion for React.


