

Welcome to this month's Prismic Chronicle! We're trying something a little different this time around. Instead of our usual monthly feature spotlight, we're dedicating this entire Chronicle to the Page Builder and everything it can do.
Over the past year, we've been busy shipping new features and improvements that make building pages faster, more intuitive, and hopefully, more enjoyable. Whether you're new to Prismic or you've been with us for a while, there's probably something here you haven't discovered yet.
We'll walk through the complete Page Builder experience, from creating your first page to advanced features like AI translation and scheduled releases. Plus, we'll give you a sneak peek at some exciting collaboration features coming your way this quarter.
For a more step-by-step walkthrough of re-creating the Prismic homepage, check out the video below. Otherwise, keep reading for a full Page Builder overview! Let’s dive in! 👇
Getting started
Let’s get started with the basics by creating our first page!
Creating your first page
To begin, you can create a new page in your Prismic repository by clicking Create a new page and selecting your desired page type.

Once your page is created, you'll land directly in the Page Builder.
Page Builder overview
Here’s what you’ll see inside your new page:
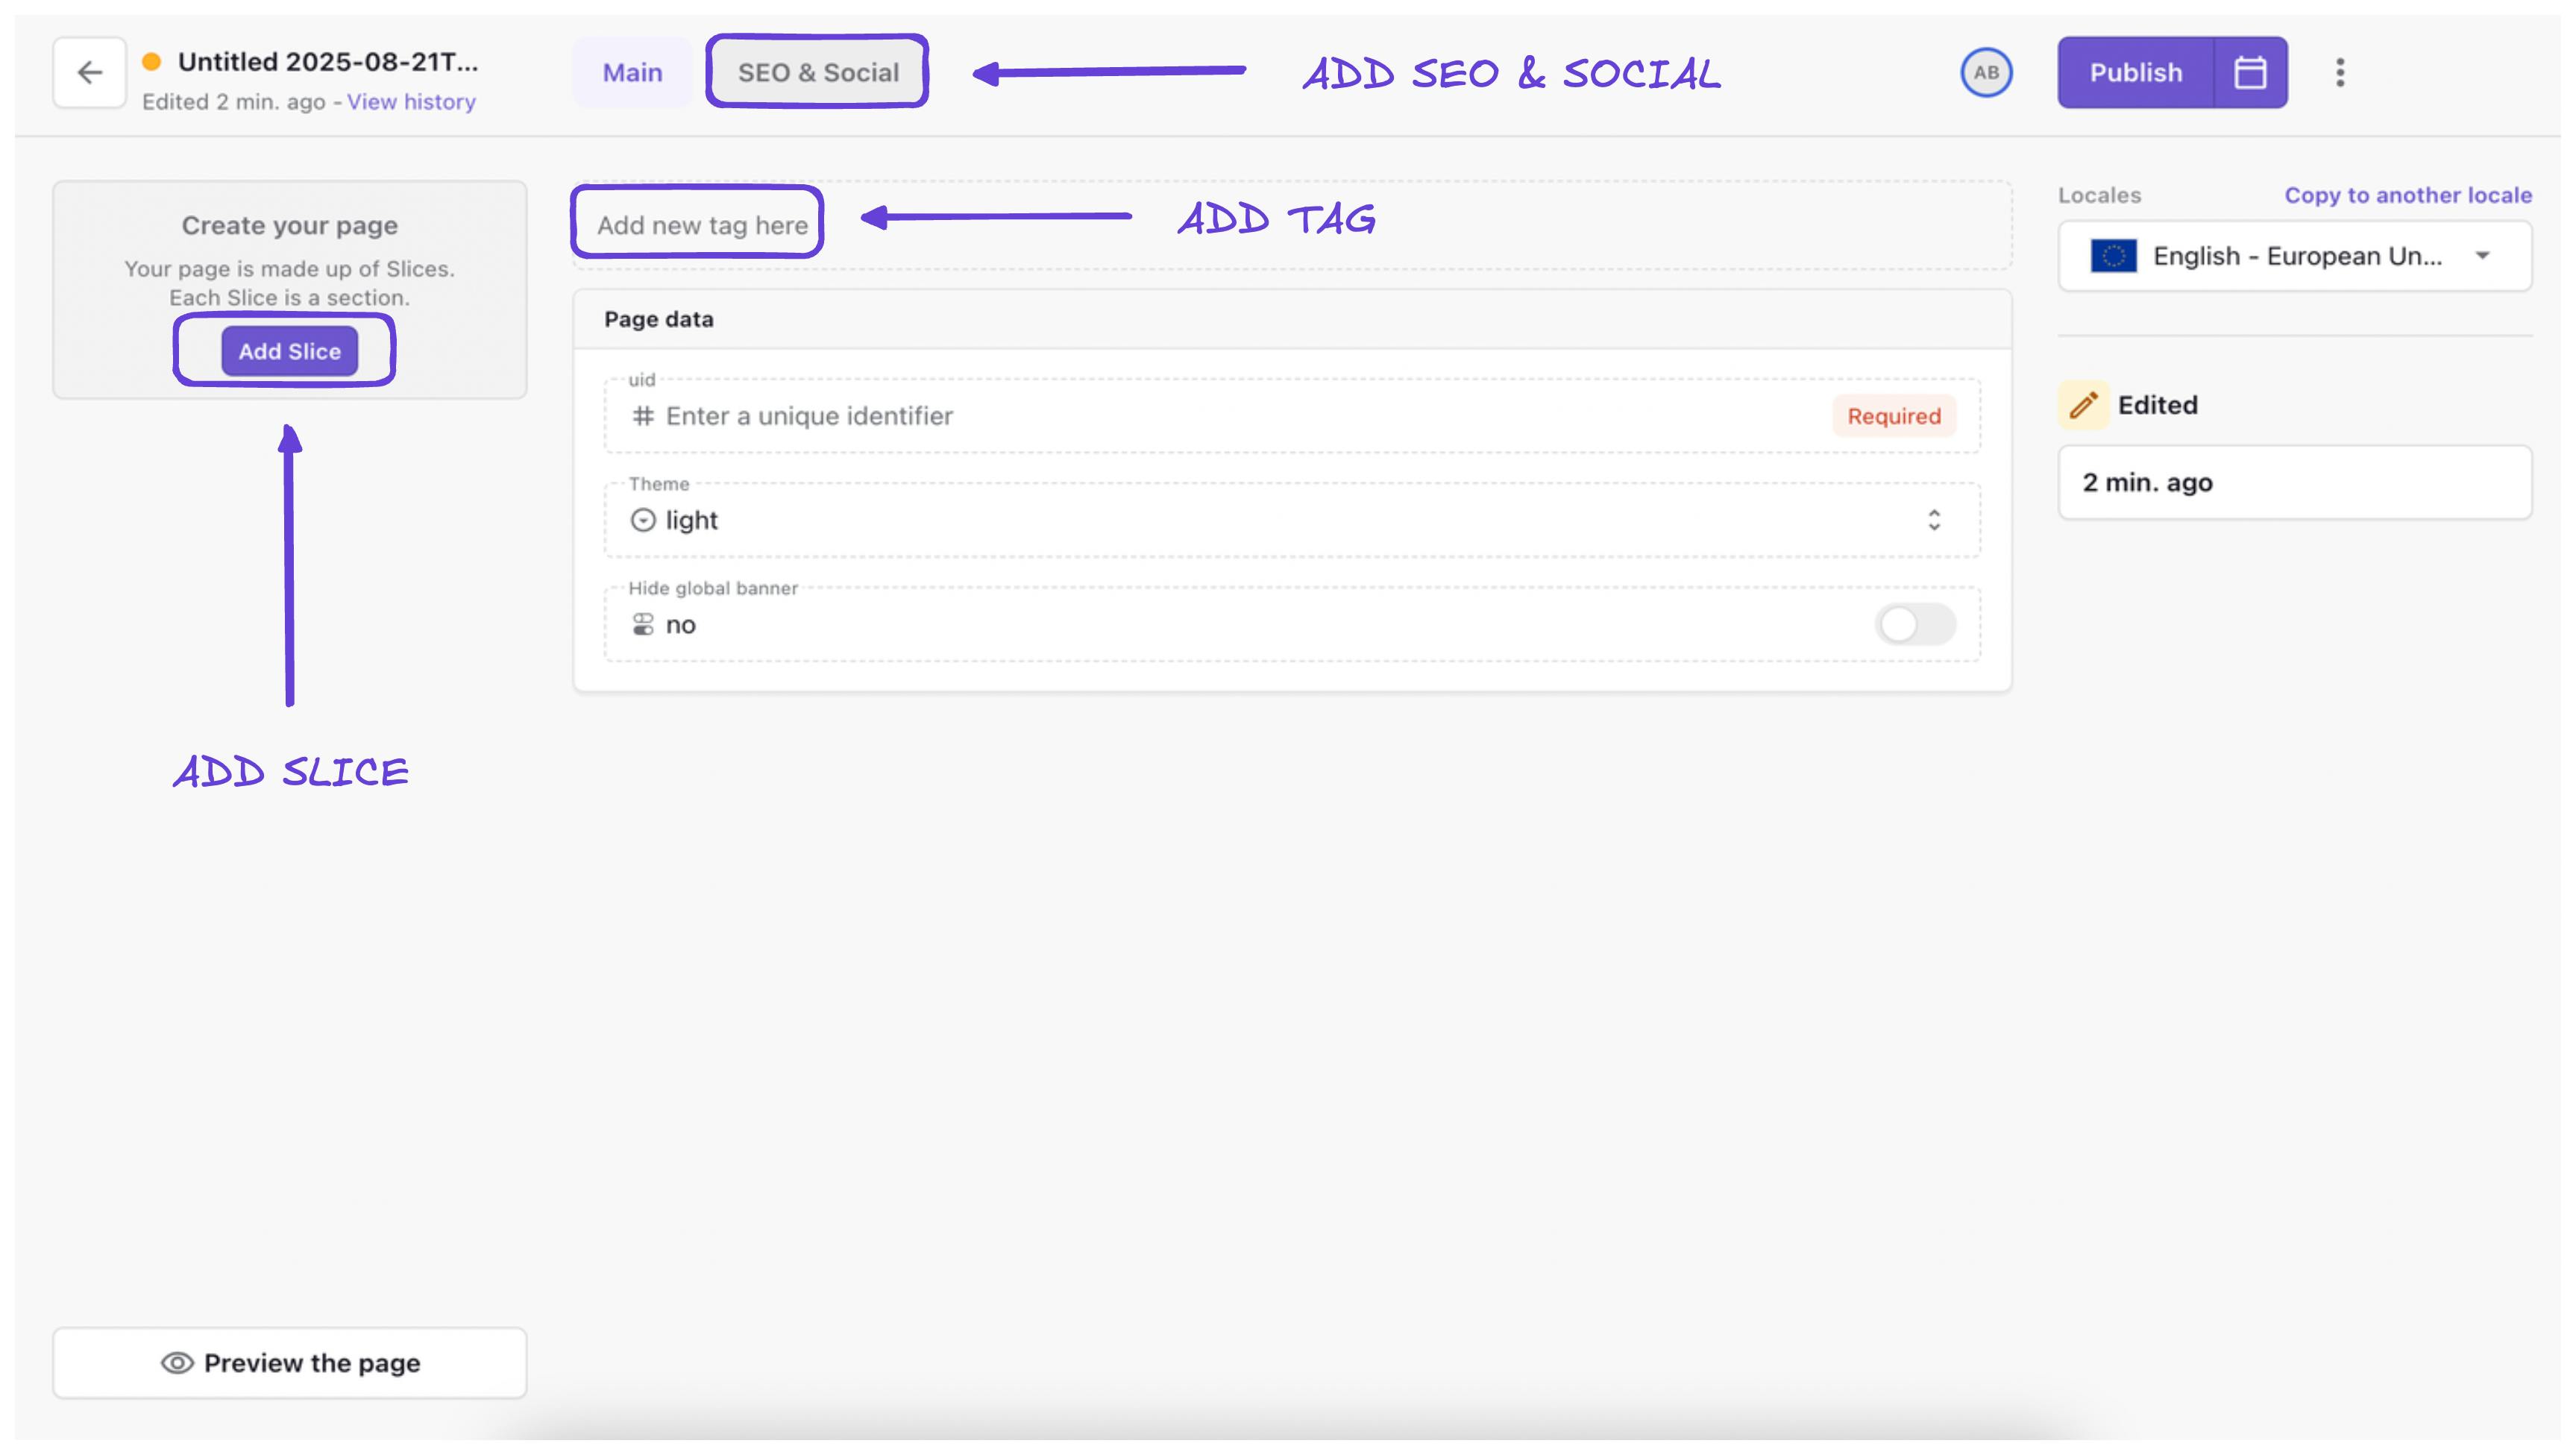
- Add Slice – opens the slice selector where you can choose from developer-built components.
- SEO & Social tab – configure metadata and preview how it looks in search and on social.
- Tags – categorize pages for easier filtering and search.
Before adding your first slice, it’s a good idea to set up a Live Preview. We’ll do that next!
Setting up live preview
Before adding content, it’s best to configure live preview so that you can see your changes in real-time. This feature dramatically improves your editing experience by showing exactly how your content will appear on the live website. To set up live preview:

- Click the three-dot menu in the upper-right corner
- Select "Live preview settings"
- Enter your website URL followed by "/slice-simulator" (e.g.,
https://yoursite.com/slice-simulator) - Save the settings
With live preview enabled, any changes you make will appear instantly in your table of slices on the left.
Adding a slice (example: hero section)
Now that you're set up with live preview, it's time to start building your page with slices. Let's walk through adding a hero slice as our first example:

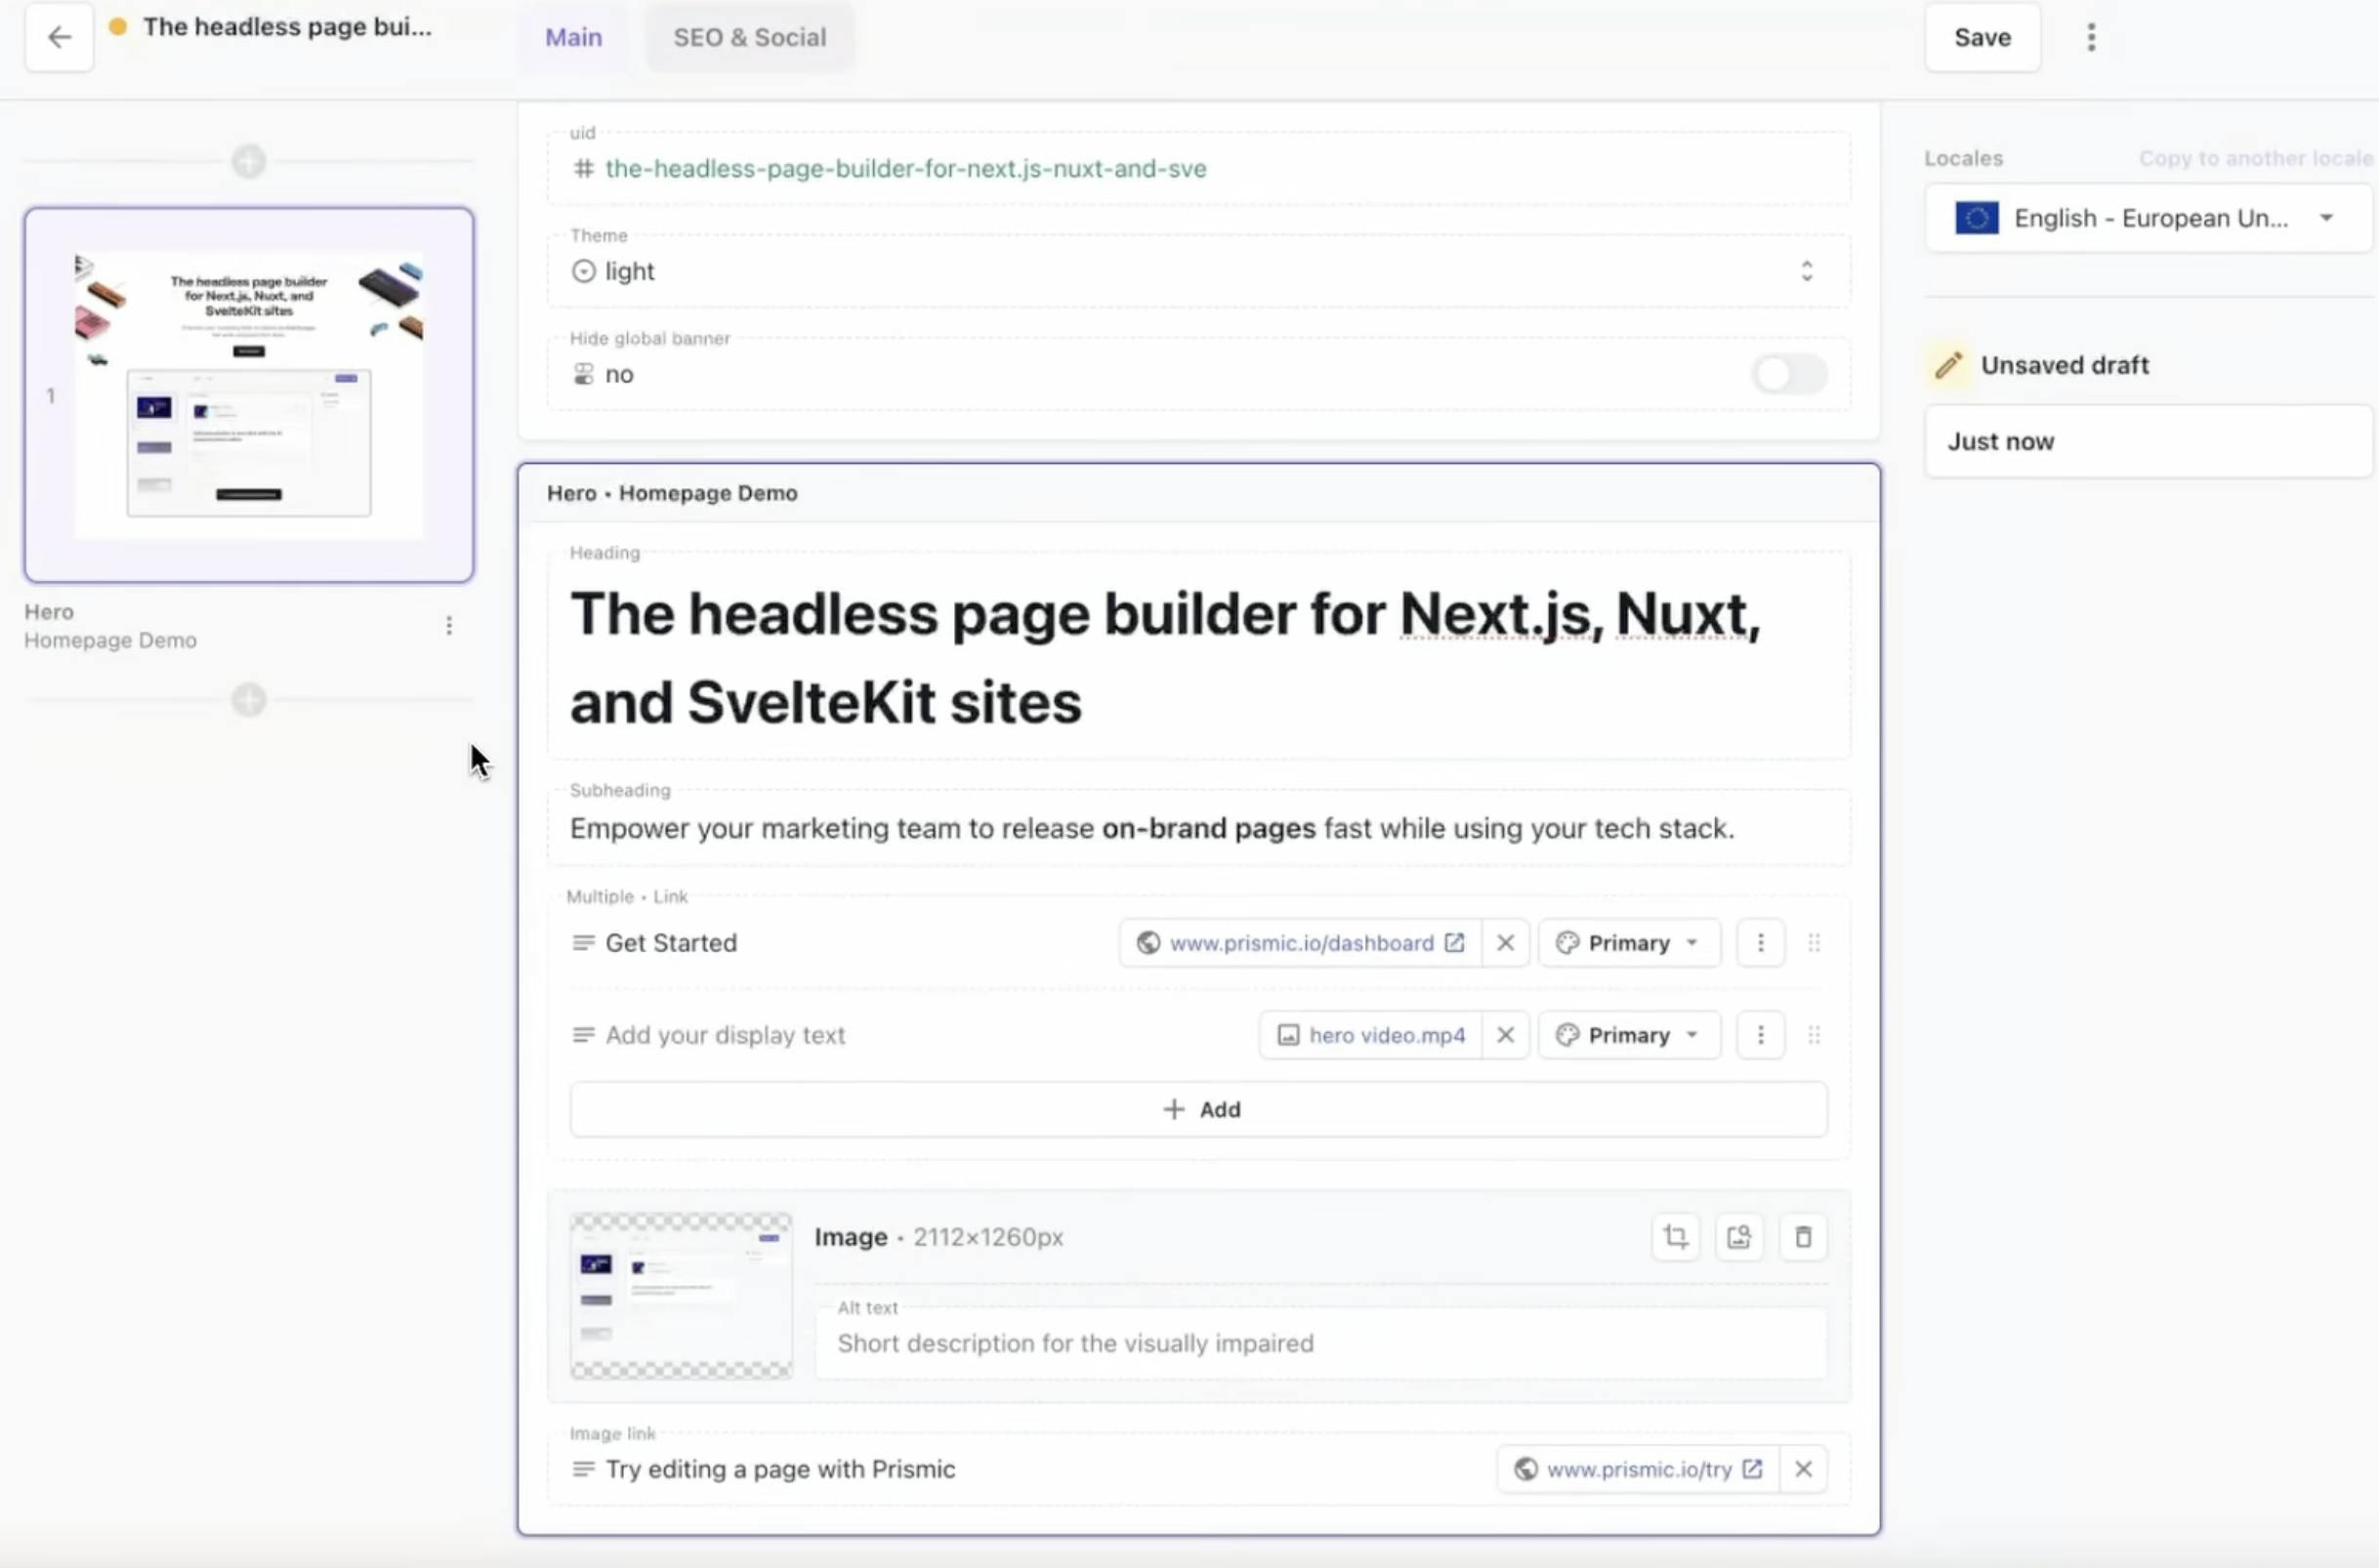
1. Click Add slice and choose Hero from the slice library.
2. Add a heading and subheading (rich text allows bold, italics, bullet lists, etc. by highlighting the text and selecting your style).
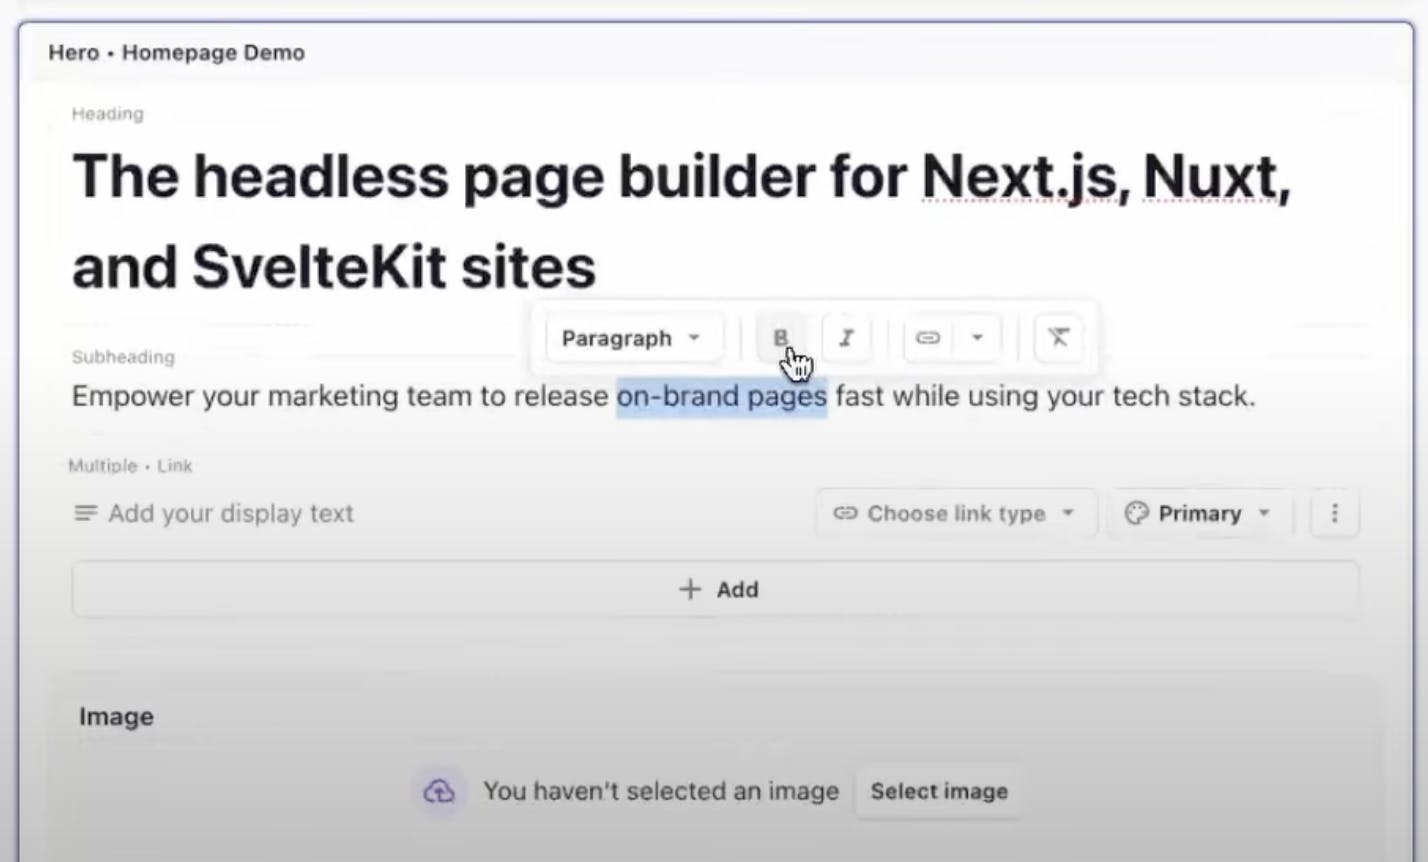
3. Add CTAs using the link variants:
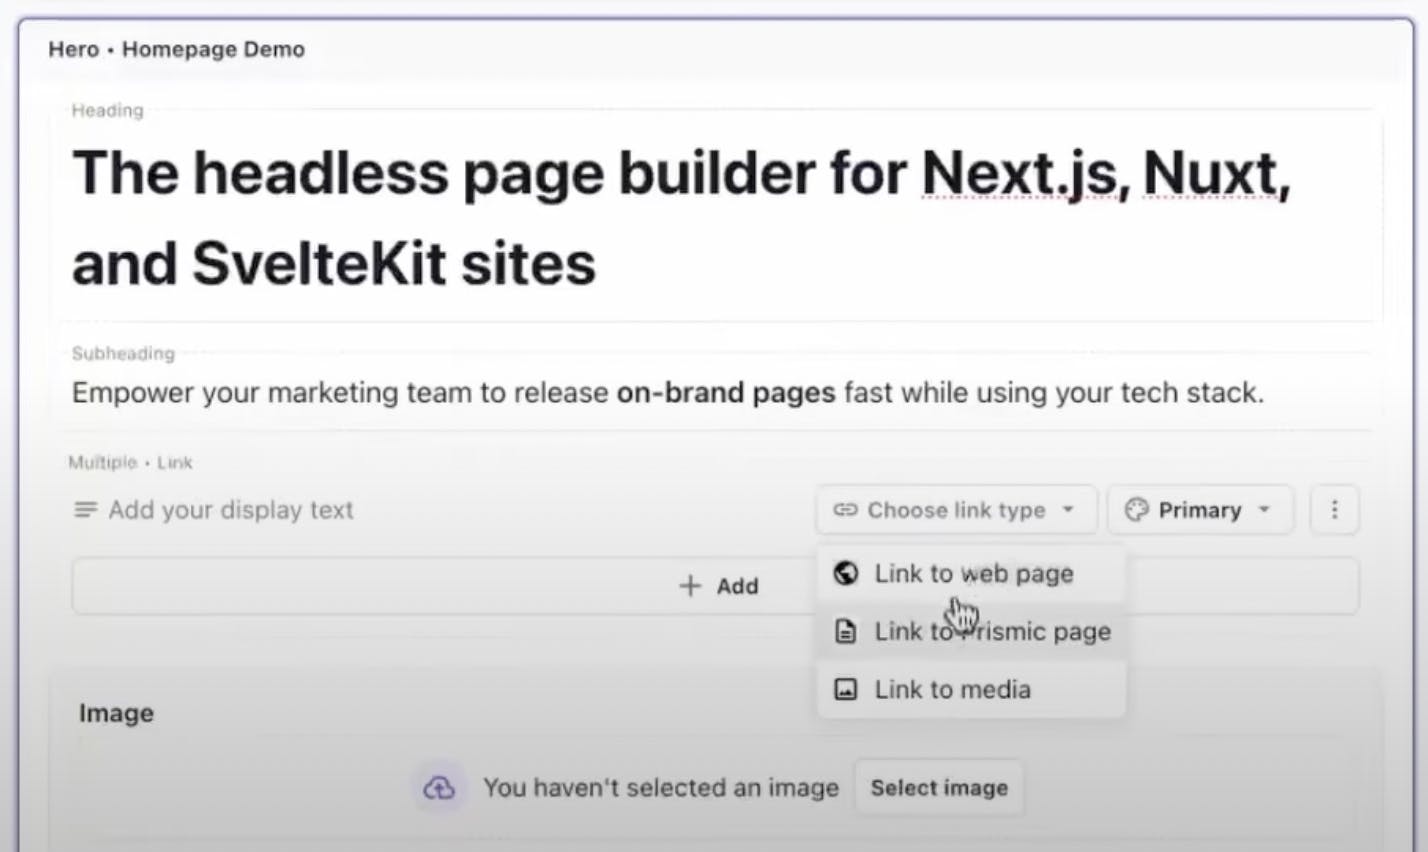
- Link to a webpage
- Link to a Prismic page
- Link to media (e.g., a video in your media library)
4. Upload and link a hero image (our enhanced media library allows you to easily search by tagged media or filter by media type or person who uploaded).

When you’re done adding your content to your slice, you should have a good idea of what it will look like in the table of slices on the left.
Now let’s take a look at some time-saving and page management features to keep your content organized.
Increase your traffic and quality leads with Prismic!
Join Prismic for free and start crafting pages that drive growth. Make and see changes in real-time with our visual Page Builder and quickly create on-brand pages that drive traffic and boost conversions!

Page management and time-saving features
There are several features in the Page Builder that will help you work more efficiently and keep your content well-organized:
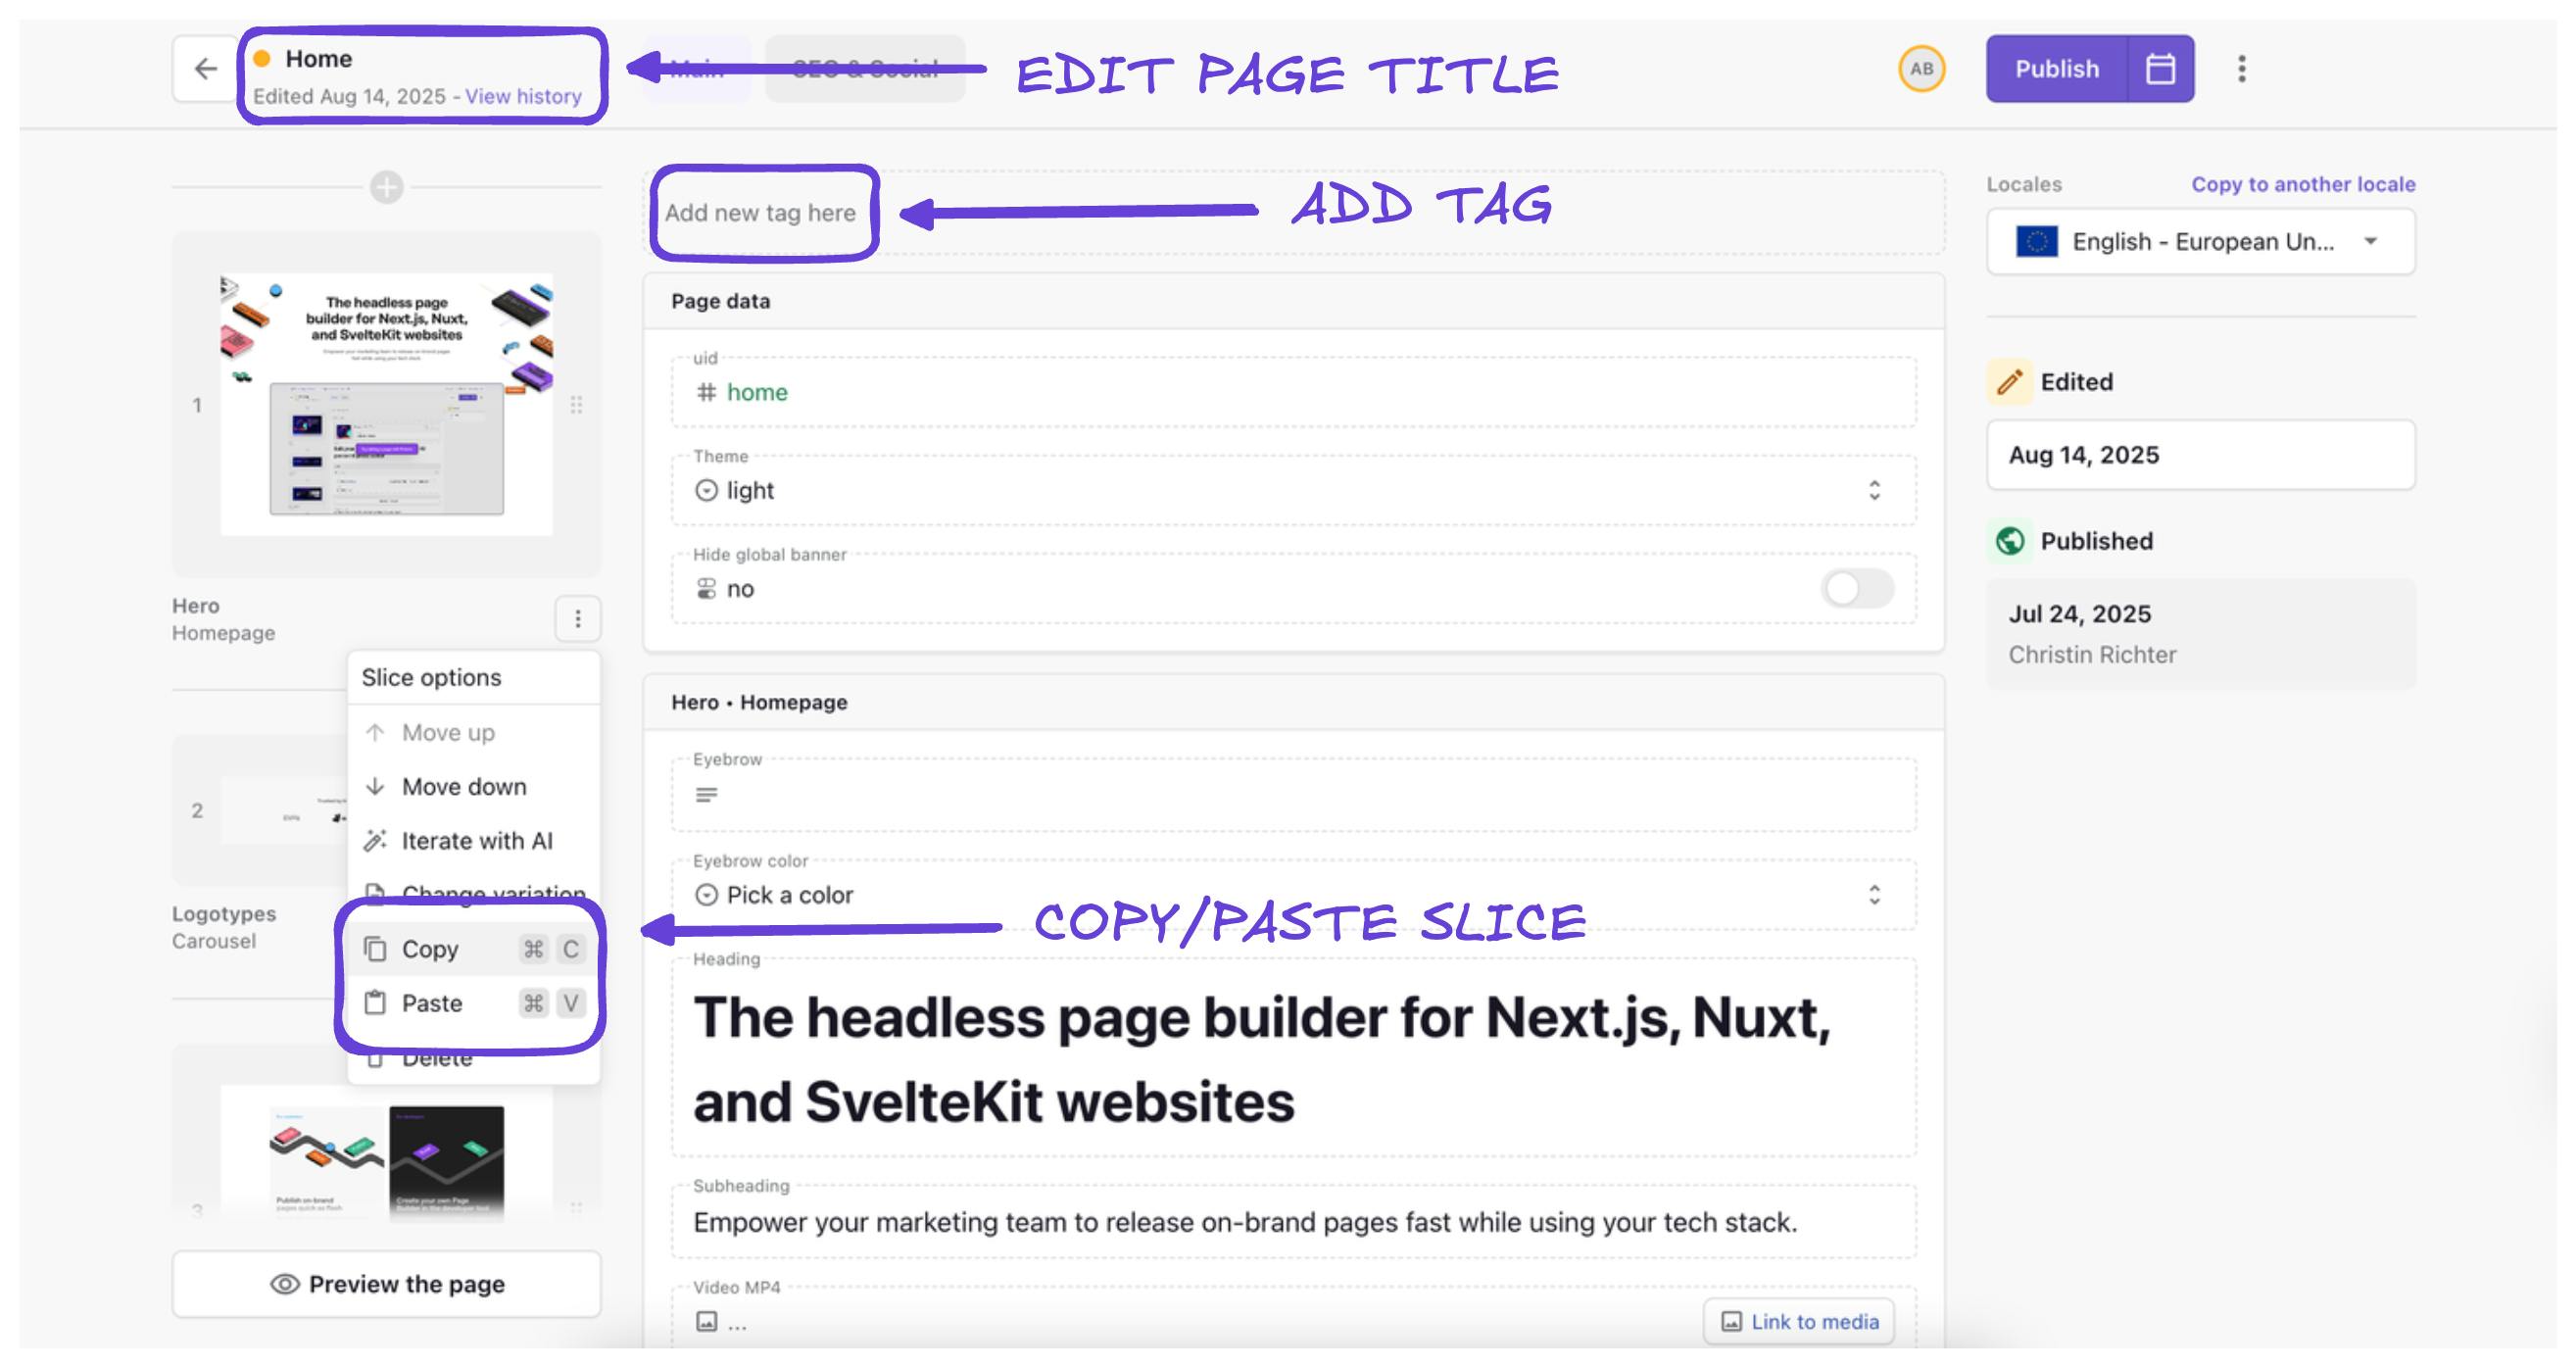
- Page Title – The title defaults to your first heading, but should be updated for clarity and repo searchability.
- Tags – Assign marketing, campaign, or functional tags to keep pages organized.
Copy & paste slices

Speed up your page creation process with our copy-paste feature for slices. Born from extensive user research, this tool gives marketers an even faster way to reuse slices with the content they’ve already perfected.
Whether you're reusing elements from your homepage, pricing page, or any other source, simply use Cmd + C (or click copy in the slice menu) to copy and Cmd + V (or click paste in the slice menu) to paste.
Optimizing with SEO & social metadata
It’s important not to forget about how your content will perform in search results and how it will appear if shared on social media. The SEO & Social tab lets you define:
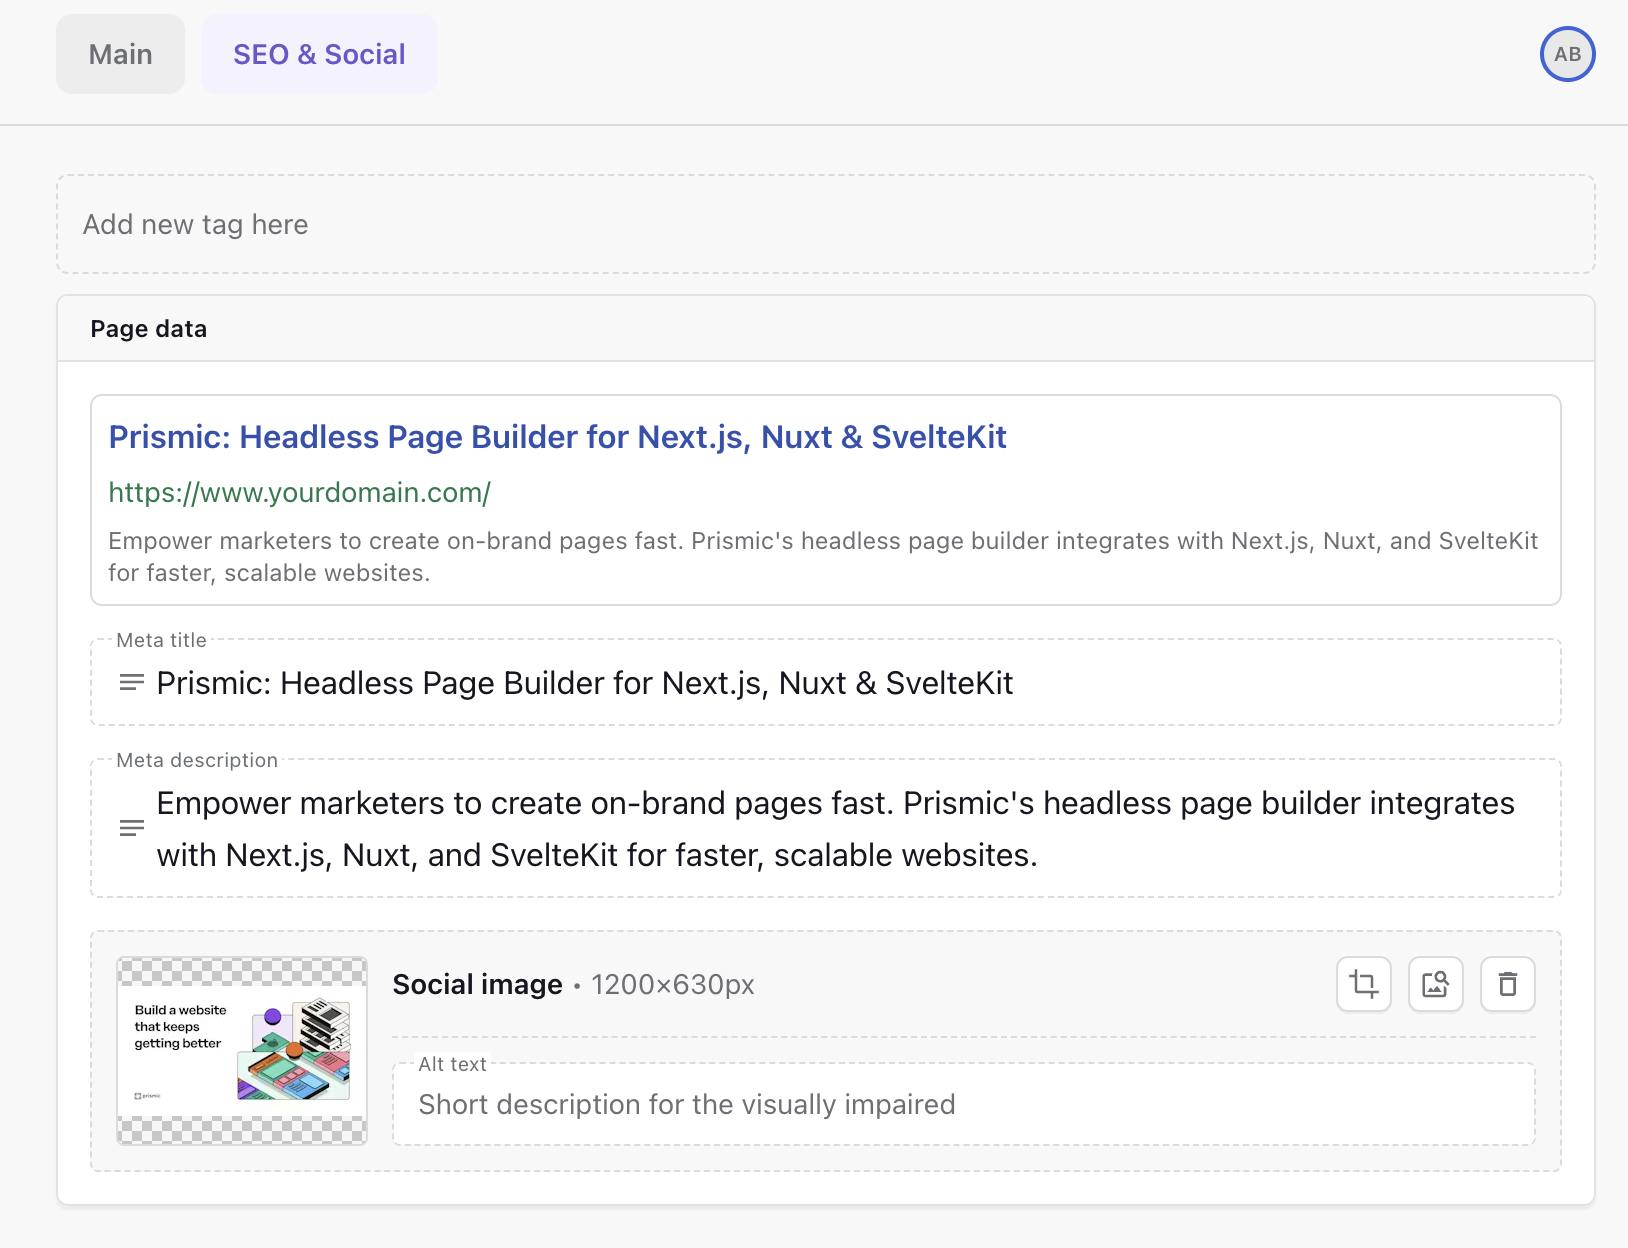
- Meta title (with character count guide).
- Meta description.
- Social image for sharing.
If fields are left blank or you need help with SEO metadata, our AI-powered SEO metadata assistant can auto-generate suggestions based on page content.

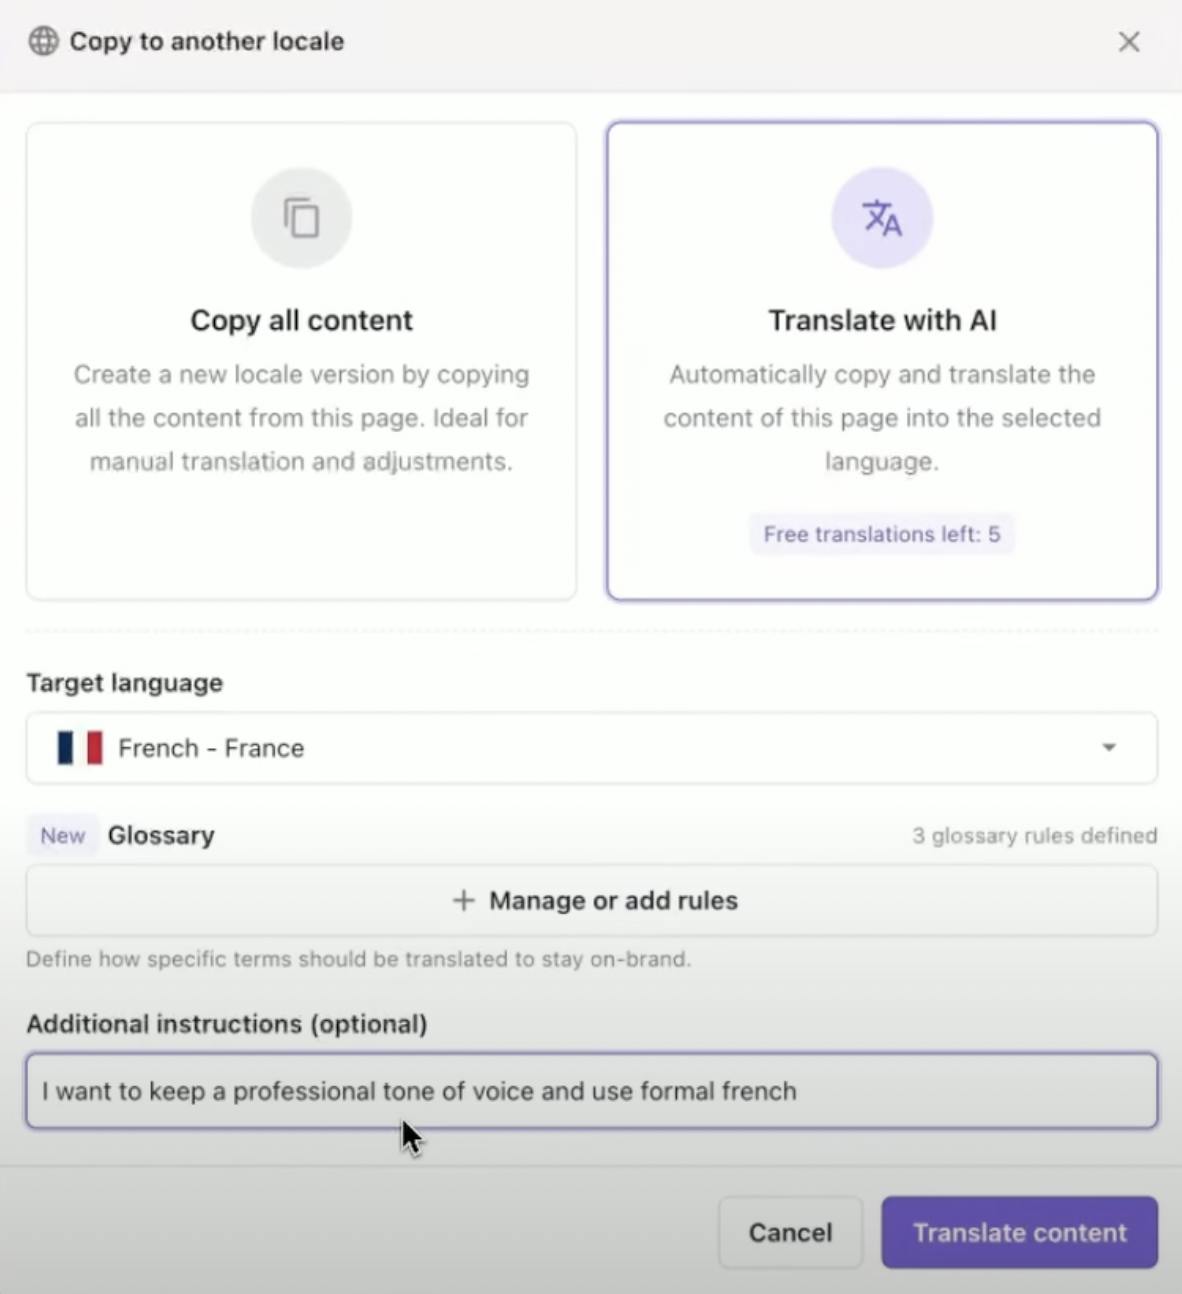
AI Translation & Glossary
For teams managing multilingual content, Prismic offers AI-powered translations that can significantly speed up your localization workflow.

This enables you to:
- Copy content into another locale (e.g., EN → FR).
- Use Translate with AI for instant translations.
- Add Glossary terms to protect brand names or product names (e.g., keep “Slice Machine” untranslated).
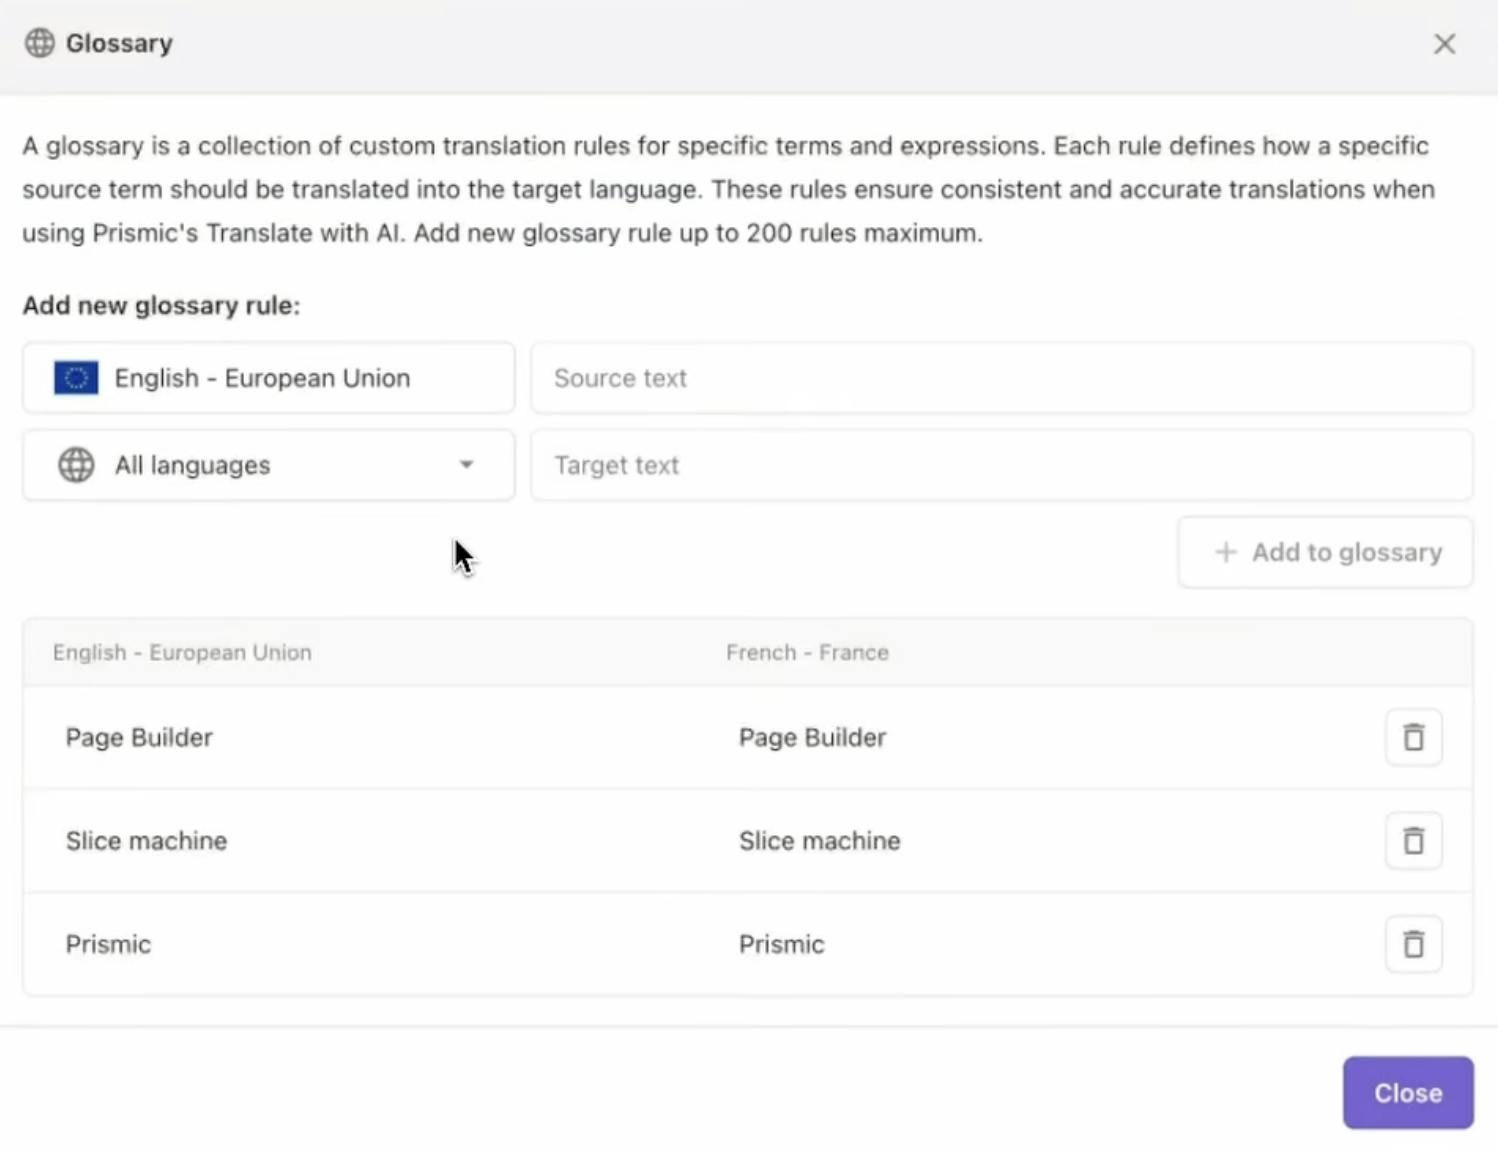
- Customize tone and formality (e.g., formal vs. casual).
Scheduling with Releases
Sometimes you need to coordinate multiple pages or plan content for future dates. That's where Releases come into play.

With Releases, you can prepare and schedule pages ahead of time:
- Group multiple pages into one release (e.g., “Summer Sale”).
- Schedule for a future date/time or publish immediately.
- Manage releases in the Planned tab.
Search & organization features
As your content library grows, finding the right pages quickly becomes essential. The Page Builder includes powerful search and organization tools to help.

In the Page builder, you can:
- Search by page name or UID.
- Filter by page type, tags, status (draft/published/archived), or author.
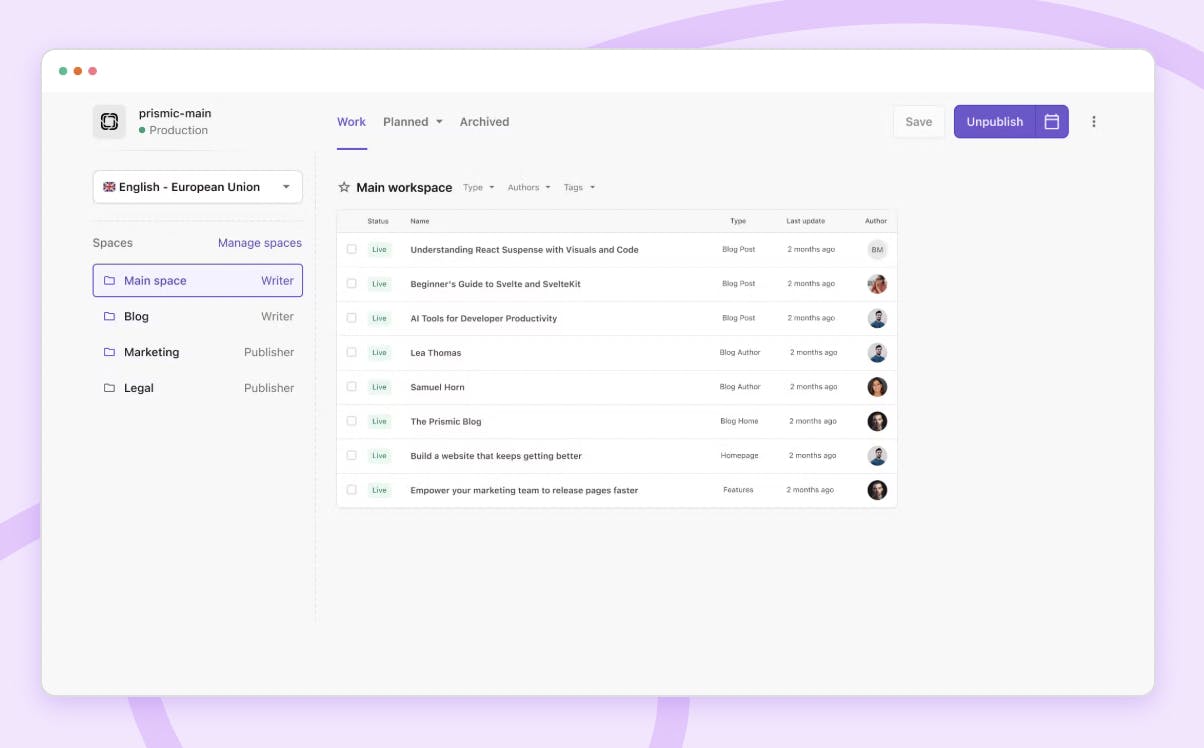
Spaces
For larger teams working on different types of content, Spaces provide an additional layer of organization.

Spaces allow you to:
- Group content by team (e.g., Blog, Marketing).
- Collaborate more easily with larger teams.
Custom roles (Enterprise)
Enterprise customers can take organization a step further with granular permissions:
With custom roles you can:
- Set access rights per space.
- Example: The Blog team can publish blog pages, but only has read-only access to Marketing pages.
Real-time collaboration features (coming soon 👀)
We're not stopping here. Some exciting collaboration features are on the horizon that will make working together even smoother.

Here are some of the powerful real-time collaboration features, coming soon:
- Status indicators show who’s editing a field.
- Autosave ensures no work is lost.
- Future updates: commenting, notifications, and more.
Conclusion
The Page Builder offers a comprehensive set of tools essential for content management, from basic page creation to advanced features like AI translation and scheduled releases. We hope these features will help you create engaging, well-organized content while maintaining efficiency and team collaboration.
We will continue to improve the Page Builder with upcoming real-time collaboration features, making it the perfect solution for teams of all sizes. Whether you’re building a simple website or managing complete, multilingual sites, these features will provide you with the foundation for successful content management. Stay tuned for more updates!


