This is the second guide in a series teaching you the easiest way to add a content management system (CMS) to a Next.js app.
In the first guide, you learned how to create a new Next.js app, set up a CMS using Prismic, and connect your CMS to the app. You now have a good foundation on which you can further build your CMS and Next.js skills. If you haven’t gone through the first guide yet, check that one out first since this guide builds upon the work you’ll do there.
Want to skip the first guide?
If you want to skip the first guide, you can start with the prepared app using the following commands:
npx degit prismicio-community/easiest-way-to-add-cms-nextjs scalable-cms-tutorialcd scalable-cms-tutorialnpx @slicemachine/init
The commands will do the following:
1. Start a new Next.js project with the prepared code.
2. Ask you to log in to Prismic or create an account.
3. Create a new Prismic content repository with sample content.
In this guide, you’re going to take your CMS-powered Next.js app and make it scalable. 🏗️ You’ll learn how and why modern agencies and companies build their websites using Prismic.
Before you jump back into the app, let’s first define what we’re aiming for.
What is a scalable app, and how can you build one?
A scalable CMS-powered Next.js app has the following attributes:
- It allows content writers to create and update pages on their time.
- Its content is always visually on-brand, without the need for a designer’s or developer’s constant involvement.
- It lets developers focus more on implementing new features and optimizations and less on mundane maintenance and repetitive tasks.
- It is architected to reduce development time for sites of any size.
You can accomplish all of this through Prismic’s killer feature: Slices. They are sections of a page that can be reused as many times as needed, each with their own content. Slices bring the component-based workflow that enables efficient website development to the content editing world. You — and your content team — are going to love it.
Through this guide, you’re going to enhance your app by doing the following:
Let’s get started!
1. Create Slices
You’ll begin by making some changes to the CMS you set up in the previous guide.
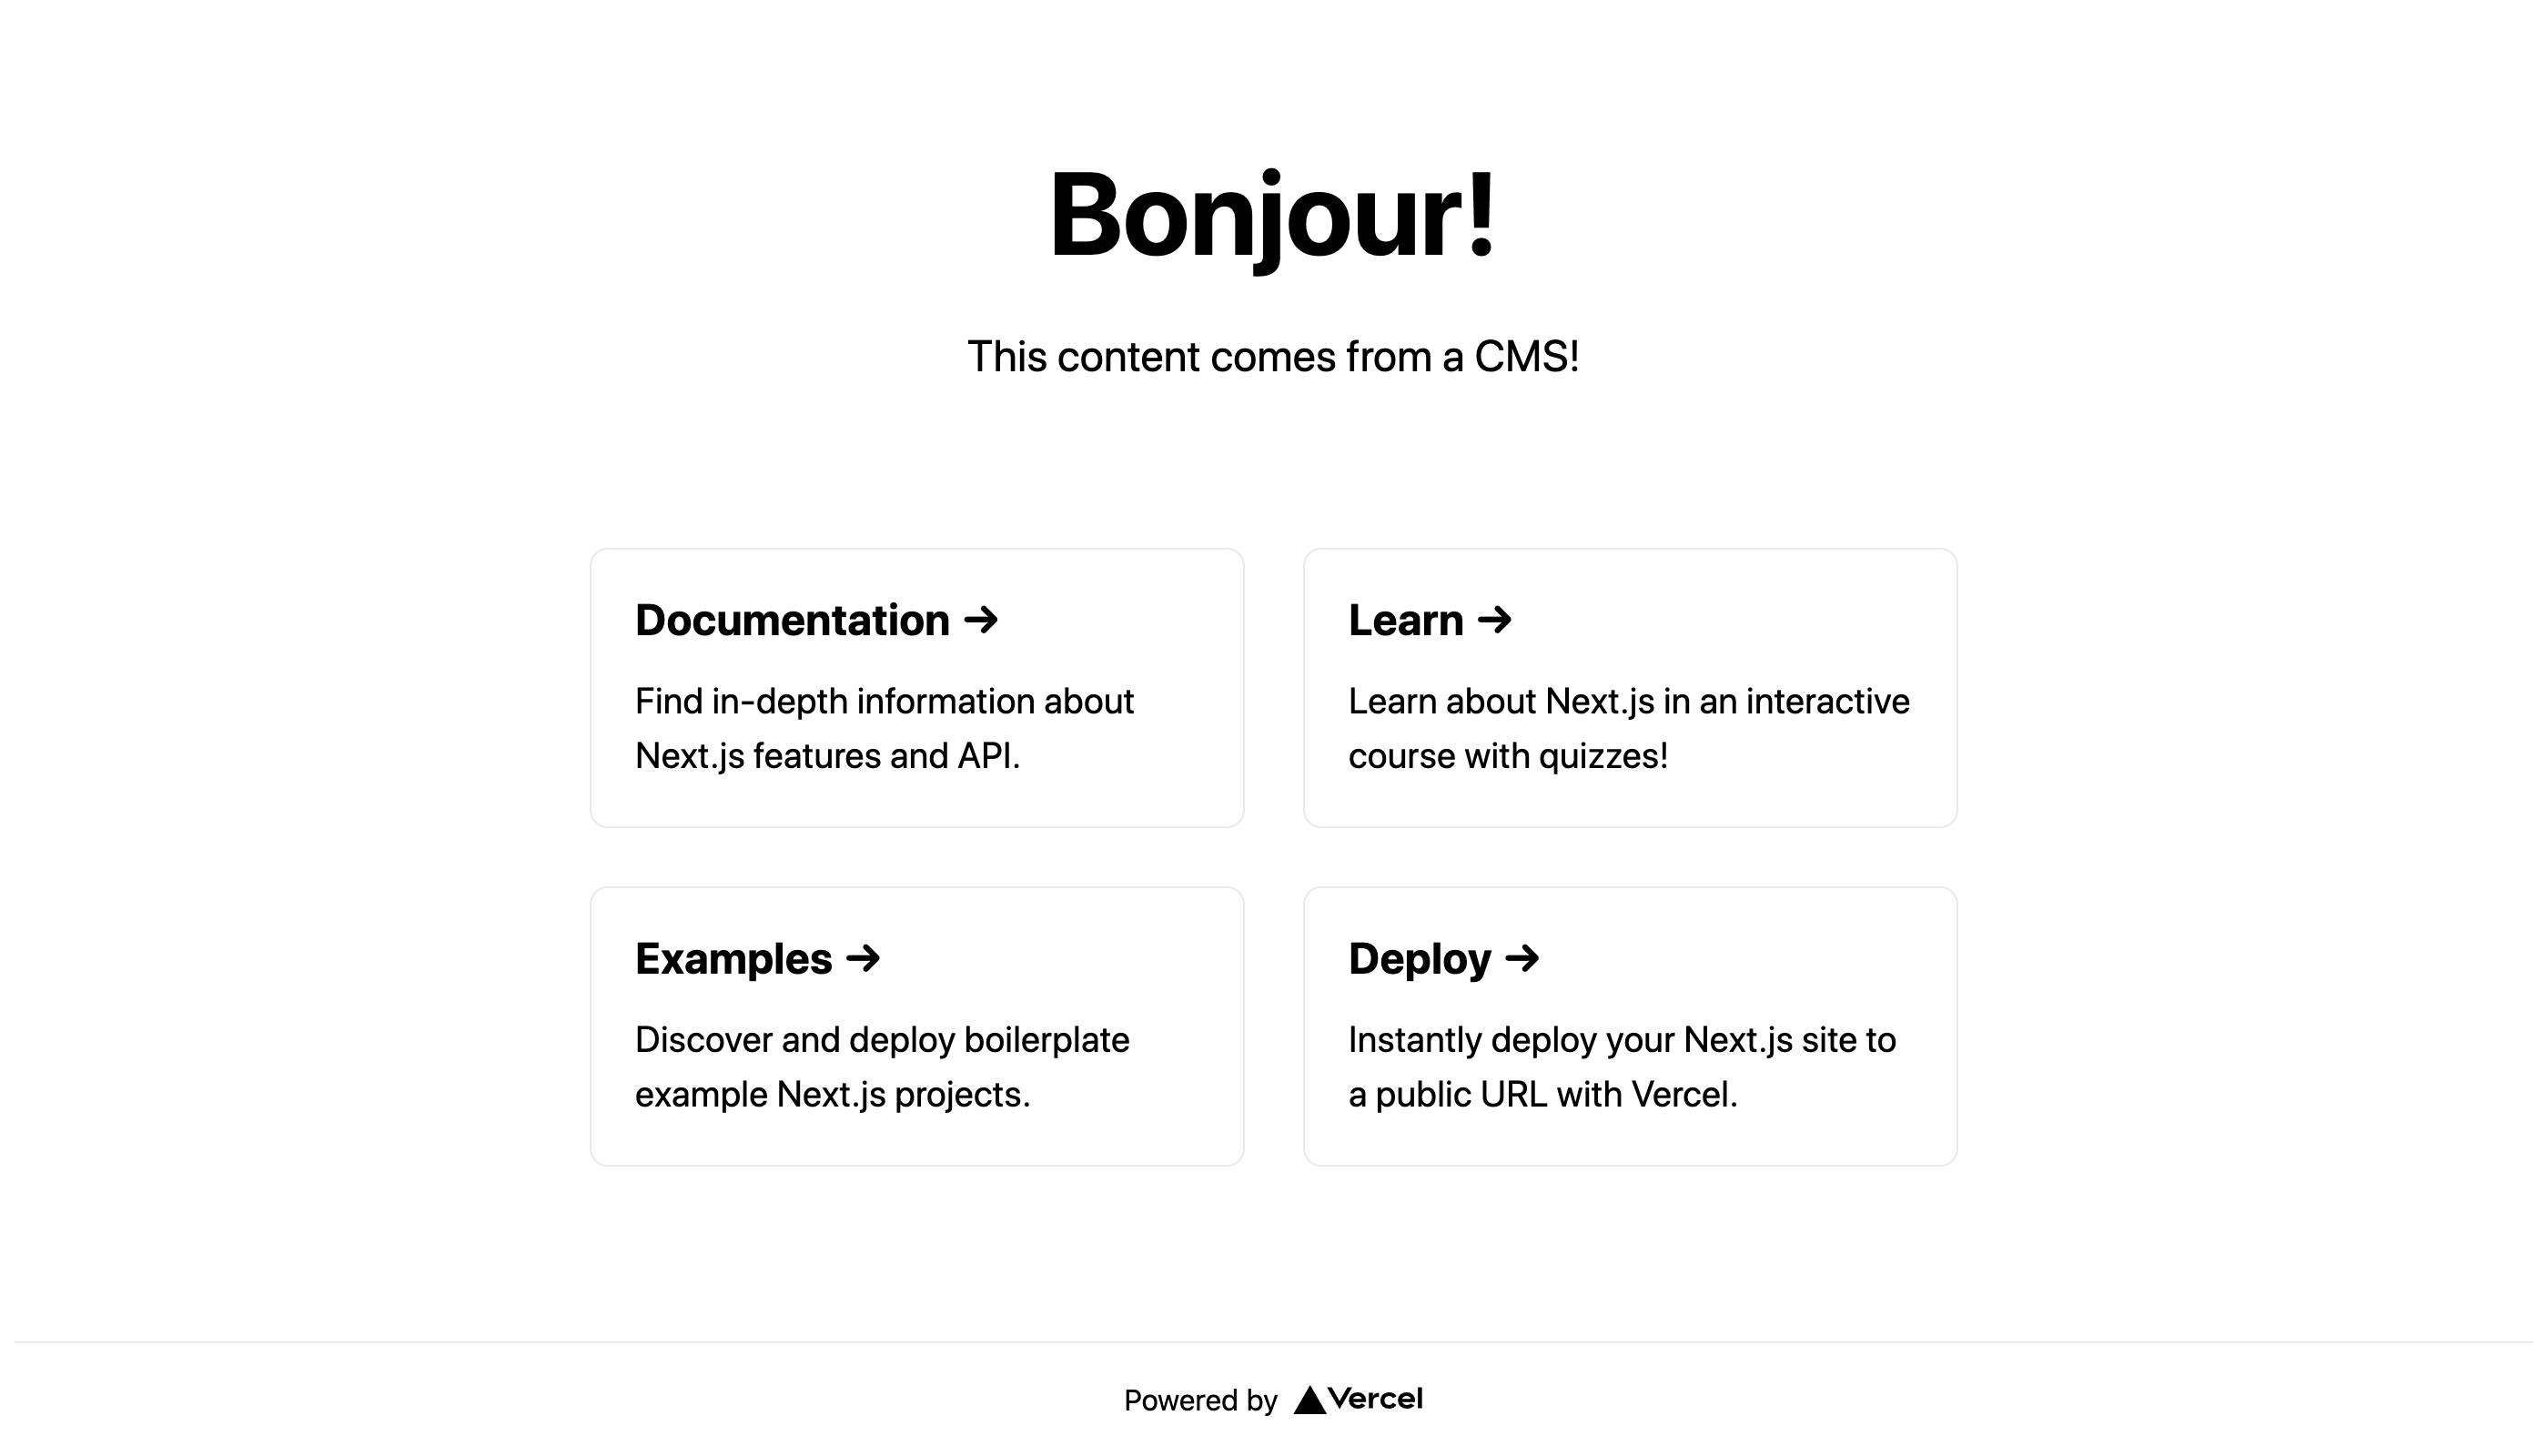
The app’s home page currently shows two fields from the CMS: a greeting and a description. These fields will be replaced with a single Slice that allows content writers to add any text they want as they create new pages. To make it obvious to writers what the Slice does, you’ll name it “Text.” A writer will be able to add a Text Slice any time text is needed on a page.
You’re also going to create a Slice for the collection of links below the description, something that wasn’t editable in the last guide. You’ll name this Slice “LinkCards” to make the Slice’s contents and design obvious to writers.
With these two Slices, content writers will be able to add Text and LinkCard Slices as many times as they want and in any order they want. Adding text below the collection of links, for example, is just one Text Slice away. A content writer can add it themselves without the need for you to edit the page’s code.
(By the way, we’re keeping this simple so you can focus on learning, but can you imagine if content teams had their own “Call to Action” Slices? Or “Image Gallery” Slices?)
To begin, start Slice Machine by running the following terminal command in the root directory of your project. As a reminder, Slice Machine is a tool you run locally to configure your Prismic CMS.
npm run slicemachineOnce the server starts, open Slice Machine by going to http://localhost:9999 in your browser. With Slice Machine running, you can create your first Slice.
1.1. Add a Slice for text context
Your first Slice will allow content writers to add text to a page. They will be able to add as many of these Slices as they want and will support special formatting like headings, lists, and more.
To create your first Slice in Slice Machine, follow these steps:
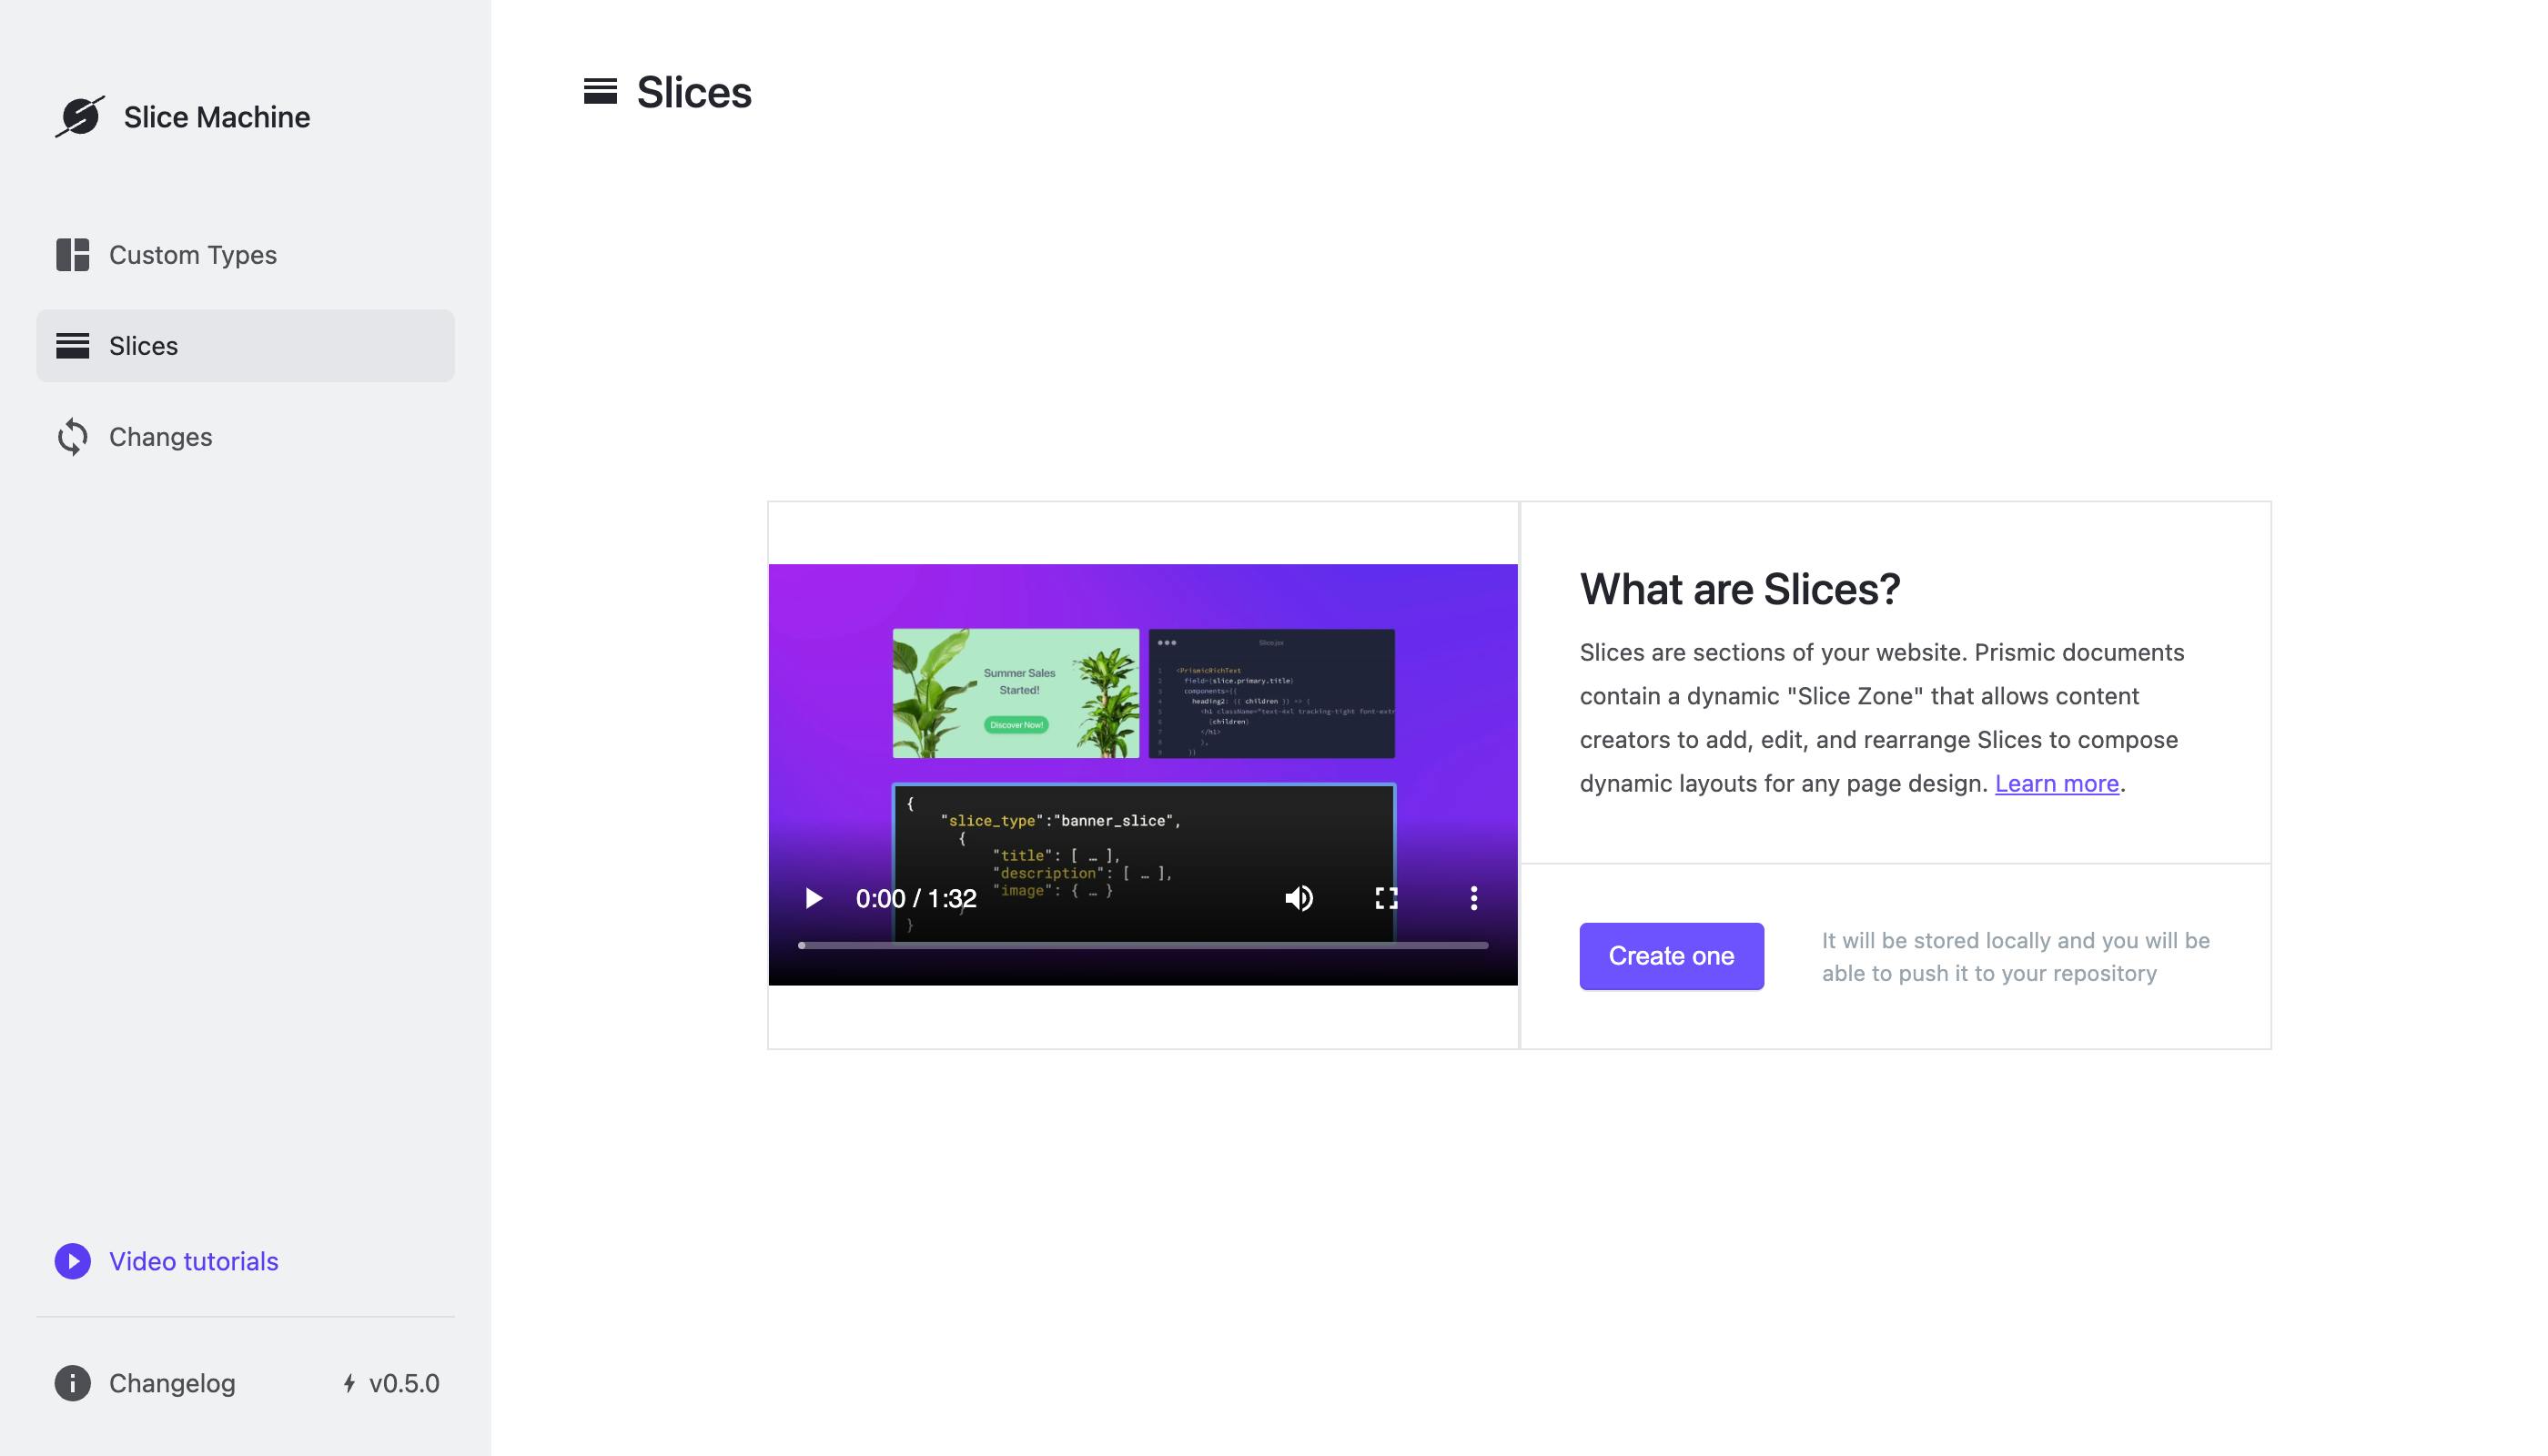
- Click on Slices in the sidebar.
- Under "What are Slices," click the purple Create one button.
- Name the Slice “Text” when prompted and click Create.
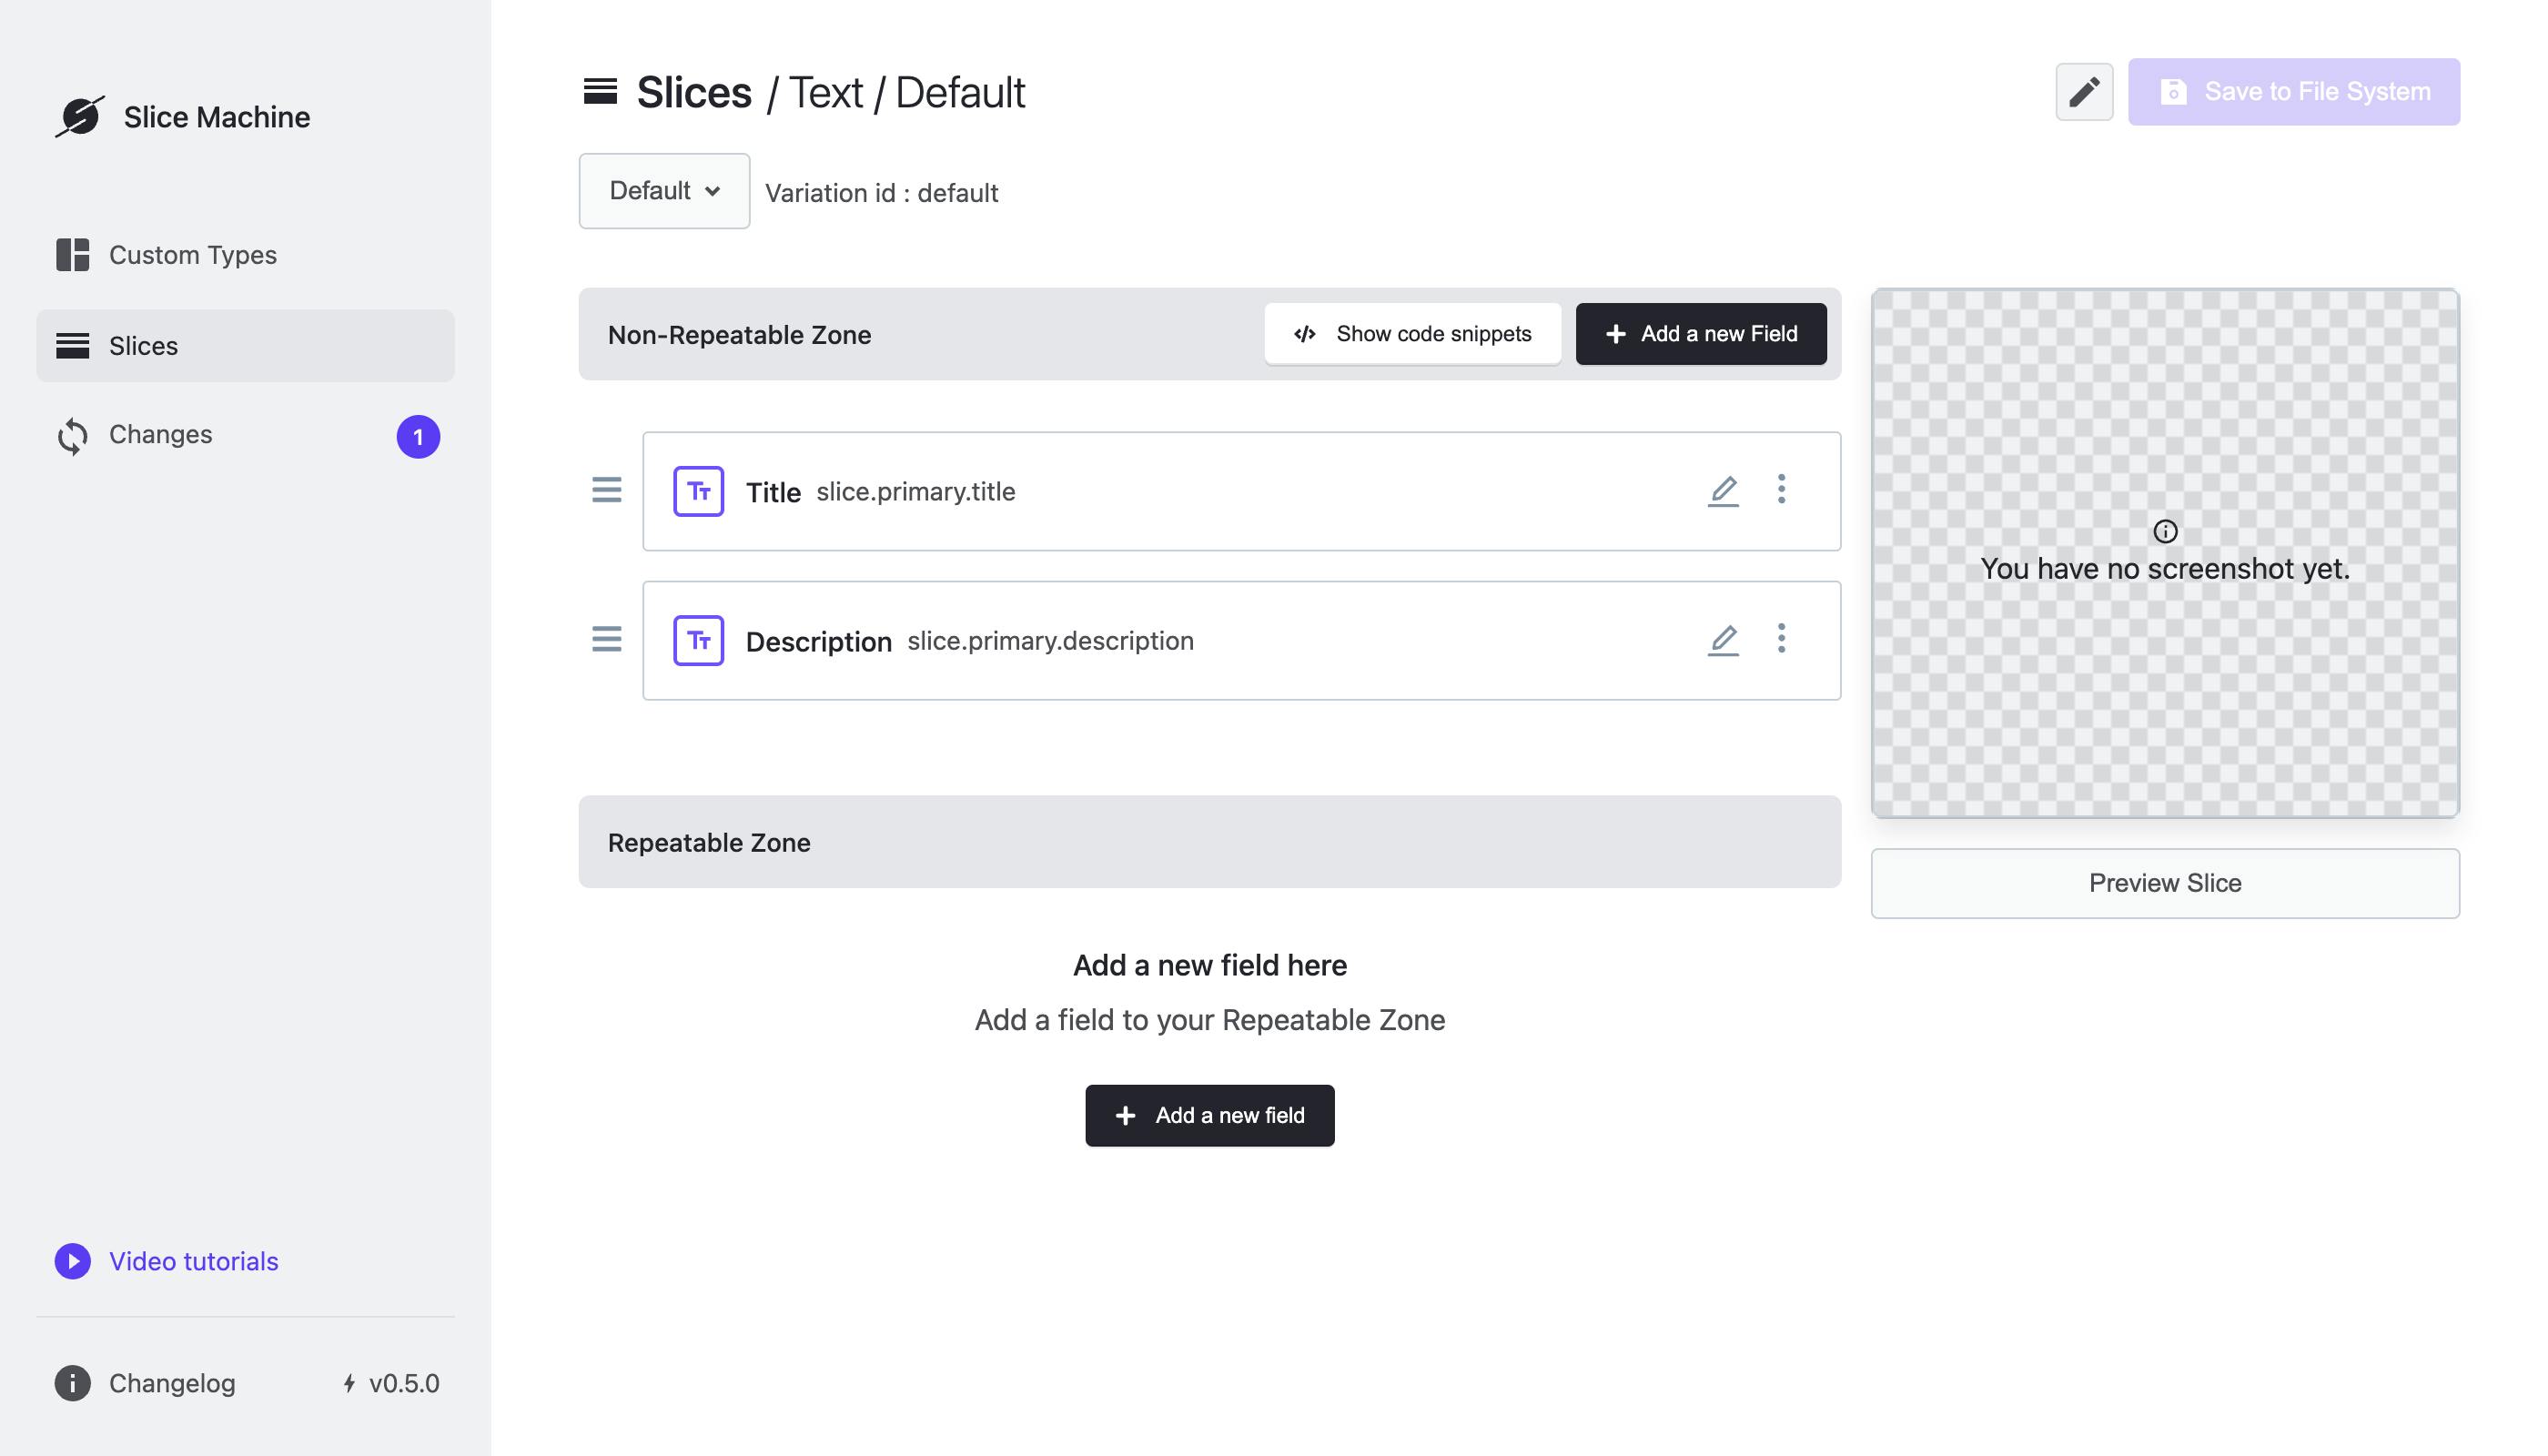
On the next screen, you’ll see that a Slice has two sections for content fields:
- “Non-repeatable Zone”: This section is for most content that will be used once in the Slice, such as a piece of text or a background image.
- “Repeatable Zone”: This section allows content writers to add the same element multiple times, which is useful for things like a collection of links or images.
You’ll only use the “Non-Repeatable zone” for your Text Slice. You’ll learn how to use the “Repeatable zone” in the next Slice.
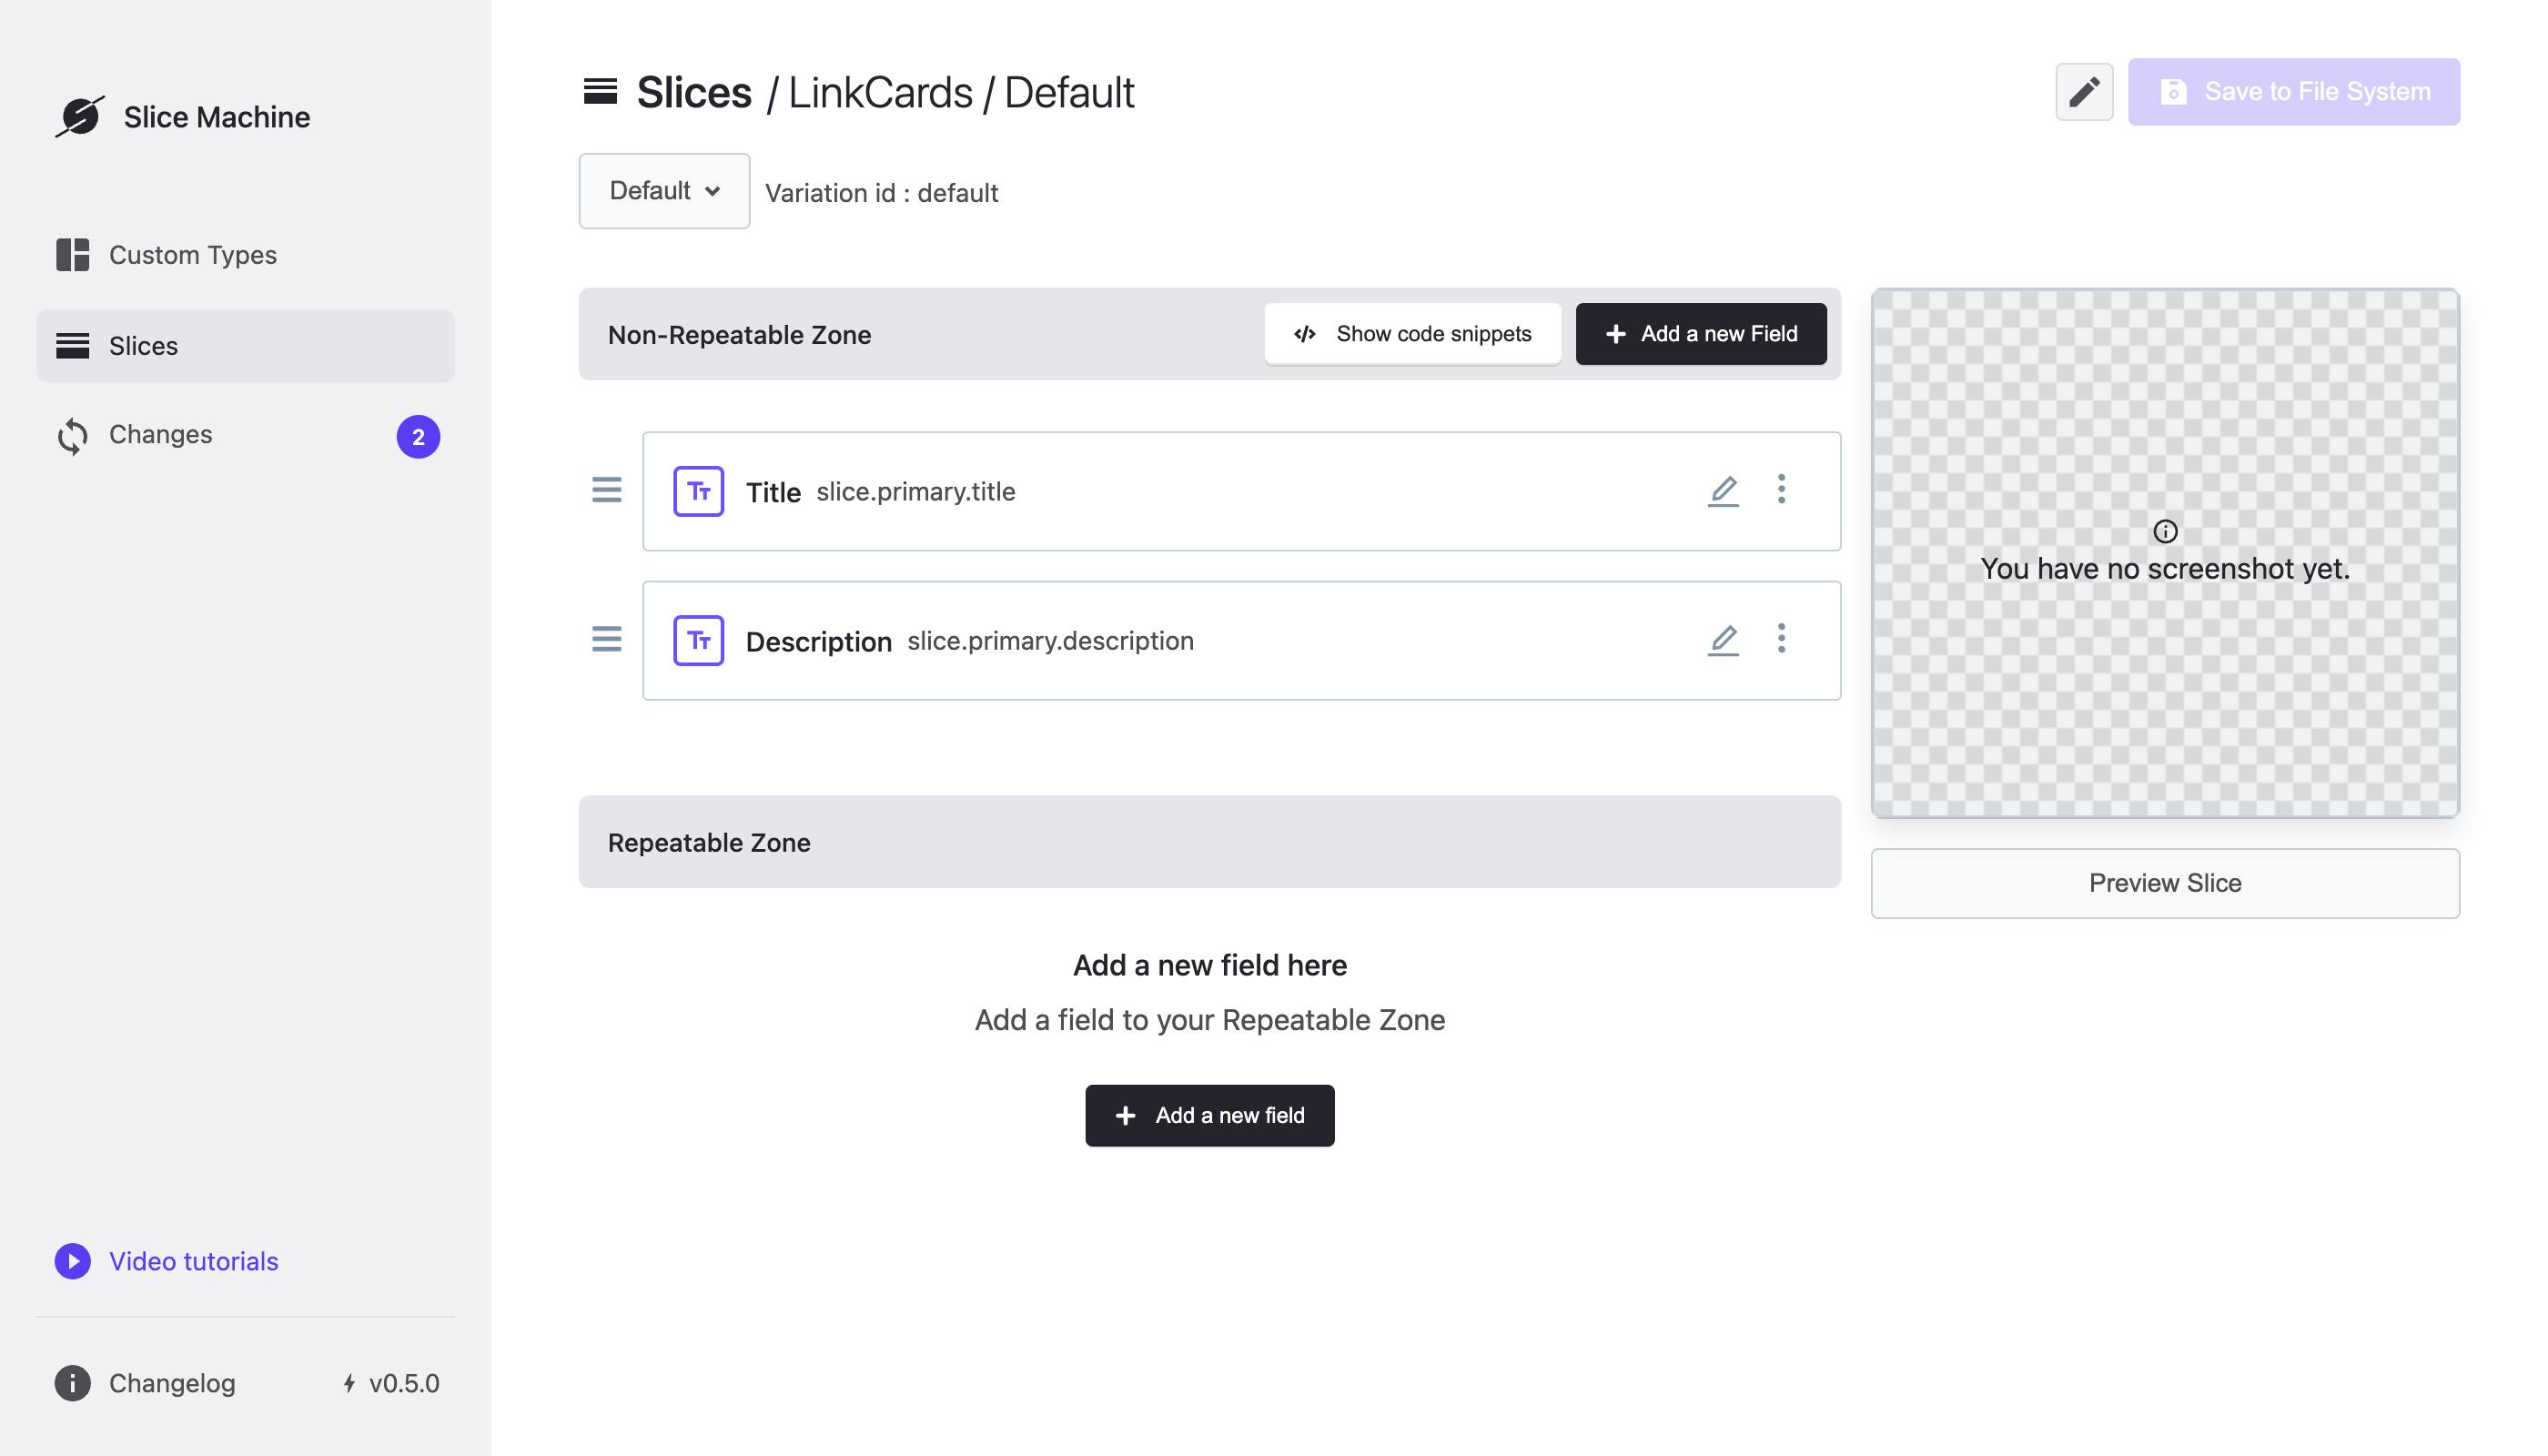
Here’s how to set up your Text Slice:
- Your Slice will have two fields in the “Non-repeatable zone” by default: a Title and a Description field. You won’t need either of them, so they can be deleted. Click the “…” button and select Delete field for each field.
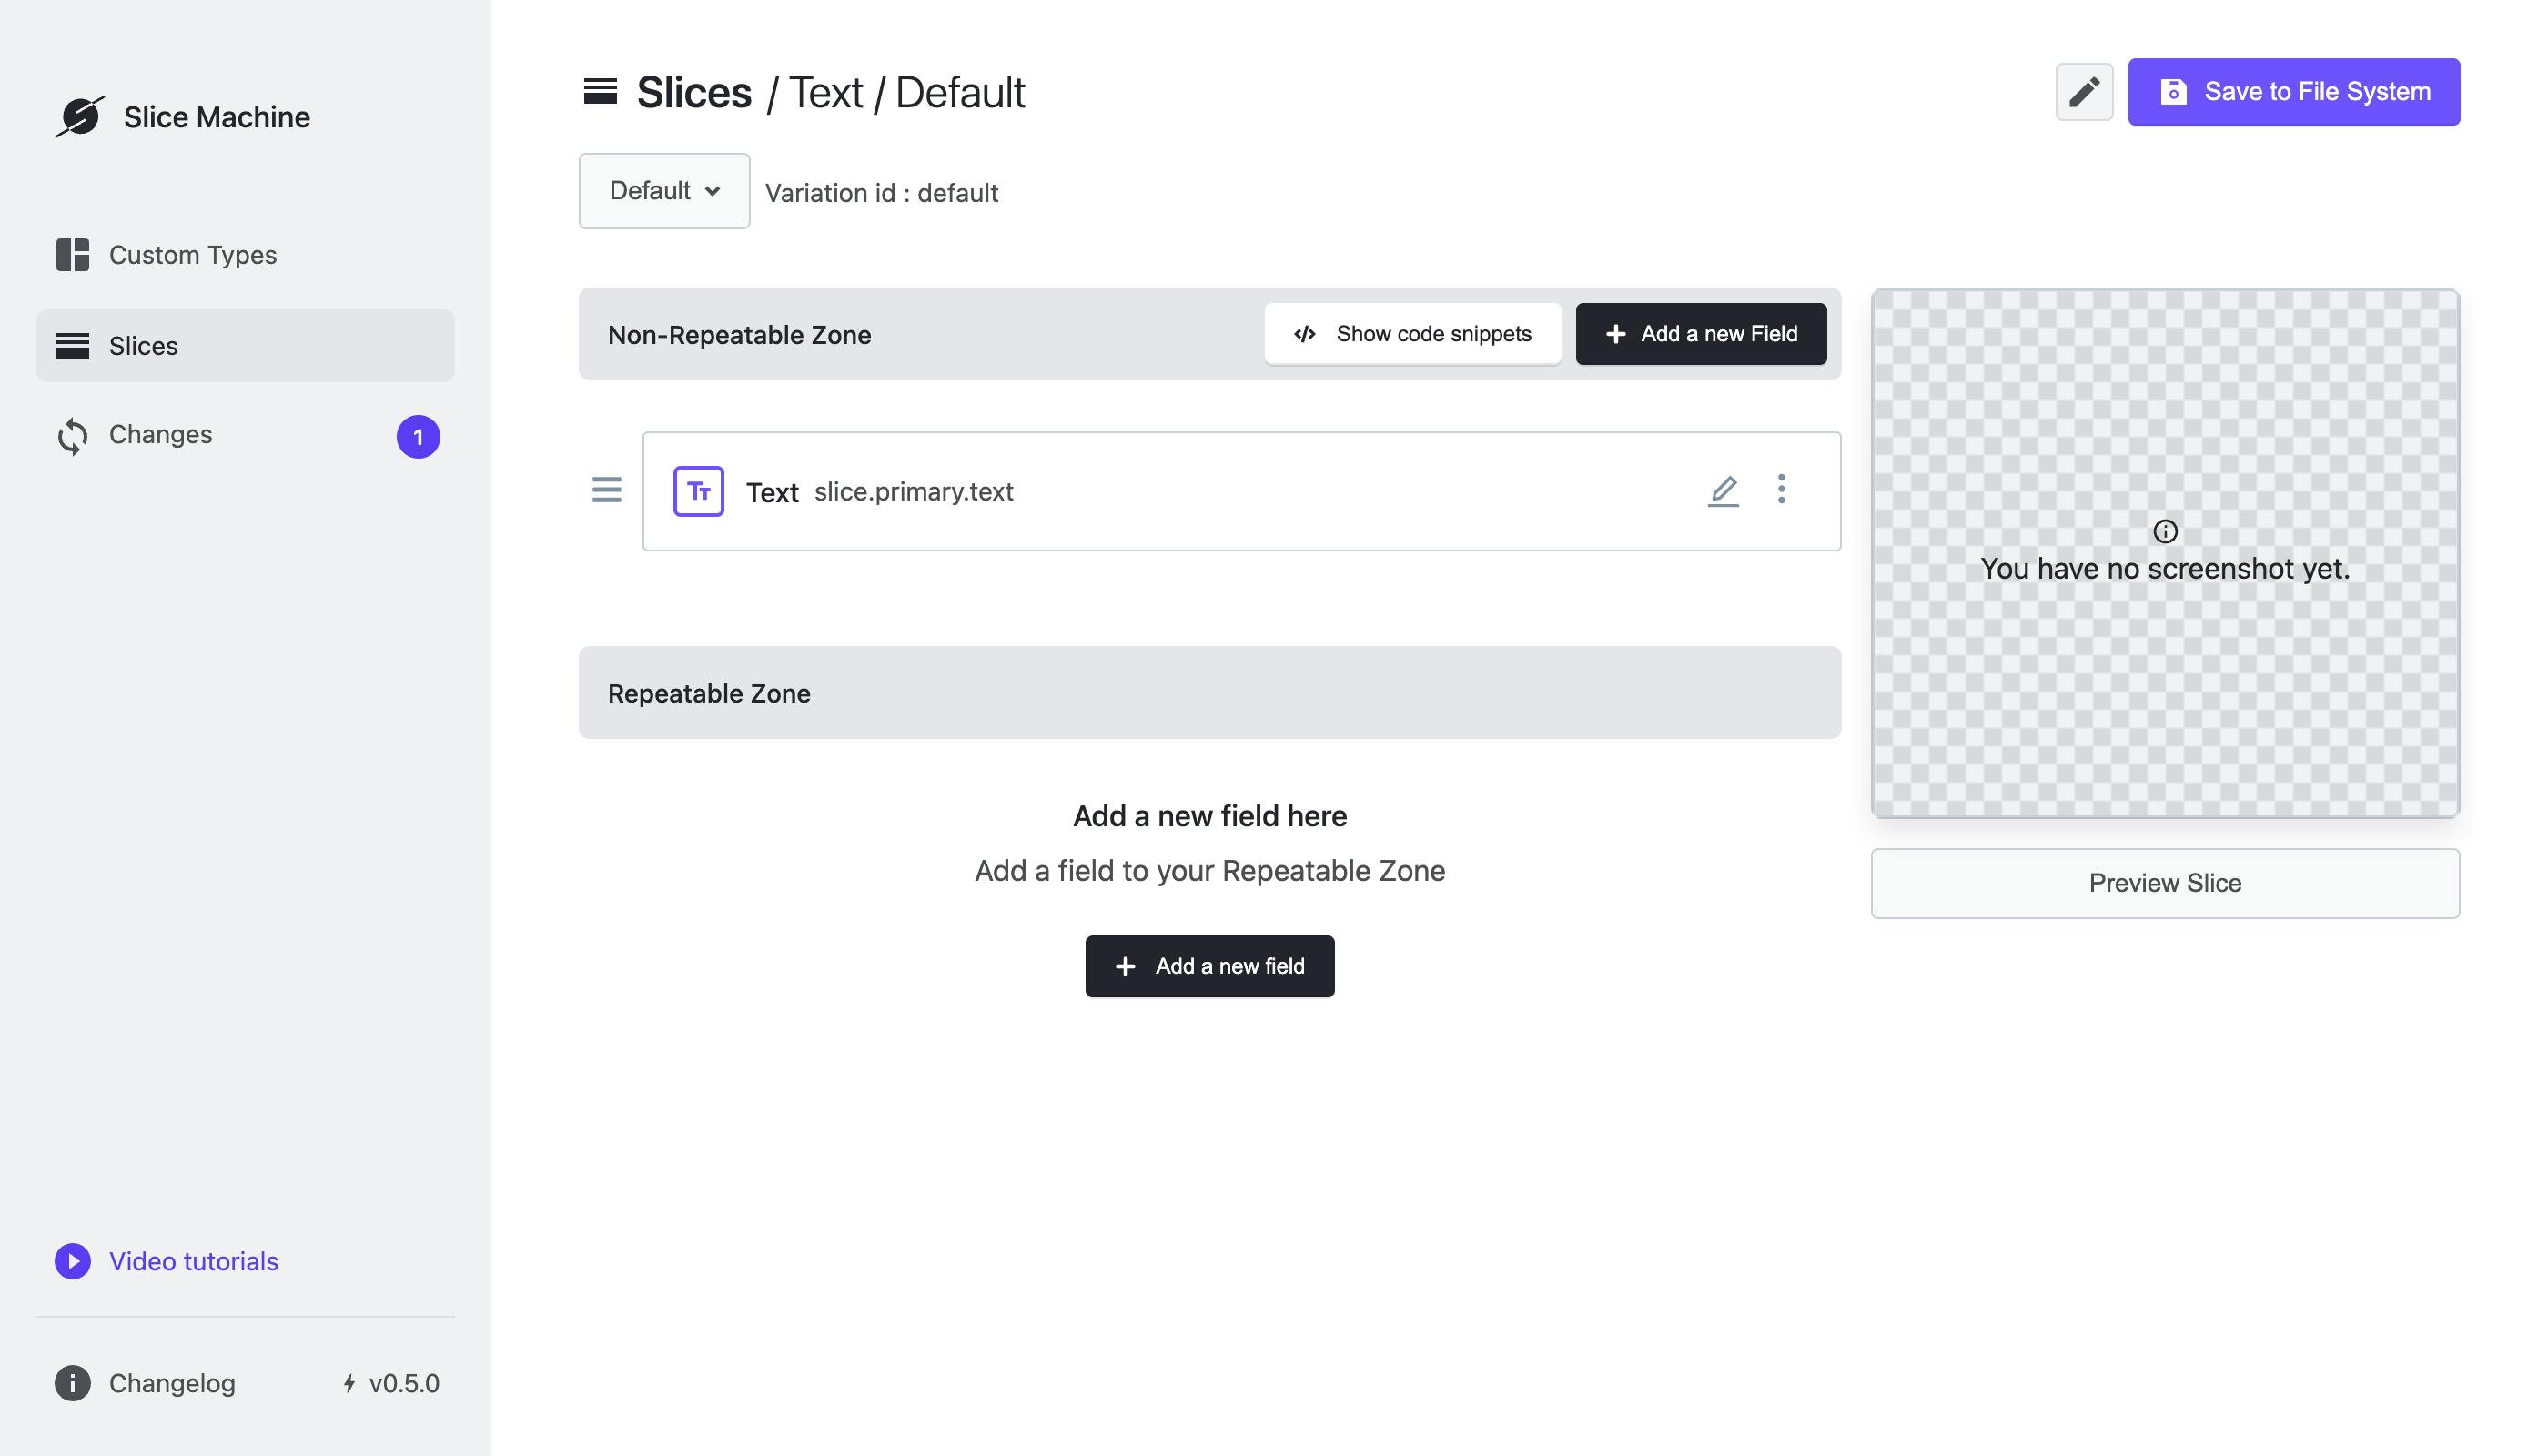
- Click Add a new field in the “Non-repeatable Zone” and select a Rich Text field.
- Enter "Text" as the field’s name and hit Enter.
- Editors will likely want to write multiple paragraphs of text, so you’ll need to enable that in the field’s settings. Click the field’s pencil icon, check “Allow multiple paragraphs,” and click Save.
- Click the Save to File System button in the top right corner.
- Your Slice is now saved locally, but you also need to push it up to your Prismic repository. Once you’re ready, click the Changes tab in the sidebar and click the Push Changes button to send it to your repository.
Congratulations! You just built your first Slice! It’s simple, but it will allow you and your content team to add and edit text content throughout your app with ease.
Now on to building your second Slice.
1.2. Add a Slice for a collection of links
Your second Slice will allow content writers to add a collection of links to a page with a card-like design. Like the Text Slice, they will be able to add as many of these Slices as they want. And because Slices are modular, content writers can add them in any order and as often as needed.
To create your second Slice in Slice Machine, follow these steps:
- Click on Slices in the sidebar.
- Click the Create a Slice button in the top right corner to create a new Slice.
- Name the Slice “LinkCards” when prompted and click Create.
This time, you’re going to add fields to the "Repeatable zone." The Slice will display a collection of links, so content writers will need the ability to “repeat” the fields you give them.
Continue creating your LinkCards Slice by adding your fields:
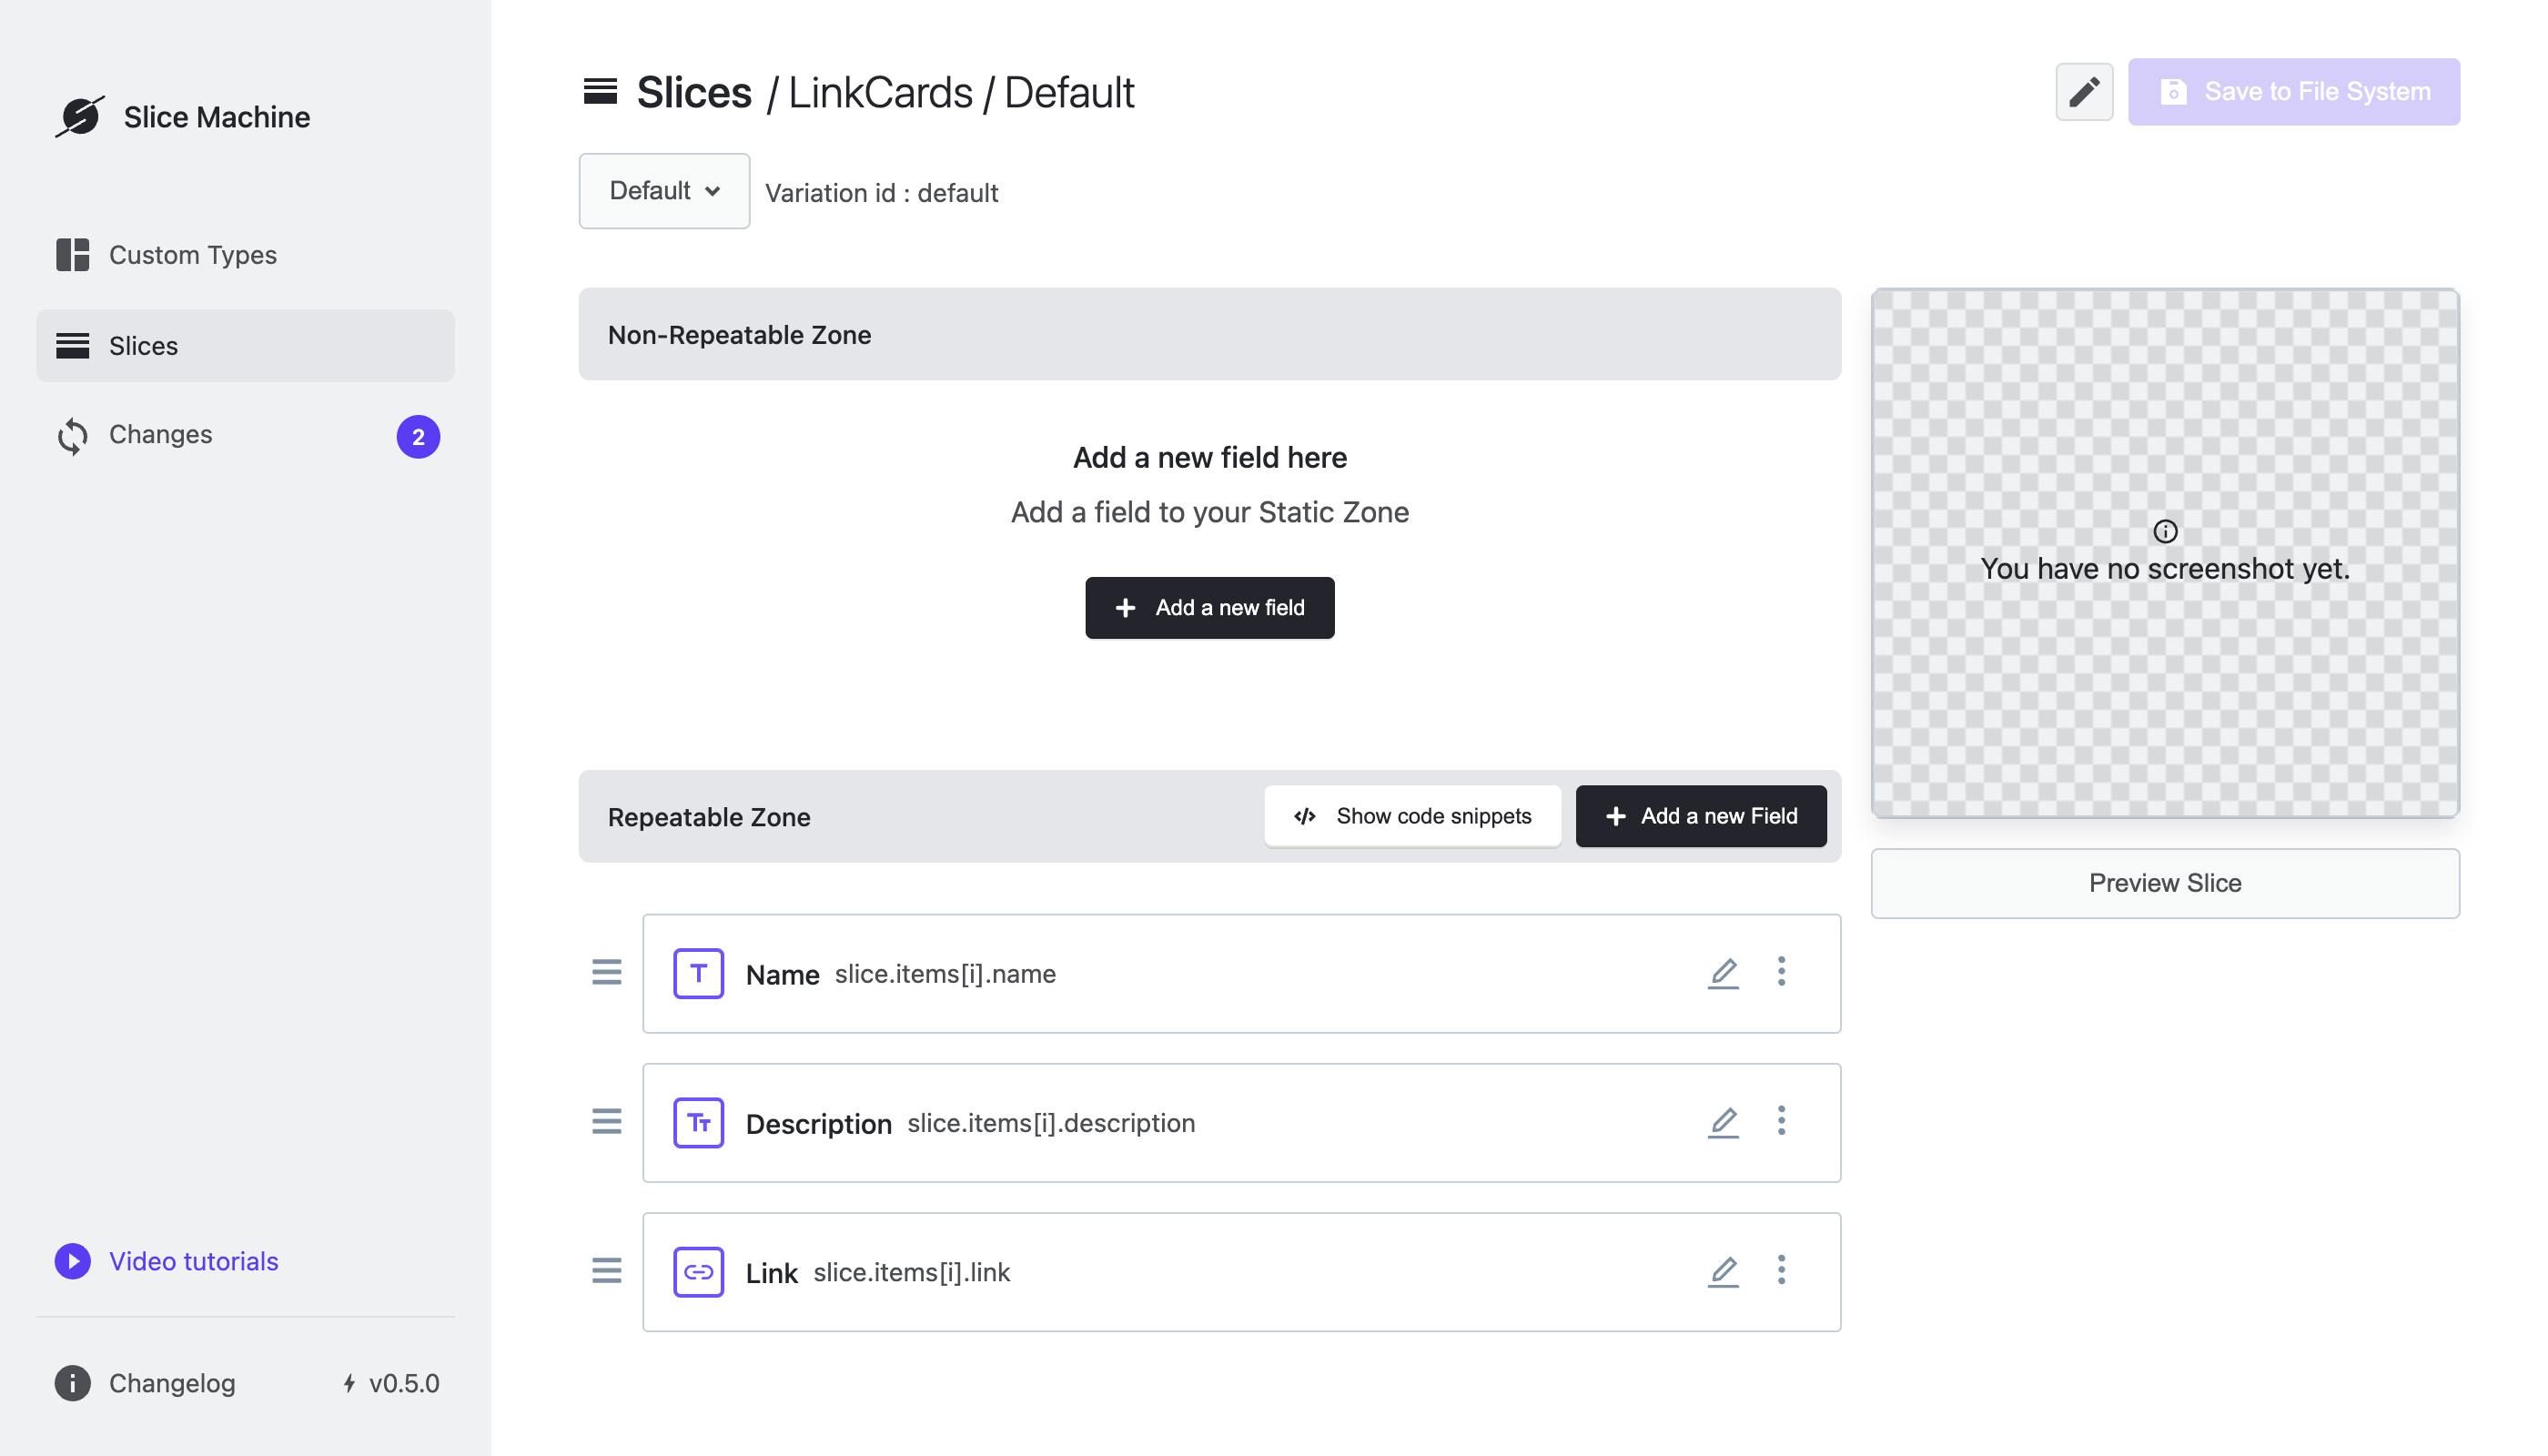
- Delete the Title and Description fields in the "Non-Repeatable zone," just like with the Text Slice.
- Click Add a new field in the "Repeatable zone" and select a "Key Text" field. This type of field holds plain text with no formatting like headings or bold text.
- Name the field "Name" and hit Enter. This field will be used as the link’s label.
- Add a "Rich Text" field named "Description". This field will let content writers add a short sentence below the link’s name.
- Add a "Link" field named "Link". This field will hold the URL for the link card.
- Click the Save to File System button in the top right corner.
- Click the Changes tab in the sidebar and click the Push Changes button to send it to your repository.
Nice! You just built your second Slice! This one is a little more complex than the Text Slice; it has multiple fields and lets content writers “repeat” the fields as needed.
Next, you’ll need to connect these Slices to your Page Custom Type.
1.3. Add the Slices to your Custom Type
To allow content writers to use your new Slices, you first need to add them to your "Page" Custom Type.
To add the Slices to the "Page" Custom Type, follow these steps:
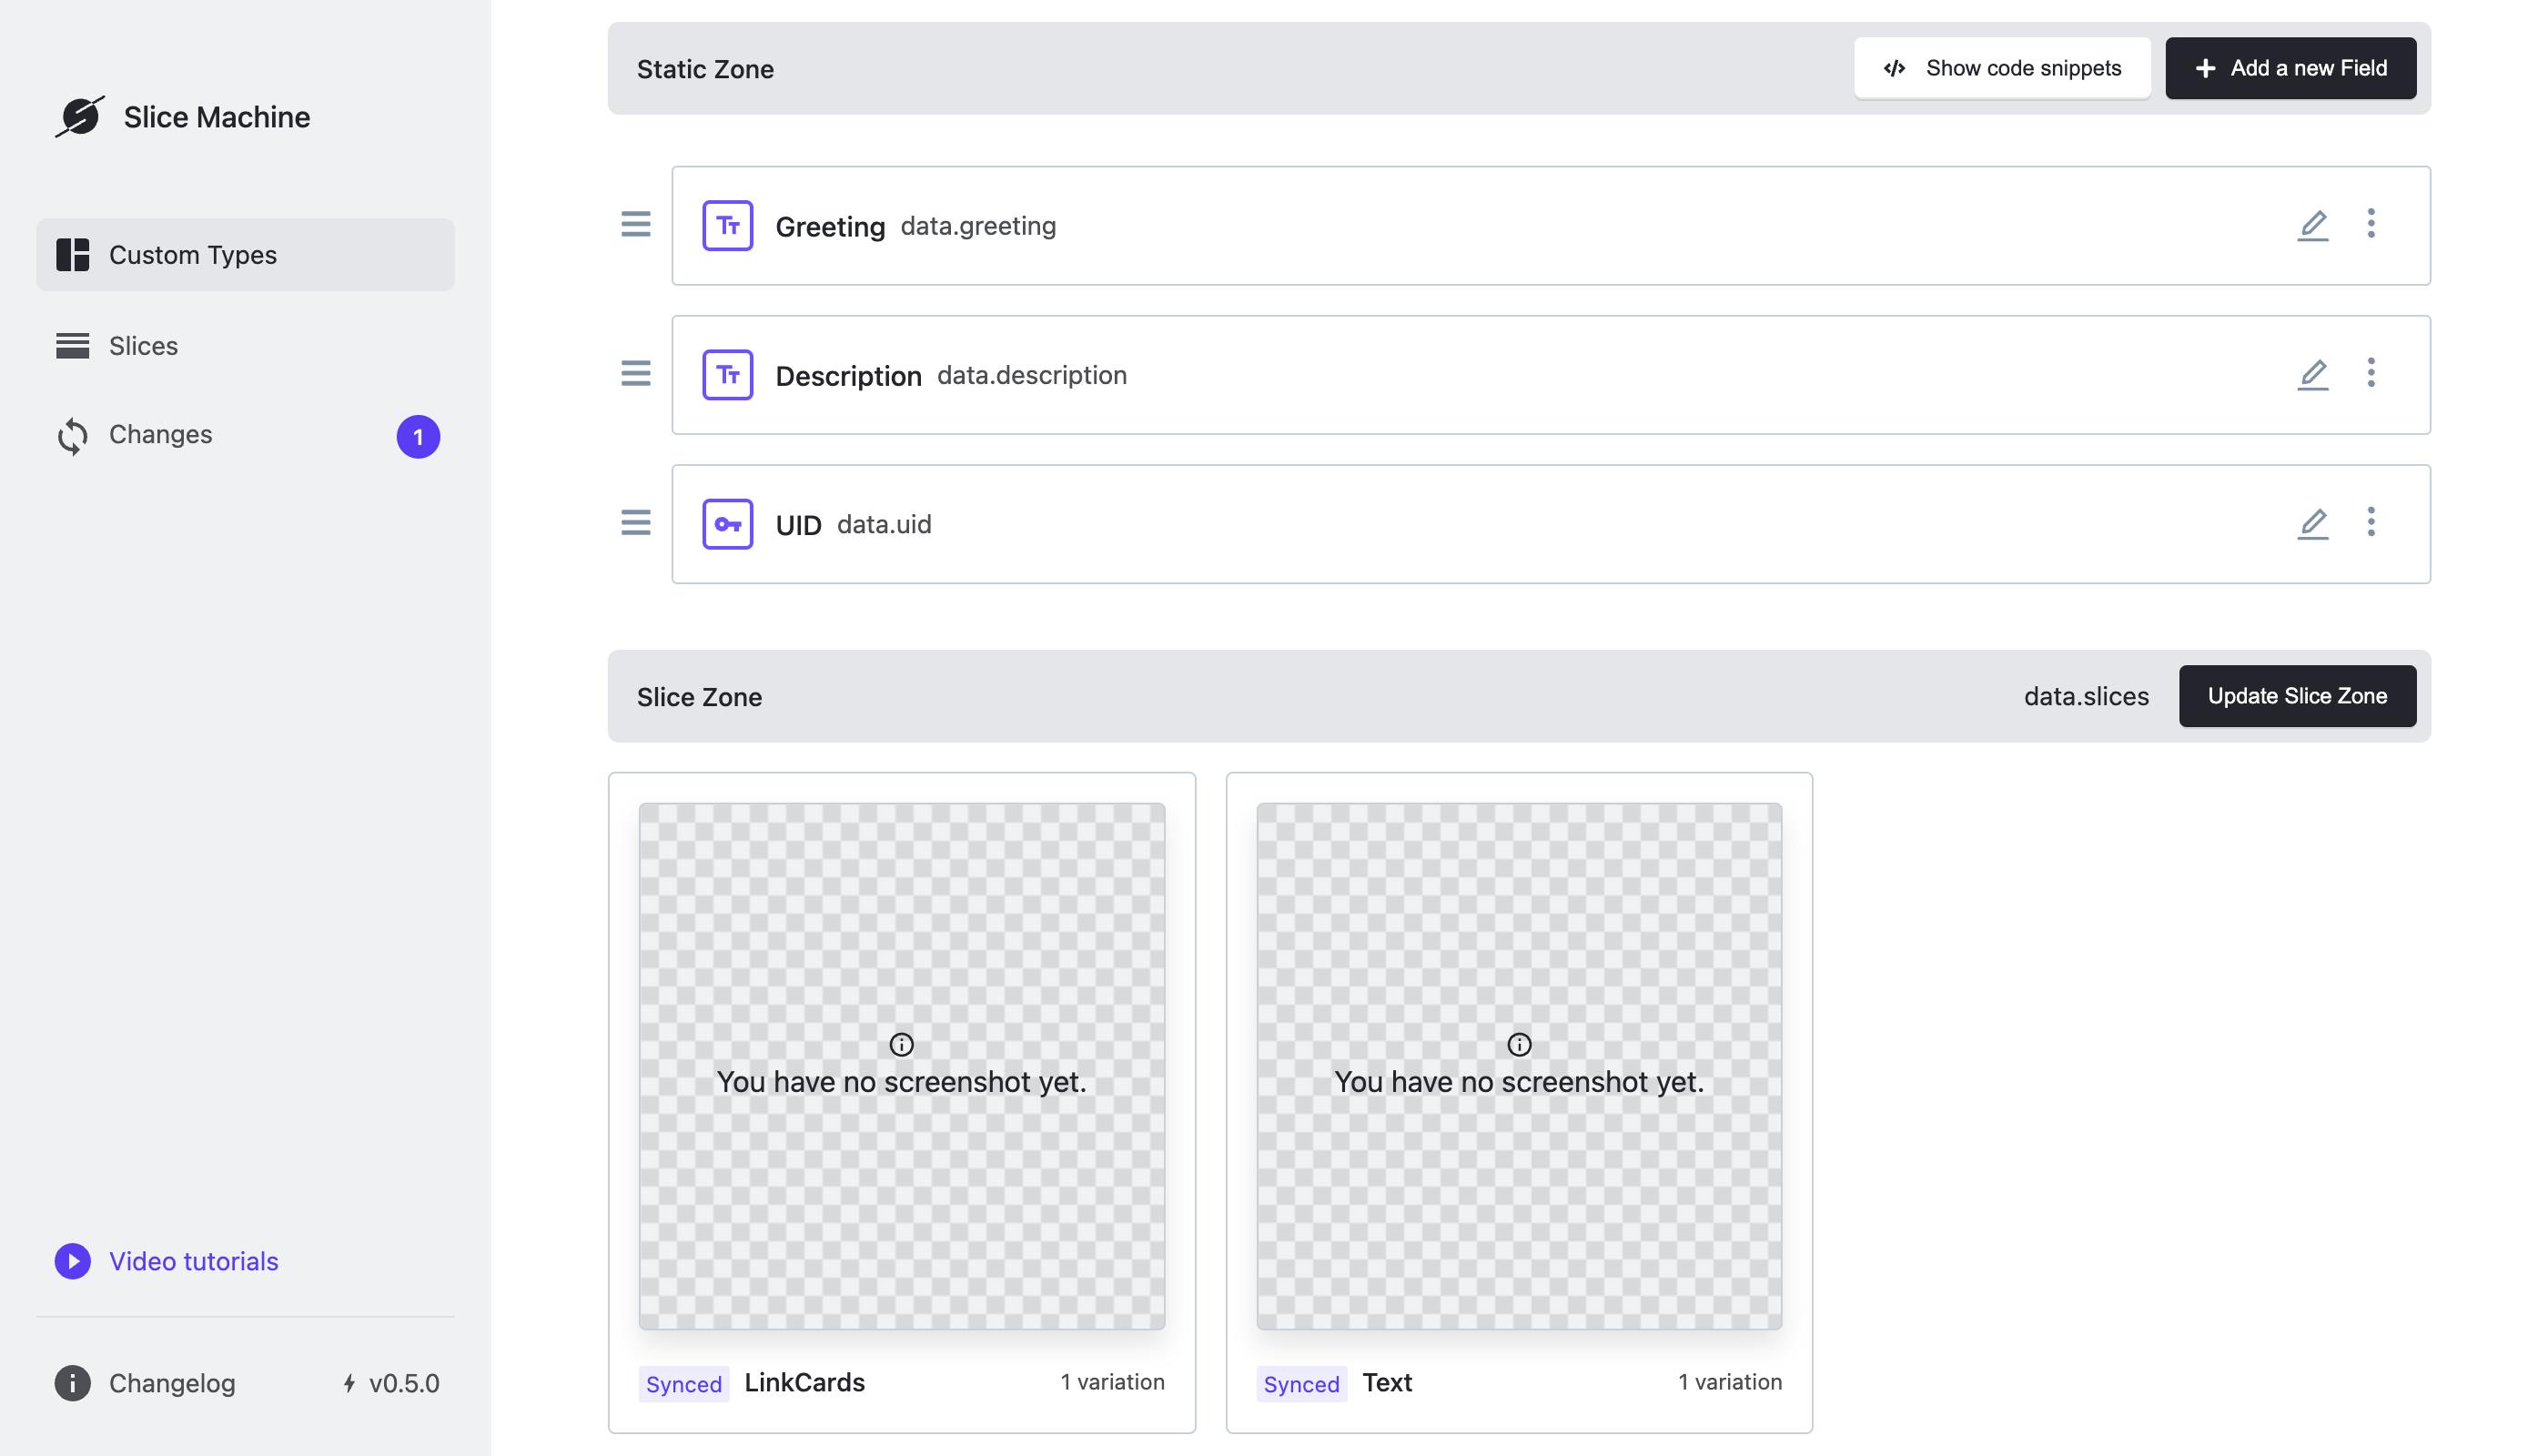
- Click on Custom Types in the sidebar and select the “Page” Custom Type.
- In the “Slice Zone” section, click the Add a new Slice button.
- You’ll see your Text and LinkCards Slices appear as options. Check the box next to each Slice and click Save.
- Click the Save to File System button in the top right corner.
- Click the Changes tab in the sidebar and click the Push Changes button to send it to your repository.
The Slices are now available for content writers to add to pages. They don’t yet have a way of displaying themselves in your app, however. Luckily, Slice Machine has secretly been doing some of the setup work for you in the background.
2. Display the Slices in your Next.js app
Your next step is to connect your Slices from Prismic to your Next.js app. Slice Machine has already created some files in your app to do this.
2.1. Create React components for each Slice
Look in the slices directory in your project and you’ll find a Text and LinkCards directory. These are named just like the Slices you created. Each directory contains an index.js file with a React component that will be rendered anytime a content writer adds its Slice to a page.
Replace the contents of each index.js file with the code given below. Notice how the React components use the slice prop to read the fields you created. The components also use @prismicio/react to render content from the Slices.
For your Text Slice:
// slices/Text/index.js

import { PrismicRichText } from '@prismicio/react'
import styles from '../../styles/Home.module.css'

const Text = ({ slice }) => (
  <section className={styles.description}>
    <PrismicRichText
      field={slice.primary.text}
      components={{
        heading1: ({ children }) => (
          <h1 className={styles.title}>{children}</h1>
        ),
      }}
    />
  </section>
)

export default Text
For your LinkCards Slice:
// slices/LinkCards/index.js
import { PrismicRichText, PrismicLink } from '@prismicio/react'
import styles from '../../styles/Home.module.css'
const LinkCards = ({ slice }) => (
<section className={styles.grid}>
{slice.items.map((item) => (
<PrismicLink
key={item.link.url}
field={item.link}
className={styles.card}
>
<h2>{item.name} →</h2>
<PrismicRichText field={item.description} />
</PrismicLink>
))}
</section>
)
export default LinkCards2.2. Update your page component to render Slices
Your app already has a pages/index.js file that displays content from Prismic. It doesn’t display the Slices you just created, however.
To do that, first import the <SliceZone> component from @prismicio/react at the top of your file:
// pages/index.js, top of the file

import { PrismicText, PrismicRichText, SliceZone } from '@prismicio/react'
Next, import your Slices’ React components. Slice Machine automatically exports them as a nice, single object in slices/index.js which works great with <SliceZone>. Add the following import at the top of your file:
// pages/index.js, top of the file

import { components } from '../slices'
Lastly, you need to use <SliceZone> to render your Slices. Delete everything in the <main> element around line 17 and replace it with the following code:
// pages/index.js, around line 17

<main className={styles.main}>
  <h1 className={styles.title}>
    <PrismicText field={page.data.greeting} />
  </h1>

  <div className={styles.description}>
    <PrismicRichText field={page.data.description} />
  </div>

  <SliceZone
    slices={page.data.slices}
    components={components}
  />
</main>
The <SliceZone> component will read the page’s Slices and render the appropriate React component.
Your page is now set up to display Slices! To see if it all works, hop over to your Prismic repository to write content — this time with Slices.
3. Write content with Slices
Writing content is done within your Prismic repository at https://prismic.io/dashboard/. Log in, if needed, and select the repository you created in the previous guide.
Once in your repository, update your content to use Slices by following these steps:
- Open the Page document you created last time you were in Prismic.
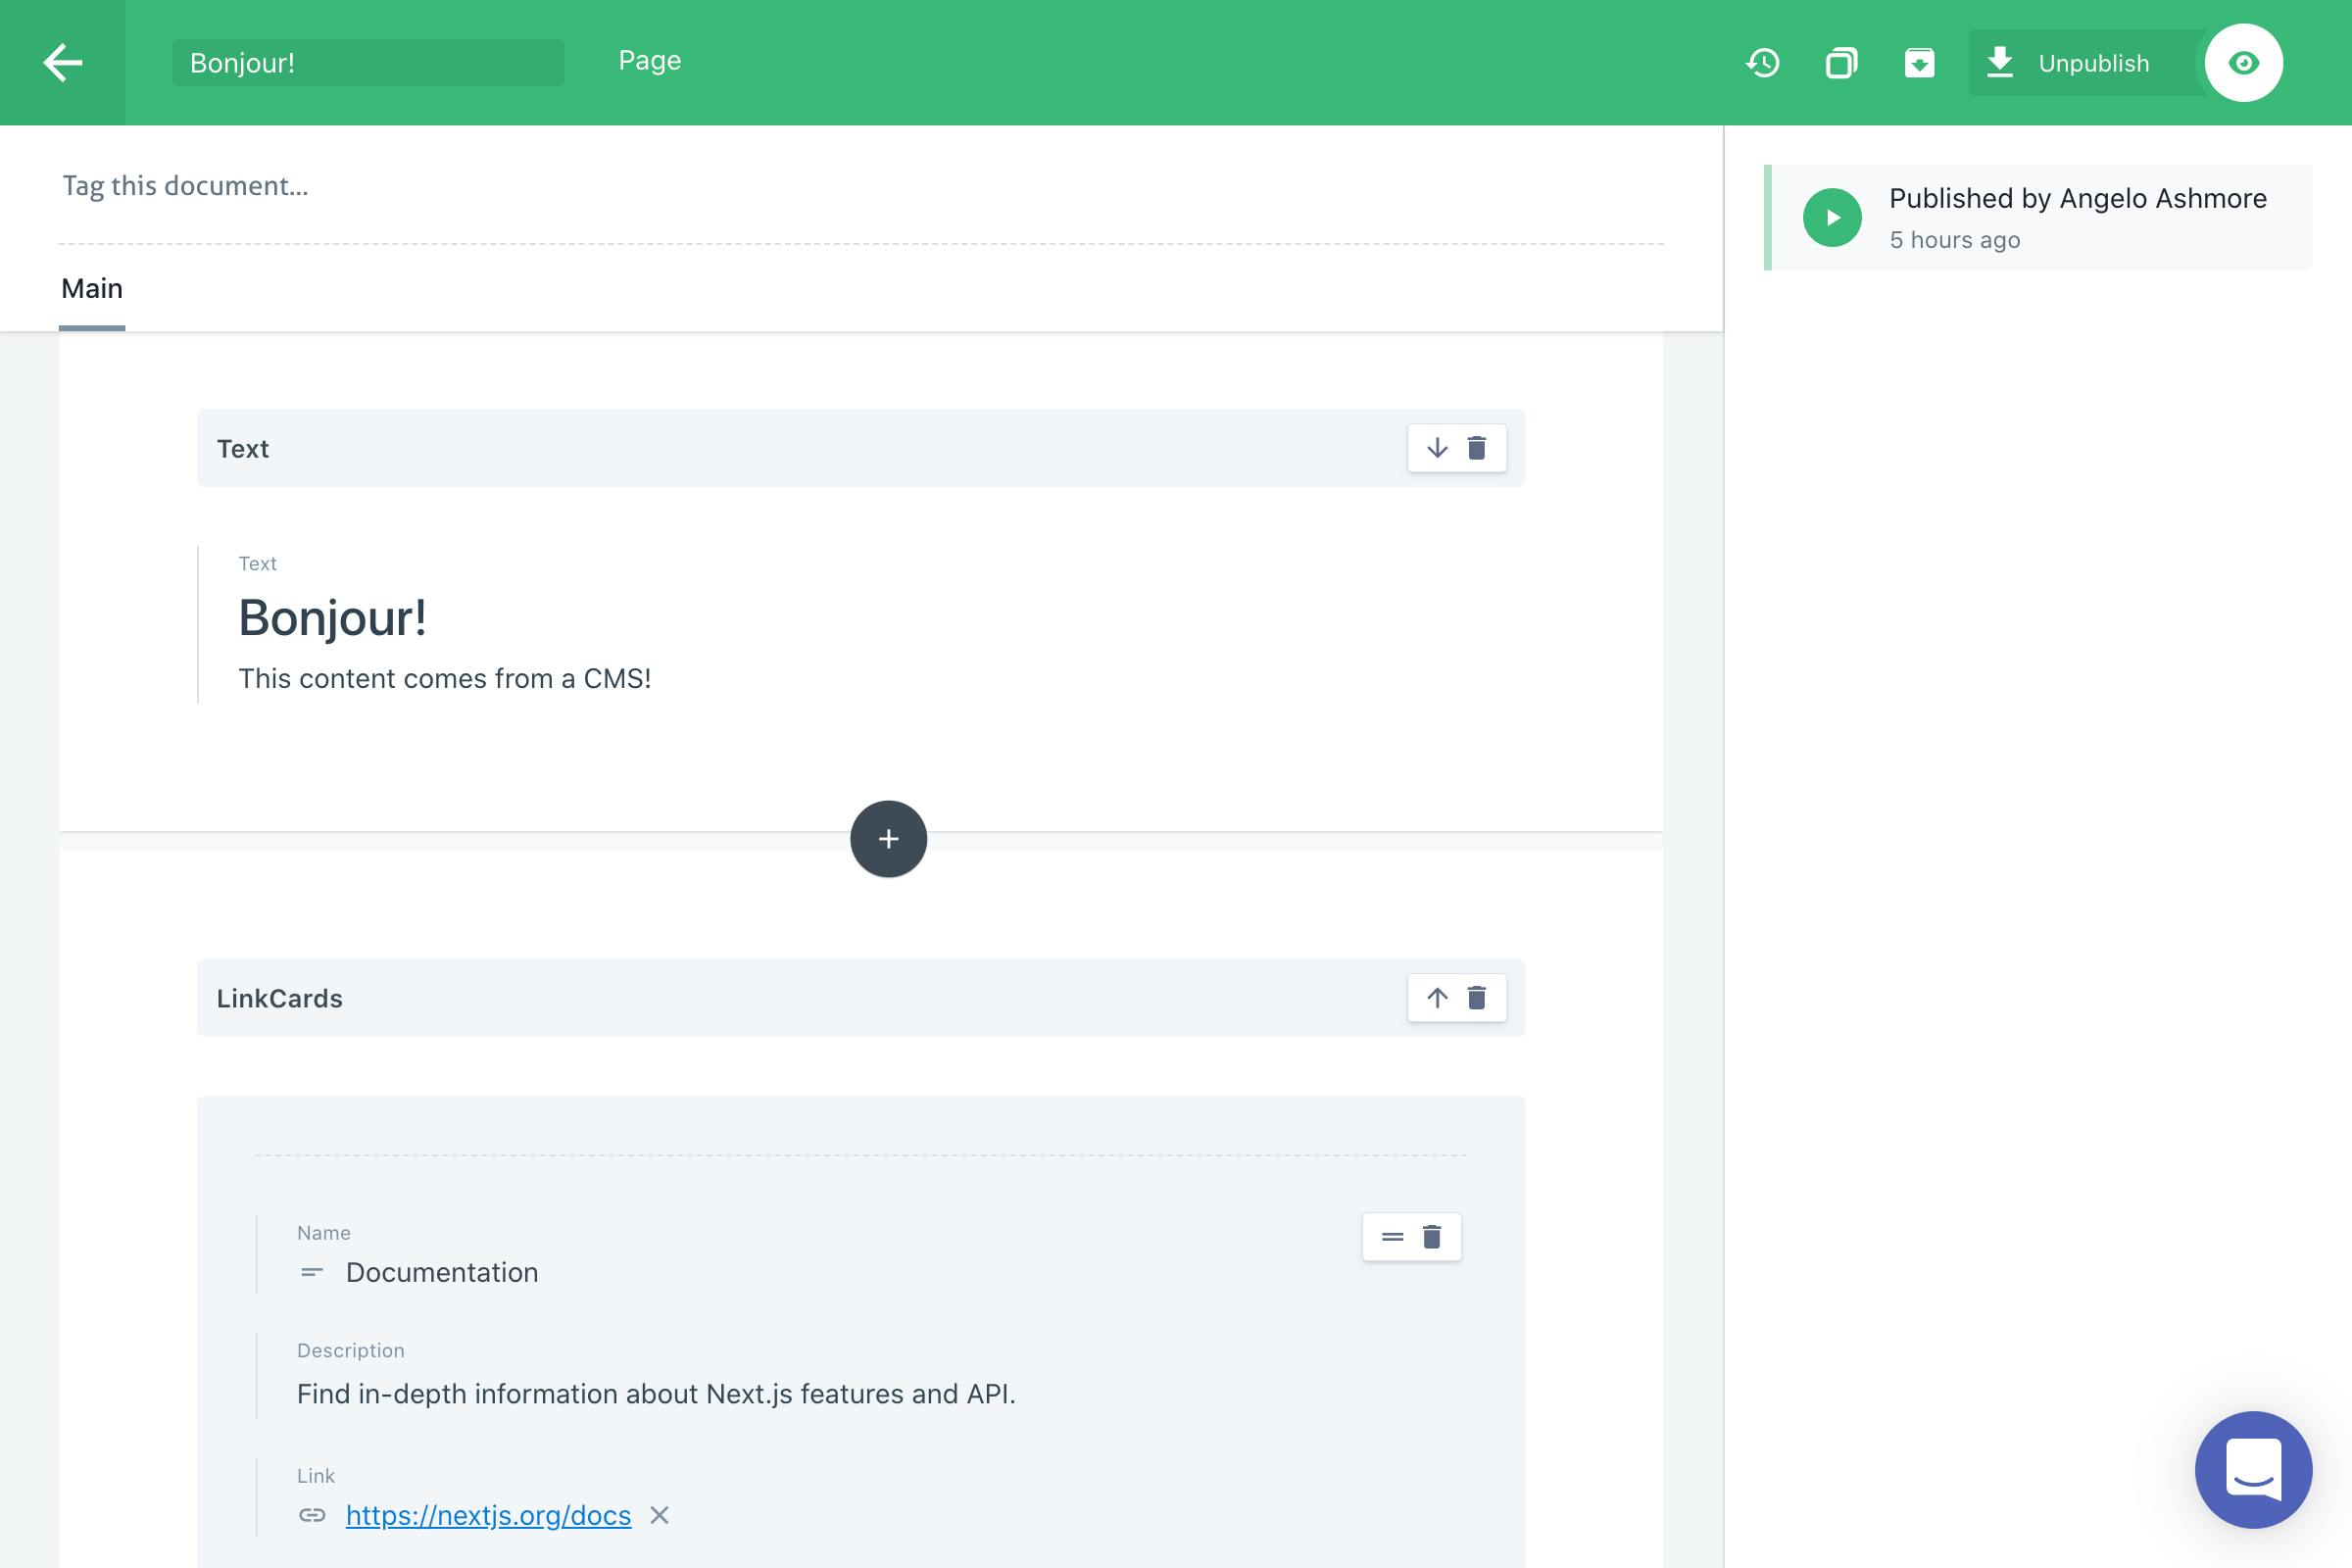
- Below the “UID” field, you’ll see your Text and LinkCards Slices as options. Select a Text Slice.
- Enter some content into the “Text” field. This text will appear at the top of your page.
- Add a second Slice by clicking the + button below the Text Slice you just added. Select a LinkCards Slice this time.
- Fill out the Name, Description, and Link fields for your first link card. Then add another link card by clicking the Add a new element in Group button and filling out the fields again. These links will appear below the Text Slice.
- Once everything looks good, click the Save button in the top right corner. Then click the Publish button in the same location and Publish again in the drawer that slides into view.
You just leveled up your homepage by using Slices to manage its content!
Test out your site by loading your Next.js app in your browser. If you haven’t already started your Next.js app, you can do so with the following terminal command in your app’s root directory:
npm run devOnce the server is running, open http://localhost:3000. You should see your new content on the page rendered using Slices.
So what was all that work for? Now you (or your content writers) can add as many Text or Link Card Slices as you want! Try it out by going back into Prismic, adding more Text and Link Card Slices (don’t forget to publish your changes!), and refreshing your homepage.
There’s just one last piece to add before your Next.js app is truly scalable: allowing content writers to create their own pages.
4. Enable content writers to create pages
Your app currently only has one page: its homepage. What if you or your content writers want to create more pages using your Slices? You really only need to change a couple of things in your app to support this. Everything you’ve done so far was made with content scalability in mind. 🧠
Here’s how to enable content writers to create pages:
- Rename
pages/index.jstopages/[[...path]].js. This lets you read the URL’s path to fetch the correct "Page" document from Prismic. It uses a Next.js “catch all” Dynamic Route. - Replace the
getStaticProps()function at the bottom ofpages/[[...path]].jswith the following code. Be sure to include the newgetStaticPaths()function. If you want to understand what the code does, read the comments throughout the functions.
// pages/[[...path]].js, bottom of the file

// This function fetches the Page document from the CMS.
// The document is passed to the page as a prop.
export async function getStaticProps({ params }) {
  // Client used to fetch CMS content.
  const client = createClient();

  // Page document from the CMS.
  const uid = params.path?.[params.path?.length - 1] || "home";
  const page = await client.getByUID("page", uid);

  // Pass the document as prop to our page.
  return {
    props: { page },
  };
}

// This function tells Next.js which URLs to accept.
// Each Page document from the CMS will be given a URL.
export async function getStaticPaths() {
  // Client used to fetch CMS content.
  const client = createClient();

  // Page documents from the CMS.
  const pages = await client.getAllByType("page");

  // URL paths for each Page document from the CMS.
  return {
    paths: pages.map((page) => ({
      params: {
        path: page.uid === "home" ? [] : [page.uid],
      },
    })),
    fallback: false,
  };
}
With this in place, you can create new "Page" documents in Prismic with their own URLs based on their UIDs. If you create a Page document with a UID of about, for example, you’ll be able to see it at http://localhost:3000/about. Try it out!

Wrap up
Congrats! 🎉 You just upgraded your Next.js app to scale and grow with your team.
When new content is needed, writers can go into the CMS and write with Slices without worrying about design or technical details. When they need new pages, they can create them themselves. And when they need to display a new style of content, you only need to develop a single Slice, not a whole new page. This frees up your time to iterate on new features, focus on website performance, and deliver on time.
This is what Prismic is all about: enabling you to build websites easily and efficiently with growth and longevity in mind.
This guide (and the one before it) walked you through using Prismic with Slice Machine in a small demo app. I hope you got a sense of how powerful Prismic is, and I encourage you to use it on your next real project. Check out the resources below to learn more about using Prismic in your Next.js apps.
- Next.js + Prismic Documentation — A reference on how to set up and use Prismic in a Next.js app.
- What Is a Slice? — Learn more about Slices and how you can use them to enrich the content modeling process.
Happy coding! 🚀
Stay on Top of New Tools, Frameworks, and More
Research shows that we learn better by doing. Dive into a monthly tutorial with the Optimized Dev Newsletter that helps you decide which new web dev tools are worth adding to your stack.


