

Chatbots are becoming more common on websites and web apps. In this article, we’ll walk through building an interactive AI-powered chatbot using Next.js, Vercel’s AI SDK, and Nvidia’s NIM API. We’ll keep the steps clear, use visuals, and help you deploy your chatbot for real-time use.
Note: This tutorial is great for developers who are familiar with the basics of JavaScript and Next.js, whether you’re just getting started or looking to add AI features to your web apps.
The gif below shows what we’ll be building.

Although this project uses Tailwind CSS for styling, we won’t cover it in this article. Our focus is on the app’s functionality. To see the styling details, you can check the Tailwind classes and other parts of the codebase in the GitHub repo.
Prerequisites
Before starting, make sure you have:
✔️ Node.js and npm installed
✔️ A Vercel account (free or paid)
✔️ A Nvidia NIM account and API key
✔️ Basic understanding of React/Next.js
Step 1: Set up your Next.js project
1. Create a new Next.js app
The command below will set up a fresh Next.js project with the latest version, create all the necessary files and folders, and install dependencies automatically.
npx create-next-app@latest ai-chatbot
cd ai-chatbot
After running this command, you will be prompted to answer a few setup questions (like TypeScript, ESLint, and styling options). You can choose based on your preference or go with the defaults by pressing Enter.
Once the setup is complete, move into your new project folder with cd ai-chatbot.
2. Install the necessary dependencies
Run the code below in your terminal to install the required packages.
npm install ai openai @ai-sdk/openai react-markdown remark-gfm react-iconsHere’s a breakdown of the major packages and their function.
ai(docs): A framework-agnostic toolkit that allows you to connect with AI model providers like OpenAI, Anthropic, and Google. It provides utilities for streaming AI responses and managing conversations.openai(docs): The official OpenAI Node.js library. It allows you to interact with OpenAI’s models like gpt-3.5-turbo or gpt-4.@ai-sdk/openai(docs): Lets you integrate OpenAI’s models into your app using the AI SDKreact-markdown(docs): Converts Markdown syntax into React components, so you can display formatted text easily.remark-gfm(docs): A plugin for remark (a Markdown processor) that adds support for GitHub Flavored Markdown (GFM).react-icons(docs): Gives you access to popular icon libraries (like Font Awesome, Heroicons, etc.) as React components, so you can easily add icons to your UI.
3. Run the development server
Run the command below to launch the app.
npm run devYou should see the default Next.js homepage at http://localhost:3000, presuming port 3000 isn’t already occupied.
Step 2: Integrate Vercel’s AI SDK and NVIDIA NIM
Create a lib/actions.js file and set up the integration of the AI model. This file will handle conversations by sending messages to Nvidia’s AI model and streaming back responses.
"use server";

import { createStreamableValue } from "ai/rsc";
import { streamText } from "ai";
import { createOpenAI } from "@ai-sdk/openai";

const nim = createOpenAI({
  baseURL: "https://integrate.api.nvidia.com/v1",
  apiKey: process.env.NVIDIA_NIM_API_KEY,
});

export async function continueConversation(messages) {
  const result = await streamText({
    model: nim("google/gemma-2-9b-it"),
    messages,
  });

  const stream = createStreamableValue(result.textStream);
  return stream.value;
}
Here’s a breakdown of the above code:
"use server": Ensures this function runs on the server, keeping API keys secure.streamText: Streams the AI-generated response in real-time, instead of waiting for the entire response to be generated before sending it to the UI. This makes the chatbot feel more responsive and interactive.createOpenAI: Configures an AI model provider using Nvidia’s API. You can use Vercel's AI SDK directly. However, we're using NIM because it provides access to a wider range of AI models via Nvidia’s API catalog.createStreamableValue: Converts the response into a streamable React value that can be used in the UI since the raw response fromstreamTextis a text stream that isn't directly usable in React components.continueConversation(messages): Takes user messages and sends them to Google’s Gemma 2 model via Nvidia NIM.- The streamText function’s
modelparameter specifies the model to use—"google/gemma-2-9b-it"in this case—for generating the response. - The
streamTextfunction’smessagesparameter holds the message the user sends in the chat.
Step 3: Create the UI components
The chat UI consists of the following components:
Button: A basic button component.Chat: Renders the user’s input and the AI-generated response.ChatInput: The input field through which the user communicates with the bot.
Having covered the components we’ll need, create their respective files—Button.js, Chat.js, and ChatInput.js in a /components folder.
Here’s the code for the Button component. It’s used for the form submission and takes className and other props as arguments.
import { FaArrowCircleRight } from "react-icons/fa";

export default function Button({ className, ...props }) {
  return (
    <button type="submit" {...props}>
      <FaArrowCircleRight />
    </button>
  );
}
Here’s the code for the ChatInput component. It contains the Button and an input field, and takes in input, setInput, handleSubmit, and handleKeyDown as arguments.
We’ll define the handleSubmit and handleKeyDown methods later on.
import Button from "@/components/Button";

export default function ChatInput({
  input,
  setInput,
  handleSubmit,
  handleKeyDown,
}) {
  return (
    <form onSubmit={handleSubmit}>
      <div>
        <textarea
          value={input}
          onChange={(e) => setInput(e.target.value)}
          onKeyDown={handleKeyDown}
        />
        <Button disabled={input.length === 0} />
      </div>
    </form>
  );
}
Here’s the code for the Chat component.
"use client";

import { useState } from "react";
import remarkGfm from "remark-gfm";
import ChatInput from "./ChatInput";
import { FaRobot } from "react-icons/fa6";
import { FaUserAstronaut } from "react-icons/fa6";
import ReactMarkdown from "react-markdown";

export default function Chat() {
  const [messages, setMessages] = useState([]);
  const [input, setInput] = useState("");

  const remarkPlugins = [remarkGfm];

  const handleSubmit = async (e) => {
    e.preventDefault();
    if (input.trim().length === 0) return;

    const newMessages = [...messages, { content: input, role: "user" }];

    setMessages(newMessages);
    setInput("");
  };

  const handleKeyDown = (e) => {
    if (
      e.key === "Enter" &&
      !e.shiftKey &&
      !e.nativeEvent.isComposing // Check if text is still being composed
    ) {
      e.preventDefault();
      if (input.trim().length > 0) {
        handleSubmit(e);
      }
    }
  };

  return (
    <div>
      {messages.map((m, i) => (
        <div key={i}>

          <div>
            {m.role === "user" ? <FaUserAstronaut /> : <FaRobot />}
            {/* user and AI icons go here  */}
          </div>

          <div>
            <ReactMarkdown remarkPlugins={remarkPlugins}>
              {m.content}
              {/* chat messages go here */}
            </ReactMarkdown>
          </div>
        </div>
      ))}

      <ChatInput
        input={input}
        setInput={setInput}
        handleSubmit={handleSubmit}
        handleKeyDown={handleKeyDown}
      />
    </div>
  );
}
Here’s a breakdown of its function.
- The
"use client"directive ensures the component runs in a client-side React environment. - The
messagesstate is an array storing chat messages. - The
inputis a string that stores the current user input. - The
handleSubmitfunction prevents form submission if the input is empty, adds the user's message to the messages state, and clears the input field after submission. - The
handleKeyDownfunction prevents submission whenShift+Enteris pressed (for multiline input) and when the user is still typing. Then, it callshandleSubmitwhenEnteris pressed. - The code maps through the messages in the
messagesstate, displaying each one. It shows an icon for the user (FaUserAstronaut) and the AI (FaRobot). - The
Markdowncomponent converts the chatbot’s response, which is in Markdown syntax, into HTML elements.
Having created the UI components, it's time to bring everything together in the Home component.
- Open
app/page.jsand import theChatcomponent to display it on the homepage.
import Chat from "@/components/Chat";

export default function Home() {
  return (
    <main className="flex flex-col items-center justify-between">
      <Chat />
    </main>
  );
}
Step 4: Add the AI functionality to the chat app
Now, it's time to add the AI functionality to the chat UI. To do that, we’ll need to update the Chat component.
First, import the continueConversation and readStreamableValue, which we created in step 2, from the lib/actions.js file and add them to the handleSubmit function.
Here’s the updated function and imports.
// Add imports at top of file
import { continueConversation } from "@/lib/actions";
import { readStreamableValue } from "ai/rsc";


// Replace handleSubmit function with this
const handleSubmit = async (e) => {
  e.preventDefault();
  if (input.trim().length === 0) return;

  const newMessages = [...messages, { content: input, role: "user" }];

  setMessages(newMessages);
  setInput("");

  // AI functionality code below
  try {
    const result = await continueConversation(newMessages);

    for await (const content of readStreamableValue(result)) {
      setMessages([
        ...newMessages,
        {
          role: "assistant",
          content: content,
        },
      ]);
    }
  } catch (error) {
    console.error(error.message);
  }
};
This code handles the AI chatbot's response generation. Here’s what it does.
continueConversation(newMessages)sends the updated chat history (newMessages) to the AI model (google/gemma-2-9b-it), which generates a response.- As mentioned earlier, the AI response is streamed using
streamText, andcontinueConversationreturns astreamable value(real-time text output). readStreamableValue(result)reads the AI response as it streams in real-time. We use thefor await...statement to process each chunk of the AI response as soon as it's received instead of waiting for the entire response.- The
setMessages()call then adds a new message to themessagesstate as each chunk (content) is streamed. - The AI message has
{ role: "assistant", content: content }, ensuring it appears in the chat UI. - The spread operator (
...newMessages) keeps previous chat messages intact in the conversation history while appending the AI response dynamically.
Step 5: Deploy to Vercel
Follow these steps to deploy your chatbot app to Vercel.
1. Push your code to GitHub, GitLab, etc.; you can clone mine
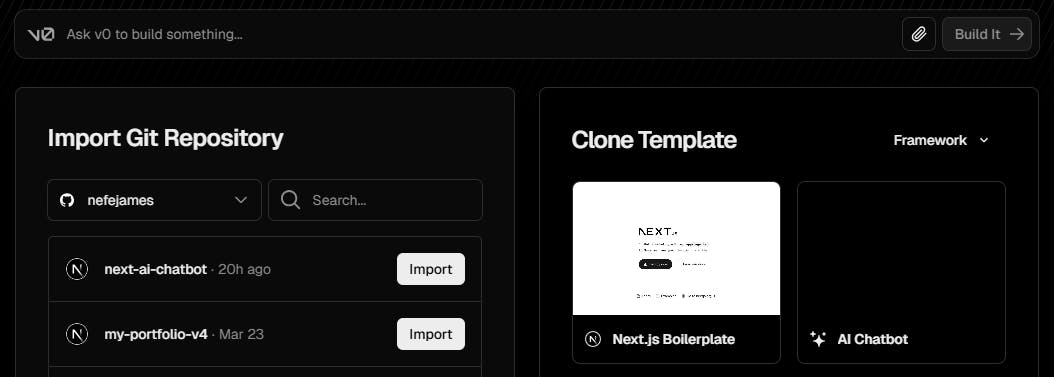
2. Connect your repository to Vercel
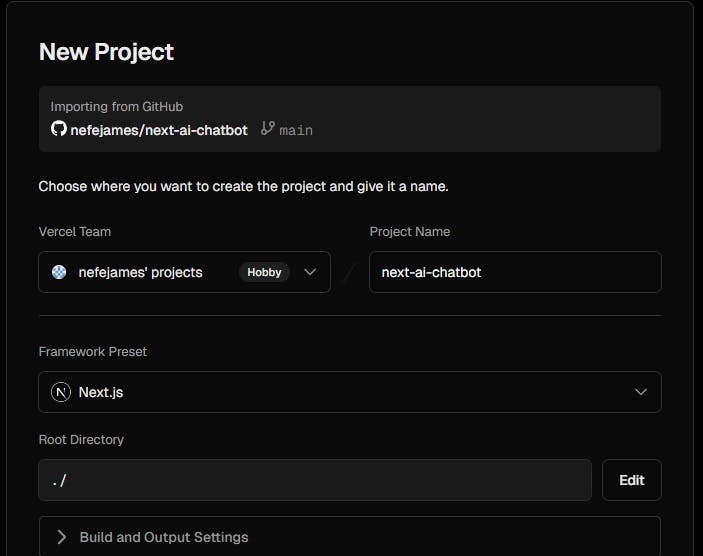
3. Add your Nvidia API key
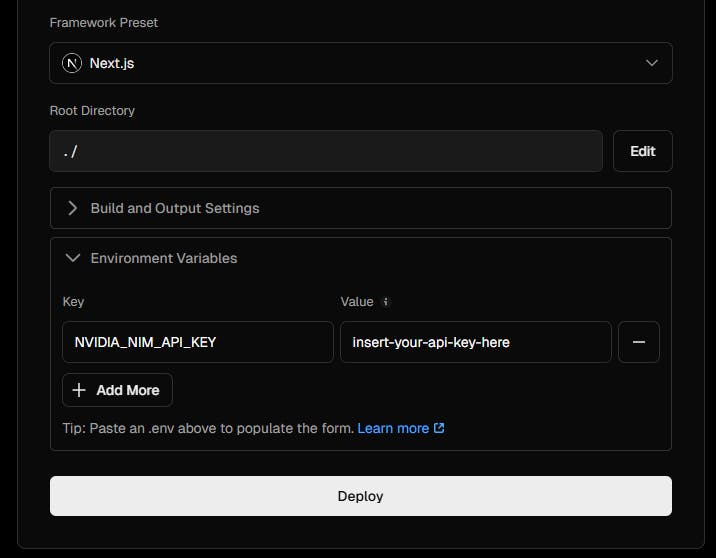
4. Deploy your project
With these steps, you have successfully deployed your chatbot. Check it out by opening the live URL in your browser. If there are no issues, you should get a response from the AI when you send a message.
Explore Prismic’s AI capabilities
Speaking of AI capabilities, Prismic provides AI features that can enhance how you build your website and manage its content.

There are Prismic AI features, which can:
- Generate copy based on your goals and page context
- Refine existing content
- Assist with localization by translating your content into various languages
Conclusion
You’ve now built an interactive AI chatbot using Next.js and Vercel’s AI SDK. You can extend the app’s functionality by adding features like message history, avatars, saving to a database, and different response tones.
Learning how to build other types of projects with Next.js? Then, explore the following resources.


