
For this month's Optimized Dev coding challenge, we learned about Pinia, a state management library for Vue. We'll start with a recap for new readers, but Optimizers, feel free to use the Table of Contents to find solutions to your challenge!
A state management library provides you with a framework for managing state that is global to your application (not belonging to a specific component) through what we call stores. For example, this could be the cart on an e-commerce website: with a state management library, you can define the cart as a store (the cart store), read its content (on the navbar and the cart page), and update it (with “Add to cart” buttons or the cart page directly).
If you’re a Vue user you might already be familiar with VueX, so why learn about Pinia?
🐣 New to Vue?
New to Vue? Have a glance at our introduction to Vue to pick up the basics so you can follow the tutorial smoothly →
Pinia started as an experiment and exploration for Vue 3 store options. Recently, it has been decided that Pinia will be the default state management library for Vue 3 over VueX. The simpler, composition-styled API Pinia offers and strong TypeScript integration are two of the main reasons that motivated this decision.
Shout-out to our Optimizers!
Way to go on those solutions @trostcodes and @helge_eight! Love the creativity we're seeing from the community. 🚀
🖱️Clicker game?
Maybe you’re already familiar with clicker games like Cookie Clicker. If you’re not, a clicker game is a game where you try to exponentially accumulate something (cookies in Cookie Clicker, confetti in Pinia’s Party) through manual actions (clicking) and automatic ones (ever more efficient — and pricy — “factories” you can acquire).
While building this challenge, we thought a clicker game might be a great candidate for learning about stores. In these games, the clicker state needs to be read at multiple places (to display the amount of confetti, owned factories, etc.) while also being updated at different locations (when clicking, acquiring factories, etc.).
Without further ado let’s dive into it!
Project setup, tour, and help
Setup
To follow that tutorial we recommend you use Stackblitz. Kickstart your own instance of the project online by clicking here.
Alternatively, if like me you’re more of a local person, you can download the starter files here. Install dependencies with npm install and start the development server npm run dev.
Project tour
Our project today is a Vite + Vue 3 application. We took care of the styling in src/assets and of most of the templating with 3 components in src/components:
<PartyArea />is the main section of Pinia’s party; it will display our number of confetti and allow us to gain more by clicking the central one.<FactoryList />is the sidebar; it will display available factories and information about them.<FactoryListItem />, following its name, will represent a factory displayed by<FactoryList />.
What’s left for us to do is to make all of that work together by adding a store to our application with Pinia, and to learn about that process 🚀
Need help?
If you get lost, you can find stepped solutions here, which represent the state of the application at the beginning of each section of the tutorial. Right now, you’re in the same state as 01-piniaSetup.
Join the next challenge!
Stay on the leading edge of web development with our fun, monthly coding challenges that help you explore new tech!

Setting up Pinia
Like most things, we first need to set it up. We already installed Pinia for you as a project dependency (with npm install --save pinia), so our first task is to register Pinia in our Vue application. To do so we’ll edit src/main.js:
  import 'nes.css/css/nes.min.css'
  import '@fontsource/press-start-2p/400.css'
  import './assets/styles.css'

  import { createApp } from 'vue'

  import App from './App.vue'
+ import { createPinia } from 'pinia'

- createApp(App).mount('#app')
+ createApp(App).use(createPinia()).mount('#app')
What we’re doing in the code above is importing the createPinia() helper and calling it to register Pinia as a Vue plugin in our application. This effectively makes the app aware that we’ll be using Pinia.
Now that our application is aware of Pinia, we can proceed to create our first store. As explained earlier, a store is an element of our application that is responsible for managing a piece of state and declaring methods to read and update it.
For Pinia’s Party, we’ll only need one store; let’s create it at src/stores/clicker.js:
import { defineStore } from 'pinia'

export const useClicker = defineStore('clicker', {
  // Default state / config
  state: () => {
    return {
      balance: 0
    }
  }
})
Using the stores directory for storing application stores is a common pattern used by the community.
Let’s explain the above snippet.
First, we import the defineStore() helper from Pinia.
We then use it to create a store with the ID “clicker.” In today’s challenge, we’ll only have one store, but if you were to have multiple inside an application, this ID needs to be unique.
Following the ID, we provide store options. For now, it only features a state method. This method returns the default state of the store, for now, an object with the property balance set to 0, as we’re starting the game with 0 confetti in our balance.
Finally, the whole store is exported as useClicker.
Great! So we’ve installed Pinia and set up our first store. Before moving to the next section let’s just see how to use this store in our application by displaying the balance we initialized in src/components/PartyArea.vue. To do so we first import our store and make it available in the component script section by calling it:
  import { ref, onMounted } from "vue"
  import Confetti from "js-confetti"

+ import { useClicker } from '../stores/clicker'

+ const clicker = useClicker()

  /* ... */
We can then update the template part of it, replacing the “TODO:BALANCE” comment with {{ clicker.balance }}:
  <template>
    <section class="partyArea">
      <h1>Pinia's Party</h1>
-     <h2><!-- TODO:BALANCE --> confetti</h2>
+     <h2>{{ clicker.balance }} confetti</h2>
      <button>
        <div class="inner">✨</div>
      </button>
      <canvas ref="canvas"></canvas>
    </section>
  </template>
And here we go! You should now see “0 confetti” instead of “confetti” in the party area ✨
Obtaining confetti on click
💢 Having issues? Pick-up here on Stackblitz →
Well, the setup part is only so much fun, so let’s move on to implementing our first game mechanic: obtaining confetti by clicking the party area confetti.
Let’s start by creating an “on click” event handler in src/components/PartyArea.vue script section:
  import { ref, onMounted } from "vue"
  import Confetti from "js-confetti"

  import { useClicker } from '../stores/clicker'

  const clicker = useClicker()

  /* ... */
  onMounted(() => {
    confetti = new Confetti({
      canvas: canvas.value
    })
  })

+  const onClick = () => {
+    clicker.balance++
+  }
Here we’re making the onClick() function available in our component. It accesses clicker.balance and increments it by one (++). Indeed with Pinia, we can update the state of the store directly. Updating the state this way is quite primitive (as it is unruled), we’ll learn about other approaches later on.
Great! Now that we have a handler, let’s bind it in our template:
  <template>
    <section class="partyArea">
      <h1>Pinia's Party</h1>
      <h2>{{ clicker.balance }} confetti</h2>
-     <button>
+     <button @click="onClick">
        <div class="inner">✨</div>
      </button>
      <canvas ref="canvas"></canvas>
    </section>
  </template>
And without more code, if we now click our confetti, we can see that the balance displayed increments. Hooray! We have a clicker.
Before we move on, let’s make clicking satisfying. To do so, we’ll update our “on click” handler to also call addConfetti():
   const onClick = () => {
     clicker.balance++
+    addConfetti()
   }
And here we go, clicking now increments our balance and also makes confetti pop 🎉

Adding factories to the UI
💢 Having issues? Pick-up here on Stackblitz →
But clicking only gets you so far in a clicker game; to grow faster you need a way to invest your hard-earned confetti into factories ... to produce even more confetti, but faster! In this section, we’ll focus on displaying those factories in our clicker game.
On Pinia’s Party, we’ll manage available factories in the store directly. We’ll define them as objects containing:
- an
iddone : - a
namefor humans to read - an
emojito represent them visually - a
basePricethat will grow the more factories of that type you own - an amount of
confettiPerSecondone factory produces - and the
ownedamount of that factory the user acquired.
Let’s start by adding two factories to our base state inside our clicker store at src/stores/clicker.js:
  import { defineStore } from 'pinia'

  export const useClicker = defineStore('clicker', {
    // Default state / config
    state: () => {
      return {
        balance: 0,
+       factories: {
+         partyPopper: {
+           id: 'partyPopper',
+           name: 'Party Popper',
+           emoji: '🎉',
+           basePrice: 10,
+           confettiPerSecond: .25,
+           owned: 0,
+         },
+         balloon: {
+           id: 'balloon',
+           name: 'Balloon',
+           emoji: '🎈',
+           basePrice: 100,
+           confettiPerSecond: 2.5,
+           owned: 0
+         },
+       }
      }
    }
  })
The state of our clicker store now contains information about factories available in Pinia’s Party. Let’s display them!
First, we need to supply a list of our factories to the <FactoryList /> component. To do so, we update this component’s script section at src/components/FactoryList.vue:
+ import { computed } from 'vue'

+ import { useClicker } from '../stores/clicker'

  import FactoryListItem from './FactoryListItem.vue'

+ const clicker = useClicker()

- const factories = []
+ const factories = computed(() => Object.values(clicker.factories))
Stackblitz might have some trouble picking up the above change correctly. If the factory list disappears from the preview, try refreshing it with the refresh button at the top left of it.
What we’ve done here is import our store inside the <FactoryList /> component. We then replaced the static factories array with a computed property, resolving our store factories as an array.
The template section of the <FactoryList /> component was previously looping over the existing factories array, so we’re already seeing a glimpse of our two factories in the sidebar. Let’s now improve that by updating the <FactoryListItem /> component in src/components/FactoryListItem.vue.
The component is already receiving the displayed factory through its props, so all that’s left to do is update the template following the “TODO” comments. For now, we can only display the factory emoji, name, and owned amount. Try to go ahead on your own using what we’ve learned in the previous steps to display those 3 values!
Done? To double-check your work, here are the changes we needed to do in the template section of <FactoryListItem /> to complete this step:
  <template>
    <li class="factoryListItem">
      <button
        class="nes-container is-rounded"
      >
-       <figure class="emoji"><!-- TODO:EMOJI --></figure>
+       <figure class="emoji">{{ factory.emoji }}</figure>
        <div class="info">
-         <strong><!-- TODO:NAME --></strong>
+         <strong>{{ factory.name }}</strong>
          <small>
            <span>✨</span><!-- TODO:PRICE -->
          </small>
          <small>
            - <!-- TODO:CPS -->cps
          </small>
        </div>
-       <span class="owned"><!-- TODO:OWNED --></span>
+       <span class="owned">{{ factory.owned }}</span>
      </button>
    </li>
  </template>
Dynamic factory information with getters
💢 Having issues? Pick-up here on Stackblitz →
When it comes to factories, we’ve only displayed static information we’ve had hardcoded in the store state so far. With only those, we were limited and couldn’t finish the templating of our factory items. More precisely, we couldn’t display each factory price and produced confetti per second (a.k.a. CPS) as those are meant to evolve following the number of factories owned (clicker games are also known as incremental games for a reason 😉).
To solve that problem we could rely on Vue computed properties as we did in the <FactoryList /> component. However, it would be extra nice for that information to be available at the store level.
Introducing Pinia getters
Getters in Pinia are the equivalent of computed values for the state of a store; they are defined alongside it. For example, if we’d like to have a getter that returns double our balance we’d need to update our store accordingly (this is an example, you don’t need to add it to your code):
  import { defineStore } from 'pinia'

  export const useClicker = defineStore('clicker', {
    state: () => {
      return {
        balance: 0,
        factories: { /* ... */ }
      }
    },
+   getters: {
+     doubleBalance: (state) => state.balance * 2
+   }
  })
In our case, we want to have a getter per factory though.
To solve that problem, instead of returning a value directly we can return a function accepting any argument we’d like. For example, this getter would return a formatted amount of a given factory that you own (same here, just an example!):
  import { defineStore } from 'pinia'

  export const useClicker = defineStore('clicker', {
    state: () => {
      return {
        balance: 0,
        factories: { /* ... */ }
      }
    },
    getters: {
      doubleBalance: (state) => state.balance * 2,
+     factoryFormattedOwned: (state) => (factoryID) => {
+       return `${state.factories[factoryID].owned} ${state.factories[factoryID].name}`
+     }
    }
  })
Factory price and confetti per second
Alright! Now that we know a bit more about getters, we need to write two actual getters for our factory item component:
- A
factoryPricegetter that grows according to the amount of owned factories (for example it could be increased by 1 for each factory of that type the user owns). - A
factoryConfettiPerSecondgetter that computes the amount of confetti produced by that type of factory (that is to say the number of factories owned of a type times the amount of confetti per second one factory produces).
If that’s clear to you, try to go ahead and write those getters on your own! If you’re not feeling so confident about it, here’s what we’ll proceed with:
  import { defineStore } from 'pinia'

  export const useClicker = defineStore('clicker', {
    state: () => {
      return {
        balance: 0,
+       factoryPriceMultiplier: 1.05,
        factories: { /* ... */ }
      }
    },
+   getters: {
+     factoryPrice: (state) => (factoryID) => {
+       // factoryPrice = basePrice * (factoryPriceMultiplier ** owned)
+       return state.factories[factoryID].basePrice * (state.factoryPriceMultiplier ** state.factories[factoryID].owned)
+     },
+     factoryConfettiPerSecond: (state) => (factoryID) => {
+       // factoryConfettiPerSecond = confettiPerSecond * owned
+       return state.factories[factoryID].confettiPerSecond * state.factories[factoryID].owned
+     },
+   }
  })
Here we’ve increased the factoryPrice according to a constant (factoryPriceMultiplier), making our factory prices exponential-ish the more factories we own. For factoryConfettiPerSecond we calculated it as planned.
Awesome! Now that our getters are ready, it’s time to use those in our template. We first need to import our store in src/component/FactoryListItem.vue script section:
+ import { useClicker } from '../stores/clicker'

  defineProps({ factory: { type: Object, required: true } })

+ const clicker = useClicker()
Then we can use the store getters in the template part directly:
  <template>
    <li class="factoryListItem">
      <button
        class="nes-container is-rounded"
      >
        <figure class="emoji">{{ factory.emoji }}</figure>
        <div class="info">
          <strong>{{ factory.name }}</strong>
          <small>
-           <span>✨</span><!-- TODO:PRICE -->
+           <span>✨</span>{{ clicker.factoryPrice(factory.id) }}
          </small>
          <small>
-           - <!-- TODO:CPS -->cps
+           - {{ clicker.factoryConfettiPerSecond(factory.id) }}cps
          </small>
        </div>
        <span class="owned">{{ factory.owned }}</span>
      </button>
    </li>
  </template>
With those changes, we now see the price and confetti per second of each factory listed 🎉
Acquiring factories with actions
💢 Having issues? Pick-up here on Stackblitz →
We’ve spent quite some time displaying those factories properly, now is time to add a new game mechanic: allowing the player to buy factories to increase the amount of confetti produced per second.
Buying a factory is a process of its own. We need to do the following, in order:
- Withdraw the price of the factory from the user balance
- Increment the owned amount of the purchased factory
To make sure the process of buying a factory is consistent throughout our application, we’d like it to be described in the store itself.
Introducing Pinia actions
Similar to Pinia getters, actions are equivalent to methods for a store. Like getters, they are defined alongside the state. For example, if we’d like to have an action that increases our balance by 100 we would write something like this:
  import { defineStore } from 'pinia'

  export const useClicker = defineStore('clicker', {
    state: () => { /* ... */ },
    getters: { /* ... */ },
+   actions: {
+     give100() {
+       this.balance += 100
+     }
+   }
  })
You probably noticed in the code above, that contrary to getters, we access the store state using this in actions. The reason for that is that actions can receive and return arbitrary values. We’ll see how that’s handy as we write the buyFactory action.
Let’s buy factories
As explained earlier, we want the buyFactory action to perform the transaction in a specific order. Let’s start with the basic process: withdrawing the money from the balance and incrementing the owned amount.
  import { defineStore } from 'pinia'

  export const useClicker = defineStore('clicker', {
    state: () => { /* ... */ },
    getters: { /* ... */ },
+   actions:{
+     buyFactory(factoryID) {
+       this.balance -= this.factoryPrice(factoryID)
+       this.factories[factoryID].owned++
+     }
+   }
  })
What we’ve done here is make the action accept a factory ID so we can specify which factory we’d like to buy. We then leveraged the factoryPrice getter we previously implemented to withdraw the right amount from the player’s balance. Finally, we incremented the owned amount for that factory type.
Great! But what about when the user doesn’t have enough money to buy the factory? Indeed! For now, our code isn’t safe for that. Let’s make it safer with two new things:
- First, we’ll write a
canBuyFactorygetter that takes a factory ID and returns a boolean representing if a user can buy said factory. - Then we’ll leverage that getter in our
buyFactoryaction.
This looks like this:
  import { defineStore } from 'pinia'

  export const useClicker = defineStore('clicker', {
    state: () => { /* ... */ },
    getters: {
      /* ... */
+     canBuyFactory(state) {
+       return (factoryID) => state.balance >= this.factoryPrice(factoryID)
+     }
    },
    actions: {
      buyFactory(factoryID) {
+       if (!this.canBuyFactory(factoryID)) {
+         throw new Error('Not enough money')
+       }

        this.balance -= this.factoryPrice(factoryID)
        this.factories[factoryID].owned++
      }
    }
  })
To access the factoryPrice getter from the canBuyFactory getter we had to use this. We then used this new getter inside our buyFactory action to guard it against being abused (we don’t loan confetti in Pinia’s Party!).
With this new getter and action, we can then proceed to update our <FactoryListItem /> component template at src/components/FactoryListItem.vue:
  <template>
    <li class="factoryListItem">
      <button
        class="nes-container is-rounded"
+       @click="clicker.buyFactory(factory.id)"
+       :disabled="!clicker.canBuyFactory(factory.id)"
      >
        <figure class="emoji">{{ factory.emoji }}</figure>
        <div class="info">
          <strong>{{ factory.name }}</strong>
          <small>
            <span>✨</span>{{ clicker.factoryPrice(factory.id) }}
          </small>
          <small>
            - {{ clicker.factoryConfettiPerSecond(factory.id) }}cps
          </small>
        </div>
        <span class="owned">{{ factory.owned }}</span>
      </button>
    </li>
  </template>
Thanks to these small changes, players can now spend their confetti to buy factories. But this isn’t enough to make them produce confetti 😱 What a scam!
Let’s fix that before we get sued! First, we need to update our store. We need it to:
- Compute global
confettiPerSecondthrough a getter, which is the sum of allfactoryConfettiPerSecond. - Increment the user balance every second by the value of
confettiPerSecond
Here are those changes:
  import { defineStore } from 'pinia'

  export const useClicker = defineStore('clicker', {
    state: () => {
      return {
        balance: 0,
+       tickDurationMs: 250,
        factoryPriceMultiplier: 1.05,
        factories: { /* ... */ }
      }
    },
    getters: {
      /* ... */
+     confettiPerSecond: (state) => {
+       return Object.keys(state.factories).reduce((confettiPerSecond, factoryID) => {
+         return confettiPerSecond + (state.factories[factoryID].confettiPerSecond * state.factories[factoryID].owned)
+       }, 0)
+     }
    },
    actions: {
      /* ... */
+     tick() {
+       this.balance += this.confettiPerSecond * this.tickDurationMs / 1000
+     }
    }
  })
We went a bit further above by also defining a tick duration, which will allow us to increment the balance more often while keeping the same rate.
Now that we have a function we can call to increment the user balance following its current confetti per second, let’s call it at a regular interval at the root of our app in src/App.vue script section:
+ import { onUnmounted } from 'vue'

+ import { useClicker } from './stores/clicker'

  import PartyArea from './components/PartyArea.vue'
  import FactoryList from './components/FactoryList.vue'

+ const clicker = useClicker()

+ // Tick every tick duration
+ let timeout
+ const run = (durationMs = clicker.tickDurationMs) => {
+   timeout = setTimeout(() => {
+     clicker.tick()
+     run()
+   }, durationMs)
+ }
+ run()

+ // Clear timeout on unmount
+ onUnmounted(() => {
+   clearTimeout(timeout)
+ })
The above code is a bit of boilerplate and great libraries like VueUse could make it much simpler looking. What we’re doing is calling setTimeout again every tickDurationMs and making sure the loop ends should the component be unmounted.
Without further ado, our game should now be working! After purchasing factories, player’s confetti per second increments, which increments their balance at every tick. We have a fully working clicker 👈👆👉👇
You might also love 👇
Optional Final Touches
💢 Having issues? Pick-up here on Stackblitz →
Before we end this tutorial and set you up for some extra challenge, let’s make Pinia’s Party a bit nicer~
First, we’ll refactor our onClick handler from the <PartyArea /> to be a store action instead in src/stores/clicker.js. This allows us to make it a bit fancier by scaling the click produced confetti according to the ongoing confetti per second produced:
  import { defineStore } from 'pinia'

  export const useClicker = defineStore('clicker', {
    state: () => { /* ... */ },
    getters: { /* ... */ },
    actions: {
      /* ... */
+     click() {
+       this.balance += 1 + (this.confettiPerSecond / 25)
+     }
    }
  })
Then we update src/components/PartyArea.vue:
<template>
  <section class="partyArea">
    <!-- Party content -->
    <h1>Pinia's Party</h1>
    <h2>{{ clicker.balance }} confetti</h2>
-   <button @click="onClick">
+   <button @click="clicker.click">
      <div class="inner">✨</div>
    </button>
    <!-- Confetti canvas -->
    <canvas ref="canvas"></canvas>
  </section>
</template>

  <script setup>
  /* ... */

- const onClick = () => {
-   clicker.balance++
-   addConfetti()
- }
  </script>
But with that refactor we lost confetti popping on each click! Thankfully Pinia has an event listener feature that allows us to react to actions being performed. It is used like this:
const onActionHandler = (informationObjectAboutTheAction) => {
  /* ... */
}

storeName.$onAction(onActionHandler)
Let’s update again the <PartyArea /> component to make confetti pops on click and following ongoing confetti per second ticks in the component script section:
  import { ref, onMounted } from "vue"
  import Confetti from "js-confetti"

  import { useClicker } from '../stores/clicker'

  const clicker = useClicker()

  /* ... */
  onMounted(() => {
    confetti = new Confetti({
      canvas: canvas.value
    })
  })

+ // On action handlers
+ clicker.$onAction(({ name, store }) => {
+   switch (name) {
+     case 'click':
+       addConfetti()
+       break
+
+     case 'tick':
+       addConfetti(Math.floor(Math.log10(store.confettiPerSecond + 1)))
+       break
+   }
+ })
Here we add back confetti on each click, and also add confetti on each tick, slowly adding more confetti the more confetti per second the player produces.
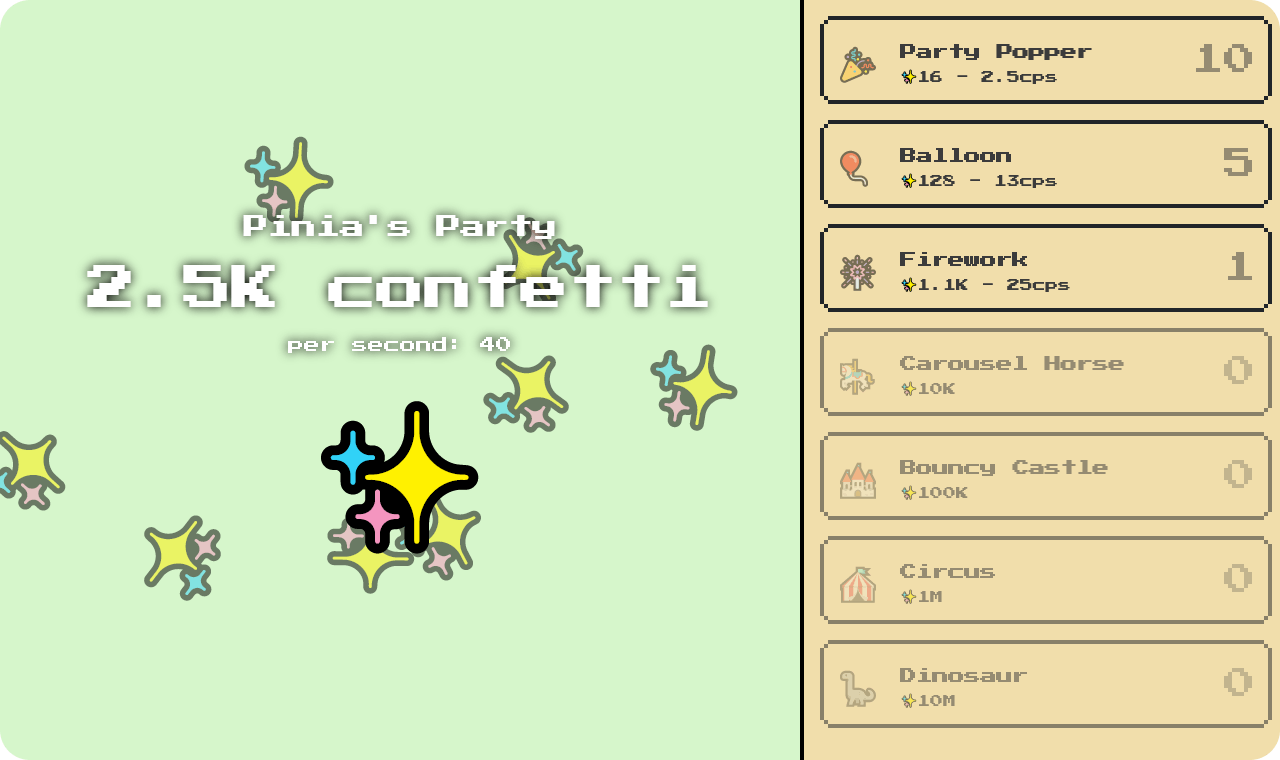
Awesome! Let’s wrap it up by putting the cherry on the cake, displaying the global confetti per second in src/components/PartyArea.vue template:
  <template>
    <section class="partyArea">
      <!-- Party content -->
      <h1>Pinia's Party</h1>
      <h2>{{ clicker.balance }} confetti</h2>
+     <span>per second: {{ clicker.confettiPerSecond }}</span>
      <button @click="clicker.click">
        <div class="inner">✨</div>
      </button>
      <!-- Confetti canvas -->
      <canvas ref="canvas"></canvas>
    </section>
  </template>
Voila 🎉
Going even further!
That’s all for today folks! Want more? Here are some extra challenges for you:
Adding more factories!
We’ve only implemented a few factories so far, try adding more following the same structure to make the game more fun.
Having more confetti pop in the background
Right now, confetti only pops when the user click. It would be nice to also make confetti pop whenever confetti are produced by the factories (thanks to the tick action we added on the previous section). We could even base the amount of popped confetti on the amount of confetti per second produced...
To help you with that you might want to have a look near the end of Pinia’s actions documentation...
Formatting numbers better
As things will grow exponentially we’ll quickly have a lot of 0s in numbers being displayed. What about displaying them using a more compact representation? (e.g. 1,000 → 1K, 1,000,000 → 1M, etc.)
To achieve this challenge you’ll need to write a few extra getters in your store. You might also want to try use the native Intl.NumberFormat API (one of the examples on that page might be useful to you 😉).
Saving player’s progress
Finally, it’ll be extra nice to save the player’s progress. This means saving our clicker store content somewhere. This could be a nice use case for the localStorage API. Maybe Pinia has a way to access the whole state of a store? 🤔
✨ Alright, we had a lot of fun creating this tutorial! We also went ahead and worked on some of the challenges above, you can see our approach on this last StackBlitz →


